SEUCK ENHANCEMENTS
Building and Linking a new front end to a SEUCK game
Building and Linking a new front end to a SEUCK game
Have you ever
written a good SEUCK game, and you get fed up with the same old front
end, with the rolling raster bars?. Or do you want to make more of a
better presentation for a SEUCK game? You can, but before you can
actually do that you may need to learn 6502 assembly to adapt better
features to your presentations.
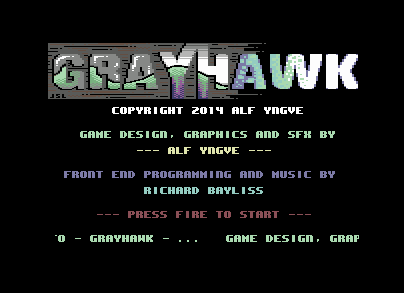
This tutorial will show you the basics of writing a simple front end for your own SEUCK game, which will feature a bitmap logo, a 1 screen presentation and scroll text and of course playing music in the background. This example will work on BOTH standard and the SIDEWAYS SEUCK mod. In this example, I'm going to use one of the existing games called "Grayhawk" by Alf Yngve. We have also supplied some PD tools for you as well as the example source code on this disk. If you would like to try it out. Click on the Disk icon to download it.

Warning: You will require the TASM/Codenet cartridge plugin or 1541Ultimate II with TASM/Codenet set up. Or use of a Cross platform Assembler/Compiler that supports Binary files.
Or, how about the ACME cross assembler PRG binaries and source? Here you go.
Before you get started, you will need the following resources set up for the project. I shall also give you tips on various parts in the tutorial.
- 1541 Ultimate 2 with TASM / CodeNET setup as main cartridge (You can use WinVice V2.23 or higher using X64SC with a Retro Replay cart Tasm CodeNET plugin)
- A Character Set
- A bitmap picture / logo (Maximum rows 8/9 chars)
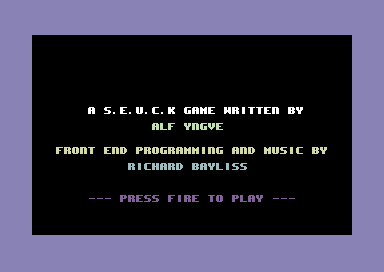
- Front end text screen + colour data
- Music
- A SEUCK game of your choice (HAHAHA, yes it would be no use otherwise :))
DESIGN A CHARACTER SET - OR RIP ONE
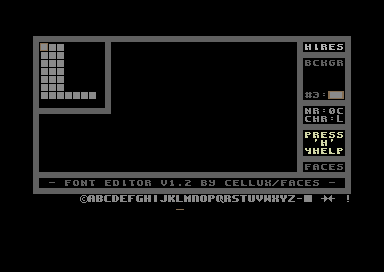
Your character set can be extracted from your SEUCK, using the M/C monitor on any freezer cartridge (or VICE monitor). The SEUCK game front end charset lies from $f400-$f800.
- Press the FREEZE button on the cartridge (or VICE plugin using ALT+Z) then type in:
S "SEUCKCHAR",8,f400,f800,2000
You can then load in any Public Domain char editors to update the characters, put them in place etc. And save them again. Or alternatively, if you really wanted to. Build your own character set and save it.
STRIPPING A BITMAP LOGO
A bitmap logo can be saved in different formats, but the common method I use is to convert an existing bitmap picture into VIDCOM paint format, and then strip out the picture data file separately.

- Load in a painting program or picture viewer that supports the format of your picture (E.G. Amica Paint and Interpaint supports Koala Paint format).
- Display the picture and then press the FREEZE button (ALT+Z if using VICE). Enter the Picture Save option in the menu and save as VIDCOM paint format. Enter the filename.
- After saving, press the RESET button and select to enter the FASTLOAD option
- Type MON to enter the machine code monitor then enter
L "B.name of picture",8
The Vidcom paint picture data will load from $5800-$7f40. We will need to strip the data out. Since the logo should be at leat 8 or 9 char rows. We can strip out a small area of the bitmap data.
- Using the M/C monitor save each part of the picture data separately using the following:
S "COLOUR RAM",8,5800,5BE8
S "VIDEO RAM",8,5C00,5FE8
S "BITMAP",8,6000,6900
OH KRAP - LET'S MAKE PRESENTATION LINES FOR OUR FRONT END
We want to design / edit our own front end screen text with colour built in memory. There are different ways in which this could be done, either find an existing colour+screen editor, or program a small simple screen+colour editor for personal use. For this one, we are going to build a little tool called KRAPSCREEN using the TASM/CodeNET Turbo Assembler utility.
- Press the RESET button (Alt+R) to enter the reset menu and select the Fastload option
- Type MON and Load in your new/updated charset using the L prompt:
L "CHARSET",8,2000
- After loading the charset type in X to exit the monitor
- Type in TASS - This will take you to the Turbo Assembler.
- Now enter the following listing.
*= $0900 ;SYS 2304 to execute
sei
jsr $e544 ;Clear screen
lda #$00 ;Black screen
sta $d021
lda #$18 ;Charset at $2000
sta $d018 ;stored to Char RAM
ldx #$00 ;Cursor Ðosition X
ldy #$00 ;Cursor Ðosition Y
clc
jsr $fff0 ;Store cursor pos
cli
jsr $a560 ;BASIC input
;Store the edited screen to memory
;at $7c00-$7fe8 and charset colour
;memory to $8000-$83e8 for SEUCK front
;end
ldx #$00
storescr lda $0400,x ;Screen RAM old loc
sta $7c00,x ;Screem RAM new loc
lda $0500,x
sta $7d00,x
lda $0600,x
sta $7e00,x
lda $06e8,x
sta $7ee8,x
lda $d800,x ;Colour RAM old loc
sta $8000,x ;Colour RAM new loc
lda $d900,x
sta $8100,x
lda $da00,x
sta $8200,x
lda $dae8,x
sta $82e8,x
inx ;Loop 256 times
bne storescr
rts ;Finished
- After typing in the listing press the BACK ARROW char key (Not cursor right) and 5 to assemble to disk. The filename can be called "KRAPSCREEN", as it is just a basic screen editor for this purpose. Not to mention, naff as well :)
- After the program has assembled to disk. Press the RESET button on the cartridge (ALT+R in VICE). Enter the fastload prompt and load in KRAPSCREEN.
- Type new. Enter SYS 2304 to run Krapscreen. Now edit your own front end screen and colour text. Pressing RETURN will exit KRAPSCREEN with a READY PROMPT.
- Enter the M/C monitor, by typing in MON
- We shall now save the new front end on screen text. It is already stored in memory where we want it to be located ($7c00-$83e8). Now let's save the front end text screen and colour data to disk.
S "SCREENTEXT",8,7c00,83e8
Okay, job is done. Now for the next task.
LET'S MOVE TO THE GROOVE
The next step is to pick some music. You could always browse through the HVSC for any tunes that Init $1000 and Play $1003 and is not bigger than $1000 bytes. The bad news is that you will need to relocate your music to $9000. There are different possible ways. However, to play it safe, you can use my tunes from my DMC collection and make use with the All Round Relocator, which can relocate music composed with JCH Newplayer or DMC V2.0 - DMC V5.1. I included the relocator with the first two DMC Collections, which available to download from the C64 Music section on my web site.
- Load in All Round Relocator
- Load in a DMC V4 tune from my collection (Or whatever)
- Relocator should find PLAYER: DMC V4.0, now enter $9000 as the address where music should relocate to.
- Save the tune.
Alternatively, you could use a PC command line tool called SidReloc, which will relocate a SID tune saved in PSID form, and relocate it to another address. For example, say you wanted to relocate a SID tune of mine called CYBER_TECHNOLOGY.SID. You would need to save it as a PSID file where SIDRELOC lies and then in the command prompt type in:
c:\sidreloc\sidreloc.exe -p 90 CYBER_TECHNOLOGY.SID -o CYBER9000.SID
Play the tune in SIDPLAY and then extract the tune in PRG / DAT form and import it into your disk or D64
SEUCK IT AND SEE
Load in your SEUCK game, which you want to build a new front end for. Then run it (Unless your game was saved as FINISHED game, instead of compressed or frozen). Have a little play around with the game, if you want. Otherwise go into the FREEZE option and enter the M/C monitor. We want to do some spring cleaning by filling wasted memory between $6580 - $b6c0 with zero bytes ($00).
- Enter as follows:
F 6580 B6C0 00
Ok, that was cleaned pretty successful.
- Now let's fix something else in SEUCK. Random firing. Enter as follows:
A $54EF LDA $5000,Y
- Ok, nearly done. Just one more thing to add.
F F3F8 F3FF C1
Now we're happy with this. Let's load in the data from the M/C monitor to specified areas
L "CHARSET",8,7000
L "SCREENTEXT",8,7C00
L "COLRAM",8,8400
L "VIDRAM",8,8C00
L "MUSIC",8,9000
L "BITMAP",A000
Right, since all is loaded. Lets save it as a whole chunk of data, just incase something gone wrong somewhere
S "FRONTENDDATA",8,7000,A900
LET'S GET CODING
Assuming that you have got all the data you need and you had enough, playing the game. It is time to program the new front end using the Turbo Assembler, in TASM/CodeNET. Where you are still at the game, press the RESET button (ALT+R in VICE), then enter TASM/CODENET. Here is the full listing for you to type into the assembler. I have also included some explanations about what happens in the code. This is a possible way to build a new front front end and link it to a SEUCK game.
The listing:
;---------------------------------------
;SEUCK With new Front End
;by Richard Bayliss
;
;This source will call a routine which
;will skip the standard front end from
;SEUCK and jump straight on to the new
;front end.
*= $0810 ;Start address for
;installation
sei
;This part of the code (at $0810) will
;set the low and high bytes of the new
;front end, and will force the old
;front end to JUMP directly to the new
;front end code.
lda #$4c
ldx #<frontend
ldy #>frontend
sta $40dd
stx $40de
sty $40df
;This next bit of code will allow use
;of the high memory area, so if we
;need to - restore the SEUCK status
;font (Otherwise just comment it out).
lda #$35 ;Kernal off to allow
sta $01 ;usage of Hi-Mem.
ldx #$00
invchr lda $f400,x ;Status charset
eor #$ff ;Reverse bits
sta $f400,x ;Store back again
lda $f500,x ;Status charset 2
eor #$ff ;Reverse bits
sta $f500,x ;Store back again
inx
bne invchr ;Do 256 times until
;complete
jmp $4245 ;Jump to SEUCK game
;init routines
;The initializing of the front end is
;complete, so now we work on the main
;front end source. This will be placed
;in a new position.
*= $6580
frontend
sei ;Set interrupt flag
;We want to switch off all interrupts
;that were used in the game.
lda #$00
sta $d019
sta $d01a
lda #$81
sta $dc0d
sta $dd0d
lda #$0b ;Screen off
sta $d011
lda #$00 ;No sprites
sta $d015
lda #$00
sta $d020 ;Border+BGR Colour
sta $d021
lda #$ea
ldx #$31
sta $0314
stx $0315
lda #$36
sta $01 ;Restore kernal
;Setup the bitmap picture colour data
;and put it into the main front end's
;position. We do this by reading 9 rows
;and drawing each row by 40 columns.
ldx #$00 ;Set loop to 0
setcols lda $8400,x ;Row 1 data
sta $d800,x ;Row 1 store
lda $8428,x ;Row 2 data
sta $d828,x ;Row 2 store
lda $8450,x ;Row 3 data
sta $d850,x ;Row 3 store
lda $8478,x ;Row 4 data
sta $d878,x ;Row 4 store
lda $84a0,x ;Row 5 data
sta $d8a0,x ;Row 6 store
lda $84c8,x ;Row 7 data
sta $d8c8,x ;Row 7 store
lda $84f0,x ;Row 8 data
sta $d8f0,x ;Row 8 store
lda $8518,x ;Row 9 data
sta $d918,x ;Row 9 store
inx
cpx #$28 ;(#40 chars???)
bne setcols ;draw next column
;Draw the front end colour data (as for
;this simple tutorial, only one screen
;is used for text. The text is also
;stored to the screen area which we use.
;Text colour data will be drawn from the
;10th row, onwards.
ldx #$00 ;Set loop X to 0
drawcls2 lda $8140,x ;Read colour data
sta $d940,x ;Store per char
lda $8200,x ;Read colour data
sta $da00,x ;Store per char
lda $82e8,x ;Read colour data
sta $dae8,x ;Store per char
inx ;Add 1 to loop
bne drawcls2;Do max 256 chars
;Next part is the main fun part. We are
;going to add some interrupts and raster
;splits to the code, but before we can
;do this. They need to be initialised.
lda #<irq1 ;Store low/hi bytes
ldx #>irq1 ;of interrupts to
sta $0314 ;the IRQ register
stx $0315 ;flag.
lda #$7f ;Enable CIA to sync
sta $dc0d ;with interrupts
sta $dd0d
lda #$2e ;Initialised raster
sta $d012 ;position.
lda #$1b ;Screen on
sta $d011 ;
lda #$01 ;Sync IRQ vectors
sta $d01a
lda #$00 ;Song number
jsr $9000 ;Initialise music at
;$9000
lda #<message ;Initialise
sta messread+1 ;scroll text
lda #>message
sta messread+2
;Clear last row for scroll
;text
ldx #$00
clearline lda #$20
sta $7fc0,x
inx
cpx #$28
bne clearline
cli ;Clear IRQ flag to
;routines outside
;the interrupt
mainloop lda #$00 ;Synchronize timer
sta timer ;outside of the
cmp timer ;interrupt so that
beq *-3 ;the new front end
;keeps on running
;smoothly.
jsr scroll ;Call subroutine to
;scroll text
lda $dc00 ;Read joystick port
lsr a ;two fire button.
lsr a ;If ignored, then
lsr a ;let the front end
lsr a ;code repeat itself.
lsr a ;
bcs mainloop
jmp gamesetup ;Setup game to
;start.
;This is the 1x1 scroll text routine. It
;will be controlled using a scroll
;pointer (scrptr), which will delay the
;speed of the scroll.
scroll
lda scrptr;Load pointer
sec
sbc #$01 ;Speed of scroll
and #$07 ;Only 7 bytes for
sta scrptr ;Hpos smooth scroll
bcs endscrl;Not enough pixels?
ldx #$00 ;Set loop as 0
pullchr lda $7fc1,x ;Screen pos pulls
sta $7fc0,x ;next char to the
;previous char.
lda #$0d ;Char colour ltgrn
sta $dbc0,x ;Char colour row
inx ;Add 1 char
cpx #40 ;40 chars read?
bne pullchr ;I guess not
messread lda message ;Read character of
;the message
cmp #$00 ;@ read?
bne nowrap
lda #<message ;Reset scroll
sta messread+1;text message.
lda #>message
sta messread+2
jmp messread
nowrap
cmp #$3f ;Lowercase range?
bcc skip ;Ok
sec ;Convert to lower
sbc #$40 ;case
skip sta $7fe7 ;Store to last
;character on the
;screen
inc messread+1 ;Read lowbyte
bne endscrl ;256 times
inc messread+2 ;Read next hi
;byte of message
endscrl rts ;Finished!
;Since the player has pressed the fire
;button on Joystick port 2. Initialise
;all interrupts and sound. Then run
;the game ($4260) directly.
gamesetup
sei
lda #$00
sta $d019 ;Interrupts off
sta $d01a
lda #$81
sta $dc0d ;CIA Timer disabled
lda #$31
ldx #$ea
sta $0314 ;IRQ flags off
stx $0315
;Initialise sound
ldx #$00
silence lda #$00
sta $d400,x
inx
cpx #$18
bne silence
cli
jmp $4260 ;Jump to SEUCK game
;The main interrupts that use raster
;splits for the front end. Use of
;Multiple Interrupts will do the trick
;Interrupt 1 - Smooth scroll routine
irq1 inc $d019 ;ACK Irq Interrupt
lda #$2e ;First raster end
sta $d012 ;position
lda #$02 ;Switch to BANK #$02
sta $dd00 ;for text chars.
lda #$1b ;Standard screen mode
sta $d011
lda #$fc ;Charset at $7000 and
sta $d018 ;screen at $7C00.
lda scrptr ;Smooth scroll at
sta $d016 ;VIC HSPosition
lda #<irq2 ;Call next IRQ
ldx #>irq2 ;raster interrupt
sta $0314
stx $0315
jmp $ea7e ;Infinite loop
;Interrupt 2 - Displaying the logo.
irq2 inc $d019
lda #$6a ;Raster end position
sta $d012
lda #$01 ;Switch to BANK #$01
sta $dd00 ;where logo lies
lda #$3b ;Bitmap mode switched
sta $d011 ;on.
lda #$38 ;Bitmap position set
sta $d018 ;to read SCREEN RAM
;at $8800.
lda #$18 ;Screen HSP
sta $d016 ;Multicolour Enabled
lda #<irq3 ;Setup the next IRQ
ldx #>irq3 ;raster interrupt
sta $0314 ;for the static
stx $0315 ;text.
jmp $ea7e ;Infinite loop
;Interrupt 3 - The static text and
;synchronised timer and music
irq3 inc $d019
lda #$ea ;Raster end position
sta $d012
lda #$02 ;Switch to bank #$02
sta $dd00
lda #$1b ;Standard screen
sta $d011 ;mode
lda #$fc ;Read charset at
sta $d018 ;$7000 and screen
;at $7c00
lda #$08 ;VIC HSP set as no
sta $d016 ;multicolour.
lda #$01 ;Switch on timer
sta timer ;pointer
lda #<irq1 ;Start raster
ldx #>irq1 ;interrupts again
sta $0314
stx $0315
jsr $9003 ;Play title music
jmp $ea7e
;Some pointers
timer .byte 0 ;Sync timer
scrptr .byte 0;Smooth scroll pointer
;The message for the scroll text. We
;will use the .txt prompt to write a
;scroll text - although there are other
;possible ways :)
*= $a900
message
.text " ... welcome to - gr"
.text "ayhawk - ... game de"
.text "sign, graphics and sou"
.text "nd effects were done b"
.text "y alf yngve using the "
.text "shoot 'em up construct"
.text "ion kit by sensible so"
.text "ftware ... front end"
.text " programming was done "
.text "by richard bayliss ..."
.text " bitmap logo was dra"
.text "wn by johan janssen .."
.text ". music was composed"
.text " by richard bayliss .."
.text ". copyright (c)2014 "
.text "the new dimension ... "
.text " mission briefing: i"
.text "t has come to attentio"
.text "n that deep in space, "
.text "an alien threat awaken"
.text "s ... aliens are sto"
.text "ring substances on hug"
.text "e asteroids ... thes"
.text "e could result to deva"
.text "stating consequencse, "
.text "should they be used to"
.text " build deadly weapons "
.text "... you must pilot a"
.text " greyhawk fighter ship"
.text " across all of the ast"
.text "eroids, and destroy ea"
.text "ch one (after you have"
.text " passed over it) ... "
.text " the asteroids are hea"
.text "vily guarded by the al"
.text "iens, which you must a"
.text "lso blast ... can yo"
.text "u destroy all of the a"
.text "steroids and whatever "
.text "is left on them, or wi"
.text "ll the galaxy be doome"
.text "d forever? ... there"
.text " is only one way to fi"
.text "nd out ... press fir"
.text "e to start the game .."
.text ".. "
.text " "
.text " "
.byte 0
Superb, the listing is typed in. However, save the code using BACK ARROW+W (Unless you are just using the .D64 you downloaded to try it out) and then press BACK ARROW+3. If it doesn't work the first time and the routine jumps back to the assembler, add the following in at the very top of the source code:
Note ... If you want to load the example game and the listing that is already on the tutorial example disk, you must load in the RAW SEUCK game file (Which was saved using the SAVE AS FINISHED GAME option). Do the 3 steps before (The F 6580 B6C0, tips, etc). Press the RESET button and select the fastload option. Load in the TITLEDATA then enter the turbo assembler. Load the sequential version of the listing using BACK ARROW + E and type in FRONTEND.SRC*.
The listing will then load in. Now type the 2 lines (indicated in yellow above the previous paragraph). Assemble and run. A READY. prompt should appear.
SAVING / TESTING YOUR FINAL PIECE
We are nearly there now. It is time to save the game, and to do that you will need to go into the Machine Code monitor in Fastload (Or freeze mode). Save the filename as follows:
S "MYGAME",8,0810,FFFA
This will save the whole game to disk from $0810 (Where we added the SEUCK title skip init routine) all the way to $FFFA. The file size will be 249 blocks. Type in G 0810 to run the game. Voila. A new front end linked to your SEUCK game.
Is this the end of it? Not quite. It is time to make the file size shorter. What do we do? ... Crunch it.
There are two different ways how you can crunch the finalized game. There is use of a packer and a cruncher (On the disk is Zipper V5.0 and 2MHz Time Cruncher V5.0 for fast speed).. Or you could just extract the finished production with a .D64 editor and compress it all with PuCrunch or Exomizer. Here's the oldschool method ...
- Load in Zipper V5.0
- Enter the load name of your SEUCK game with the new front end
- Enter the save name of your SEUCK game with the new front end
- Enter $0810 as the jump address - since that is where the init front end skip routine lies
- Enter $37 as the $01 value
- Enter SEI in the SEI / CLI option
- Wait for the file load and pack.
- When the border is grey (with nothing happening), press SPACEBAR to save your packed game
If you load in the compressed game game (before using a cruncher) you'll need to type in SYS2049 to run it to see if it works. If it does, then the next stage just for you.
- Load in 2MHz Time Cruncher V5.0
- Enter the load name of the game, which you compressed using Zipper V5.0
- Enter the save name of the crunched game
- Enter $0801 (not $0810) as the jump address - since that is where the decruncher from Zipper V5.0 commences
- Enter $37 as $01 Value
- Crunching step = speed (1 is fastest crunch speed), the higher the step, the better result, but slower ther crunch gets).
- Start loading and crunching the file, by pressing the Spacebar
- Wait a few minutes during crunching
- Select Save option
- Select RUN program option. The screen should blank and then come on and execute the Zipper decruncher which will then run the game.
That's it, job is done.
THE PUCRUNCH EXOMIZER METHOD
If the packing/crunching method takes too long for you, then we recommend usage of PuCruncher or Exomizer. Exomizer gives out the best results, but the decruncher takes longer, where is PuCrunch crunches as hard as possible and gives a shorter decrunch.
USING PUCRUNCH
- Use a PC D64 editor to export your PRG of the game
- Use the command prompt to call the directory where PuCrunch is
- Enter as follows:
pucrunch seuckgame.prg -s seuckgamecrunched.prg -x $0810
- Import into a .D64 or test .PRG in VICE via autostart
- Get your game released (if it works 100%)
USING EXOMIZER
- Use a PC D64 editor to export your PRG of the game
- Use the command prompt to call the directory where Exomizer is
- Enter as follows:
exomizer sfx $0810 seuckgame.prg -o seuckgamecrunch.prg
- Import into a .D64 or test .PRG in VICE via autostart
- Get your game released (if it works 100%)
Job done :)
This tutorial will show you the basics of writing a simple front end for your own SEUCK game, which will feature a bitmap logo, a 1 screen presentation and scroll text and of course playing music in the background. This example will work on BOTH standard and the SIDEWAYS SEUCK mod. In this example, I'm going to use one of the existing games called "Grayhawk" by Alf Yngve. We have also supplied some PD tools for you as well as the example source code on this disk. If you would like to try it out. Click on the Disk icon to download it.
Warning: You will require the TASM/Codenet cartridge plugin or 1541Ultimate II with TASM/Codenet set up. Or use of a Cross platform Assembler/Compiler that supports Binary files.
Or, how about the ACME cross assembler PRG binaries and source? Here you go.
Before you get started, you will need the following resources set up for the project. I shall also give you tips on various parts in the tutorial.
- 1541 Ultimate 2 with TASM / CodeNET setup as main cartridge (You can use WinVice V2.23 or higher using X64SC with a Retro Replay cart Tasm CodeNET plugin)
- A Character Set
- A bitmap picture / logo (Maximum rows 8/9 chars)
- Front end text screen + colour data
- Music
- A SEUCK game of your choice (HAHAHA, yes it would be no use otherwise :))
DESIGN A CHARACTER SET - OR RIP ONE
Your character set can be extracted from your SEUCK, using the M/C monitor on any freezer cartridge (or VICE monitor). The SEUCK game front end charset lies from $f400-$f800.
- Press the FREEZE button on the cartridge (or VICE plugin using ALT+Z) then type in:
S "SEUCKCHAR",8,f400,f800,2000
You can then load in any Public Domain char editors to update the characters, put them in place etc. And save them again. Or alternatively, if you really wanted to. Build your own character set and save it.
STRIPPING A BITMAP LOGO
A bitmap logo can be saved in different formats, but the common method I use is to convert an existing bitmap picture into VIDCOM paint format, and then strip out the picture data file separately.
- Load in a painting program or picture viewer that supports the format of your picture (E.G. Amica Paint and Interpaint supports Koala Paint format).
- Display the picture and then press the FREEZE button (ALT+Z if using VICE). Enter the Picture Save option in the menu and save as VIDCOM paint format. Enter the filename.
- After saving, press the RESET button and select to enter the FASTLOAD option
- Type MON to enter the machine code monitor then enter
L "B.name of picture",8
The Vidcom paint picture data will load from $5800-$7f40. We will need to strip the data out. Since the logo should be at leat 8 or 9 char rows. We can strip out a small area of the bitmap data.
- Using the M/C monitor save each part of the picture data separately using the following:
S "COLOUR RAM",8,5800,5BE8
S "VIDEO RAM",8,5C00,5FE8
S "BITMAP",8,6000,6900
OH KRAP - LET'S MAKE PRESENTATION LINES FOR OUR FRONT END
We want to design / edit our own front end screen text with colour built in memory. There are different ways in which this could be done, either find an existing colour+screen editor, or program a small simple screen+colour editor for personal use. For this one, we are going to build a little tool called KRAPSCREEN using the TASM/CodeNET Turbo Assembler utility.
- Press the RESET button (Alt+R) to enter the reset menu and select the Fastload option
- Type MON and Load in your new/updated charset using the L prompt:
L "CHARSET",8,2000
- After loading the charset type in X to exit the monitor
- Type in TASS - This will take you to the Turbo Assembler.
- Now enter the following listing.
*= $0900 ;SYS 2304 to execute
sei
jsr $e544 ;Clear screen
lda #$00 ;Black screen
sta $d021
lda #$18 ;Charset at $2000
sta $d018 ;stored to Char RAM
ldx #$00 ;Cursor Ðosition X
ldy #$00 ;Cursor Ðosition Y
clc
jsr $fff0 ;Store cursor pos
cli
jsr $a560 ;BASIC input
;Store the edited screen to memory
;at $7c00-$7fe8 and charset colour
;memory to $8000-$83e8 for SEUCK front
;end
ldx #$00
storescr lda $0400,x ;Screen RAM old loc
sta $7c00,x ;Screem RAM new loc
lda $0500,x
sta $7d00,x
lda $0600,x
sta $7e00,x
lda $06e8,x
sta $7ee8,x
lda $d800,x ;Colour RAM old loc
sta $8000,x ;Colour RAM new loc
lda $d900,x
sta $8100,x
lda $da00,x
sta $8200,x
lda $dae8,x
sta $82e8,x
inx ;Loop 256 times
bne storescr
rts ;Finished
- After typing in the listing press the BACK ARROW char key (Not cursor right) and 5 to assemble to disk. The filename can be called "KRAPSCREEN", as it is just a basic screen editor for this purpose. Not to mention, naff as well :)
- After the program has assembled to disk. Press the RESET button on the cartridge (ALT+R in VICE). Enter the fastload prompt and load in KRAPSCREEN.
- Type new. Enter SYS 2304 to run Krapscreen. Now edit your own front end screen and colour text. Pressing RETURN will exit KRAPSCREEN with a READY PROMPT.
- Enter the M/C monitor, by typing in MON
- We shall now save the new front end on screen text. It is already stored in memory where we want it to be located ($7c00-$83e8). Now let's save the front end text screen and colour data to disk.
S "SCREENTEXT",8,7c00,83e8
Okay, job is done. Now for the next task.
LET'S MOVE TO THE GROOVE
The next step is to pick some music. You could always browse through the HVSC for any tunes that Init $1000 and Play $1003 and is not bigger than $1000 bytes. The bad news is that you will need to relocate your music to $9000. There are different possible ways. However, to play it safe, you can use my tunes from my DMC collection and make use with the All Round Relocator, which can relocate music composed with JCH Newplayer or DMC V2.0 - DMC V5.1. I included the relocator with the first two DMC Collections, which available to download from the C64 Music section on my web site.
- Load in All Round Relocator
- Load in a DMC V4 tune from my collection (Or whatever)
- Relocator should find PLAYER: DMC V4.0, now enter $9000 as the address where music should relocate to.
- Save the tune.
Alternatively, you could use a PC command line tool called SidReloc, which will relocate a SID tune saved in PSID form, and relocate it to another address. For example, say you wanted to relocate a SID tune of mine called CYBER_TECHNOLOGY.SID. You would need to save it as a PSID file where SIDRELOC lies and then in the command prompt type in:
c:\sidreloc\sidreloc.exe -p 90 CYBER_TECHNOLOGY.SID -o CYBER9000.SID
Play the tune in SIDPLAY and then extract the tune in PRG / DAT form and import it into your disk or D64
SEUCK IT AND SEE
Load in your SEUCK game, which you want to build a new front end for. Then run it (Unless your game was saved as FINISHED game, instead of compressed or frozen). Have a little play around with the game, if you want. Otherwise go into the FREEZE option and enter the M/C monitor. We want to do some spring cleaning by filling wasted memory between $6580 - $b6c0 with zero bytes ($00).
- Enter as follows:
F 6580 B6C0 00
Ok, that was cleaned pretty successful.
- Now let's fix something else in SEUCK. Random firing. Enter as follows:
A $54EF LDA $5000,Y
- Ok, nearly done. Just one more thing to add.
F F3F8 F3FF C1
Now we're happy with this. Let's load in the data from the M/C monitor to specified areas
L "CHARSET",8,7000
L "SCREENTEXT",8,7C00
L "COLRAM",8,8400
L "VIDRAM",8,8C00
L "MUSIC",8,9000
L "BITMAP",A000
Right, since all is loaded. Lets save it as a whole chunk of data, just incase something gone wrong somewhere
S "FRONTENDDATA",8,7000,A900
LET'S GET CODING
Assuming that you have got all the data you need and you had enough, playing the game. It is time to program the new front end using the Turbo Assembler, in TASM/CodeNET. Where you are still at the game, press the RESET button (ALT+R in VICE), then enter TASM/CODENET. Here is the full listing for you to type into the assembler. I have also included some explanations about what happens in the code. This is a possible way to build a new front front end and link it to a SEUCK game.
The listing:
;---------------------------------------
;SEUCK With new Front End
;by Richard Bayliss
;
;This source will call a routine which
;will skip the standard front end from
;SEUCK and jump straight on to the new
;front end.
*= $0810 ;Start address for
;installation
sei
;This part of the code (at $0810) will
;set the low and high bytes of the new
;front end, and will force the old
;front end to JUMP directly to the new
;front end code.
lda #$4c
ldx #<frontend
ldy #>frontend
sta $40dd
stx $40de
sty $40df
;This next bit of code will allow use
;of the high memory area, so if we
;need to - restore the SEUCK status
;font (Otherwise just comment it out).
lda #$35 ;Kernal off to allow
sta $01 ;usage of Hi-Mem.
ldx #$00
invchr lda $f400,x ;Status charset
eor #$ff ;Reverse bits
sta $f400,x ;Store back again
lda $f500,x ;Status charset 2
eor #$ff ;Reverse bits
sta $f500,x ;Store back again
inx
bne invchr ;Do 256 times until
;complete
jmp $4245 ;Jump to SEUCK game
;init routines
;The initializing of the front end is
;complete, so now we work on the main
;front end source. This will be placed
;in a new position.
*= $6580
frontend
sei ;Set interrupt flag
;We want to switch off all interrupts
;that were used in the game.
lda #$00
sta $d019
sta $d01a
lda #$81
sta $dc0d
sta $dd0d
lda #$0b ;Screen off
sta $d011
lda #$00 ;No sprites
sta $d015
lda #$00
sta $d020 ;Border+BGR Colour
sta $d021
lda #$ea
ldx #$31
sta $0314
stx $0315
lda #$36
sta $01 ;Restore kernal
;Setup the bitmap picture colour data
;and put it into the main front end's
;position. We do this by reading 9 rows
;and drawing each row by 40 columns.
ldx #$00 ;Set loop to 0
setcols lda $8400,x ;Row 1 data
sta $d800,x ;Row 1 store
lda $8428,x ;Row 2 data
sta $d828,x ;Row 2 store
lda $8450,x ;Row 3 data
sta $d850,x ;Row 3 store
lda $8478,x ;Row 4 data
sta $d878,x ;Row 4 store
lda $84a0,x ;Row 5 data
sta $d8a0,x ;Row 6 store
lda $84c8,x ;Row 7 data
sta $d8c8,x ;Row 7 store
lda $84f0,x ;Row 8 data
sta $d8f0,x ;Row 8 store
lda $8518,x ;Row 9 data
sta $d918,x ;Row 9 store
inx
cpx #$28 ;(#40 chars???)
bne setcols ;draw next column
;Draw the front end colour data (as for
;this simple tutorial, only one screen
;is used for text. The text is also
;stored to the screen area which we use.
;Text colour data will be drawn from the
;10th row, onwards.
ldx #$00 ;Set loop X to 0
drawcls2 lda $8140,x ;Read colour data
sta $d940,x ;Store per char
lda $8200,x ;Read colour data
sta $da00,x ;Store per char
lda $82e8,x ;Read colour data
sta $dae8,x ;Store per char
inx ;Add 1 to loop
bne drawcls2;Do max 256 chars
;Next part is the main fun part. We are
;going to add some interrupts and raster
;splits to the code, but before we can
;do this. They need to be initialised.
lda #<irq1 ;Store low/hi bytes
ldx #>irq1 ;of interrupts to
sta $0314 ;the IRQ register
stx $0315 ;flag.
lda #$7f ;Enable CIA to sync
sta $dc0d ;with interrupts
sta $dd0d
lda #$2e ;Initialised raster
sta $d012 ;position.
lda #$1b ;Screen on
sta $d011 ;
lda #$01 ;Sync IRQ vectors
sta $d01a
lda #$00 ;Song number
jsr $9000 ;Initialise music at
;$9000
lda #<message ;Initialise
sta messread+1 ;scroll text
lda #>message
sta messread+2
;Clear last row for scroll
;text
ldx #$00
clearline lda #$20
sta $7fc0,x
inx
cpx #$28
bne clearline
cli ;Clear IRQ flag to
;routines outside
;the interrupt
mainloop lda #$00 ;Synchronize timer
sta timer ;outside of the
cmp timer ;interrupt so that
beq *-3 ;the new front end
;keeps on running
;smoothly.
jsr scroll ;Call subroutine to
;scroll text
lda $dc00 ;Read joystick port
lsr a ;two fire button.
lsr a ;If ignored, then
lsr a ;let the front end
lsr a ;code repeat itself.
lsr a ;
bcs mainloop
jmp gamesetup ;Setup game to
;start.
;This is the 1x1 scroll text routine. It
;will be controlled using a scroll
;pointer (scrptr), which will delay the
;speed of the scroll.
scroll
lda scrptr;Load pointer
sec
sbc #$01 ;Speed of scroll
and #$07 ;Only 7 bytes for
sta scrptr ;Hpos smooth scroll
bcs endscrl;Not enough pixels?
ldx #$00 ;Set loop as 0
pullchr lda $7fc1,x ;Screen pos pulls
sta $7fc0,x ;next char to the
;previous char.
lda #$0d ;Char colour ltgrn
sta $dbc0,x ;Char colour row
inx ;Add 1 char
cpx #40 ;40 chars read?
bne pullchr ;I guess not
messread lda message ;Read character of
;the message
cmp #$00 ;@ read?
bne nowrap
lda #<message ;Reset scroll
sta messread+1;text message.
lda #>message
sta messread+2
jmp messread
nowrap
cmp #$3f ;Lowercase range?
bcc skip ;Ok
sec ;Convert to lower
sbc #$40 ;case
skip sta $7fe7 ;Store to last
;character on the
;screen
inc messread+1 ;Read lowbyte
bne endscrl ;256 times
inc messread+2 ;Read next hi
;byte of message
endscrl rts ;Finished!
;Since the player has pressed the fire
;button on Joystick port 2. Initialise
;all interrupts and sound. Then run
;the game ($4260) directly.
gamesetup
sei
lda #$00
sta $d019 ;Interrupts off
sta $d01a
lda #$81
sta $dc0d ;CIA Timer disabled
lda #$31
ldx #$ea
sta $0314 ;IRQ flags off
stx $0315
;Initialise sound
ldx #$00
silence lda #$00
sta $d400,x
inx
cpx #$18
bne silence
cli
jmp $4260 ;Jump to SEUCK game
;The main interrupts that use raster
;splits for the front end. Use of
;Multiple Interrupts will do the trick
;Interrupt 1 - Smooth scroll routine
irq1 inc $d019 ;ACK Irq Interrupt
lda #$2e ;First raster end
sta $d012 ;position
lda #$02 ;Switch to BANK #$02
sta $dd00 ;for text chars.
lda #$1b ;Standard screen mode
sta $d011
lda #$fc ;Charset at $7000 and
sta $d018 ;screen at $7C00.
lda scrptr ;Smooth scroll at
sta $d016 ;VIC HSPosition
lda #<irq2 ;Call next IRQ
ldx #>irq2 ;raster interrupt
sta $0314
stx $0315
jmp $ea7e ;Infinite loop
;Interrupt 2 - Displaying the logo.
irq2 inc $d019
lda #$6a ;Raster end position
sta $d012
lda #$01 ;Switch to BANK #$01
sta $dd00 ;where logo lies
lda #$3b ;Bitmap mode switched
sta $d011 ;on.
lda #$38 ;Bitmap position set
sta $d018 ;to read SCREEN RAM
;at $8800.
lda #$18 ;Screen HSP
sta $d016 ;Multicolour Enabled
lda #<irq3 ;Setup the next IRQ
ldx #>irq3 ;raster interrupt
sta $0314 ;for the static
stx $0315 ;text.
jmp $ea7e ;Infinite loop
;Interrupt 3 - The static text and
;synchronised timer and music
irq3 inc $d019
lda #$ea ;Raster end position
sta $d012
lda #$02 ;Switch to bank #$02
sta $dd00
lda #$1b ;Standard screen
sta $d011 ;mode
lda #$fc ;Read charset at
sta $d018 ;$7000 and screen
;at $7c00
lda #$08 ;VIC HSP set as no
sta $d016 ;multicolour.
lda #$01 ;Switch on timer
sta timer ;pointer
lda #<irq1 ;Start raster
ldx #>irq1 ;interrupts again
sta $0314
stx $0315
jsr $9003 ;Play title music
jmp $ea7e
;Some pointers
timer .byte 0 ;Sync timer
scrptr .byte 0;Smooth scroll pointer
;The message for the scroll text. We
;will use the .txt prompt to write a
;scroll text - although there are other
;possible ways :)
*= $a900
message
.text " ... welcome to - gr"
.text "ayhawk - ... game de"
.text "sign, graphics and sou"
.text "nd effects were done b"
.text "y alf yngve using the "
.text "shoot 'em up construct"
.text "ion kit by sensible so"
.text "ftware ... front end"
.text " programming was done "
.text "by richard bayliss ..."
.text " bitmap logo was dra"
.text "wn by johan janssen .."
.text ". music was composed"
.text " by richard bayliss .."
.text ". copyright (c)2014 "
.text "the new dimension ... "
.text " mission briefing: i"
.text "t has come to attentio"
.text "n that deep in space, "
.text "an alien threat awaken"
.text "s ... aliens are sto"
.text "ring substances on hug"
.text "e asteroids ... thes"
.text "e could result to deva"
.text "stating consequencse, "
.text "should they be used to"
.text " build deadly weapons "
.text "... you must pilot a"
.text " greyhawk fighter ship"
.text " across all of the ast"
.text "eroids, and destroy ea"
.text "ch one (after you have"
.text " passed over it) ... "
.text " the asteroids are hea"
.text "vily guarded by the al"
.text "iens, which you must a"
.text "lso blast ... can yo"
.text "u destroy all of the a"
.text "steroids and whatever "
.text "is left on them, or wi"
.text "ll the galaxy be doome"
.text "d forever? ... there"
.text " is only one way to fi"
.text "nd out ... press fir"
.text "e to start the game .."
.text ".. "
.text " "
.text " "
.byte 0
Superb, the listing is typed in. However, save the code using BACK ARROW+W (Unless you are just using the .D64 you downloaded to try it out) and then press BACK ARROW+3. If it doesn't work the first time and the routine jumps back to the assembler, add the following in at the very top of the source code:
*=$0801
RTS
RTS
Note ... If you want to load the example game and the listing that is already on the tutorial example disk, you must load in the RAW SEUCK game file (Which was saved using the SAVE AS FINISHED GAME option). Do the 3 steps before (The F 6580 B6C0, tips, etc). Press the RESET button and select the fastload option. Load in the TITLEDATA then enter the turbo assembler. Load the sequential version of the listing using BACK ARROW + E and type in FRONTEND.SRC*.
The listing will then load in. Now type the 2 lines (indicated in yellow above the previous paragraph). Assemble and run. A READY. prompt should appear.
SAVING / TESTING YOUR FINAL PIECE
We are nearly there now. It is time to save the game, and to do that you will need to go into the Machine Code monitor in Fastload (Or freeze mode). Save the filename as follows:
S "MYGAME",8,0810,FFFA
This will save the whole game to disk from $0810 (Where we added the SEUCK title skip init routine) all the way to $FFFA. The file size will be 249 blocks. Type in G 0810 to run the game. Voila. A new front end linked to your SEUCK game.
Is this the end of it? Not quite. It is time to make the file size shorter. What do we do? ... Crunch it.
There are two different ways how you can crunch the finalized game. There is use of a packer and a cruncher (On the disk is Zipper V5.0 and 2MHz Time Cruncher V5.0 for fast speed).. Or you could just extract the finished production with a .D64 editor and compress it all with PuCrunch or Exomizer. Here's the oldschool method ...
- Load in Zipper V5.0
- Enter the load name of your SEUCK game with the new front end
- Enter the save name of your SEUCK game with the new front end
- Enter $0810 as the jump address - since that is where the init front end skip routine lies
- Enter $37 as the $01 value
- Enter SEI in the SEI / CLI option
- Wait for the file load and pack.
- When the border is grey (with nothing happening), press SPACEBAR to save your packed game
If you load in the compressed game game (before using a cruncher) you'll need to type in SYS2049 to run it to see if it works. If it does, then the next stage just for you.
- Load in 2MHz Time Cruncher V5.0
- Enter the load name of the game, which you compressed using Zipper V5.0
- Enter the save name of the crunched game
- Enter $0801 (not $0810) as the jump address - since that is where the decruncher from Zipper V5.0 commences
- Enter $37 as $01 Value
- Crunching step = speed (1 is fastest crunch speed), the higher the step, the better result, but slower ther crunch gets).
- Start loading and crunching the file, by pressing the Spacebar
- Wait a few minutes during crunching
- Select Save option
- Select RUN program option. The screen should blank and then come on and execute the Zipper decruncher which will then run the game.
That's it, job is done.
THE PUCRUNCH EXOMIZER METHOD
If the packing/crunching method takes too long for you, then we recommend usage of PuCruncher or Exomizer. Exomizer gives out the best results, but the decruncher takes longer, where is PuCrunch crunches as hard as possible and gives a shorter decrunch.
USING PUCRUNCH
- Use a PC D64 editor to export your PRG of the game
- Use the command prompt to call the directory where PuCrunch is
- Enter as follows:
pucrunch seuckgame.prg -s seuckgamecrunched.prg -x $0810
- Import into a .D64 or test .PRG in VICE via autostart
- Get your game released (if it works 100%)
USING EXOMIZER
- Use a PC D64 editor to export your PRG of the game
- Use the command prompt to call the directory where Exomizer is
- Enter as follows:
exomizer sfx $0810 seuckgame.prg -o seuckgamecrunch.prg
- Import into a .D64 or test .PRG in VICE via autostart
- Get your game released (if it works 100%)
Job done :)