TND Productions, C64 News + Updates

SEUCK REDUX
By Richard Bayliss and Martin Piper
Last Updated: 16th April 2022 - Slight alteration to the tutorial, renaming ScrollEntry.a to ScrollEntry_SEUCK.a
IMPORTANT NOTE:
Due to the source updates that are available and updated in GitHub. Source files and batch files are subsequent to change in the Scroller archive. The projects made on this page were done in older versions of the SEUCK Redux frame work. Games programmed in SEUCK Redux work on PAL C64s and will not work on NTSC.
1. INTRODUCTION
1A. INTRODUCTION
1B. GETTING STARTED
1C. SETTING UP AND TESTING THE SOURCE
1D. IMPORTING YOUR OWN SEUCK GAME DATA INTO THE SOURCE CODE
1E. SOME COOL EXPERIMENTS
2. POWER UPS
ADDING POWER UPS
2A. A QUICK EXAMPLE (BORDER CHANGE):
2B. TESTING MORE THAN ONE ENEMY KILLED
2C. BULLET SPEED
2D. CHANGING THE PLAYER'S OBJECT
2E. SETTING DEFAULTS
2F. PROGRESSIVE POWER UPS
2G. OTHER PLAYER PROPERTIES + INFORMATION
3. ENEMY AIM FIRING
ENEMY AIM FUNCTION
3A. SINGLE ENEMY AIM FIRING
3B. MULTIPLE ENEMY AIM FIRING
4. BACKGROUND ANIMATION
ADDING BACKGROUND ANIMATION
4A. PARALLAX SCROLLING EXAMPLE
4B. ANIMATED CHARACTER SETS
5. MUSIC / SOUND EFFECTS
MUSIC AND SOUND EFFECTS
5A. MUSIC PLAYERS, FORMAT AND MEMORY
5B. SETTING INIT / PLAY ADDRESSES IN CUSTOM PLAYERS
5C. PLAYING IN GAME MUSIC WITH A DIFFERENT TRACK
5D. PLAYING MUSIC AND SOUND EFFECTS AT THE SAME TIME
6. DATA GROWTH
GENERAL INFORMATION ABOUT DATA GROWTH
7. ADDITIONAL SEUCK REDUX COMMANDS
ADDITIONAL SEUCK REDUX COMMANDS IN ScrollEntry.a
8. MAKING A NEW SCORE PANEL
MAKING A NEW SCORE PANEL
8A. MAKING AN 8 SPRITE SCORE PANEL
8B. MAKING A CHAR BASED SCORE PANEL
9. MAKING A NEW FRONT END
MAKING A NEW FRONT END
9A. PUTTING LOGO, TEXT AND CUSTOM CHAR SET INTO A NEW FRONT END
9B. USING RASTER SPLITS
9C. FINISHING THINGS OFF - DO IT YOUR WAY
10. LET'S WORK ON A PROJECT - ROCKET 'N ROLL REDUX
1A. INTRODUCTION
1B. PROJECT PREPARATION
2A. CHANGING THE MUSIC
2B. ADDING IN GAME MUSIC
3A. TWEAKING THE GAME PLAY
3B. PLAYER PROPERTIES
3C. POWER UPS
3D. ENEMY DETECTION
4A. TWEAKING ENEMIES
4B. GIVING ENEMIES SMART AIM
4C. BOSS OBJECTS AND LINKED ENEMIES
4D. THOSE FLIPPIN' TRAJECTORIES
5A. ADDING BACKGROUND ANIMATION
6A. CREATING A NEW SCORE PANEL
6B. RENDERING A SCORE CHAR TO SPRITES
7A. BUILDING A NEW FRONT END
7B. ADDING A SCROLL TEXT
7C. ADDING A HIGH SCORE DETECTION
7D. ADDING IN GAME OPTIONS
8A. ADDING SOME FINAL TOUCHES
1. INTRODUCTION
1A. SEUCK REDUX IS MOST DEFINITELY NOT SEUCK!!!
SEUCK (Short for Shoot 'Em Up Construction Kit) has been well known for creating and developing shoot 'em up games without any need for programming. This was pretty much limited for games developers. Some games developers just rushed out simple little games. Others spend more time on their projects and try to even PUSH SEUCK'S LIMITATIONS even further. If you are a SEUCK user who likes to make quality SEUCK game creations and want to try and do more to these (or find a programmer who knows the ACME cross assembler by heart, who is willing to help). There is now a special SEUCK ENHANCEMENT framework, which uses the ACME cross assembler.
SEUCK REDUX is something very special for SEUCK game titles. It will give you the ability to produce quality game productions, inside a brand new source code framework. To put it another way, SEUCK Redux allows you to make brilliant game creations out of SEUCK. It is possible to program a new front ends with/without hi score tables, add new special features, such as power ups, and even tweak the game to do different things, which the original Shoot Em Up Construction Kit cannot do. For example turn random firing into aim functions, make enemy bullets shootable to kill, add artificial intelligence to the enemies. Another brilliant thing about SEUCK Redux is that is your games will NO LONGER HAVE TO SUFFER THE TYPICAL SEUCK SLOWDOWN SYNDROME no more.
With a basic knowledge of this framework, you can create commercial quality vertical/horizontal scrolling shoot 'em ups, that recreates SEUCK's attack waves and player settings and transform your game into something special. The code's multiplexer allows you to use up to 24-32 sprites in the code (memory restrictive). There are also some SEUCK example work files which you can play around with, inside the source. SEUCK Redux allows you to import your SEUCK files, which were saved as ALL DATA from the SEUCK/Sideways SEUCK editor. Take a look at GETTING STARTED to see what to do here.
IMPORTANT THING TO NOTE BEFORE USING SEUCK REDUX - PLEASE READ THESE GUIDE LINES FIRST
1. Always keep up to date with any new builds that are released on Martin Piper's GITHUB page. These might need to be downloaded.
2. Programming knowledge is advised, although code editing should be simple enough if you want specific features as this tutorial might help you get through some parts of the frame work.
3. The current frame work will only work on PAL C64's and will crash on NTSC machines. It will be up to you to update the source yourself in order to get your game work on NTSC machines as well as PAL.
4. In the level editor, your SEUCK game MUST NOT use CONTINUE in any parts of the level editor. This could cause sprites inside the multiplexer code to mysteriously become invisible and make your game more unplayable. This means that in your game, you will need to find another way round, using the REDRAW pointers instead.
EDIT: 8th August 2020 - This problem is fixed and updated in Martin Piper's Github page. In SEUCK you can now use CONTINUE. Also the IRQ crash bug in SetupIRQs.a has also been fixed. Grab the source from the link in (1.).
5. If you are making a commercial C64 game using this source PLEASE ASK FOR MARTIN PIPER'S PERMISSION first.
6. The SEUCK Redux framework allows you to use up to 24-32 sprites on one screen. If you use SEUCK Redux, not only should you avoid using the CONTINUE command in your SEUCK Level editor. You should also try to avoid having MORE than 8 sprites on the same raster line. (Basically try to limit the number of sprites in the same horizontal position. I.E. too many bullets could possibly make other sprite objects disappear.)
7. Compiled source (the game in particular) supports PAL only. If you can program the game code to work on NTSC machines.
8. Be careful how you manage memory. (Like with all C64 games, there are memory limitations)
10. Have fun
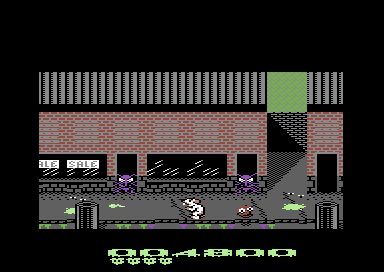
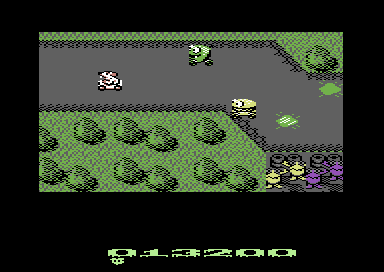
SOME EXAMPLES OF SEUCK REDUX GAMES RELEASED:
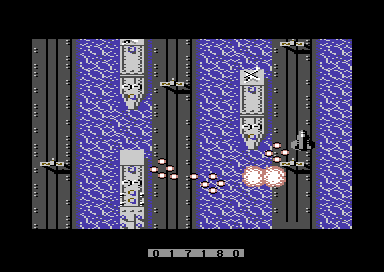
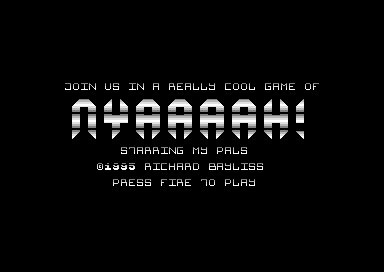
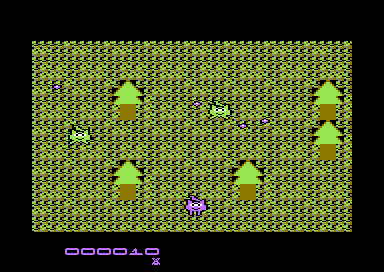
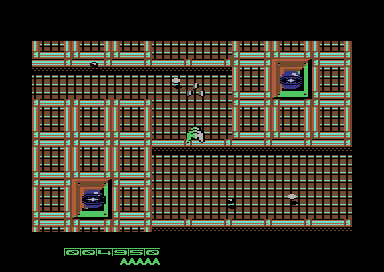
TOP LEFT: Legion of the Damned by Eleanor Burns, TOP RIGHT: NYAAAAAH! 15th Anniversary Edition by Richard Bayliss, BOTTOM LEFT: Nuclear Strike Force by Richard Bayliss, BOTTOM RIGHT: Flying Cobra by Alf Yngve
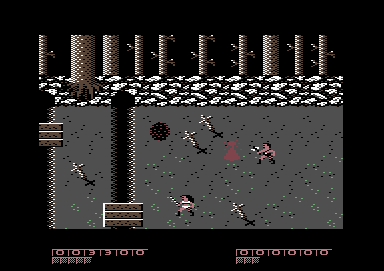
Legion of the Damned is a prime example of some of a special power up feature. Where both players, Player 1 and Player 2 could press a letter key to cast spells, should any bottles have been picked up. The spells use a kind of smart bomb feature. The more bottles picked up, the more powerful the spells would have become. To check out this feature, enable Scroller_LOTD=1 in ScrollEntry.a.
Nyaaaah! - 15th Anniversary Edition uses a tweak to the score board, which is also possible with SEUCK Redux.
Nuclear Strike Force and Flying Cobra both feature the test AIM function. Where a selected enemy (which uses random firing) can use the test AIM function. We will be looking at the AIM function later on.
BACK TO TOP
1B. GETTING STARTED:
CLICK ON THE FOLLOWING LINKS FOR THE FOLLOWING APPLICATIONS (Note that each link will open a new window)
ESSENTIAL PC BASED PROGRAMS REQUIRED
Dir Master by Style - Software for exporting PRG and P00 files from your own D64 directories
Relaunch 64 by Payday - Code writing GUI, which supports commodore 64 programming (Alternatively you can use Notepad ++ and command prompt).
VICE by VICE Team - This is most essential for testing C64 software development and/or playing C64 games (if you don't have a Commodore 64, Ultimate 64, theC64 machines).
ACME Cross Assembler by Sm0rb0rd Software - Martin Piper's C64Public archive contains the latest version
Martin Piper's Complete C64 Archive (Available from from his GITHUB page) - also includes SEUCK REDUX (Scroller), example SEUCK work files, Music Studio V2, Compression/Decompression and other work files, publicly available by Martin, himself).
OPTIONAL PC BASED PROGRAMS
SIDPlay2/W by Adam Lorentzon - SID Music player, which you can load/save C64 SID chip tunes from the HVSC and other sources
SIDReloc - by Linus Akesson - Command line SID Music relocator - allows you to relocate PSID tunes (saved from SIDPlay W)
Goat Tracker V2.7 by Covertbitops - SID Music maker, which features functions such as SFX support, etc.
CheeseCutter V2.8 by Abadon/Triad - SID Music maker
Exomizer V3 - by Magnus Lind - One of the most popular PC based command line cruncher/level packers for Commodore 64 programs and also support for other 8-bit machines
^^ Please note that you don't have to use Exomizer for SEUCK Redux, as Martin Piper's source has Martin's own compression/decompression code, which compresses quicker. Also Exomizer V3 has some known bug in which doesn't always pack/link very well. There is a patch to this problem, by using this command below:
exomizer sfx $0400 scroller.prg -o scroller.prg -Di_ram_during=$34 -x2
This will crunch memory from the start address of your compiled project using all memory from $0400-game end address. It will also include the crucial data $a000-$cfff, $d000-$dfff, $e000-$fxxx. The sfx decruncher will decrunch correctly.
(If you want your exomizer decruncher screen to be blank during decrunch you can add to the command -s "lda #$0b sta $d011")
QUICK STEPS
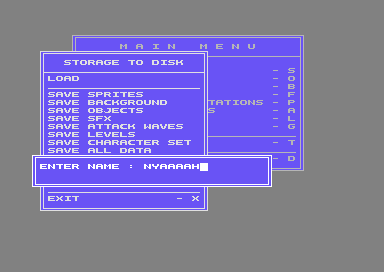
METHOD 1: Using SEUCK and saving all of your game data
Assuming that you have written your own SEUCK game creation and you think you may have finished your own game creation. In VICE, go to the FILE menu, and select ATTACH/DETACH DISK IMAGE. Go to DRIVE 8 and then type in the filename box SEUCKDATA.D64 and then click on CREATE IMAGE. Next click on the ATTACH button. Now in SEUCK, go to the menu option and select SAVE ALL DATA. This is the file you will need for using in the SEUCK REDUX source code. Once you have saved all of your data. Go to the FILE menu and DETACH the D64 image. NOTE: You can also save your SEUCK GAME using save as finished game. - THIS WORKS ON BOTH HORIZONTAL AND STANDARD VERSIONS OF S.E.U.C.K :)
METHOD 2: Recovering your standalone SEUCK game to the editor.
Unfortunately, there could be the case where you actually made a SEUCK game, but you might have lost the work file for it. If that is the case. Don't worry. There is a way around this problem. VICE has a warm reset as well as a hard reset. You will need SEUCK REVIVE by Entropy from the CSDB. Once you have downloaded it. Load your SEUCK game like normal. After your game has run successfully. Press ALT+R (Not CTRL, ALT+R). Attach the SEUCK REVIVE disk, and then type in LOAD"*",8,1 Check through your game, then follow METHOD 1 (see above). This method can also help remove music, enhancements from your SEUCK creation and restore the editor for repairing/updating your own game. ONLY WORKS ON STANDARD S.E.U.C.K GAMES, NOT HORIZONTAL SCROLLING VERSIONS.
METHOD 3: Manual recovery and freezer cartridges.
If you have made a SEUCK game years back and you know how to use a freezer cartridge and your game has not been enhanced or touched before. It is possible to save your complete game data, whilst it is intact. Run your SEUCK game like normal. Press the FREEZE button on your Action Replay/Retro Replay/Final cartridge. Enter the MACHINE CODE monitor. Then save your complete game data from $0900-$FFFA using:
S "MYGAMEDATA",8,0900,FFFA

METHOD 4: VICE MONITOR. This is probably the most quickest method of all for all standalone SEUCK game creations, which main code and data has been untouched. After running your finished SEUCK Game in VICE. Create a new D64 in VICE, (See guide in method 1). Then press ALT+M to enter the VICE machine code monitor. The monitor window will pop up. Like with method 3. We want to save the complete game data to your D64. Type in the following command:
bank ram
s "mygamedata" 8 0900 fffa
In a quick of a flash the SEUCK game will save to your D64. Remember to DETACH the D64 when you are ready!
DO NOT USE METHOD 2, 3 OR 4 FOR COMPLETELY ENHANCED SEUCK GAMES OR POST-BUILT SEUCK REDUX TITLES. THIS WILL NOT WORK!
BACK TO TOP
1C. SETTING UP AND TESTING THE SOURCE
Boot up Relaunch64. Load up the assembly source files (i.e. scrollerdata.a), in the path which you extracted the C64Public-Master/Scroller directory to. Download and open my edited ScrollEntry.a (which replaces the original ScrollEntry.a source). Then open the original ScrollerDataMacro.a into Relaunch64. If you press F5 to compile and run. Nothing will happen. This is because the compiler needs script commands to be called in order to compile and execute your program.
If using the latest SEUCK Redux framework from 2021, you will need to use ScrollEntry_SEUCK.a instead
NOTE: If your game is made using the HORIZONTAL SCROLLING SEUCK, you will need to remove the comment (;) by the command Scroller_IsHorizontal = 1 (If using the 2021 version and Horizontal SEUCK files, you will need to edit the source ScrollerSingle_H.a and comment out or delete ;scrollerRealMovementYPixels !by 0)
Now for the practical part. We shall test one of the example sources that has been included in the archive. Nyaaaah! Resurrection, one of my old C64 games I made in 2006 for the SEUCK vault,(Which I also supplied to Martin Piper). You can see that many of the !BIN (Binary files) have been commented out. A lot of those files were test files, but may have not been included in the source code. We shall run one of the example games that has been supplied in the archive. In Relaunch64 open the file ScrollerDataMacro.a and change GIGASEUCK.P00 to ...
We are not ready to run the game yet. Relaunch 64 hasn't got a compiling script set up. We have to do it ourselves. In order to make a script, go to the following menu option in Relaunch 64:
OPTIONS / PREFERENCES
Click on the tab 'Compile and Run scripts'. Click on the NEW SCRIPT button and type in the following (Or copy+paste) this compile command (you may need to edit this script). It should hopefully work:
@echo off
SETLOCAL
del Scroller.prg Scroller.map
rem Usually pass in a parameter for the build customisation you want to use
rem IF [%1] == [] SET CHOICE=ScrollEntry_MultiDirection.a
IF [%1] == [] SET CHOICE=ScrollEntry_SEUCK.a
IF NOT [%1] == [] SET CHOICE=%1
echo Build choice: %CHOICE%
..\acme.exe -v4 --msvc --lib ../Scroller/ ScrollEntry.a %CHOICE% ScrollEntryAfter.a
if not exist Scroller.prg goto error
copy /y Scroller.prg ScrollerOrig.prg
c:\exomizer\win32\exomizer.exe sfx $0400 ScrollerOrig.prg -o scroller.prg -x2
goto end
:error
echo Scroller.prg not created!
:end
MAKE SURE THE PATH NAMES ARE CORRECT, or RE-NAME the paths. Name the script as SEUCK REDUX or whatever you like.
Click on UPDATE SCRIPT. Then exit the script editor
Now we are ready to compile and run the example game. PRESS F5. The commands on the RIGHT will show the status of compiling. Should there be NO ERRORS, VICE will boot up and load up the assembled and compressed program. The result should look something like this:

Oh, and did I say this framework also plays SID music? Well, it sure does ;)
BACK TO TOP
1D. IMPORTING YOUR OWN GAME INTO THE SOURCE CODE:
Now you have tested the SEUCK Redux engine. It is time to import your own SEUCK game data into the source code. In order to be able to do this, you need Style's DIR MASTER. Load up DIR MASTER, and then a D64 image which contains your SEUCK ALL DATA. Move your mouse on to the filename in the D64, and click on the RIGHT button of your mouse. In the pop up menu, Select EXPORT. Next go to the box which says Save As Type change from PRG to P00. Then save into the C64PUBLIC-MASTER/SEUCK folder, your game as MYSEUCK.P00 or whatever you would like to call it.
Now that has been done. What you want to do now is test your game in SEUCK Redux. Go to the file ScrollerDataMacro.asm and look for the UNCOMMENTED (!bin command without an ; next to it (For example !BIN "NYAAAHRS.P00), and rename the file with the game you have exported into the C64PUBLIC-MASTER/SEUCK directory.
Once you have done that. Click on the save tab on Relaunch64 and then press F5 to compile and test the code. If your game is standard SEUCK, then background should be in tact otherwise if the game is SIDEWAYS SEUCK, then you'll notice your map will look completely garbled up. That's probably because in ScrollEntry_SEUCK.a you didn't uncomment Scroller_isHorizontal=1. So make sure you uncomment Scroller_IsHorizontal=1 in ScrollEntry_SEUCK.a if using Sideways SEUCK. Otherwise comment it out if using standard SEUCK.
Congratulations. Your SEUCK game is now a SEUCK Redux game. You can now play around with it :)
SPACE CRUMPETS WORK DISK IS ALSO AVAILABLE TO DOWNLOAD FROM HERE. GO AND GRAB IT.
1E. SOME COOL EXPERIMENTS AND ADDITIONAL COMMANDS IN ScrollEntry_SEUCK.a
Now that we have got to grips with importing SEUCK data into your own game creations. We are going to do some experiments on the game, so that you know some of the basics.
SPRITE EXPANSION:
First of all, let's go to ScrollEntry_SEUCK.a and add a few tweaks to the game.
First, just for a bit of fun. Let's make the sprites massive :) To do this look up and then uncomment the command:
Global_SpriteExpandX = 1
Global_SpriteExpandY = 1
This feature expands the X and Y axis of all of the in game sprites (Except for the score panel, which would need to be done manually in SetupIRQs.a
ARGH! What have I done?
Okay, now you might wonder how to restore the expanded sprites. Well, place a ; by Global_SpriteExpandX = 1 and ;Global_SpriteExpandY = 1 and you'll have normal sprites again.
LET'S CUT TO THE CHASE
The next example could be very handy for cutting your screen. It will disable the top and bottom borders and also cut a portion of the scroller to make way for a static screen of 5 columns. This is very handy for if you would like to make a char based score panel for your game.
For a full screen, with score panel as sprites. We use:
Scroller_FullScreen = 1
If you disable it by adding ; before Scroller_FullScreen = 1. Here is how the game will turn out:
The garbled mess below can easily be changed to a text based panel. Which is revealed later on in this tutorial.
by uncommenting Scroller_UseDemoScorePanel = 1 with the command above will give you an example score panel, which can be customized using CHARPAD.
To restore the full screen scroller. Simply uncomment Scroller_FullScreen = 1
ENABLING / DISABLING SOUND EFFECTS IN YOUR GAME
SEUCK Redux doesn't just give you visual images, but it is also possible to enable and disable sound effects inside your own game. You can even program custom sound effects if you really wanted to. Martin Piper has created his own music player Music Studio V2, which also features sound effects support. We will be looking in to this later on. First, here are the commands you can use.
Scroller_PlaySoundEffectsDuringGame = 1
This will simply play the default sound effects which have been made using the Shoot Em Up Construction Kit. If you put a ; on the same row before Scroller_PlaySoundEffectsDuringGame, this will override the sound effects player to play the music instead. That is unless of course if the command DisableSound = 1 is used. Which will silence everything.
Now, SEUCK Redux also has a special feature in which can also play sound effects, based on set instruments/sounds made in MusicStudio V2. You will need to have Scroller_PlaySoundEffectsDuringGame = 1 enabled. Also you will need to use this other command:
Scroller_PlayMusicAndSoundEffectsDuringGame = 1
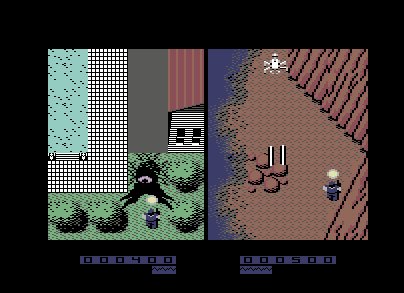
PLAYER BEHAVIOR PATTERNS AND SCORE SHARING
Now, sometimes if you are making a SEUCK game. You might want to do crazy things to the player. Alf Yngve certainly did that for a few of his game titles. I mean Split Second, Zap Fight, etc uses a form of Twin Mode. It is even possible to link two players to one score and lives counter. Here are a few commands, if enabled:
Scroller_LinkedPlayers = 1
By enabling this feature, you link one single player to a single joystick. You can also set the link position of each player by changing the X (horizontal) and Y (vertical) position value of:
Scroller_LinkedPlayersOffsetX = 0
Scroller_LinkedPlayersOffsetY = -21
There is also a command which is called
Scroller_TwinMode = 1
This will control two players with one joystick, but each player has its own separate speed and behavior. The Scroller_LinkedPlayers = 1 MUST be DISABLED if using the twin mode option.
Now what about sharing the score panel in Twin Mode or Linked Players? Simply enable this option:
Scroller_SingleScoreLives = 1
This basically shares the score and amount of lives the player has in the game. After one player has lost its last life (or if in linked players both players lose all of their lives), then the other player loses its last life the game will end. The screen shot below shows two players in twin mode, and sharing just one score and lives.
ENEMY PROPERTIES
Perhaps you are writing a game in which boss enemies are linked together to form as one big enemy. In SEUCK, killing a boss enemy is normally caused by killing one piece of an enemy at a time. If you uncomment the term below, it will allow you to destroy ALL linked enemies in one go.
Scroller_LinkedEnemyTest = 1
Please be warned that with this feature enabled, it will also destroy ANY sprite in SEUCK considered to have been LINKED TO. For example if you placed two small enemies at the same time, destroy one of those, the other enemy will disappear. There is a way to fix this problem. More about this later on.
ARTIFICIAL INTELLIGENCE
SEUCK games don't use artificial intelligence, but SEUCK Redux can actually use this feature. It can be possible by creating two different SEUCK work files. One of which is the main game data, and another in which is the same enemy. The enemy can then be forced to behave like the AI Test code. The command can be called by using
EnemyAITest = 1
The next command, which I use heck of a lot. This encourages chosen enemies to aim for the player's current position and try to fire at the player. This can be very handy for any games, where aliens fire at random direction and target the player's X/Y position and try firing at the player. More on this feature later on:
EnemyAimTest = 1
Now, what about enemies that move directional and shoot directional as they move across the screen and then suddenly stop. In SEUCK the enemies automatically are firing upwards. In SEUCK Redux this feature can be changed, simply by overriding the default animation direction. The command for this is:
OverrideDefaultAnimationDirection = 1
SPRITE BEHAVIOR
If you are writing a game and you want you player to hide behind the background. There is a solution to enabling this feature, like in the Contributor's game Wacky Waste. This is known as the Sprite/Background priority.
For games that allow your sprite hide behind the background, the command used is:
Scroller_SetSpriteBackgroundPriority = $ff
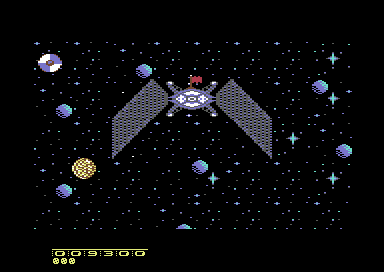
Of course, looking at the snapshot below, this feature doesn't suit Space Crumpets, but it can be handy for some games, in which you could hide behind background objects.
NOTE:
Sprite behind background priority works on CHAR COLOUR and background MULTI-COLOUR #2.

There are some other features (which I have automatically enabled already) which relates to the Sprite to Background collision.
CollisionAllowEscape = 1
This feature allows the player, in certain circumstances after a loss of a life, escape from a deadly background. Sometimes push scroll games force a player to get stuck when spawning the player back on to a STOP/DIE background obstacle.
CollisionHotSpotTweakY = 8
CollisionHotSpotTweakX = 4
The command above sets the collision X, and Y offset value when the player collides into a background object.
TryOtherPlayerSafePositionForRespawn = 1
This tries to hunt of a safe position of the other player, before a player respawns after death or starts a new game.
ITS POSSIBLE TO MAKE THE PLAYER SHOOT POWER UP STYLE BULLETS
There is a possibility for the player to fire a power up, such as a 3 way firing system, like what was made with Nuclear Strike Force. The example used is:
ExamplePlayerBulletTwoWay = 1
LEVEL SKIPPING (I DON'T MEAN CRACKS AND TRAINERS)
It is possible to call SEUCK Redux to skip levels, or warp directly to another level. Like Precinct 20: Dead Strange did. The feature is called
Scroller_LevelSkipDemoCode = 1
BACK TO TOP
2. ADDING POWER UPS
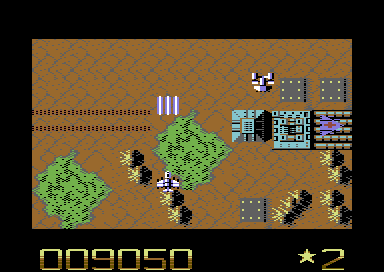
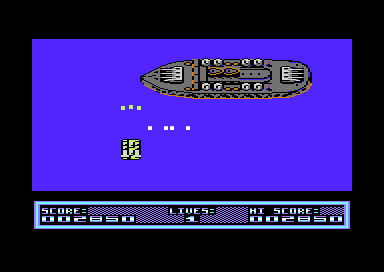
When creating games in the SEUCK Redux environment it is possible to generate different types of power ups for the player. It is also possible to alter the animation frame of the player, its bullet and other bits. Zap Fight 2, featured in Shoot Em Up Destruction Set #4 is one example which uses the awesome power up feature. The event occurs every time a player picks up a specified object value (original object value set in SEUCK). It is possible to create as many power ups as you probably can. In this chapter we look at identifying the collectible enemy object picked up. Then later on give the player player power ups, which involve, speed, amount of bullets, invincibility, and awarding extra lives.
In order to give the player specific power ups. The AnimationType should be read
lda AnimationType,x
cmp #OBJECT_TYPE
bne .NotPickup
jsr .Effect
jmp .ExitPowerUpTest
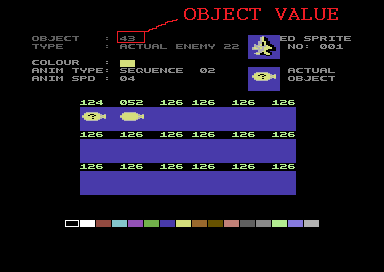
If you refer to the original SEUCK editor, the source is trying to test the animation type object, to see which object has been killed by the player or bullet. Object 22, represents ACTUAL ENEMY 1 and Object 57 represents ACTUAL ENEMY 36. Refer to the OBJECT NUMBER (not Actual Enemy value. Otherwise that WONT work.). For this example we shall refer to Actual Enemy 22, (Object 43) from Nuclear Strike Force. The player collects an airship power up, in order to gain better firing abilities.
NOTE: You will need your original SEUCK work file to look at in order work out the enhancements.
2A. A QUICK EXAMPLE (BORDER CHANGE):
In AnimationEngine.a, Look for the label .makeItDead (Before !IF DEF LOTD). Add the following command. This will test whether or not ENEMY 22 (Object 43) has been killed. If it has, then a border will change colour. If not then no effect will take place. (This is referred to Nuclear Strike Force by the Way).
.makeItDead
lda AnimationType,x ;Check actual object
cmp #22 ;Actual Enemy 1
bne .NotPowerUp
jsr AwardPowerUp
jmp .makeItDeadEnd
.NotPowerUp
.makeItDeadEnd
BACK TO TOP
2B. TESTING MORE THAN ONE ENEMY KILLED
It is possible to EXPAND the enemy check command. Say, if you had a multiple number of enemies to give power ups you can simply expand the routine above.Say for example enemy 2 and enemy 3 are different sprites to give power ups to the player. The command can be modified like this:
.makeItDead lda AnimationType,x ;Check actual object
cmp #22 ;Actual enemy 1???
bne .NotPowerUp1
jsr AwardPowerUp
jmp .makeItDeadEnd
.NotPowerUp1 cmp #23 ;Actual enemy 2???
bne .NotPowerUp2
jsr AwardPowerUp2
jmp .makeItDeadEnd
.NotPowerUp2 cmp #24 ;Actual enemy 3???
bne .NotPowerUp3
jsr AwardPowerUp3
jmp .makeItDeadEnd
.NotPowerUp3
.makeitDeadEnd
Now look for the command .charThatHit, and type in the following subroutine. This will make the border red.
.charThatHit !byte 0
AwardPowerUp lda #2 ;Colour RED
sta $d020 ;Border colour
rts
Now what if you wanted to actually set a power up to allow the player arm itself with faster bullets and change the animation frame for player 1?.
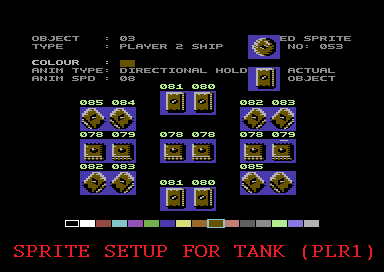
You'll need to create an 18 byte table based on sprite values for each player. Before you can generate the sprite value table in SEUCK's object editor. You should look at the sprite order table. If your player type uses directional frames. To get the correct frame order, set the Animation Type in SEUCK to something else other than DirectionalHold. (DON'T SAVE YOUR GAME IN SEUCK AFTERWARDS ...)

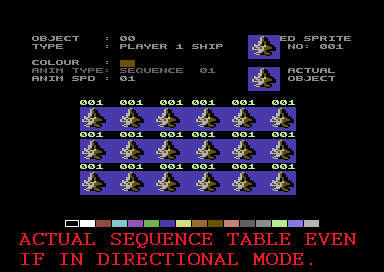
Look at the two images above. The first example indicates the player in directional/directional hold. If you used the sequences from the directional/directional hold table to transform your ship with different sprites. You will end up with some animation errors. Whereas the PROPER way to make an 18 byte table is to temporarily change the Directional/Directional hold type to the one before it. That will then display an 18 sprite table in the correct order of sequence. This trick is very handy for transforming the player, bullet or whatever you like to transform.
In AnimationEngine.a Underneath The AwardPowerUp subroutine, underneath RTS add a bullet power up table to the source. (DON'T COPY THIS TABLE BELOW, USE THE CORRECT VALUES OF SPRITES IN your SEUCK project which you would like to use as bullets for power ups). For this example I'm turning the player's bullet into a black bomb.
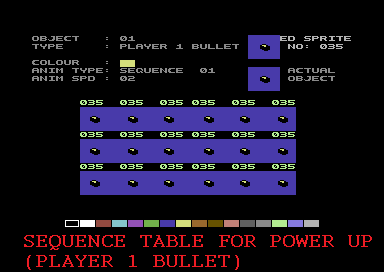
Bullet_Power_Up_Table:
!byte 035,035,035,035,035,035
!byte 035,035,035,035,035,035
!byte 035,035,035,035,035,035
Now change the subroutine AwardPowerUp to read the table and store it to all 18 frames in the actual sprite object.
AwardPowerUp ldy #$00 ;USE Y' loop NEVER USE X LOOP, else it will mess up the animation
.PowFrameLoop lda Bullet_Power_Up_Table,y ;Read Bullet_PowerUpTable
sta ObjectAnimations+($14*AnimationType_Player1Bullet),y ;Store to Object frames for - Player 1's bullet
iny
cpy #18
bne .PowFrameLoop
rts
BACK TO TOP
2C. BULLET SPEED
Assuming you want to increase the speed of the player's bullet this can be altered by setting up a value of the two properties.
Player1Properties+PlayerOffset_BulletSpeed
Player1Information+PlayerGameOffset_FireSpeedNeg
or
Player2Properties+PlayerOffset_BulletSpeed
Player2Information+PlayerGameOffset_FireSpeedNeg
In order to set a new bullet speed for the player, a POSITIVE and NEGATIVE value needs to be set. If the player is shooting DOWNWARDS or RIGHT. Velocity values are POSITIVE. UPWARDS or LEFT give NEGATIVE values. So Let's say you wanted to fire a bullet at a speed of 4. We set the bullet speed like so:
lda #4 ;Give positive value for player bullet speed
sta Player1Properties+PlayerOffset_BulletSpeed
... or if you want to include player 2 with this ...
sta Player2Properties+PlayerOffset_BulletSpeed
lda #-4 ;Give negative value for player bullet speed
sta Player1Information+PlayerGameOffset_FireSpeedNeg
... or if you want to include player 2 with this ...
sta Player2Information+PlayerGameOffset_FireSpeedNeg
Now let's add it to the power up subroutine - Along with the frame change ...
AwardPowerUp ldy #$00 ;USE Y' loop NEVER USE X LOOP, else it will mess up the animation
.PowFrameLoop lda Bullet_Power_Up_Table,y ;Read Bullet_PowerUpTable
sta ObjectAnimations+($14*AnimationType_Player1Bullet),y ;Store to Object frames for - Player 1's bullet
iny
cpy #18
bne .PowFrameLoop
lda #4 ;Set speed of player 1 bullet (Positive)
sta Player1Properties+PlayerOffset_BulletSpeed
lda #-4 ;Set speed of player 1 bullet (Negative)
sta Player1Information+PlayerGameOffset_FireSpeedNeg
rts
BACK TO TOP
2D. CHANGING THE PLAYER'S OBJECT
You may have already noticed about the bullet object being changed to a different frame. It is also possible to read a table and change the animation of the player as well. Yet again, by generating another 18 byte frame table and storing it to the player can be done.
Just for fun, I will be transforming the player's jet into one of the enemy tanks. Underneath the 18 byte table Bullet_Power_Up_Table, add another 18 byte table for the PLAYER anim.
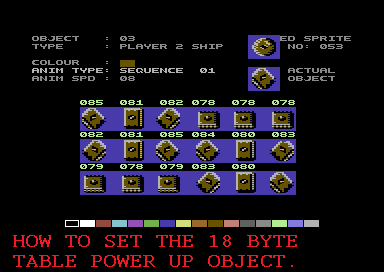
Player_Power_Up_Table
!byte 085,081,082,078,078,078
!byte 082,081,085,084,080,083
!byte 079,079,083,080,035,085
The object animation type for storing 18 sprites to the player is
ObjectAnimations+($14*AnimationType_Player1)
or
ObjectAnimations+($14*AnimationType_Player2)
Now let's add this into the AwardPowerUp subroutine
AwardPowerUp ldy #$00 ;USE Y' loop NEVER USE X LOOP, else it will mess up the animation
.PowFrameLoop lda Bullet_Power_Up_Table,y ;Read Bullet_Power_Up_Table
sta ObjectAnimations+($14*AnimationType_Player1Bullet),y ;Store to Object frames for - Player 1's bullet
lda Player_Power_Up_Table,y ;Read Player_Power_Up_Table
sta ObjectAnimations+($14*AnimationType_Player1),y ;Store to Object frames for - Player 2
iny
cpy #18
bne .PowFrameLoop
lda #4 ;Set speed of player 1 bullet (Positive)
sta Player1Properties+PlayerOffset_BulletSpeed
lda #-4 ;Set speed of player 1 bullet (Negative)
sta Player1Information+PlayerGameOffset_FireSpeedNeg
rts
BACK TO TOP
2E. SETTING DEFAULTS
Although we now have power ups setup into the game, itself. There is a slight snag involved with this. The feature stays in the game. Should you wish to start a new game, the power ups are still stored in the game's memory. In order to remove the power ups and restore the player or bullet. A default subroutine should be created. A table that defaults the player and bullet would need to be created.
Default_Player
!byte 001,001,001,001,001,001
!byte 001,001,001,001,001,001
!byte 001,001,001,001,001,001
Default_Player_Bullet
!byte 003,003,003,003,003,003
!byte 003,003,003,003,003,003
!byte 003,003,003,003,003,003
Now let's create a subroutine that will default everything underneath RTS in AwardPowerUp
DefaultPlayerSettings
ldy #$00
DefaultPlayerLoop lda Default_Player,y
sta ObjectAnimations+($14*AnimationType_Player1),y
... can also do this for player 2 if 2 player game ...
lda Default_Player_Bullet,y
sta ObjectAnimations+($14*AnimationType_Player1Bullet),y
iny
cpy #18
bne DefaultPlayerLoop
lda #2 ;Bullet speed 2
sta Player1Properties+PlayerOffsetBulletSpeed
lda #-2
sta Player1Information+PlayerGameOffsetFireSpeedNeg
rts
As you know, this subroutine will not work yet. In order to fix this issue. We need to make a JSR call, to the subroutine. Both of these effects should occur in player settings (Should you wish the player to lose all power ups when it dies). Also at a start of a brand new game, the default settings should be in place.
In the following assembly source files
PlayerControl.a
Look for the command:
dec Player1Information+PlayerGameOffset_Lives
Before that command, enter
jsr DefaultPlayerSettings
Now in the source code ScrollMain.a look for the command jsr TitleScreenWaitForOffScreenFromRaster add underneath the } underneath that prompt
jsr DefaultPlayerSettings
Save all of your changes and then test run the compiled program. You now have a game with one power up and it gets lost after a new game has started, or a life has been lost.
BACK TO TOP
2F. PROGRESSIVE POWER UPS
It is possible to make progressive power ups in order to improve on the player's capabilities. A counter has to be set and the counter value should be checked. If you reach the last check in the counter the cycle could either reset or something different could occur. Let me take Zap Fight 2 for example.
The player has to pick up stars in order to gain various power ups. Those power ups can either change the shape of the player ship or increase the firing rate of the player. There was also a special feature where the player could have a drone power up. That drone was in fact player 2. The second player was set to be invincible and was controlled using the linked players / twin mode option in ScrollEntry_SEUCK.a
In order to create a power up counter you would need to create a single byte.
So, after RTS in DefaultPlayerSettings, in AnimationEngine.a add a single byte to make a power up counter. Basically set it to 0.
PowerUpCounter !byte 0
Now in the subroutine AwardPowerUp, add the following code
AwardPowerUp
inc PowerUpCounter ;Increment value of power up counter
lda PowerUpCounter
cmp #1 ;If PowerUpCounter = 1 ... Power up 1 set
bne NotPowerUp1
jmp AwardPowerUp1
NotPowerUp1 cmp #2
bne NotPowerUp2
jmp AwardPowerUp2
NotPowerUp2 cmp #3
bne NotPowerUp3
jmp AwardPowerUp3
NotPowerUp3 cmp #4
bne NotPowerUp4
jmp AwardPowerUp4
NotPowerUp4 cmp #5
bne NotFinalPowerUp
jmp AwardPowerUp5
NotFinalPowerUp
rts
Let's have a little play with BASIC power ups. - Boost the player's speed, fire rate, amount of bullets, etc. Make the final power up an extra life.
Before making the power ups, let's make a default setup which is linked to the player settings.
In AnimationEngine.a where we created DefaultPlayerSettings setup up the default speed for the play, the bullet speed (positive and negative) and also amount of bullets. Set up the code to set the default speed of your game, referring to the SEUCK editor. I have decided to base this setup on Zap Fight 2.
DefaultPlayerSettings
lda #0
sta PowerUpCounter ;Reset power up counter
lda #$06
sta Player1Properties+PlayerOffset_BulletSpeed ;Positive bullet speed for P1
lda #-6
sta Player1Information+PlayerGameOffset_FireSpeedNeg ;Negative bullet speed for P1
lda #0 ;ALTHOUGH 0 ... That will shoot one bullet at a time
sta Player1Properties+PlayerOffset_NumBullets
lda #2
sta Player1Properties+PlayerOffset_Speed
ldy #$00
DefaultPlayerLoop lda Default_Player,y
sta ObjectAnimations+($14*AnimationType_Player1),y
... can also do this for player 2 if 2 player game ...
lda Default_Player_Bullet,y
sta ObjectAnimations+($14*AnimationType_Player1Bullet),y
iny
cpy #18
bne DefaultPlayerLoop
rts
Now let's make some new power ups. Underneath the rts by NotFinalPowerUp add the following:
;POWER UP 1 - Set a new speed to the player
AwardPowerUp1 lda #3
sta Player1Properties+PlayerOffset_Speed
rts
;POWER UP 2 - Set bullet count to 3 (3 bullets firing), also change
;the bullet firing animation
AwardPowerUp2 lda #2
sta Player1Properties+PlayerOffSet_NumBullets
ldy #$00
changeanim lda Power_Up_Bullet,y
sta ObjectAnimations+($14*AnimationType_Player1Bullet),y
lda Power_Up_Player,y
sta ObjectAnimations+($14*AnimationType_Player1),y
iny
cpy #18
bne changeaanim
rts
;POWER UP 3 - Increase bullet speed to its max
AwardPowerUp3
lda #9
sta Player1Properties+PlayerOffset_BulletSpeed
lda #-9 ;If directional fire is in the game.
sta Player1Information+PlayerGameOffset_FireSpeedNeg
rts
;POWER UP 4 - Temporary invincibility
AwardPowerUp4
lda #255 ;Set invincibility counter
sta Player1Information+PlayerGameOffset_Invulnerable
rts
;POWER UP 5 - Give out an extra life
AwardPowerUp5
lda #0 ;Reset Power up counter
sta PowerUpCounter
inc Player1Information+PlayerGameOffset_Lives
rts
2G. OTHER PLAYER PROPERTIES + INFORMATION
This is more of a theory session than a practical, but it gives your more examples of the player settings, which could be triggered to be enabled or disabled or configured. Here is a brief description for each feature, which could be triggered/configured in your SEUCK game.
This can refer to one or BOTH players
Player1Information+PlayerGameOffset_[command]
or
Player2Information+PlayerGameOffset_[command]
... for example
Player1Information+PlayerGameOffset_Lives
Lives ;Amount of lives for player 1 (or player 2, if changed to Player2Information).
Invulnerable ;Invincibility counter.
TargetVelX ;Target X Velocity
TargetVelY ;Target Y Velocity
FireSpeedNeg ;Negative directional fire
Player1Properties+PlayerOffset_[command]
or
Player2Properties+PlayerOffset_[command]
... for example
Player1Properties+PlayerOffset_BulletSpeed
BulletSpeed ;Positive bullet speed
DieOrStop ;If hit background, should the player die or stop (0 = stop, 1 = die)
Character_Collision ;Which char and higher should the player collide into (0-254).
Directional ;Directional fire enabled/disabled (0 = Disabled, 1 = Enabled)
ObjectAnimations+(value*AnimationType_[Command])+value
Where value = type of value of object (Could range from animation speed, anim type, etc)
ObjectAnimations+($14*AnimationType_Player1) - 18 Sprite frame table for player 2
ObjectAnimations+($14*AnimationType_Player2) - 18 Sprite frame table for player 2
ObjectAnimations+($14*AnimationType_Player1Bullet) - 18 Sprite frame table for player 1 bullet
ObjectAnimations+($14*AnimationType_Player2Bullet) - 18 Sprite frame table for player 2 bullet
ObjectAnimations+($14*AnimationType_Player1)+19 - 18 Sprite frame table for player 2
ObjectAnimations+($14*AnimationType_Player2)+19 - 18 Sprite frame table for player 2
ObjectAnimations+($14*AnimationType_Player1Bullet)+19 - 18 Sprite frame table for player 1 bullet
ObjectAnimations+($14*AnimationType_Player2Bullet)+19 - 18 Sprite frame table for player 2 bullet
Colour of an actual sprite object. Important, the values for each colour MIGHT play with the animation. For example, if your sprite uses 1 - 18 frames and is NOT set to directional or directional hold a standard #$00-#$0F can be set as the values of the colour object. If using frames that use directional #$10-#$1F is used. Directional hold uses #$30-#$3F.
Say for example player 1 colour set to green, we use:
lda #$05
sta ObjectAnimations+($14*AnimationType_Player1)+19
... what if the player uses Directional
lda #$15
sta ObjectAnimations+($14*AnimationType_Player1)+19
... and what if the player uses Directional Hold?
lda #$35
sta ObjectAnimations+($14*AnimationType_Player1)+19
BACK TO TOP
3. ENEMY AIM FUNCTION
3A Enemy AIM firing
SEUCK games have always been the same, and made enemies fire the way you wanted to make them fire. Enemies could either shoot, up, down, left, right, 4 way horizontal and vertical, 4 way diagonal and random and the same direction an enemy was moving. Every single SEUCK game used that function. Now wouldn't things be even MORE interesting if enemies could actually aim for player before firing?. SEUCK Redux versions of Tau Zero, Tau Omega, Nuclear Strike Force and Zap Fight 2 all used this function. Now guess what we are going to do ... EXACTLY THAT!
Before you can get enemies to AIM, you will need to take a look at the ENEMY bits of the enemy object you would like to AIM. For my example, I have chosen the red enemy tank which rotates its turrets in Nuclear Strike Force. Object 25 - Actual enemy 03. To detect which enemy can use the aim function, we can simply use the COMPARE method yet again, as we did for detecting power ups.

In ScrollEntry_SEUCK.a, look up ;EnemyAimTest = 1, and remove the ; beside the command to enable it. Now in AnimationEngine.a look up .smAnimType underneath !ifdef EnemyAimTest { and type in the following command:
!ifdef EnemyAimTest {
.smAnimType lda #0 ;Self modified
cmp #25 ;Is object 25 (Actual Enemy 03) firing
bne .notDoAimedFire
jmp .doAimedFire
.notDoAimedFire
}
Now if you test this. The red tanks will AIM for player 1 instead of fire random shots.
3B. Enabling more than one enemy type use EnemyAimTest
What if you want more enemies to use the AIM function. Simply browse through your SEUCK work file, pick out the enemy objects, and expand the code. Let's do the same trick for enemies 4,5 and 6. Update the source like this:
!ifdef EnemyAimTest {
.smAnimType lda #0 ;Self modified
cmp #25 ;Is object 25 firing
bne .checkNextObject1
jmp .doAimedFire ;Allow enemy to AIM for the player's position
.checkNextObject1 cmp #26 ;Is object 26 firing
bne .checkNextObject2
jmp .doAimedFire ;Allow enemy to AIM for the player's position
.checkNextObject2 cmp #27 ;Is object 27 firing
bne .notDoAAimedFire
jmp .doAimedFire ;Allow enemy to AIM for the player's position
.notDoAimedFire ;Ignore the rest of the enemy object types
}
You don't always need to choose enemies that fire randomly to AIM for the player. You can choose any enemy you like to perform this task.
That's all you need to know for the enemy aiming function.
BACK TO TOP
4. BACKGROUND ANIMATION
This chapter is a very small feature on in game background animation, and using it in SEUCK Redux. As you noticed in the past, most of my SEUCK Redux enhanced games use the background animation trick. This tutorila has two different types of background animation tricks. These are as follows:
1. Parallax Background add on feature
This is a built in function, which comes with SEUCK Redux. The Parallax Background scroller is an example 5x5 block scroller, which has additional code implemented into the source. A guide to using this feature has been added to this tutorial. (Only works on Standard vertical scrolling code).
Parallax_Enable = 1
BACK TO TOP
2. Single Character animation
This is probably the most easiest method for making a single char constantly scroll and wrap. A feature which I used a lot in and outside SEUCK Redux. It is also possible to animate charsets to change shape as well.
BACK TO TOP
4A. The Parallax Background Add On
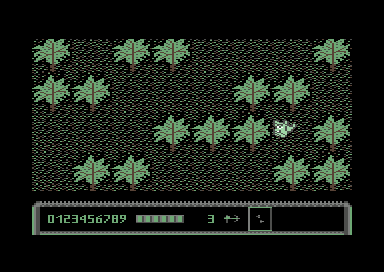
Before you read on. Please be aware that this extension will only work on vertical scrolling SEUCK games. The parallax feature scrolls 3 layers together. Here is how the demo scroller looks with all characters/blocks put together.
In order to be able to use this feature. The SEUCK background editor needs to be used TWICE. In order to understand the parallax scrolling, take a look at the example of the SEUCK background editor below. Copy the data files from the P00 into your .D64 (Using 64copy) and then load up SEUCK in order to examine (and maybe edit them). Load in SEUCK, then load the ALL DATA file of the PARALAXTEST file and examine the background chars (in the background editor). Then load the ALL DATA file of the PARAXBLOCKS file and examine the first set of chosen chars for that also. The two screen shots below show you the first set of chars which form the background scrolling and the parallax effect inside the blocks. The parallax scroll consists of a charset overriding another character set, over the background to give a visual effect. This feature is most suitable for games such as futuristic blasters.
Left: The rows of chars that form the parallax effect inside the map
Right: The rows of chars that form the chars that should go OVER the parallax. The first 25 chars (000 - 024) indicate where the each layer of the 25 parallax chars should be placed. Basically, create 2 blocks for the parallax scroll.
In order to be able to test/use the parallax scroll. In ScrollerDataMacro.a uncomment the Parallax test binary files (Remove ; beside the command) and rename the two test files with your very own creation. Where one is your main scroller, and the other is your parallax block scroller. Files must have been saved as ALL DATA. Then in ScrollEntry_SEUCK.a uncomment Paralax_Enable = 1. This will then enable the extended code that can perform the parallax scrolling.
Should this feature not work the way you want to. It is worth playing around with the SEUCK until you get what you wish to have. Remember to keep chars 25 - 96 of your actual map reserved as blank chars in your test scroll.
BACK TO TOP
4B. The Single Char Animation
Many games I wrote using SEUCK Redux has at least single char animation. This may vary to scrolling chars, to form waterfalls or flowing water, lava, etc or scrolling voids. It is possible to scroll your chars any direction.
SEUCK's background character set in SEUCK Redux is stored at $c000-$c7ff. Each character consists of 8 bytes. In order to get a scrolling effect, you roll the 8 bytes forwards or backwards (for up/down), or you can scroll the chars left, and right by rotating the value of the whole charset to the left or rotating the value of the whole charset to the right. At ScrollMain.a look for SFXPlay or MusicPlayerPlay and before the comment:
!ifdef DisableSound {} else {
!ifdef Scroller_MultiDirection {
jsr MusicPlayerPlay
} else {
!ifdef Scroller_PlaySoundEffectsDuringGame {
... rest of program
Add a new subroutine, which is:
jsr AnimateBackground
Before we can actually scroll a single character, we would need to work out the value of the charset. Up / Down is basically picking the first or last byte of the chosen character, place it into a temp byte, then perform a loop which will push/pull each byte to the next byte.
8*n+$c000 ;Where n = the block number
Then store a temp byte into the first / last row of the character set. Say for example you want to scroll char 073, a subroutine looks like this:
Scrolling chars up:
doCharAnim1 lda 8*73+$c000,x
sta tempbyte
ldx #$00
scrollCharUp lda 8*73+$c000+1,x
sta 8*73+$c000+0,x
inx
cpx #$08
bne scrollCharUp
lda tempbyte
sta 8*73+$c000+7
rts
tempbyte !byte 0
Now what if you wanted to scroll chars down. Well, we reverse the process and carry the bytes forwards, rather than backwards. Here's how to do it:
Scrolling chars down:
doCharAnim2 lda 8*73+$c007
sta tempbyte2
ldx #$07
scrollCharDown
lda 8*73+$c000-1,x
sta 8*73+$c000,x
dex
bne scrollCharDown
lda tempbyte2
sta 8*73+$c000
rts
tempbyte2 !byte 0
What about left or right scrolling? Well ASL, LSR ROL and ROR are pretty much helpful for those particular features. There's no need to make tempbytes when scrolling left or right.
Scrolling chars left:
doCharAnim3 ldx #$00
scrollCharLeft
lda 8*73+$c000,x ;Rotate chars to the left
asl ;8 times in the loop
rol 8*73+$c000,x ;will scroll a single char
asl
rol 8*73+$c000,x
inx
cpx #8
bne scrollCharLeft
rts
... and for scrolling chars to the right - we do the opposite ...
Scrolling chars right:
doCharAnim4 ldx #$00
scrollCharRight
lda 8*73+$c000,x ;Rotate chars to the right
lsr ;8 times in the loop
ror 8*73+$c000,x ;will scroll a single char
asl
rol 8*73+$c000,x
inx
cpx #8
bne scrollCharRight
rts
Finally ... If you tried one of these four features, you will notice that the charset animation is scrolling too fast. In order to slow it down, a timer/delay is needed to be made. So, let's go back to the upward scrolling subroutine, and add a time to the scroll.
AnimateBackground
lda BGRDelay
cmp #$02 ;Changeable speed for the effect
beq doCharAnim
inc BGRDelay
rts
doCharAnim lda #0
sta BGRDelay
lda 8*74+$c000
sta tempbyte
ldx #$00
ScrollCharsUp lda 73*8+$c000+1,x
sta 73*8+$c000,x
inx
cpx #8
bne ScrollCharsUp
lda tempbyte
sta 73*8+$c000+7
rts
BGRDelay !byte 0
That's it for character set animation.
BACK TO TOP
5. MUSIC AND SOUND EFFECTS
SEUCK Redux has support for allowing you to play in game music or sound effects. There are for different methods which SEUCK Redux can use, where it comes to playing music, or sound effects. These are:
Title screen with music, in game sound effects only
Title screen with music, in game music
Title screen with music, in game music with sound effects
Title screen without music, in game sound effects.
The commands in ScrollEntry_SEUCK.a look something like this:
Scroller_PlaySoundEffectsDuringGame = 1
The command above allows your game to play standard SEUCK sound effects. however, with an extension below, it also allows you to play IN GAME MUSIC and SOUND EFFECTS. The extension looks like this:
Scroller_PlaySoundMusicAndSoundEffectsDuringGame = 1
In order to play sound effects as well as music. You should use Martin Piper's 'MusicStudio V2.2' and allow SFX support. Although when I created enhancements for Hover Raider, I created my very own SFX player and linked the player to the code, since music was composed using a different editor.
Scroller_NoMusic = 1
This will switch off all music players, and not assemble any in memory. Should the command Scroller_PlaySoundEffectsDuringGame =1 also be disabled, this will crash the system. So be careful.
BACK TO TOP
5A. Music Players, Format and Memory
SEUCK Redux allows any type of music player, which fits in memory range. Music must be relocated to $8000. Most C64 musicians nowadays likes to use the Goat Tracker, or Cheesecutter, due to the powerful tunes that can be created with the music editor. Memory for music needs to be at $8000-$9200. If the music data goes OVER that area, it could corrupt some of the background graphics block data positions. The SEUCK Redux can also support tunes made with Future Composr, Dutch USA Music Assembler, JCH and DMC players. To add your tune into the source, look for the "MusicAndSFX.PRG" in ScrollerData.a and rename it with your own file.
BACK TO TOP
5B. Setting up Init and Play of Custom Music Players:
If you are using GoatTracker, MusicStudioV2.2 Cheesecutter, DMC, or anything like that in particular. You won't need to setup the init and play address, as it is already set up for you in the source code. However should you wish to change the INIT / PLAY address. You can look for MusicPlayerInit and MusicPlayerPlay in ScrollerData.a and change the addresses you wish the music to init and play at.
Future Composer: INIT $8000 / PLAY $8006
USA Music Aseembler/Voicetracker: INIT $8048 / PLAY $8021
BACK TO TOP
5C. Playing a different tune for in game music
If you disable in game sound effects feature, and wish to have just in game music. When you run your game, and enable in game music. You'll discover that it plays the title music by default. With C64 games. It is always good to have an in game tune, as well as a title tune. Assuming that in MusicStudio or any other music player. You created two different tunes on the same file. (Track 0 and Track 1). You want Track 0 as the title screen, and wish to play Track 1 as in game music. All you will need to do is add one additional command in ScrollMain.a.
In ScrollMain.a look for the command: MusicPlayerInit and before MusicPlayerInit, change it to:
lda #$01 ;Play track 1
jsr MusicPlayerInit
Test run the source and you'll get track 1 playing in your game.
BACK TO TOP
5D. Playing in game Music and Sound effects
There is a feature in SEUCK Redux, which allows you to play in game music and also sound effects as well. However this feature doesn't always work right, due to the sound/instrument limitations. You need to use MusicStudio V2.2 to not only compose your music, but also create instruments to use as the sound effects. Two commands need to be enabled in ScrollEntry_SEUCK.a In order to be able to play sound effects with music. They are as follows:
Scroller_PlaySoundEffectsDuringGame = 1
Scroller_PlaySoundMusicAndSoundEffectsDuringGame = 1
Also you will need to take a look at SFXWithMusic.a and edit the table which will select the chosen instruments that will play as sound effects. Also the voice pitch table. The SFX table (for playing the instruments) look something like this. In the example below, while a normal tune is playing in the background. Instruments 2, 3, 4, and 5 are used as in game sound effects. Tunes 2 and 3 are also used as the drum instrument, and voices 4 and 5 represent the lead instruments. It is up to you to work out your own instruments and implement those into the tables below.
; A lookup table that converts SEUCK SFX number to the music player envelope number
; There are 24 SEUCK sound effects
.SEUCKToMusicSFX
!by 2 , 3 , 4 , 5 , 5 , 4 , 3 , 2
!by 2 , 3 , 4 , 5 , 5 , 4 , 3 , 2
!by 2 , 3 , 4 , 5 , 5 , 4 , 3 , 2
; A lookup table to allow each sound effect to have a different note
.SEUCKToMusicSFXNote
!by 48, 50, 32, 16, 32, 48, 52, 40
!by 48, 50, 32, 16, 32, 48, 52, 40
!by 48, 50, 32, 16, 32, 48, 52, 40
It is possible to NOT use the Scroller_PlaySoundMusicAndSoundEffectsDuringGame and customize the ScrollMain to play in game music, and your very own sound effects player (Like I did for Hover Raider). Simply add after jsr MusicPlayerPlay a JSR CustomFXPlayerPlay or whatever you would like it to be.
BACK TO TOP
6. DATA GROWTH AND HOW TO USE IT
If you wanted to really push your game, which you made using SEUCK. Not only should additional code be created, but you should use external DATA in order to enhance your production even more. SEUCK Redux completely strips out the SEUCK Editor, and reserves memory for additional data an code. For example, you'd want an external charset, or sprites data for a custom score panel. Or maybe, a few charsets and matrix data for a logo for your front end. SEUCK Redux leaves plenty of room for expansion. All you need to do is program a new front end or whatever that supports the data / additional that is placed in memory. One example which uses the DATA GROWTH is Hover Raider.
An external charset, and screen memory is reserved for the char based score panel (Where the command in ScrollEntry_SEUCK.a disables Scroller_FullScreen=1, by commenting it out). Also the external data growth was used for scroll text. Areas which may be allowed at the beginning of data growth should not overlap $8000. Extended data and code can also be added between $f000-$ff40. If you required to transfer charset data to make the score panel. In order to get a working panel, you will need to generate your own code and store it to screen position memory.
Okay. That is a bit of explanation about DATA GROWTH, but what about how to use it all?
Let us say that you wanted to edit the existing code for the SEUCK front end and you wish to make something which stands out more. You can add external data and code in memory. There's plenty of space for certain data, but impossible to fit a bitmap logo/picture in to the source, due to the code. Logos are best stored in 3-coloured Font and Screen format. The same goes for sprite data, etc for a title screen. In order to get your custom font and logo in place on to the title screen. You would need to label the binary file in ScrollerMusicData.a for example. Build a logo, and combine a charset with the logo, and display
the logo's screen:
SOURCE: ScrollerMusicData.a
LogoCharset !bin "mychar.prg",,2
TextCharset !bin "textcharset",,2
LogoMatrix !bin "myscreen.prg",,2
SOURCE: TitleScreen.a
;Relocate logo charset to $0800-$0bff, and TextCharset to $0c00,$0fff
Look up the subroutine which copies the SEUCK title screen charset, and replace it with:
;This will fill memory with the charset data.
ldx #$00
RelocFont lda LogoCharset,x
sta $0800,x
lda LogoCharset+$100,x
sta $0900,x
lda LogoCharset+$200,x
sta $0a00,x
lda LogoCharset+$300,x
sta $0b00,x
lda TextCharset,x
sta $0c00,x
lda TextCharset+$100,x
sta $0d00,x
lda TextCharset+$200,x
sta $0e00,x
lda TextCharset+$300,x
sta $0f00,x
inx
bne RelocFont
Displaying the logo matrix row by row is simply:
ldx #$00
DrawMatrix lda LogoMatrix,x
sta $0400,x
lda LogoMatrix+1*40,x
sta $0400+1*40,x
lda ... next line, etc
sta ... next screen line, etc
inx
cpx #$28 ;40 chars a row
bne DrawMatrix
SEUCK Games always had the same old score and lives panel, which is quite boring. It is possible to use custom sprites to make a custom score panel (This has been mentioned in a later chapter). We can use the same method to relocate other bits of data to the BANK 3 memory, when we need to use it. Then implement some code into it. (SEE Chapter 8 on score panels).
It is possible to save memory by simply just importing the title screen logo matrix and copy the ORIGINAL font from your original SEUCK title screen presentation and move it. However code would need to be tweaked in order to display either the charset or the title screen logo correctly.
BACK TO TOP
7. ADDITIONAL SEUCK REDUX COMMANDS / FEATURES
There have been many good additional features implemented into SEUCK Redux in order to make the games stand out more. Take a look at ScrollEntry_SEUCK.a to see what they are and look like. I'll tell you a few examples and what these actually do. Of course if you wanted to use those features you may have to tweak them in your game, to make it the way you want it to be. The commands are as follows:
Scroller_FullScreen = 1
This command makes full use of the full border. Like SEUCK Does. The score panel consists of sprites, and can also be edited with your own code in the SetupIRQs.a and ScrollMain.a code. We do have examples. When disabled the code will not use the full screen, but instead, will use screen char, for a char based score panel. Chapter 8 will tell you more about this feature.
Scroller_LevelSkipDemoCode = 1
A special feature, which can skip levels, should up on a joystick in port 1 be pushed once. This feature can be edited to create clever tricks such as flip screen. Say you were writing a vertical scrolling space shoot 'em up and you wanted to create objects to teleported the player to another world, or loop instantly. This feature is very handy for exactly THAT. Of course the code would need to be edited to change joystick push up to object detection.
Scroller_UseDemoScorePanel = 1
This is an extension which uses Martin's example char score panel. Without it, the status screen will be blank. Disable full border option. It will be up to you to design your own score panel, and implement some code to get it working. Chapter 8 will show you how it can be done :)
Scroller_NeedFullColourScroll = 1
Allows the screen to use full colour scroll code. If this is not enabled then colour scheme will always be the same.
Scroller_IsHorizontal = 1
Allows Sideways SEUCK scrolling engine to be used. If you imported Sideways SEUCK ALL DATA files into SEUCK Redux and not enable Scroller_IsHorizontal. The code will think your game is vertical scrolling and will mess the map, and scroll upwards instead of to the right.
Scroller_LOTD = 1
Gives you extended code for Legion of the Damned. A game which was written back when SEUCK Redux source first came out. The scrolling is set to horizontal, and also gives the players the ability to cast spells (smart bomb) on the enemies when keys 'S' or 'W' are pressed - every time the player collects a bottle.
Scroller_PlaySoundEffectsDuringGame = 1
Allows to play SEUCK's default in game sound effects. If disabled, will only play the title music (Unless you set the in game music to init after the title screen, before music plays in the game).
Scroller_PlaySoundMusicAndSoundEffectsDuringGame = 1
Allows use of MusicStudioV2.2's sound effects and music extension feature. Plays sound effects from the instruments of the current tune and also in game music.
TitleScreen_AnimatingSprites = 1
Replaces the standard SEUCK Title screen effect with Armalyte style balls over the title screen. Of course the multiplexor animation doesn't always have to be balls :)
Scroller_LinkedEnemyTest = 1
Checks for any linked enemies, and makes those explode as a whole. Be very careful when using this feature. Since enemies which use a linked path and are not connected together will explode as a whole. This feature is good for end of level bosses and big space ships, etc.
Scroller_LinkedPlayers = 1
Links players in a set position. This is handy for games where you would like to bolt two players together to form a huge space ship, a ninja or whatever. Setting the value of Scroller_LinkedPlayersOffsetX, and Scroller_LinkedPlayersOffsetY will set up the position for both players to form an object. If you use SEUCK, make sure players are EXACTLY the same speed, otherwise strange results will occur.

ScrollerSingleScoreLives = 1
Player 1 and player 2 shares the same score, and amount of lives. However, should the game be set to TWIN MODE, after one player has lost its last life, the other player has only one life left.
Scroller_TwinMode = 1
Allows use of two separate players but shares the same joystick control. This is handy for a one player team style game, where you could have two people in two different dimensions, etc like in Alf Yngve's Double or Nothing (Which won the SEUCK Compo a few years back).
Scroller_SetSpriteBackgroundPriority = (value)
Allows you to set the sprites to be either in front, or go behind parts of the background. For example Wacky Waste allows use of the sprite behind background feature, in order to hide one player when in race mode, or walking mode.
CollisionAllowEscape = 1
SEUCK games always had a problem where the player gets stuck when spawning in invincibility mode over characters that represent the deadly/stop char or higher. This feature can prevent the player from getting stuck when re spawning, before the player's invincibility timer runs out.
Scroller_NoMusic = 1
Disables all music
Paralax_Enable = 1
Enables the block parallax scrolling feature (See background animation feature to find out more about this (Chapter 4).
ExamplePlayerBulletTwoWay = 1
Generates a two way firing feature, any time the player shoots,one bullet fires the default direction, and another can fire a set direction, according to the table set in PlayerControl.a. It is possible to make it a 3 way firing feature, but I won't be telling you how that was done. That's just my secret :)
EnemyAITest = 1
Tests artificial intelligence of a selected enemy. Basically replaces all of one enemy object with a chosen enemy. Enabled the ENEMYTST.P00 in ScrollerDataMacro.a to see what happens.
EnemyAimTest = 1
Tests chosen enemies to aim for the player's current position in the game area - before firing.
OverrideDefaultAnimationDirection = 1
Uses the last directional position of an object. SEUCK usually sets enemy objects to directional up, after they have stopped. This feature overrides this.
WackyWaste = 1
Defining this will turn on the player switching mode, according to the level which the player is already at.
EnemyBulletToPlayerBulletTest = 1
Makes enemy bullets shootable, and morph into a chosen object should the player shoot it.
ScorePlayer1XPos / ScorePlayer2XPos
X-Position for the default SEUCK score panel. If you wanted to make a new score panel (Chapter 8 will show you 2 methods on this). Extra code will be required.
BACK TO TOP
8. MAKING A SCORE PANEL
In this chapter we take a look at the basics of making a new score panel for your Redux program. SEUCK has always used the same scoring panel. However SEUCK Redux allows you to implement even better scoring panels, for either vertical, horizontal or multiscrolling programs. In this chapter I give you a quick start on how to use a custom charset panel display (See Hover Raider 2016), and also how to do a single sprite status panel for a 1 player game.
So how is the score panel done?. A normal SEUCK scoring panel, checks for the value of player 1's score, or player 2's score and then creates a subroutine which renders a character set into the lower border. You can see where the status panel sprites are located in SetupIRQs.a (Look up BottomBorder, and you'll see as you scroll down a bit further the vertical position for the score sprites, and slightly further along, the horizontal position of the player sprites. Look for and have a play with the values of this:
; Now update the rest of the sprite pointers to display what we want
; Turn off multi colour here so we don't get rubbish at the bottom of the screen sprite data.
; If this is done earlier in the raster the timing is slightly wrong
lda #0
sta VIC2SpriteMulticolour
; Here there is more raster time.
lda # ( ((ScorePlayer1XPos+0)/256) << 0 ) + ( ((ScorePlayer1XPos+24)/256) << 1 ) + ( ((ScorePlayer1XPos+48)/256) << 2 ) + ( ((ScorePlayer1XPos+72)/256) << 3 ) + ( ((ScorePlayer2XPos+0)/256) << 4 ) + ( ((ScorePlayer2XPos+24)/256) << 5 ) + ( ((ScorePlayer2XPos+48)/256) << 6 ) + ( ((ScorePlayer2XPos+72)/256) << 7 )
sta VIC2SpriteXMSB
lda #<(ScorePlayer1XPos+0)
sta VIC2Sprite0X
lda #<(ScorePlayer1XPos+24)
sta VIC2Sprite1X
lda #<(ScorePlayer1XPos+48)
sta VIC2Sprite2X
lda #<(ScorePlayer1XPos+72)
sta VIC2Sprite3X
lda #<(ScorePlayer2XPos+0)
sta VIC2Sprite4X
lda #<(ScorePlayer2XPos+24)
sta VIC2Sprite5X
lda #<(ScorePlayer2XPos+48)
sta VIC2Sprite6X
lda #<(ScorePlayer2XPos+72)
sta VIC2Sprite7X
With this part of the code, it is possible to alter the X position of the sprites to build / construct a better scoring / status panel under the border. All you need to do is modify the code to change a sprite score panel. If the lower border isn't used, and a char panel is to be used instead. You don't need to trigger the sprite multiplexor scoring code. It is also possible to change the colour of the status panel in SetupIRQs.a Have a proper scroll through the source code and look up the colour setting for player 1 or player 2. Then play around with values #$00-#$0f and store to the sprite colour panel. You'll get some results.
8A. Making the a Sprite Score Panel
The same old SEUCK status panel has always been there. You want to make something more different and cooler? Well, modifying SetupIRQ.a and adding a little extra code can do exactly that. In this small part of this chapter. We are going to do a sprite based score panel for a chosen SEUCK game. For this task, I have chosen Zap Fight 2 - Zapped into Oblivion. Before we do any code, we want to setup the sprite type to represent various objects. One object (I used a star for this) is a Star, for the Lives icon, and the rest are numbers, to represent the scoring and lives. Draw what you like using SpritePad, or any other sprite editor. Here's what Zap Fight's panel sprites will look like:

What if we wanted to make the above become something like this: ????
The first thing you would need to do is to create your own sprites for the status panel in Charpad (or whatever), export it to C64 PRG format (If you export as raw format, just remove the ,,2 command in !bin "filename.ext",,2. Import the sprite data into the source ScrollerData.a where there is room for data growth (or after $f000 in memory). Before *=$8000 (if you have enough room) add a new label and binary import, which is:
SpritePanel
!bin "StatusPanel.prg",,2 (or !bin "StatusPanel.raw")
Also underneath it (or in any other free area of the code) create a subroutine to place them in correct memory every time a new game starts:
InitStatusSprites
ldx #$00
MoveSpriteData lda SpritePanel,x
sta $0900,x
lda SpritePanel+$100,x
sta $0a00,x
lda SpritePanel+$200,x
sta $0b00,x
inx
bne MoveSpriteData
rts
This will not do anything yet, because you would need to add some code which will copy the status panel to memory the sprite panel should be relocated to $0900-$0bc0 ($0bc0 and higher is used for different data or code). Let's do a score copy subroutine. Where to place it? ScrollMain.a is probably the best place to store it before the music of sfx init routine in ScrollMain.a (or after it) add the following command:
jsr InitStatusSprites
Now that will init status sprites, however we want to actually render the score and lives counters with the sprite displays. So let's first of all position those, and then setup the scoring / lives system. This can be done in SetupIRQs.a. Look up the label BottomBorder2, and make these current adjustments, to set up the position of the new status panel sprites:
NOTE: ONLY COMPLIES TO 1 PLAYER GAMES ONLY, like Zap Fight, Nuclear Strike Force, etc. This example picks sprites 1 and 2 to use MSB (for the other end of the screen).
lda #%00000011;
sta VIC2SpriteXMSB
lda #$20
sta VIC2Sprite0X
lda #$3a
sta VIC2Sprite1X
lda #$20
sta VIC2Sprite2X
lda #$20+$1a
sta VIC2Sprite3X
lda #$20+2*$1a
sta VIC2Sprite4X
lda #$20+3*$1a
sta VIC2Sprite5X
lda #$20+4*$1a
sta VIC2Sprite6X
lda #$20+5*$1a
sta VIC2Sprite7X
Now underneath we shall render the main score panel.
;RENDER
lda #$ff
sta $d01c
sta $d015 ;Sprites + Multicolour switched on
; Sprite score pointers. $fdc0-ffbf
ldx #$22+12 ;Display star (Lives icon)
stx $07f8
;Check whether or not player 1 reaches higher
;than 9 lives. If so, then flip back one life
;on the counter.
Player1Lives
lda Player1Information+PlayerGameOffset_Lives
cmp #$09 ;If over
bne LivesSetOK
;Reset number of lives to 9 - Value of 0 represents 1 on status panel
lda #$08
sta Player1Information+PlayerGameOffset_Lives
LivesSetOK
lda Player1Information+PlayerGameOffset_Lives
clc
adc #$25 ;Sprite value for lives + 1 ($0940)
sta $07f9
lda ScorePlayer1 ;Read first pointer on score panel
clc
adc #$24 ;ScorePlayer1 + the value of the sprite at $0900-$0bc0 = the actual sprite to display
sta $07fa ;Store to sprite 2
lda ScorePlayer1+1 ;Read second pointer on score panel
clc
adc #$24 ;Same calculation as above
sta $07fb ;Store to sprite 3
lda ScorePlayer1+2 ;Read third pointer on score panel
clc
adc #$24 ;Guess what... More of the same
sta $07fc ;Store to sprite 4
lda ScorePlayer1+3 ;Read fourth pointer on score panel
clc
adc #$24 ;Calculate
sta $07fd ;Store to sprite 5
lda ScorePlayer1+4 ;Read fith pointer on score panel
clc
adc #$24 ;Calculate
sta $07fe ;Store to sprite 6
lda ScorePlayer1+5 ;Read sixth pointer on score panel
clc
adc #$24 ;Calculate
sta $07ff ;Store to sprite 7
lda #$09 ;Sprite multicolour #1 = Brown
sta $d025
lda #$07 ;Sprite multiccolour #2 = Yellow
sta $d026
lda #$08 ;Score multicolour for all sprites
sta $d027
sta $d028
sta $d029
sta $d02a
sta $d02b
sta $d02c
sta $d02d
sta $d02e
All of these will now give you a new score panel for the player. However, if you assemble the code straight away, you will spot a small glitch in the game. The player object's multicolour is the same colour as the status panel. In order to fix this issue, you will need to look up in SetupIRQs.a .retNMI and before .retNMI add the the values of the sprite multicolour colours for your game. Here's what Zap Fight 2 used:
lda #$00 ;Black
sta $d025
lda #$0e ;Light blue
sta $d026
.retNMI
If you run the altered code, you will notice that the score will not display in the panel. Instead you'll get a set of the main game sprites. Reason being is because the VIC BANK and CHARMEM needs to be set correctly. Look up the label BottomBorder3 and add underneath the command stx IRQXStore the following code:
lda #$14 ;Set default Char RAM at VIC Bank #3
sta $d018
lda #$03 ;Set VIC Bank #3
sta $dd00
And there you go. A new score panel made up of 8 sprites.
BACK TO TOP
8B. MAKING A CHAR BASED SCORE PANEL
In this part of Chapter 8, we show you how to actually make a char based score panel. It will then be up to you to work out how to make a proper panel, yourself. Before we actually make a char based score panel, I must warn you that using this method, will allow enemies to shoot upwards (when behind the score panel) and the bullets will appear. So should you wish to use a character based score panel in your SEUCK creations. Make sure enemy bullets sprites are not visible, when firing any of the upward directions - unless you intend to have sneaky firing of course :) Also, if you use the char status panel method - Make sure you update your player's lower position where the player can STOP over the panel. Otherwise the player will just go underneath it. It doesn't really matter for the enemies that go up. The size of your score panel should be like the example below
4 chars down, 40 chars across

Your panel doesn't have to use large characters if you don't wish it to. Just make sure you use the CharPad, to save the file as CTM CharPad project format or export 3 files, Panel Charset, Screen RAM and Colour RAM. Now in ScrollEntry_SEUCK.a Disable the Scroller_FullScreen, and then enable Scroller_UseDemoScorePanel by uncommenting it out. After you have done this, if you do a test run, you'll see a test score panel. All you need to do is go to ScrollerData.a and replace this with the filename of your charset project. Then you're done ... Test run the source, and you will notice your score panel is displayed. But what if you wish to render score, lives, etc into the code?. Well, all you would need to do is create a subroutine in ScrollMain.a, via a loop and call a routine before or after jsr MusicPlayerPlay, which is as follows:
jsr RenderScore
The Render score code look something like this:
RenderScore
ldx #$00
scrloop lda ScorePlayer1,x
clc
adc #TFNC ;TFNC = The value of the first number char (Custom digit 0) in your charset
sta [ScoreCharPos1],x ;ScoreCharPos is the chosen char position for player 1's score. Ranging from $0720-$0798
lda ScorePlayer2,x ;If you have a 2 player mode, you can do the same
clc
adc #TFNC
sta [ScoreCharPos2],x ;ScoreCharPos is the chosen char position for player 2's score. Ranging from $0720-$0798
inx
cpx #$06 ;Do 6 chars
lda Player1Information+PlayerGameOffset_Lives
clc
adc #TFNC
sta [LivesCharPos1] ;Lives char is the chosen char position for player 1's lives. Ranging from $0720-$0798
lda Player2Infromation+PlayerGameOffset_Lives
clc
adc #TFNC
sta [LivesCharPos2]
rts
... and that is how you do a charset based score panel. OH... WAIT - Not quite there yet. There is something I have forgot to mention. You will want to know where you can change the colour of the score panel. Am I right? Yes?, okay. Just add this command before RTS.
lda #[Multicolour1]
sta $d022
lda #[Multicolour2]
sta $d023
9. CREATING A NEW FRONT END
In this final chapter, we take a look at creating a new front end. It is possible to keep the old SEUCK title screen, with the old scrolling raster bars and all that. However one you have seen one basic presentation like that you have seen them all. Every new game made in Redux should really have a brand new front end presentation. A title screen of today / or front end consists of a logo with credits, optional hi score table, game options, etc with music. In this chapter we will be showing you how to turn a basic SEUCK title screen into to something more spectacular.
An old default SEUCK game title screen looks like this:
And after a major transformation - It looks like this:
This title screen didn't use SEUCK Redux, but was made as a prize for the SEUCK Compo 2013. The title screen consists of a logo, with some colour washing effects and swirling sprites, page flip and scroll text. SEUCK Redux doesn't have enough room for bitmap with colour RAM and Video RAM in place. Logos should always be in charset format.
BACK TO TOP
9A. PUTTING LOGO, CHARSET AND TEXT ON TO THE TITLE SCREEN
So then, how do we make an actual new front end in SEUCK Redux? Well, first of all you need to have two sets of charset graphics. The first of which is the main logo charset (and matrix), followed by a text charset. You can place both of those in the ScrollerData.a source, where there is enough memory for data growth, or in the $f000-$ff00 range. When editing the title screen. The first thing you would need to do is either comment out all the code that does the colour washing trick, and also alter / add more raster splits using CMP $D012 : BNE *-3 commands. Before we do this, have your graphics prepared and in ScrollerData.a add the following:
;There is memory for data growth
LogoCharset
!bin "logofont.prg",,2
LogoMatrix
!bin "logoscreen.prg",,2
TextCharset
!bin "myfont.prg",,2
;Still text to add to your front end
!ct scr
CreditsLine1
!text " game design, graphics and sound effects"
CreditsLine2
!text " by your name "
CreditsLine3
!text " additional programming by "
CreditsLine4
!text " martin piper and your name "
CreditsLine5
!text " music composed by whoever "
CreditsLine6
!text " press fire to start "
;Scroll text for the title screen presentation
ScrollMess !text "name of game ... game design, graphics and sound effects by your name "
!text "... additional programming by martin piper and your name ... music com"
!text "posed by composer ... (c)2016 your name / group ... press fire to play"
!text " and enjoy ... "
!byte 0 ;Text restart byte value
xpos !byte 0 ;Soft scroll control counter
Now let's edit the title screen. First of all, you will want to use the custom charset and logo charset on your title screen. In order to be able to do this, you would need to change the command that relocates the SEUCK charset data and places it on to the screen. Look up the command
;Copy the SEUCK title screen data to relevent places
... and then replace it all with the new code. Also remove the complete command
!ifdef TitleScreen_AnimatingSprites {
lda TitleScreenBallSprites,x
sta $0a00,x
lda TitleScreenBallSprites+$100,x
sta $0b00,x
}
Replace it with a subroutine, which can copy the logo data to memory, and the new titlescreen charset. Do as follows in TitleScreen.a
ldx #$00
.l1 lda LogoCharset,x
sta $0800,x
lda LogoCharset+$100,x
sta $0900,x
lda LogoCharset+$200,x
sta $0a00,x
lda LogoCharset+$300,x
sta $0b00,x
lda TextCharset,x
sta $0c00,x
lda TextCharset+$100,x
sta $0d00,x
lda TextCharset+$200,x
sta $0e00,x
lda TextCharset+$300,x
sta $0f00,x
inx
bne .l1
Now fill the entire screen with a blank char. Say for example, the space bar character on the title screen's text charset
ldx #$00
.fillScreen
lda #$00
sta $0400,x
sta $0500,x
sta $0600,x
sta $06e8,x
inx
bne .fillScreen
What about drawing the logo and displaying the charset? Well, simply copy the data from the data growth memory, and then place it into the title screen code.Say we had a logo of char 8 rows, we code something like this.
ldx #$00
.setupTitleCharScreen
lda LogoMatrix,x
sta $0400,x ;Top screen area
lda LogoMatrix+1*40,x
sta $0400+1*40,x
lda LogoMatrix+2*40,x
sta $0400+2*40,x
lda LogoMatrix+3*40,x
sta $0400+3*40,x
lda LogoMatrix+4*40,x
sta $0400+4*40,x
lda LogoMatrix+5*40,x
sta $0400+5*40,x
lda LogoMatrix+6*40,x
sta $0400+6*40,x
lda LogoMatrix+7*40,x
sta $0400+7*40,x
lda #$0b ;Say your logo uses a blue scheme where cyan is
sta $d800,x ;the multicoloured charset, and dark blue and light blue
sta $d800+1*40,x ;represent the logo background multicolours. We fill the
sta $d800+2*40,x ;colour RAM to fill the chosen chars CYAN/Multicolour (or dark grey if not multicolour)
sta $d800+3*40,x
sta $d800+4*40,x
sta $d800+5*40,x
sta $d800+6*40,x
sta $d800+7*40,x
;Credits text position
lda CreditsLine1,x
sta $0400+11*40,x ;Row 11 of the screen RAM
lda CreditsLine2,x
sta $0400+12*40,x ;Row 12 of the screen RAM
lda CreditsLine3,x
sta $0400+14*40,x ;Row 14 of the screen RAM
lda CreditsLine4,x
sta $0400+15*40,x ;Row 15 of the screen RAM
lda CreditsLine5,x
sta $0400+17*40,x ;Row 17 of the screen RAM
lda CreditsLine6,x
sta $0400+19*40,x ;Row 19 of the screen RAM
lda #1 ;Colour white for all of the previous char lines
sta $d800+11*40,x ;Row 11 of the colour RAM
sta $d800+12*40,x ;Row 12 of the colour RAM, etc. ...
sta $d800+14*40,x
sta $d800+15*40,x
sta $d800+17*40,x
sta $d800+19*40,x
inx
cpx #40 ;If full charset not drawn, fill 40 times
beq FinishedFillingChars
jmp .setupTitleCharset
BACK TO TOP
9B. RASTER SPLITS / SCREEN CUTS
Raster splits and screen cuts are good for controlling the main backbone of your front end. These can be used to do synchronized events such as colour washing, controlling a scroll text, etc. In this example, the front end sets up two screen cuts. The top area for the static text, and the bottom for a smooth scrolling message. In TitleScreen.a comment or delete these commands. (To be safe I commented out the command that controls the colour rolling. Add before the comment:
jsr doScrollText
; Use the raster table colour type to calculate the index into the colour table
; lda RasterColourTableType
; sec
; sbc #$10
; asl
; asl
; asl
; clc
; adc #<RasterColourTable
; sta tempWork0
; lda #>RasterColourTable
; adc #0 ; And carry any remaining from the above add
; sta tempWork1
;
; Update the table scroll counter every four frames
;.sm1 ldy #0
;.sm2 lda #0
; bne .noUpdate
; inc .sm1+1
; lda .sm1+1
; and #7
; sta .sm1+1
; lda #3
; sta .sm2+1
;.noUpdate
; dec .sm2+1
; ; Wait for the top of the character data to start the raster effect
; ldx #50+(6*8)
;.l5
; lda RasterColourTableType
; cmp #$10
; ; If we are not doing a raster effect then just use the colour
; bcc .l6
; lda (tempWork0),y
;.l6
; cpx VIC2Raster
; bne .l6
; sta VIC2ScreenColour
; inx
; inx
!ifdef Scroller_LOTD {
; dey
} else {
; iny
}
; tya
; and #7
; tay
; cpx #50+(20*8)
; bne .l5
}
Right, now let's replace the old raster code underneath the above command with two screen cuts. One for the static screen, and the other for the scroll text.
testBorder = 1
;Top raster position for title screen static text + logo
lda #$32
cmp $d012
bne *-3
!ifdef testBorder {
lda #1
sta $d020
}
lda #8 ;Smooth scroller off ....
sta $d016
;Bottom position for where scrolling text should take place
lda #$e2
cmp $d012
bne *-3
!ifdef testBorder {
lda #2
sta $d020
}
lda xpos ;Smooth scroller on
sta $d016
Now let's add a scroll text subroutine, doScrollText to the code. Look up any RTS command that is in TitleScreen.a and underneath it, add this small scroll text subroutine:
doScrollText
lda xpos
sec
sbc #2 ;Speed of smooth scroll
and #7
sta xpos
bcs endscroll
;Loop to scroll a row of chars across to the left
ldx #$00
.moveChr lda $0400+23*40+1,x ;Chosen row to scroll chars back
sta $0400+23*40+0,x ;Chosen row
lda #7 ;Select colour for row
sta $d800+23*40,x
inx
cpx #40
bne .moveChr
;Now for the crucial part. Detecting an end byte in self-mod
MessRead lda ScrollMess
cmp #$00 ;Check for text restart marker
bne StoreToLastChar
;Restart text via Selfmod
lda #<ScrollMess ;Low byte of very first text message char
sta MessRead+1
lda #>ScrollMess ;Hi byte of very first text message char
sta MessRead+2
jmp MessRead
;Store to the next character the the message to last the char
StoreToLastChar sta $0400+23*40+39
;Increment lowbyte position
inc MessRead+1
bne endscroll
;Increment hibyte position
inc MessRead+2
;Finished scrolling
endscroll
rts
Finally when you run the front end, you'll notice the scroll text will NOT restart every time a game is over. To be able to restart the scroll text. In the next line after clearing your screen, add the command. Then you're done.
lda #<ScrollMess
sta MessRead+1
lda #>ScrollMess
sta MessRead+2
BACK TO TOP
9C. FINISHING THINGS OFF - DO IT YOUR WAY
To finalise this chapter, it is possible to add various tricks and features into your front end. You can add counters to make in game options, or a GET READY, GAME OVER, and GAME COMPLETE screen. It is also possible to create the front end the way you like, as long as you can code it yourself. You can also display game sprites by copying those from memory and pasting them to spare memory between $0800-$0fff, should there be no charset overlapping the memory. At the end of the day, using SEUCK Redux it is up to you to design and create your finished game production, and presentation. I wish you all the best of luck with SEUCK Redux, and making your games feel much LESS like SEUCK in the future. :)
BACK TO TOP
10. LET'S WORK ON A PROJECT - ROCKET 'N ROLL REDUX
1A. INTRODUCTION
You may have read through the last 9 chapters, or you probably may not have read through the last 9 chapters. Now you have a shiny new chapter and something pretty much practical and a whole lot of fun for a little project. Back in 2019 I did a chapter based on the invisibility cloak. Where I did an example game called, Rocket 'N Roll. People seemed to have enjoyed this game. So now for this little exercise. We are going to try and re-create the project, but add a few additional features to the game. This project is going to be made step by step.
Here is how the game looks without the enhancements
TITLE SCREEN + GAME UN-ENHANCED
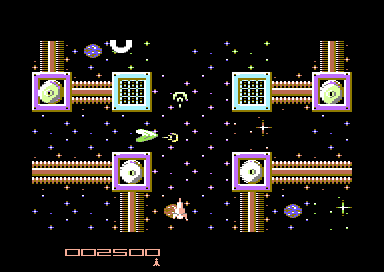
1B. PREAPARATION
First of all download the ROCKET 'N ROLL project work disk (by clicking on the disk icon below the four images below). This will contain the game ALL DATA file, and relocated MUSIC data to suit the game. Also included is a runnable version of the game as standard SEUCK (crunched). Also included in the same D64 is the FINISHED GAME. The result AFTER the project has been run through the tutorial WILL turn out differently to a standard SEUCK. The standard SEUCK game looks like a typical SEUCK game creation. Aliens are firing at random, the player gets stuck on the deadly background when spawning and look at that score panel below. It's just typically SEUCK. We want to change all of that.
We are going to give this game a BIG transformation. The attack waves and enemy patterns are still all there, but we are going to attempt to make the game less than just typically S.E.U.C.K. This will be done by enhancing the game play and the look of the game, and also creating a new front end with in game sound options, plus a game over, end screen and high score detection. All this is to be made for you to follow the easiest way where possible.
BEFORE+AFTER: Front end (above)
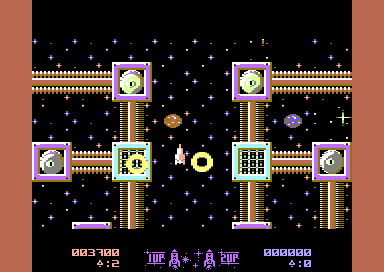
BEFORE + AFTER: Main game (above)
DOWNLOAD WORK DISK + COMPILED GAME DISK
Also, click on this LINK and download the C64PUBLIC-MASTER archive from Martin Piper's GITHUB archive (Click on the green Clone or Download). This will download the complete C64PUBLIC archive including the ACME cross assembler. Extract the entire archive on to your PC. The folders we are most interested in are SCROLLER and SEUCK.
Putting Rocket 'n Roll's SEUCK work file into the frame work
The first thing which we are going to do is export the SEUCK all data work file into the SEUCK Redux framework. Before doing this. We should COPY + PASTE the SCROLLER project folder in the C64PUBLIC-MASTER directory and then rename the project file as ROCKETNROLL. Let's do that. Also, download from this page and replace the AnimationEngine.a and ScrollEntry_SEUCK.a source file as well. Since these two builds have been updated specially for the project. At the end of the complete project on this page, there will be a download available, including the edited source and program files, with DIVIDERS to help you know where to place code. All you would need to do is replace those with the existing files and of course modify the code to suit your game (See previous chapters on how this can be done). It would be better however to read through this feature carefully. So you know where the code should go. Also in ScrollEntry_SEUCK.a Enable the Scroller_DisableUpdateSprites = 1 by removing ; next to it. Also set to Multiplex_Items = 24
Load up DirMaster on to your PC and export the SEUCK work data ROCKETNROLL .I into the SEUCK folder (Save as rocketnroll.p00) on the C64PUBLIC-MASTER directory (which you downloaded from Martin's GITHUB page). Next grab the two music files and export those into the newly created ROCKETNROLL directory. Save as ROCKTITLE7000 and ROCKGAME8000.
That'll be all for the time being. We are going to work on enhancing this project step by step.
Right. For a start off, let's start by importing the Rocket 'N Roll SEUCK file into the SEUCK Redux source code. Like with the Space Crumpets example. After all we want to make sure it is working.
In relaunch 64, open the files ScrollEntry_SEUCK.a and also ScrollerDataMacro.a. Click on the ScrollerDataMacro.a tab, and look for the UNCOMMENTED SEUCK work file and replace the last file name with ROCKETNROLL.P00. Then (assuming you still have pre-build command added to relaunch 64. If you don't then refer to Options/Preferences from chapter 1C).
Press F5 to compile and run to VICE. Hopefully Rocket 'N Roll should unpack and display in the SEUCK Redux.
BACK TO TOP
2A. CHANGING THE MUSIC
We are starting with adding music to the game. As you will notice the original title screen just plays the title music. You'll want the game to also play in game music as well. For now, we are going to change the title music. In order to do this, open the file ScrollerData.a. Hunt for the term, *=$8000 and change that to *=$7000 then underneath, change the filename !bin "MusicAndSFX.PRG",,2 to !bin "ROCKTITLE7000.PRG",,2
This replaces the default SEUCK redux music with the original title screen for RocketNRoll. Also change the parameters to
MusicPlayerInit = $7000
MusicPlayerPlay = $7003
;MusicPlayerSoundEffectsPlay = $8009 <- We don't need this ... Comment it out or delete it!
Once again, press F5 to compile and run the game.
The music has changed. Sounds very Hagar like eh? Press FIRE to play the game. You get sound effects.
IMPORTANT THING TO NOTE: If you are relocating tunes composed with DMC, it is best to use the original DMC relocator such as All Round Relocator in VICE rather than Sid Reloc, due to not all memory being moved correctly. If not used correctly, SEUCK Redux will crash the game while music is playing.
BACK TO TOP
2B. ADDING IN GAME MUSIC
Okay, so you might be bored with having in game sound effects and might want only have in game music instead. This is also possible. Simply comment out ScrollerPlaySoundEffectsDuringGame = 1 with a ; (;ScrollerPlaySoundEffectsDuringtGame=1).
Press F5 to compile. As you will notice, the sound effects have been replaced by continue playing the title music.
Well, that is handy, but wouldn't it be better to add a different in game tune to the code? YES! That is what we are going to do right now.
Here is how to do it.
Go back to the file ScrollerData.a
Right under the !ALIGN $255,0 which is under MusicPlayerPlaySFX = $8009. Add the following command:
;Setup and import in game music properties
*=$9000 ;In game music load address
!bin "ROCKINGAME8000.PRG",,2
MusicPlayer2Init = $8000
MusicPlayer2Play = $8003
For safety purposes after importing in game music, place underneath the MusicPlayer2Play = $8000 command:
!Align $200,0
Now if you press F5 and compile the game again. You'll still have the title music playing in the background, even when playing. This is because the in game music hasn't been changed. Let's do something about it.
Open the file ScrollMain.a then search for MusicPlayerInit followed by an }
Underneath it, type in the following code.
lda #$00
jsr MusicPlayer2Init
Still in scrollmain.a, look up the command jsr MusicPlayerPlay, and replace that with
jsr MusicPlayer2Play
Press F5 and your game will unpack and run with a title music and playing the game. In game music will also play.
At times during writing your game, you may want to test through the whole game to ensure no major bugs are left in the game. The best way to do this is by loading in PlayerControl.a and commenting out dec .playerInformation+PlayerGameOffset_Lives (;dec .playerInformation+PlayerGameOffset_Lives). This can be done simply by adding a ; next to the command.
Press F5 to compile and run and enjoy what has been done to your game so far :)
It is possible to add routines which can switch between in game music or sound effects. We will look in to this later on when we work on the title screen.
3A. TWEAKING THE GAME
Now that Rocket 'n Roll RX has title and in game music. We are going to tweak the game play to make it more fun and quite enjoyable. During this chapter, we will be tweaking the player's settings, introduce smart aim to aliens, rather than random firing. Also we will be animating the background, by creating some additional code. Finally make a new score panel for the game. Chapter 4 will look at creating a new front end for this game.
BACK TO TOP
3B. PLAYER PROPERTIES
For the first part of this game update, we are going to start with tweaking the player's properties. If you take a look at SEUCK games in general. There is a case scenario where now and then a player can get stuck on background when spawning. For this game, we are going to avoid this happening. Here's what is going to happen.
During game play, the player should start with a temporary shield. This shield should allow the player to fly over any deadly background as well as kill enemies. A power up will also create a temporary shield for the player.
Let us start by creating a subroutine that can act as the shield.
Open AnimationEngine.a and search for !ZN and AnimationBackupLastCollisionFrame, before the temp !ZN add this piece of code below. This will check whether or not the player is invulnerable. If the player isn't invulnerable, restore the colour of the player to how it should look.
First of all, we want some subroutines. These are to call jump subroutines to check the shield status for player 1 and player 2. They are as follows:
;Player 1 and player 2 invincibility checks ...
CheckPlayerShields
jsr CheckPlayer1Shield ;Check routine for player 1 shield
jsr CheckPlayer2Shield ;Check routine for player 2 shield
jsr ProcessFlashShield ;Colour flash process
rts
The above first calls a subroutine which will check for player 1's shield. The second will check for player 2's shield. the last line just creates a subroutine which processes the flashing table and store it to the player. Anyway, the next part of the code is required. This will check whether or not PLAYER 1 is invincible. If the player is invincible, it should replace the main player colour with the shield's flashing colour.
Here's the shield check routine for player 1. It first checks whether the player's invincibility has run out. If it hasn't then it will call the subroutine ShieldCloakPlayer1. Next the code checks whether or not the object Player 1 is active during the game. If the player is active, the animation sprite colour will be PINK. The player is not flashing.
Remember that each routine should be typed one after another :)
;Test player 1 invincibility cloak
CheckPlayer1Shield
lda Player1Information+PlayerGameOffset_Invulnerable
cmp #0 ;Value of shield = 0 NOT INVINCIBLE
bne ShieldCloakPlayer1 ;Call shield/flash subroutine P1
;Player is not invincible - restore colour to default
;(pink animated)
ldx Player1Information+PlayerGameOffset_AnimationIndex
bmi .Player1Inactive ;If player 1 is not in the game -
;terminate
lda #$0a
sta AnimationSpriteColour,x
.Player1Inactive
rts
Next, we do a similar case scenario checking the player's activity. Just like we have done with the routine above, but this time the player is invincible, and the colour is flashing. The FlashStorePlayer1 is read and stored to the sprite animation colour.
;Player is invincible - replace colour of player as
;flashing colour
ShieldCloakPlayer1
ldx Player1Information+PlayerGameOffset_AnimationIndex
bmi .Player1Inactive
lda FlashStorePlayer1 ;Read stored flash pointer - P1
sta AnimationSpriteColour,x ;Store to player 1 sprite colour
rts
A similar routine is also for Player 2's shield check and activity check.
;Test player 2 invincibility cloak
CheckPlayer2Shield
lda Player2Information+PlayerGameOffset_Invulnerable
cmp #0 ;Value of shield = 0 NOT INVINCIBLE
bne ShieldCloakPlayer2 ;Call shield/flash subroutine P2
;Player is not invincible - restore colour to default
;(light blue animated)
;Check if player 2 exists in game
ldx Player2Information+PlayerGameOffset_AnimationIndex
bmi .Player2Inactive ;Player 2 non-existant
lda #$0e
sta AnimationSpriteColour,x
.Player2Inactive
rts
ShieldCloakPlayer2
;Check if player 2 exists in game
ldx Player2Information+PlayerGameOffset_AnimationIndex
bmi .Player2Inactive ;Skip player 2 (Not active)
lda FlashStorePlayer2 ;Store flashing shield on player 2
sta AnimationSpriteColour,x
rts
Now for the main flash subroutine. It first reads the delay of the flashing, before reading the main flashing table. Once the flashing table has reached the end. The main flash pointer resets itself in order to loop the colour cycling table. This gives the player a nice colour fade effect inside the game while in invincibility mode.
;Shield flash subroutine (Player 1 and Player 2)
ProcessFlashShield
lda ShieldFlashDelay ;Delay the flash speed
cmp #2 ;Delay value :)
beq ShieldFlashOK
inc ShieldFlashDelay
rts
ShieldFlashOK
lda #0 ;Reset flash delay
sta ShieldFlashDelay
ldx ShieldFlashPointer ;Read flash pointer
lda ShieldFlashTable1,x ;...and flash table for player 1
sta FlashStorePlayer1 ;store it to pointer FlashStorePlayer1
lda ShieldFlashTable2,x ;...read flash table for player 2
sta FlashStorePlayer2 ;store it to pointer FlashStorePlayer2
inx ;read next value of ShieldFlashPointer
cpx #ShieldFlashTableEnd-ShieldFlashTableStart ;Read until end of table
beq ResetShieldFlash ;Reached end? Yes reset.
inc ShieldFlashPointer ;NO read next byte on table
rts
ResetShieldFlash
ldx #$00 ;Reset the value of the shield flash
stx ShieldFlashPointer ;pointer. So that colour sequence loops.
rts
Finally some pointers are needed.
ShieldFlashDelay !byte 0
ShieldFlashPointer !byte 0
FlashStorePlayer1 !byte 0
FlashStorePlayer2 !byte 0
Press F5 and assemble+run the game. You'll notice that the players are still not flashing in invincibility mode. Not to worry. The reason behind this is because although we have typed in the code to make the players flash. The code hasn't actually been implemented. In ScrollMain.a you will need to create a jump subroutine call. Just before jsr MusicPlayer2Play add the command
jsr CheckPlayerShields ;Call routine to check for player 1 or 2's shield
Press F5 to assemble and run. The player has now got a shield.
There is still a small issue though. Although the player is invincible it still gets stuck on a scrolling background. We want the player to be able to actually fly over the background. There is most definitely a trick to this. While the player is invincible, a value of the collision with char can be triggered. If you look at the main SEUCK file (Load SEUCK in VICE and load in the ROCKETNROLL .I file. The player's collision with char (before death) is 146 or higher. We will want to avoid the collision with that particular char when invincible. A solution to this will be to set the value of the collision to 255, just like in the older SEUCK School Tutorial build of Rocket 'N Roll.
Underneath labeled routines ShieldCloakPlayer1 and ShieldCloadPlayer2 add
;For player1
lda #255
sta Player1Properties+PlayerOffset_CharacterCollision
;For player 2
lda #255
sta Player2Properties+PlayerOffset_CharacterCollision
Press F5 and run.
Now after running this. You will notice that even outside invincibility mode, the player seems to happily fly over deadly background. There is a simple solution to this problem to prevent this problem. After all, the player is supposed to die if outside invincibility mode, it lands on a deadly background character. Let's fix this.
In the file PlayerControl.a look for the command dec .playerInformation+PlayerGameOffset_Invulnerable underneath the decrementing invulnerable routine type in as follows:
jmp .skipcoll
Then underneath .noInvDec type in:
lda #146 ;Set collision charset to 146 so player WILL die in this area
sta .playerProperties+PlayerOffset_CharacterCollision
.skipcoll
Press F5 and you'll have it all working how it should :)
BACK TO TOP
3C. POWER UPS + SHIELD
When I did the original Rocket 'N Roll last year, I created a power up in which allowed an enemy (The collectible pod) give the player a temporary shield. This time round, we want to make things slightly more different and fun. Yes, the player should have a shield, like in the original enhanced game, but what if we gave the player ability to fire faster? Well, why not? Before we do this. We should set a DEFAULT bullet speed. The maximum bullet speed the player has is 9 . .player1Properties+PlayerOffset_BulletSpeed. So how shall we do it.
For a start off, let's create 2 subroutines called DefaultPlayer1Settings and DefaultPlayer2Settings. Let us create these in AnimationEngine.a before the shield pointers and colour table which we did for the player's shield. Here is how they should look. ... and you don't need to add much here ;)
;Default player 1's bullet firing
DefaultPlayer1Settings
lda #6 ;New default bullet speed
sta Player1Properties+PlayerOffset_BulletSpeed
lda #-6
sta Player1Information+PlayerGameOffset_FireSpeedNeg
rts
;Default player 2's bullet firing
DefaultPlayer2Settings
lda #6 ;New default bullet speed
sta Player2Properties+PlayerOffset_BulletSpeed
lda #-6
sta Player2Information+PlayerGameOffset_FireSpeedNeg
rts
Now, we will need to set the defaults to both players through ScrollMain.a the easy way. Find jsr MusicPlayer2Init then just before it add
jsr DefaultPlayer1Settings
jsr DefaultPlayer2Settings
Press F5, and you'll see the player bullet speed is slower. Which is good, because at the end of the day we want to make faster bullets as power ups for the player rockets. Now underneath the actual code (AnimationEngine.a) before the pointers and tables we did for the shield. We are going to create some code which will increase the speed of the player bullet during firing. A subroutine for each player. Also, the subroutine should make the player invincible. Here is how to do it:
;Award Player 1 shield and power up
AwardPowerUpPlayer1
lda #255 ;Shield count
sta Player1Information+PlayerGameOffset_Invulnerable
dec Player1Information+PlayerGameOffset_FireSpeedNeg
lda Player1Information+PlayerGameOffset_FireSpeedNeg
cmp #-10 ;If speed too high ...
beq DefaultPlayer1BulletSpeed
rts ;Code finished ....
DefaultPlayer1BulletSpeed
lda #-6
sta Player1Information+PlayerGameOffset_FireSpeedNeg
rts
;Award Player shield 2 and power up
AwardPowerUpPlayer2
lda #255 ;Shield count
sta Player2Information+PlayerGameOffset_Invulnerable
dec Player2Information+PlayerGameOffset_FireSpeedNeg
lda Player2Information+PlayerGameOffset_FireSpeedNeg
cmp #-10
beq DefaultPlayer2BulletSpeed
rts
DefaultPlayer2BulletSpeed
lda #-6 ;Default player bullet speed
sta Player2Information+PlayerGameOffset_FireSpeedNeg
rts
Please note that Player1Information+PlayerGameOffset_FireSpeedNeg is the NEGATIVE direction for the bullet firing. Which means in directional fire mode, the bullet will move LEFT horizontally, and UP vertically. Since the player's bullet fires UP we still use Player1Information+PlayerGameOffset_FireSpeedNeg.
Press F5 to run. The player has default firepower speed, but there's still a case scenario where a power up will not exists.
BACK TO TOP
3D. DETECTING AN ENEMY TO AWARD POWER UPS
When writing additional code for your SEUCK Redux game, you will need to pick a specific enemy which will award the player a power up. In order to do this, you will need to load up the Shoot Em Up Construction Kit and of course your game work file. Go in to EDIT OBJECTS and select enemy and note down the OBJECT NUMBER of the enemy. For this example, for Rocket 'N Roll. We are selecting the power up pod object (Actual enemy 01, Object 22).

Now let's create a variable for that particular object in ScrollEntry_SEUCK.a (Put it underneath !initmem %10101010)
;Collectable object (Pod)
Object_Collectible_Pod = 22 ;Object number that defines the power up pod
Here is where the fun part starts in order to make this Collectable take effect. In AnimationEngine.a search for the term .makeItDead then type in the following code:
;Read animation object type and then check for the power up object. If
;the object is a power up POD, check which player picked it up, then
;award the power up to the correct player
lda AnimationType,x ;Read object killed
cmp #Object_Collectible_Pod ;Is power up a pod?
bne EndPowerUpCode ;No, skip to EndPowerUpCode
;Check which player has picked up the power up
lda .playerTypeOrBulletTypeThatKilled
cmp #AnimationType_Player1 ;Did player 1 collect the power up?
bne CheckPlayer2CollectedIt;no, check Player 2 picked it up instead!
jsr AwardPowerUpPlayer1 ;Give player 1 the power up
jmp EndPowerUpCode ;No more power ups to give away
;Check if player 2 has collected the power up
CheckPlayer2CollectedIt
cmp #AnimationType_Player2 ;Did player 2 collect the power up?
bne EndPowerUpCode ;no, just cancel the power up code
jsr AwardPowerUpPlayer2 ;Award player 2 a power up
jmp EndPowerUpCode ;No more power ups to give away
EndPowerUpCode
Now press F5 to assemble and run. Hopefully no errors. Play the game and you'll notice a huge difference in game play from last time. The power ups trick is complete.
BACK TO TOP
4A. TWEAKING THE ENEMIES
In this part of the chapter. We are going to tweak the enemies in the game. During the game, we will want some enemies to be smarter than what they are in a normal SEUCK game. That's right. Aliens will be using smart aim. Also, we will want to make end of level bosses destroy in one go. At the end of the day, we will want to make enemies more challenging to fight.
BACK TO TOP
4B. GIVING ENEMIES SMART AIM
The first part of tweaking the enemies settings is the Smart Aim feature. The idea is to have all enemies in Rocket 'n Roll fire with smart aim instead of random firing. Before we can do this, we will want to enable the Smart Aim feature.
In ScrollEntry_SEUCK.a look up the command ;EnemyAimTest = 1 and remove the ; so that we can enable this feature.
Now let's go back to SEUCK's object pointers. In the object menu select the EDIT ENEMY BITS and look for all of the objects which use the firing type 'R' (Random). We are going to make these enemies aim for the player's position before firing a bullet. Here are the enemies which will be using the EnemyAimTest function.
Type in the following variables, which correspond to the random firing objects:
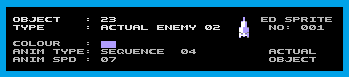
SmartAimEnemy1 = 23
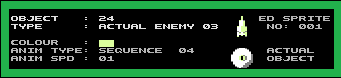
SmartAimEnemy2 = 24

SmartAimEnemy3 = 25
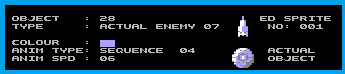
SmartAimEnemy4 = 28
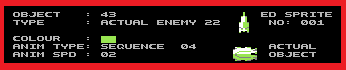
SmartAimEnemy5 = 43

SmartAimEnemy6 = 44
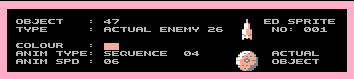
SmartAimEnemy7 = 47
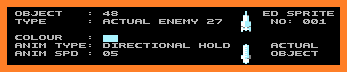
SmartAimEnemy8 = 48
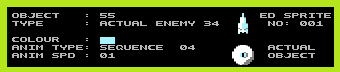
SmartAimEnemy9 = 55
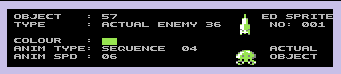
SmartAimEnemy10 = 57
We now have those variables in place, but we'll also need to create some code to encourage the chosen enemy objects to use the smart aim function.
In AnimationEngine.a search for the command .smAnimType underneath !ifDef EnemyAimTest {
Replace the code:
.smAnimType lda #0 ; Self modified and cached by code above
cmp #23 ; The correct enemy object ID
bne .notdoAimedFire
jmp .doAimedFire
.notdoAimedFire
with
.smAnimType lda #0 ; Self modified and cached by code above
cmp #SmartAimEnemy1 ;Is object chosen enemy object
bne .SkipSmartAim1 ;no.
jmp .doAimedFire ;yes. let it do aimed firing
;Check for next smart aiming alien
.SkipSmartAim1
cmp #SmartAimEnemy2
bne .SkipSmartAim2
jmp .doAimedFire
.SkipSmartAim2
cmp #SmartAimEnemy3
bne .SkipSmartAim3
jmp .doAimedFire
.SkipSmartAim3
cmp #SmartAimEnemy4
bne .SkipSmartAim4
jmp .doAimedFire
.SkipSmartAim4
cmp #SmartAimEnemy5
bne .SkipSmartAim5
jmp .doAimedFire
.SkipSmartAim5
cmp #SmartAimEnemy6
bne .SkipSmartAim6
jmp .doAimedFire
.SkipSmartAim6
cmp #SmartAimEnemy7
bne .SkipSmartAim7
jmp .doAimedFire
.SkipSmartAim7
cmp #SmartAimEnemy8
bne .SkipSmartAim8
jmp .doAimedFire
.SkipSmartAim8
cmp #SmartAimEnemy9
bne .SkipSmartAim9
jmp .doAimedFire
;Check final alien to replace random firing with smart aim
.SkipSmartAim9
cmp #SmartAimEnemy10
bne .notdoAimedFire
jmp .doAimedFire
.notdoAimedFire
Now press F5 to compile and run the game. The aliens will now try to smart aim for one of the two players. Hooray, no more typical SEUCK random firing. :)
BACK TO TOP
4C. BOSS OBJECTS AND LINKED ENEMIES
In standard games created with the Shoot 'em up Construction Kit. The biggest challenge for most game developers is to generate a boss. We all know that making an end of level boss with SEUCK is plain simple to put together by linking enemies together. However, the hardest part is to have a boss explode in one go. SEUCK doesn't support that particular feature, unless you add additional code.
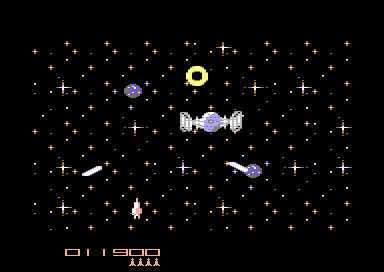
We don't want to have boss stages where a boss dies like this:
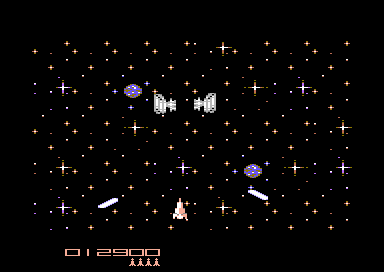
Yes, you are absolutely right. The boss aliens that get killed in SEUCK are blasted in parts. We don't want this in our game.
Luckily SEUCK Redux however, there is a simple linked enemy test, which will destroy all enemies that are currently linked to each other. This is triggered by enabling the term below. Simply uncomment the command in ScrollEntry_SEUCK.a
Scroller_LinkedEnemyTest = 1
Press F5 to compile and run the game ... Try and fight the boss.
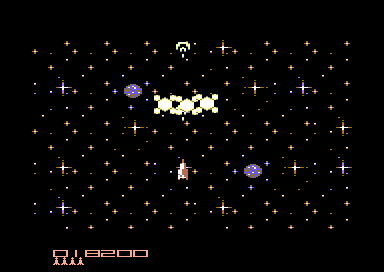
Wahey, the boss explodes in one go.
However, after playing throughout the whole game, there is still a problem where the linked enemy sprites are concerned. All enemies in SEUCK that used the LINK ENEMIES option also explode. Simply play through the whole game and you will see the problems mainly rely on these objects. In ScrollEntry_SEUCK.a we shall create some new variables
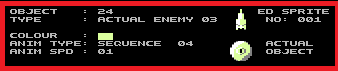
ObjectNoLinkedDeath1 = 24
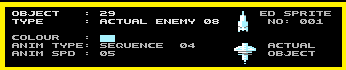
ObjectNoLinkedDeath2 = 29
ObjectNoLinkedDeath3 = 30
ObjectNoLinkedDeath4 = 31
ObjectNoLinkedDeath5 = 32
ObjectNoLinkedDeath6 = 33
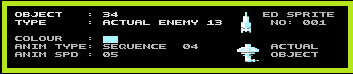
ObjectNoLinkedDeath7 = 34
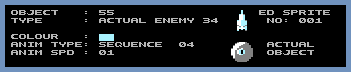
ObjectNoLinkedDeath8 = 55
Take note about this tip. If you make a game in which enemies are linked with appearance/position instead of correctly joined together. You should only select the enemies that are linked with SEUCK's LINK ENEMIES option.
Now we have the new variables, let's make some code for it. Inside AnimationEngine.a search for the command .lec1 inside the linked enemy test copy the following code.
;Check for any chosen linked enemies that are not connected
;together with another enemy
cmp #ObjectNoLinkedDeath1
bne .NotAvoidLink1
jmp .lec2
;.lec 2 skips linked enemy explosion
.NotAvoidLink1
cmp #ObjectNoLinkedDeath2
bne .NotAvoidLink2
jmp .lec2
.NotAvoidLink2
cmp #ObjectNoLinkedDeath3
bne .NotAvoidLink3
jmp .lec2
.NotAvoidLink3
cmp #ObjectNoLinkedDeath4
bne .NotAvoidLink4
jmp .lec2
.NotAvoidLink4
cmp #ObjectNoLinkedDeath5
bne .NotAvoidLink5
jmp .lec2
.NotAvoidLink5
cmp #ObjectNoLinkedDeath6
bne .NotAvoidLink6
jmp .lec2
.NotAvoidLink6
cmp #ObjectNoLinkedDeath7
bne .NotAvoidLink7
jmp .lec2
.NotAvoidLink7
cmp #ObjectNoLinkedDeath8
bne .NotAvoidLink8
jmp .lec2
.NotAvoidLink8
cmp #Object_Collectible_Pod
bne .NotAvoidLinkedEnemyDeath
jmp .lec2
.NotAvoidLinkedEnemyDeath
Press F5 to compile and run the code. The linked enemies will all explode, except for those which you have chosen not to. Great! We are more or less done in this chapter, but WAIT. There is still one more thing missing. After killing each end of level boss, the level stays on the same screen. Well, thankfully there is a trick on solving this problem.
Do you remember the code we did earlier on to check whether or not the player picks up a power up object? Well, why don't we extend that routine by checking for some of the end of level boss objects. If an end of level boss explodes, trigger the level time to 1 second before moving on to the next level.
Go back to SEUCK and look at the Object Editor to pick out the boss parts. Then in ScrollEntry_SEUCK.a create some new variables to represent the shootable boss parts:
;Shootable objects that form the selected boss parts
ShootableBossPart1 = 28
ShootableBossPart2 = 38
ShootableBossPart3 = 39
ShootableBossPart4 = 47
ShootableBossPart5 = 49
ShootableBossPart6 = 54
Now let's go to the work file where the enemy type check for the collectible is (Look for EndPowerUpCode) then underneath, enter the following code:
;Code check to see if enemy object killed is a shootable enemy boss
;object.
cmp #ShootableBossPart1
bne .NotBossObject1
jmp .ForceLevelComplete
.NotBossObject1
cmp #ShootableBossPart2
bne .NotBossObject2
jmp .ForceLevelComplete
.NotBossObject2
cmp #ShootableBossPart3
bne .NotBossObject3
jmp .ForceLevelComplete
.NotBossObject3
cmp #ShootableBossPart4
bne .NotBossObject4
jmp .ForceLevelComplete
.NotBossObject4
cmp #ShootableBossPart5
bne .NotBossObject5
jmp .ForceLevelComplete
.NotBossObject5
cmp #ShootableBossPart6
bne .NotBossObject6
.ForceLevelComplete
;Level is complete, so set still counter as 1 second before
;skipping directly on to the next level
lda #1
sta LevelStaticCountSeconds
.NotBossObject6
Press F5 to assemble and run.
Play through the game and try to fight the end of level bosses.
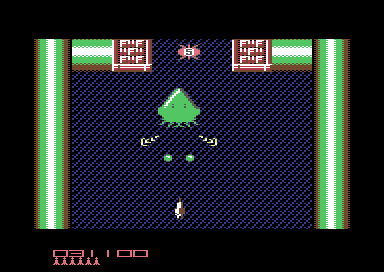
After they all explode, GREAT. After a split second, you will move on to the next level.
4D. THOSE FLIPPIN' TRAJECTORIES
Well, we are mostly done with the game play, but unfortunately, just like the original game. It is extremely had to play. Especially during stages where the static trajectories and some end of level bosses shoot those deadly yellow rings at you. Wouldn't it be great if we eased the game play a little by making those deadly bullets shootable? Well, let's do that.
The ringed bullet is represented by object 009 (Enemy Bullet 3)
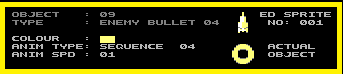
We want to allow the player to shoot these bullets, and be awarded 100 points for it. We can also use Enemy Death #2 (Object 15) for spawning the explosion.
First in ScrollEntry_SEUCK.a look for the comment ;EnemyBulletToPlayerBulletTest = 1 uncomment this then also uncomment EnemyBulletToPlayerBullet_Type1 = 7 and change to:
EnemyBulletToPlayerBullet_Type1 = 9
Now we want to actually get this working correctly. Go to AnimationEngine.a, replace the following lines:
; Or mutate the enemy bullet into an enemy death type
ldy #AnimationType_Enemy1Death+2
jsr AnimationMutateToType
; Add 500 points (50x10) to the player that shot the bullet
lda #50
jsr DoScoreAndLives
in to
;Or mutate the enemy bullet into an enemy death type
ldy #15 ;Object ID for enemy explosion
jsr AnimationMutateToType
;Add just 100 points (10x10) to the player that shot the bullet
lda #10
jsr DoScoreAndLives
Press F5, and have fun playing the game. It is much easier now you can shoot those trajectories.
Even more great news. The main game play section is complete.
BACK TO TOP
5A. ADDING BACKGROUND ANIMATION
Now that we have dealt with the main game play, it is time to tweak some of the game background. In the last Rocket 'N Roll game released some time last year. I added a cool effect behind the background. The same effect is going be added in this new build also. Unlike SEUCK where the background character data was located $f800-$ffff. SEUCK Redux source code has the background character set data in areas $c000-$c800. Before we do actual background animation, like I did with Rocket 'n Roll last year. I'm going to give you a little maths lesson.
FORMULA:
BGC = N+$C000*8
BGC = Background Char Address
N = Char Number
So for the predefined effects, we did from the original Rocket 'n Roll. We have to do a similar routine as we have done before.
In AnimationEngine.A before the pointers, create this new code:
;In game background animation
BackgroundAnimation
jsr ScrollScene ;Scrolling background scene of levels 2,4
jsr ScrollDeadlyBackground ;Scrolling deadly background
rts
;Scroll scene controlled by vertical scroll routine. Will continue
;to scroll in stop mode also.
ScrollScene lda VoidByte
cmp #1
beq VoidByteOK
inc VoidByte
rts
VoidByteOK lda #0
sta VoidByte
ScrollChr1 lda $c000+2*8 ;Grab char #002, and store
sta VoidStore ;to temp byte
lda $c000+96*8 ;Grab char #096 and store
sta VoidStore+1 ;to second temp byte
lda $c000+97*8 ;Grab char #097 and store
sta VoidStore+2 ;to third temp byte
;Call routine to scroll bits of the chosen
;chars.
ldx #$00
scrollup1 lda $c000+2*8+1,x ;Fetch next byte
sta $c000+2*8,x ;store to first byte
lda $c000+96*8+1,x
sta $c000+96,x
lda $c000+97*8+1,x
sta $c000+97,x
inx
cpx #8 ;7 bytes read
bne scrollup1
lda VoidStore ;Fetch temp byte
sta $c000+2*8+7 ;Place to last byte of char 002
lda VoidStore+1 ;Fetch second temp byte
sta $c000+96*8+7 ;Place to last byte of char 096
lda VoidStore+2 ;Fetch third temp byte
sta $c000+97*8+7 ;Place to last byte of char 097
rts
;Scroll deadly char (253) upwards
ScrollDeadlyBackground lda DeadlyBlockScrollDelay ;Control delay before scroll
cmp #1 ;characters
beq ScrollUp2 ;Delay = 1 do main routine
inc DeadlyBlockScrollDelay ;Else add one and skip
rts
ScrollUp2 lda #$00 ;reset delay interval
sta DeadlyBlockScrollDelay
lda $c000+253*8 ;Read the start of char 253
sta DeadlyBlockScrollStore ;store to a tempbyte
ldx #$00 ;As with a previous
ShiftChrUp lda $c000+253*8+1,x ;routine. Grab next byte of char
sta $c000+253*8,x ;store to previous byte.
inx
cpx #8
bne ShiftChrUp
lda DeadlyBlockScrollStore ;Fetch temp byte
sta $c000+253*8+7 ;store to last byte of char 253
rts
VoidStore !byte 0,0,0,0
DeadlyBlockScrollDelay !byte 0
DeadlyBlockScrollStore !byte 0
VoidByte !byte 1
That is the main code. Now open SetupIRQs.a look up
; Then disable all the sprites
lda #0
sta VIC2SpriteEnable
inc topIRQDone
lda #0
sta bottomMultiplexIRQDone
sta panelIRQDone
Then add the following code below:
;Call subroutine that animates the background
jsr BackgroundAnimation
Press F7 and run the game. The cool effects are behind the background characters 002 , 066, 067 and 253 :)
BACK TO TOP
6A. Creating a new Score Panel
Well, the majority of the main game is complete. However there is one slight issue with the game. The score panel is too much SEUCK like. We need to get rid of that. In this part of the tutorial. We are going to fix the score panel so that it doesn't use the SEUCK score panel, but uses a custom score panel. First of all. Load up CharPad (or use a native C64 char drawing program) to create your own scoring charset ... Here's my example below:

Basically, start with numbers from 0 - 9 then a small icon (representing the lives icon), a colon and also two letters SC (For score).
In Mega Tank Blasta I created a 4 sprite decoration. For this game, we'll just leave that blank for now.
After you have made your charset in Charpad and exported it as a raw .BIN file (Or created a charset on a native C64 and exported is PRG format. It is time to try and implement it in to the main game code.
In the source, load up scrollerdata.a and at the very end of the code in that file, add the following command:
PanelCharMem
!bin "panelchar.bin" ;(add ,,2 at the end if your file is .prg)
We are now going to add a little extra code to the file ScrollMain.a which is going to completely zero fill 8 memory $0900-$0b00 with blank sprites.
Search for the term jsr MusicPlayer2Init and underneath the two { symbols. Type in the following code:
;Erase memory $0900-$0b00 for new panel
;area
ldx #$00
ZeroFillMem900
lda #$00
sta $0900,x
sta $0a00,x
inx
bne ZeroFillMem900
We are still not done there yet. Next, go to SetupIRQs.a and search for BottomBorder2. We are going to change the code so that it uses VIC BANK #$03, and reads memory $0900-$0b00 for sprites. Delete the old code, until you reach ;Get the sprite colours for each player then replace it with the following code:
; Now update the rest of the sprite pointers to display what we want
; Turn off multi colour here so we don't get rubbish at the bottom of the screen sprite data.
; If this is done earlier in the raster the timing is slightly wrong
lda #$03 ;VIC2 BANK #$03
sta $dd00
lda #$14 ;Default C64 Char memory
sta $d018
lda #$ff ;Enable all sprites (Just in case you want to add decoration
sta $d015 ;to your panel later on.
lda #$00 ;All sprites are hi-res instead of multicolour
sta $d01c
;Setup the score panel ...
lda #$0a ;Sprites 0 and 1 colour set as pink
sta $d027 ;for player 1
sta $d028
lda #$0e ;Sprites 2 and 3 colour set as lt blue
sta $d029 ;for player 2
sta $d02a
lda #$00 ;Rest is set to black, but can be
sta $d02b ;changed if you decide to add a
sta $d02c ;decoration with the score panel
sta $d02d
sta $d02e
;Position the sprites
lda #%00001100
sta $d010
lda #$00
sta VIC2Sprite2X
clc
adc #$18
sta VIC2Sprite3X
;Set sprite values (All are currently blank sprites)
lda #$24
sta $07f8
lda #$25
sta $07f9
lda #$26
sta $07fa
lda #$27
sta $07fb
lda #$28
sta $07fc
lda #$29
sta $07fd
lda #$2a
sta $07fe
lda #$2b
sta $07ff
lda #$40
sta VIC2Sprite0X
clc
adc #$18
sta VIC2Sprite1X
;Now setup the additional 4 sprites
;(Which can be made into a 4sprite logo or
;picture if you want it to)
lda #$88
sta VIC2Sprite4X
clc
adc #$18
sta VIC2Sprite5X
clc
adc #$18
sta VIC2Sprite6X
clc
adc #$18
sta VIC2Sprite7X
What the above does is it replaces the old score panel area with a different VIC2 bank, and fills the bottom border with blank (or decoration) sprites. The sprites are positioned in place, and are set to hi-resolution. It is possible to set the sprites as multi-colour if your game wanted to, but I will let you work out how to do it for yourself.
Press F5 and you'll get messy sprites at the bottom of the panel. We are still not quite done with the panel yet. Before we render a new panel. We will want to update the IRQ to display at the bottom border VIC BANK #3 and blank sprites. In the current source file, search for BottomBorder3 then underneath stx irqXAStore delete what is highlighted in red below, and type in what is in green for the following the following:
; Make the VIC use bank $c000-$ffff screen $c800 for these border sprites
lda #%00100000
sta VIC2MemorySetup
lda #%00
sta CIA2PortASerialBusVICBank
; Make the VIC use bank $0000-$3fff screen $0400 for these border sprites
lda #$03
sta $dd00
lda #$14
sta $d018
Press F5 and you should have a blank panel in the game. Oh, maybe not, it is still quite messy. Probably because in ScrollEntry_SEUCK.a there is a variable which needs to be either deleted or commented out. Go to Scroller_UseDemoScorePanel = 1 and put a ; next to it. Press F5 and run the game again. We have fixed it :) Blank sprites.
BACK TO TOP
6B. Rendering a score panel
Rendering a score panel is going to be the fun part in this chapter. We have a charset for the score and lives, but it needs to be rendered into the main game code. Can that be done?. Yes, of course it can be done. That was how SEUCK's sprite score panel was made. It basically reads char memory and then turns it into a sprite. :) We are going to convert the custom score panel font into sprites.
In SetupIrqs.a underneath, or just before jsr BackgroundAnimation create a new JSR subroutine, which will render a new score panel. The code for this is:
;Call subroutine to create and render a new score
;panel for the game
jsr RenderNewScorePanel
Now in ScrollerData.a go to the very bottom of the page and type in the following code: (Or just copy and paste it)
;Render a new score panel for the game
PanelFont = PanelCharMem
Digit0 = PanelFont
Digit1 = PanelFont+1*8
Digit2 = PanelFont+2*8
Digit3 = PanelFont+3*8
Digit4 = PanelFont+4*8
Digit5 = PanelFont+5*8
Digit6 = PanelFont+6*8
Digit7 = PanelFont+7*8
Digit8 = PanelFont+8*8
Digit9 = PanelFont+9*8
Rocket = PanelFont+10*8
Colon = PanelFont+11*8
RenderNewScorePanel
ldy #$00
;Score rendering ....
ldx ScorePlayer1,y ;Digit 1
lda FontMemLow,x
sta scfont1a+1
lda FontMemHi,x
sta scfont1a+2
iny
ldx ScorePlayer1,y ;Digit 2
lda FontMemLow,x
sta scfont1b+1
lda FontMemHi,x
sta scfont1b+2
iny
ldx ScorePlayer1,y ;Digit 3
lda FontMemLow,x
sta scfont1c+1
lda FontMemHi,x
sta scfont1c+2
iny
ldx ScorePlayer1,y ;Digit 4
lda FontMemLow,x
sta scfont1d+1
lda FontMemHi,x
sta scfont1d+2
iny
ldx ScorePlayer1,y ;Digit 5
lda FontMemLow,x
sta scfont1e+1
lda FontMemHi,x
sta scfont1e+2
iny
ldx ScorePlayer1,y ;Digit 6
lda FontMemLow,x
sta scfont1f+1
lda FontMemHi,x
sta scfont1f+2
;iny
;-----------------------------------------
ldy #0
ldx ScorePlayer2,y ;Digit 1
lda FontMemLow,x
sta scfont2a+1
lda FontMemHi,x
sta scfont2a+2
iny
ldx ScorePlayer2,y ;Digit 2
lda FontMemLow,x
sta scfont2b+1
lda FontMemHi,x
sta scfont2b+2
iny
ldx ScorePlayer2,y ;Digit 3
lda FontMemLow,x
sta scfont2c+1
lda FontMemHi,x
sta scfont2c+2
iny
ldx ScorePlayer2,y ;Digit 4
lda FontMemLow,x
sta scfont2d+1
lda FontMemHi,x
sta scfont2d+2
iny
ldx ScorePlayer2,y ;Digit 5
lda FontMemLow,x
sta scfont2e+1
lda FontMemHi,x
sta scfont2e+2
iny
ldx ScorePlayer2,y ;Digit 6
lda FontMemLow,x
sta scfont2f+1
lda FontMemHi,x
sta scfont2f+2
ldy #0
ldx Player1Information+PlayerGameOffset_Lives,y
cpx #$ff
beq NoLivesPlayer1
cpx #$09
bcc SkipLives1
ldx #$09
jmp SkipLives1
jmp SkipLives1
NoLivesPlayer1 ldx #$00
SkipLives1
lda FontMemLow,x
sta lvfont1+1
lda FontMemHi,x
sta lvfont1+2
ldy #0
ldx Player2Information+PlayerGameOffset_Lives,y
cpx #$ff
beq NoLivesPlayer2
cpx #$09 ;Higher than 9 lives
bcc SkipLives2
ldx #$09
jmp SkipLives2
NoLivesPlayer2 ldx #$00
SkipLives2
lda FontMemLow,x
sta lvfont2+1
lda FontMemHi,x
sta lvfont2+2
;-----------------------------------------
CopyFontToSprite ldx #$00
ldy #$00
renderscoreandlivesloop
;Rendering score panel for player 1
scfont1a lda PanelCharMem,x
sta $0900,y
scfont1b lda PanelCharMem,x
sta $0901,y
scfont1c lda PanelCharMem,x
sta $0902,y
scfont1d lda PanelCharMem,x
sta $0940,y
scfont1e lda PanelCharMem,x
sta $0941,y
scfont1f lda PanelCharMem,x
sta $0942,y
;Rendering score panel for player 2
scfont2a lda PanelCharMem,x
sta $0980,y
scfont2b lda PanelCharMem,x
sta $0981,y
scfont2c lda PanelCharMem,x
sta $0982,y
scfont2d lda PanelCharMem,x
sta $09c0,y
scfont2e lda PanelCharMem,x
sta $09c1,y
scfont2f lda PanelCharMem,x
sta $09c2,y
;Rendering lives for player 1
;FIRST CHAR = SKULL
skullcharPlayer1 lda PanelFont+(10*8),x
sta $0961,y
sta $09e1,y
lda PanelFont+(11*8),x
sta $0962,y
sta $09e2,y
lvfont1 lda PanelFont,x
sta $0963,y
lvfont2 lda PanelFont,x
sta $09e3,y
;------------------------------------------
iny
iny
iny
inx
cpx #8
bne renderscoreandlivesloop
rts
!byte <Digit0
FontMemLow !byte <Digit0,<Digit1,<Digit2,<Digit3,<Digit4
!byte <Digit5,<Digit6,<Digit7,<Digit8,<Digit9
!byte >Digit0
FontMemHi !byte >Digit0,>Digit1,>Digit2,>Digit3,>Digit4
!byte >Digit5,>Digit6,>Digit7,>Digit8,>Digit9
Press F5 to assemble and run. Great, a new score panel.
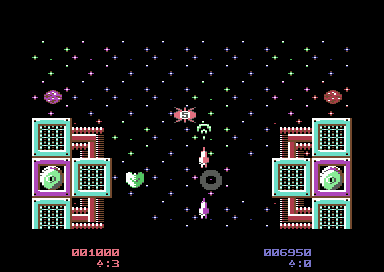
Still it looks a bit plain, but much better, compared to the original SEUCK score panel we see time and time again. Let's add one more thing to it. Some quick decoration. Below I have made 4 sprites in which to fit between the score panel. Here is how they look:

Now how about fitting these above into the score panel? We need to import the sprite data into the project. Go to ScrollerData.a and underneath the !Align $200,0 which is underneath the in game music. Import the new sprite panel data.
;Insert 4 sprites for score panel decoration
SpritePanelData
!bin "panelsprites.bin"
Then search for the sprite zero fill code (Search $0900) inside ScrollMain.a. Then underneath bne ZeroFillMem0900 After the routine, type in the following:
;Now put the panel sprites decoration
;in to memory for sprites 2,3,4,5
ldx #$00
DecoratePanel
lda SpritePanelData,x
sta $0a00,x
inx
bne DecoratePanel
This small snippet of code will copy the sprite data from the binary file panelsprites.bin, into the memory area $0a00-$0b00. We are nearly done there. There is one more thing to do now. Go to the SetupIRQs.a source and edit sprite colour settings for $d02b, $d02c, $d02d and $d02e. Change the colour to Purple. (Value #$00 should be changed to #$04).

WOOOW! This looks great :). Let's add one more thing. A side border colour. Let's make that RED.
Simply add underneath the sprite copy code:
lda #$02
sta $d020
Now the game looks less plain, and more interesting, which I hope the audience will enjoy playing for a bit. We are now done in this part of the game project.
BACK TO TOP
7A. BUILDING A NEW FRONT END
This is the final part in this tutorial. We are going to be creating a basic final front end with a simple high score checker and in game sound options, for the game production. The way you want to design the front end will be up to you. We are just going to do something pretty much basic and fun. First of all, just for fun, we shall create a text charset. In order to draw the correct characters for the game (Since a scroll text is also going to be added at the bottom of the screen), you will need to check out the C64's Character Set Chart showed as an example in the C64 Wiki. Alternatively, you could design your character set with CuneiForme. Although designing the screen can be done in CharPad. Alternatively you can just capture and IMPORT this snapshot of the char set. This is what I have done in Charpad:
(You will be able to download the finished piece with source code and binary at the end of this tutorial).
Title Screen character set

Title Screen Front End Matrix
Looks nice eh. You will want to export the character set, character attributes and screen (map) as binary files. These have already been provided with the final package (with full instructions on how to put it together). What we intend to do is replace this much nicer screen over the old SEUCK screen. How do we come about it?
After exporting the character set and other binary files. Load up ScrollerData.a and go to the very end of the source file, then type in the following:
;Import title screen data created from CharPad
;Character set
TitleScreenCharset
!bin "rocket_charset.bin"
TitleMap
;Main screen data
!bin "rocket_map.bin"
TitleAttribs
;Charset colour data
!bin "rocket_charset_attribs.bin"
Now we have the files in place. It is now time to edit the title screen code, so that all old SEUCK title code is replaced with the code for a brand new title screen. We will do this step by step.
Load up TitleScreen.a
Look for the comment ; Copy the SEUCK title screen data to the relevant places in VIC bank 0 and from there, DELETE or comment out the old code, until you reach past the label bne .l2. Underneath the comment ;Copy the SEUCK title screen data. Type in the following code. This will replace the character set with the new custom charset for the title screen.
;Copy the new title screen character set to
;VIC BANK #03 for displaying the main title
;screen. (This will copy a full 256 characters
;, should your logo use more characters)
ldx #$00
CopyCharMem
lda TitleScreenCharset,x
sta $0800,x ;Destination addres for custom charset
lda TitleScreenCharset+$100,x
sta $0900,x
lda TitleScreenCharset+$200,x
sta $0a00,x
lda TitleScreenCharset+$300,x
sta $0b00,x
lda TitleScreenCharset+$400,x
sta $0c00,x
lda TitleScreenCharset+$500,x
sta $0d00,x
lda TitleScreenCharset+$600,x
sta $0e00,x
lda TitleScreenCharset+$700,x
sta $0f00,x
inx
bne CopyCharMem
Don't assemble and run the title screen yet. We will need to update the title screen code a little more. Underneath this code, add this piece of code. This will read the title screen matrix, and place it on to the screen RAM, also the second piece of code (after drawing the title graphics) will paint the screen. It will then enable multicolour mode. (type this code before the comment ;Initialise the Multi Plexor)
;Copy the front end matrix data and place it on
;to the main screen RAM.
ldx #$00
CopyTitleMatrix
lda TitleMap,x
sta $0400,x
lda TitleMap+$100,x
sta $0500,x
lda TitleMap+$200,x
sta $0600,x
lda TitleMap+$2e8,x
sta $06e8,x
;Copy colour data
ldy TitleMap,x
lda TitleAttribs,y
sta $d800,x
ldy TitleMap+$100,x
lda TitleAttribs,y
sta $d900,x
ldy TitleMap+$200,x
lda TitleAttribs,y
sta $da00,x
ldy TitleMap+$2e8,x
lda TitleAttribs,y
sta $dae8,x
inx
bne CopyTitleMatrix
Right. Now that the title screen data and colour read is in place. The next thing to do is to update the title screen raster code. What we want to do is split the title screen's raster, in order to present the game with a title screen with scroll text. The main raster code will need to be changed. In order to do this, let's comment out (or delete) the old raster code, and replace it with a 2 raster split. (Where the bottom raster split can be used for the scroll text) ...
Where ; Use the raster tale colour type to calculate the index into the colour table is located, comment out/delete all of the code from that area until you reach the } by Wait for fire. Make sure the } is not deleted or commented. Now type in the following code. This will create our raster.
;New title screen raster code
;Top raster - Multi colour mode.
lda #$2a ;Top raster split
cmp $d012
bne *-3
lda #$18 ;Screen multicolour mode on
sta $d016
lda #$09 ;Char Multicolour 1 - Brown
sta $d022
lda #$01 ;Char Multicolour 2 - White
sta $d023
lda #$f3 ;Bottom raster split (Change value of split if char flickers)
cmp $d012
bne *-3
lda XPos ;Smooth scroller pointer
sta $d016
Press F5 to see what has been done so far. Hooray, we have a new front end.
BACK TO TOP
7B. ADDING A SCROLL TEXT
We may have already created a simple title screen, but would it be nice if we added a scroll text to the title screen. If you want to do this. We can start by adding a pointer which does the screen horizontal position control. Go to the bottom of the title screen code and search for ;Add a scrolling message to the title screen. Before it, add:
XPos !byte 0
Now, let's create and type in our scroll text message at the very bottom of ScrollerData.a
!CT SCR
ScrollText
!text "... welcome to - rocket &n roll redux - ... "
!text "this is a game for 1 or 2 players ... plug a "
!text "joystick in to either port ... push left / "
!text "right to select in game sound options ... "
!text "press fire to start the game ... "
!text "your mission is to reach and explore the sun ... "
!text "unfortunately you have entered alien territory ... "
!text "fight the aliens, collect the pods and enjoy a trip "
!text "of a life time ... have fun ... "
!text "press fire to play "
!byte 0
Now we have typed in a scroll text. It is time to create some code that will display the scroll text. Go back to the raster code in TitleScreen.a and underneath
lda #$3a
cmp $d012
bne *-3
Add a subroutine that calls to display the scrolling message at the bottom of the title screen.
jsr TitleScroller
Then underneath the routine:
.joystick1start
lda #1
sta TitleScreen_Enable_ScrollerDemoWait_Hooks
lda #1
sta TitleScreenJoystickStarted
rts
Add the following code to make your scroll text come to life:
;Create title screen scroll text routine
TitleScroller
lda XPos
sec
sbc #2 ;Set speed of scrolling message
and #7
sta XPos
bcs EndScroll
;Char pulling routine
ldx #$00
ScrollLoop1
lda $0400+24*40+1,x ;(Last row on screen +1 char)
sta $0400+24*40,x ;(Pull back every char one column)
lda #$03 ;Set scroll colour as cyan
sta $d800+24*40,x ;Store to last row color ram
inx
cpx #40 ;Max no. of chars to pull on screen
bne ScrollLoop1
;Read memory of scroll text, check if @ is read
;(byte 0). If @ = True, reset scroll message.
MessRead ;Self-mod pointer
lda ScrollText
cmp #$00 ;Byte 1 (@)
bne StoreCharacter ;Okay, just store
;reset message
lda #<ScrollText
sta MessRead+1
lda #>ScrollText
sta MessRead+2
jmp MessRead
;Store the character read from the message
;to the last screen character on the screen
;row.
StoreCharacter
sta $0400+24*40+39
;Update message to next character of the
;scroll text.
inc MessRead+1
bne EndScroll
inc MessRead+2
EndScroll
rts
Okay, press F5 to compile and Run, and here's the result:
It looks much nicer now, but there is a fault in the title screen scroll text. If you start the game, and return back to the title screen. The scroll text will not automatically restart, until it has reached the end of the scroll text. We have a solution to this problem for your title screen. Go to where you copied the main charset data and matrix and just after that type in just the 'yellow' highlighted code from the above code snippet. This will refresh the scroll text.
7C. Adding a High Score checker
The next part in this chapter is where we have more fun. The game may be challenging itself, but wouldn't it be great to add a last score and high score checker on the front end? We won't be doing a high score table as such, but it is always fun to record the last score for each player. This way you can challenge your own friends to compete against each other to see if they can obtain the highest score possible.
Let's go all the way to the bottom of the title screen, and just before the ScrollText you have written in ScrollerData.a (and underneath the !CT SCR command), type in the following:
;Last score and hi score text
LastScoreText
!text "1up:"
P1FinalScore !text "000000"
!text " 2up: "
P2FinalScore !text "000000 hi: "
HiScore !text "000000"
Now just after the screen data we copied for the title screen, and either before or after the scroll text routine. Let's generate the hi-score check routine and display the hi-score text.
;Check player1's score with hi score
lda P1FinalScore
sec
lda HiScore+5
sbc P1FinalScore+5
lda HiScore+4
sbc P1FinalScore+4
lda HiScore+3
sbc P1FinalScore+3
lda HiScore+2
sbc P1FinalScore+2
lda HiScore+1
sbc P1FinalScore+1
lda HiScore
sbc P1FinalScore
bpl Player1NoHiScore
;Player 1 new hi score
ldx #$00
NewHiP1
lda P1FinalScore,x
sta HiScore,x
inx
cpx #6
bne NewHiP1
Player1NoHiScore
;Check player 2 for new hi score
lda P2FinalScore
sec
lda HiScore+5
sbc P2FinalScore+5
lda HiScore+4
sbc P2FinalScore+4
lda HiScore+3
sbc P2FinalScore+3
lda HiScore+2
sbc P2FinalScore+2
lda HiScore+1
sbc P2FinalScore+1
lda HiScore
sbc P2FinalScore
bpl NoHiScore
;Player 2 new hi score
ldx #$00
NewHiP2
lda P2FinalScore,x
sta HiScore,x
inx
cpx #6
bne NewHiP2
NoHiScore
;Display the last score and hi score
;text on to the screen (in yellow)
ldx #$00
CopyHiText
lda LastScoreText,x
sta $0400,x
lda #7
sta $d800,x
inx
cpx #40
bne CopyHiText
Now, we are ready to compile and run the game. Press F5 and check it out ... Wahey We have a hi score checker ;)
BACK TO TOP
7D. Adding in game options
We have a fresh front end with scroll text and also a hi score table. However don't you ever get the feeling that there is still something else missing? Not everybody likes to play a C64 with just in game music, but they may want to have sound effects. Sadly it is not possible to combine the original game sound effects with in game music. You would need to create your own custom player. That was how I did the sounds for Precinct 20: Dead Strange, Split Second, Hover Raider and a few other game titles. What we are going to do instead is keep the normal SEUCK sound effects, but give the player an option to select between in game music and sound effects. Also while doing this, two icons should display just before the scroll text. One which shows the music icon, and another which should show the sound effects icon.
Before we add these options. ScrollEntry_SEUCK.a will need to have re-enabled the variable/command:
Scroller_PlaySoundEffectsDuringGame = 1
Simply re-enabled this.
Go back to TitleScreen.a and underneath XPos !byte 0, add an extra pointer. (This will be our last pointer for this project).
SoundOption !byte 0
Now in the same source file, move to jsr TitleScroller then underneath it add:
jsr CheckSoundOption
Underneath the RTS under EndScroll, add the following code
CheckSoundOption
jsr ReadJoystickOption
;Call joystick read subroutine, and then check
;for sound options. If music, display music icon
;as white. If SFX, display sfx as cyan. Otherwise
;opposite symbol as dark blue
CheckSoundOption
jsr ReadJoystickOption
;Display music icon
lda #35 ;Char 35
sta $0798+18
;Display sfx icon
lda #36
sta $0798+20
lda SoundOption
cmp #1 ;If option is 1 then is SFX
beq DisplaySFX
;Otherwise in game music is selected
lda #3 ;Colour white
sta $db98+18
lda #6
sta $db98+20
rts
DisplaySFX ;Highlight sfx pointer
lda #6
sta $db98+18
lda #3
sta $db98+20
rts
;Check joystick control pointers
ReadJoystickOption
;Read Joystick port 2
lda #4 ;Read left
bit $dc00
bne LeftNotRead1
;Make sound option MUSIC
lda #0
sta SoundOption
rts
LeftNotRead1 lda #8
bit $dc00
bne RightNotRead1
lda #1
sta SoundOption
rts
RightNotRead1
;Read Joystick port 1
lda #4 ;Read left
bit $dc01
bne LeftNotRead2
lda #0
sta SoundOption
rts
LeftNotRead2 lda #8
bit $dc01
bne RightNotRead2
lda #1
sta SoundOption
RightNotRead2
rts
Now in ScrollMain.a, locate
!ifdef Scroller_PlaySoundEffectsDuringGame {
jsr SFXPlay
}
and change the code so that we can choose either in game sound effects or music from the title screen.
;Call subroutine that checks for the player's shield
jsr CheckPlayerShields
;Check sound options
lda SoundOption
cmp #1
beq SoundEffectsEnabled
InGameMusicEnabled
jsr MusicPlayer2Play
jmp SkipSoundCheck
SoundEffectsEnabled
jsr SFXPlay
SkipSoundCheck
Now press F5 to assemble and run. Finally your game title screen is finished. The in game music or sound effects (depending on the game option) is set. Every thing's working?. Not quite, as we need to create a routine check on all of the game sound effects pointers. As music gets interrupted by the sound effects. In AnimationEngine.a let's make a sound check routine (after RTS at the end of the background animation routine:
PlaySoundEffectsWhenEnabled
ldy SoundOption cpy #1 beq AllowSoundInit rts
AllowSoundInit jsr SFXInit rts
Then afterwards. In AnimationEngine.a and PlayerControl.a, search for all of the commands jsr SFXInit, and change all of those (except for the jsr SFXInit inside AllowSoundInit) into jsr PlaySoundEffectsWhenEnabled. This will of course skip the sound effects player settings while in game music is playing in the background.
... or are we done with the project? Not quite. We are nearly there.
BACK TO TOP
8A. Adding some final touches
The game will play either in game music or sound effects. ... but are we finished with the project? ... Not quite, but we are nearly there. There are only a couple of things that are missing. The game is missing a GAME OVER and END scene. So let's make one.
In TitleScreen.a, underneath the pointer, SoundOption !byte 0 we are going to make a new pointer. It is called Scene.
!Scene !byte 0
No search for the ;No Sprites Allowed (lda #$00 sta $d015) type in the following code:
;Check which scene to run
SceneSelect
jmp TitleScreenExtension
Next we are going to create some more text, then add some code for the title screen's GAME OVER and END SCREEN. In the source file, ScrollerData.a let's create some text for GAME OVER and the END SCREEN. Before the score text, underneath !CT SCR add the following text:
!ct scr
;Main game over text (just basic GAME OVER)
GameOverText
!text " g a m e o v e r "
;Game complete text (Comical)
EndText
!text " you numpty, you stupid fool! "
!text " "
!text " you were supposed to fly over the sun "
!text " not right inside it. you, and your "
!text " rockets have been toasted. it goes to "
!text " show - you should never play with fire!"
!text " "
!text " press fire to continue "
Hopefully, we should have enough memory to create the Game Over and End Screens. Instead of putting it into the TitleScreen.a (as memory available is quite low, due to me using 2 music players instead of one) we are going to put the end and game over scenes inside ScrollerData.a. Before !ct scr, type in the following code:
;This should be linked to the title screen code:
TitleScreenExtension
;Clear screen (fill screen with space bar character)
ldx #$00
clrscrloop lda #$20
sta $0400,x
sta $0500,x
sta $0600,x
sta $06e8,x
lda #0 ;Blackout colour RAM
sta $d800,x
sta $d900,x
sta $da00,x
sta $dae8,x
inx
bne clrscrloop
lda Scene
cmp #1 ;Scene 1 = GAME OVER
beq Scene_GameOver
cmp #2 ;Scene 2 = END SCREEN
beq Scene_EndScreen
jmp TitleMain
;Display game over text (as red)
Scene_GameOver
ldx #$00
CopyGameOverText
lda GameOverText,x
sta $0400+12*40,x
lda #2
sta $0400+12*40,x
inx
cpx #$28
bne CopyGameOverText
jmp WaitForFireToExit
;Display end text
Scene_EndScreen
ldx #$00
CopyEndText lda EndText,x
sta $0400+8*40,x
lda EndText+40,x
sta $0400+9*40,x
lda EndText+80,x
sta $0400+10*40,x
lda EndText+120,x
sta $0400+11*40,x
lda EndText+160,x
sta $0400+12*40,x
lda EndText+200,x
sta $0400+13*40,x
lda EndText+240,x
sta $0400+14*40,x
lda EndText+280,x
sta $0400+15*40,x
lda #2
sta $d800+8*40,x
lda #7
sta $d800+9*40,x
sta $d800+10*40,x
sta $d800+11*40,x
sta $d800+12*40,x
sta $d800+13*40,x
sta $d800+14*40,x
lda #5
sta $d800+15*40,X
inx
bne CopyEndText
;The loop which displays the GAME OVER
;or END SCREEN accordingly.
WaitForFireToExit
lda #0 ;Init title music
jsr MusicPlayerInit
JoyLoop lda #$80
cmp $d012
bne *-3
jsr MusicPlayerPlay
lda #16 ;Wait fire
bit $dc00
bne JoyLoop2
jmp ExitFireTest
JoyLoop2 lda #16
bit $dc01
bne JoyLoop
ExitFireTest lda #0
sta Scene
jmp SceneSelect ;Back to main title loop
We are not quite ready to run it yet. There are just a couple of things that need to be altered. First of all, we will want to set the GAME OVER scene every time a current game is aborted or the player loses a life. In ScrollMain.a just under JSR MusicPlayer2Init (after the zero filling for the sprite panel code) or just before it. Add the following code:
;Automatically set the scene as GAME OVER, just
;in case the player loses its last life or
;aborts the game.
lda #1
sta Scene
This will set out the GAME OVER screen after the code jumps back to the start of the title screen code, after the game is over.
Next, we will want to have the working game ending. Open LevelControl.a and search for the ;must be loop command and just before .exitEndOfLogic create the following
lda #$02
sta Scene
lda #1
sta ScrollerExitMainLineCounter
Press F5 to assemble and run, and we are finally finished :)
Although there's no major technical talk about what each routine does. I do hope you find these tips to be very useful for when you are creating a future game project in SEUCK, and you wish to push it even further by adding power ups, smart aim, new front end, etc.
Finally as promised ... The final production (including the edited source files that come along with it). In order to successfully assemble and run this source. You will need the GITHUB repository from Martin Piper's web site. Copy the binaries and the edited source code to the scroller folder (Make sure the original scroller folder has been backed up, or re-name the folder as RocketNRoll). I hope you have fun :) Enjoy the game.
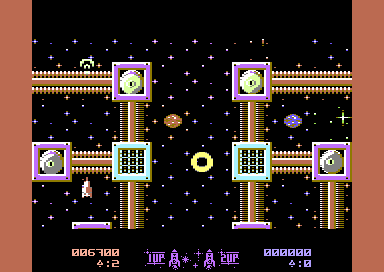
CLICK DISK ICON TO DOWNLOAD - and enjoy the final production.
Please note that no full release disk or tape version has been made - since this is only for the SEUCK School tutorial. (To see the game, run Scroller.PRG). We do welcome anyone releasing this production as a standalone on .D64 or .TAP on their web site - providing it isn't sold!
BACK TO TOP
IMPORTANT NOTE:
This document was written legally as a short brief reference to the Scroller project source code by Martin Piper. Screen shots may have been taken from some sources, but shouldn't infringe any form of copyright. Any infringement in this document will be respectably removed from this web site, should we hear about it. The goal of SEUCK Redux is to help people who write SEUCK games, enhance their games even further through a new source code, in order to support this tool even more.
Disclaimer:
Some example snapshots of the utility were examples of my own / Martin's productions from the Shoot Em Up Construction Kit by Sensible Software. The Shoot Em Up Construction Kit was a commercial games creating utility that was written back in 1987 and published by Palace Software, then on Budget 1991 Gremlin Graphics. Sideways version of SEUCK is (C)2008 Sensible Software and Jon Wells.
The new game source code in SEUCK Redux is (C)2020+ By Martin Piper and released under GITHUB. Martin has his own blessing for SEUCK Redux to be used for non-commercial productions. However, for commercial productions, please ask for permission first. Remember to credit Martin for part of the code as well as yourself, since most of the source is his :)
If there are any topics I have missed out on this page, which you need to know about. Please contact me at my usual email address. This page will be edited to give more future features should any more come along.