Project Housekeeping, Custom Sprite Moving, Screen Scrolling with Additional Game Projects
Project Housekeeping / Custom sprite movement / Directional Detection Movement / Game 8: Granny's Teeth (Craptastic version) / Recorded Path Movement / Timed Control Movement
/ Background + Character Animation and Star Fields / Horizontal Scrolling / GAME 9: Blastopia
/ Vertical Scrolling /Scrolling Upwards / Scrolling Downwards / GAME 10: Super Toboggan Challenge
Project Housekeeping
Probably the most boring subject in the Assemble It feature, but it can be a good option for you to learn from. Although there is nothing to download from this little chapter. There are some example games which also use the housekeeping method anyway. So how helpful is this part of the chapter supposed to be for you?. Let us put things this way. If you were to create a bigger game project, and use just one assembly file to program your game. There could be very long strings of code, and you can easily get yourself lost. (Like you probably are already in this part of the chapter).
Let us say for example, you are writing a new C64 game, it has a title screen, the main game, and fully animated end sequence. You should create SEPARATE assembly files in which should be linked to your project. Let us take for example, Missile Blasta (from the previous chapter) for example. The game should be split into separate assembly files: The main project code (to assemble to should be MISSILEBLASTA.ASM TITLESCREEN.ASM, GAMECODE.ASM, ENDING.ASM. (To create your own assembly source code, simply do the same as you did before when you created a new project. (ADD, NEW ASSEMBLY FILE, enter name of your assembly code). It will be placed in the project.
Now what if you wanted to link the entire source together, which you already done - placed into separate files?
Simple:
You enter !source "assemblyfile.asm"
An example for setting a Missile Blasta V2, project with additional ASM files would sort of look something like this:
;Missile Blasta - Remastered V2
;by Richard Bayliss
;For Assemble It 2018
!to "MISSILEBLASTA.PRG",CBM
;setup basic / sys start address (since nothing
;is overlapping memory $0801)
*=$0801
!basic 2018,$3800
*=$0c00
attribs
!bin "bin/attributes.bin"
;insert the sprites
*=$2000
!bin "bin/sprites.bin"
;insert the status screen (pre-built from older build)
*=$2700
!bin "bin/status.prg",,2
;insert the game binary charset
*=$2800
!bin "bin/charset.bin"
;insert the game screen binary (made from charpad)
*=$3000
gamematrix
;insert the game screen matrix (made from charpad)
!bin "bin/screen.bin"
*=$3400
titlematrix
;Insert the title screen matrix (made from charpad)
!bin "bin/titlescreen.bin"
;Main game code
*=$3800
!source "GAMECODE.ASM"
;Insert title screen code
!source "TITLECODE.ASM"
;Insert end sequence code
!source "ENDCODE.ASM"
scorebackup
!bin "bin/status.prg",,2
;insert the music (,,2 prg)
*=$8000
!bin "bin/music.prg",,2
;goat tracker custom sound effects table
So remember, any time you create a new C64 project (Which you will discover in the next few chapters on this page), always organize your project into separate parts. It isn't all that hard.
BACK TO TOP
clc
adc Alien1XSpeedStore
sta objpos+4
lda objpos+5
clc
adc Alien1YSpeedStore
sta objpos+5
;Calculate flip properties - So that
;the movement can be triggered to change
;direction
jsr Alien1FlipTest
rts
;Actual flip test for alien 1
Alien1FlipTest
lda Alien1FlipDelay ;Alien flip delay test ... Counter
cmp Alien1_FlipTime
beq Alien1SwitchToNextMotion ;Switch to next motion from table
inc Alien1FlipDelay
rts
;Switch alien motion
Alien1SwitchToNextMotion
lda #$00 ;Reset alien flip delay
sta Alien1FlipDelay
ldx Alien1FlipPointer ;Read pointer
lda Alien1_XSpeed,x ;Read selected X direction/speed from table
sta Alien1XSpeedStore ;Store it to alien speed X (Alien1SpeedStore)
lda Alien1_YSpeed,x ;Read selected Y direction/speed from table
sta Alien1YSpeedStore ;Store it to alien speed Y (Alien1SpeedStore)
inx
cpx #$04 ;Has the table reached the last byte on each speed table?
beq Alien1SpeedReset ;Yes ... Reset the speed table.
inc Alien1FlipPointer ;Then move to next table setup (To be Self-modified)
rts
;Reset flip table and delay for alien 1
Alien1SpeedReset
ldx #$00
stx Alien1FlipPointer
lda #$00
sta Alien1FlipDelay
rts
;Time alien 1's movement. Has it reach its movement deadline
;if so. Switch over to the next set of properties for the next
;alien. Then spawn the next alien object.
TimeAlien1Movement
lda Alien1MovementPointer
cmp Alien1_MoveTime
beq Alien1WaveComplete
inc Alien1MovementPointer
rts
Alien1WaveComplete
lda #$00
sta Alien1MovementPointer
lda #1
sta Alien1Offset
rts
BACK TO TOP
Background Character Animation and Starfields
When producing a game or a demo, it is possible to generate animation through character sets. There are different methods in which you can animate a character. You could scroll a character, (or a set of characters) to form an effect, or maybe roll through a set of characters one after another by using frames. Here are a few examples to try in C64Studio.
The scrolling character
The most easiest way to scroll a character would be to scroll it left/right. Or alternatively you could scroll the character up or down. The concept would be to pick out the address of the 8 bytes of a character you wish to scroll and produce a simple loop to roll the character along. Scrolling characters left/right are the most simplest way to move them. However if you wanted to scroll characters UP/DOWN then you would need to generate some pointers for those.
A small example of scrolling a char left:
;Small example of scrolling a character left
!to "scrollcharleft.prg",,2
*=$0801
!basic 2064 ;SYS2064
*=$0810
lda #$18 ;Set character mode to $2000-$2800
sta $d018
;Fill the entire screen with zeroed character
ldx #$00
FillScreenWithChar
lda #$00 ;Very first char (@)
sta $0400,x
lda #1
sta $d800,x
inx
bne FillScreenWithChar
TestLoop
lda #$80
cmp $d012
bne *-3
jsr ScrollCharsLeft
jmp TestLoop
ScrollCharsLeft
;Scroll the very first character
;to the left.
ldx #$00
ScrollLeft
lda $2000,x ;Each char = 8 bytes.
asl ;
rol $2000,x ;Rotate char to the left by one byte
inx
cpx #8 ;8 bytes read
bne ScrollLeft
rts
;Let's make a custom character for char 0 (Alternatively
;as a shortcut, you can import a charset using the !bin command
*=$2000
!byte %11111111
!byte %10000001
!byte %10111101
!byte %10100101
!byte %10100101
!byte %10111101
!byte %10000001
!byte %11111111
;End of program
Without changing the additional source in GREEN. Copy the code and change the YELLOW example to this next example below.
A small example of scrolling a character to the right
ScrollCharRight
ldx #$00
CharRight:
lda $2000,x ;Each char = 8 bytes.
lsr
ror $2000,x ;Rotate char to the right
inx
cpx #8
bne CharRight
rts
Rotating the characters left/right are much easy to perform. A word of warning however. If you try and scroll multicolour chars, they will change colour. In order to solve this problem. You could add and extra LSR ROR $CHAR, or ASL ROL $CHAR. This should prevent colour shifts of each character.
Moving Charsets Up / Down
What if you wanted to move characters up or down? It works completely differently. You would need to make a temp byte to store the current character byte to. Scroll the character in a forward or backward loop (depending on the direction your character is scrolling) then store the stored loop to either the FIRST or LAST byte of the character that is being read.
A small example of scrolling a character up
ScrollCharUp
lda $2000
sta CharByteStore
ldx #$00
ShiftCharUp
lda $2001,x ;Fetch last char
sta $2000,x ;move to the next char
inx
cpx #8
bne ShiftCharUp
lda CharByteStore
sta $2007 ;Grab last character
rts
CharbyteStore !byte 0
A small example of scrolling a character down
ScrollCharDown
lda $2007
sta CharByteStore ;We just reverse the above
ldx #$07 ;process
ShiftCharDown
lda $2000-1,x
sta $2000,x
dex
bpl ShiftCharDown
lda CharByteStore
sta $2000
rts
Swapping Frames
It is also possible to animate charsets by swapping their own frames. You will want to work out how many frames your animation charset should use and how to come about with them. We simply copy 8 bytes of the first character, and paste it to the last character. Then call a simple loop which pulls each of the 8 bytes of each character frame. So that there is an actual character animation. This works like this:
AnimChars
lda AnimDelay
cmp #4
beq AnimOK
inc AnimDelay
rts
AnimOK
lda #0
sta AnimDelay
ldx #$00
CopyAndPaste1
lda $2000,x
sta $2040,x
inx
cpx #8 ;8 bytes = 1 char
bne CopyAndPaste1
ldx #$00
CopyAndPaste2
lda $2008,x
sta $2000,x
inx
cpx #$40 ;Max, 8 charaacter frames!
bne CopyAndPaste2
rts
AnimDelay !byte 0
Star Fields
Generating char-based star fields can be quite awkward, but are actually VERY EASY to implement. All you need is to know the memory address of where the frames for your char star field is. Then roll each byte forward or backwards and follow on, for the other charsets. Here is a small example on how a star field animation is formed (Using different layers). The example code below uses a star field that consists of four characters in the char set. $2000-$2020. A pixel skip is placed in the code, in order to rotate the same byte of the whole 4 characters. It is possible to increase the size of the star field. Simply by generating additional characters.
;Character based wrap-around animation. Produce
;a starfield, by rolling the bytes of the
;selected layers to be animated at different speeds
StarField
jsr AnimPixel1
jsr AnimPixel2
jsr AnimPixel2
jsr AnimPixel3
jsr AnimPixel3
jsr AnimPixel3
jsr AnimPixel4
jsr AnimPixel4
rts
;Animate the first chosen pixel on the
;current charset - Scroll it to the left.
AnimPixel1
lda CHARSET+1
asl
rol CHARSET+1+24
rol CHARSET+1+16
rol CHARSET+1+8
rol CHARSET+1
rts
AnimPixel2
lda CHARSET+3
asl
rol CHARSET+3+24
rol CHARSET+3+16
rol CHARSET+3+8
rol CHARSET+3
rts
AnimPixel3
lda CHARSET+5
asl
rol CHARSET+5+24
rol CHARSET+5+16
rol CHARSET+5+8
rol CHARSET+5
rts
AnimPixel4
lda CHARSET+7
asl
rol CHARSET+7+24
rol CHARSET+7+16
rol CHARSET+7+8
rol CHARSET+7
rts
That covers this section on character animation.
BACK TO TOP
SCREEN HORIZONTAL SCROLLING
In an earlier chapter, I showed you how to scroll text messages. This time round, I am going to show you how to scroll more than just text. Let us assume you are writing a new C64 game, and you want to scroll a background for the first time, without having to generate blocks/maps. Well, it is possible. What you have to do is set a speed of a scrolling pointer. Then we pull characters back through a loop. Once that has been done, a memory read of the map area is then placed as last character for each row. Then we update the code to increment to the next LO-BYTE of the map column address on the picked row. A code snippet below shows this simple example.
;Simple Screen Horizontal Scrolling
;by Richard Bayliss
!to "horizscreenscrl.prg",cbm
SCRN = $0400
jsr InitMapPosition
TestLoop
lda #$f8
cmp $d012
bne *-3
jsr ScrollMap
lda SCROLLX
sta $d016
jmp TestLoop
;Start by setting the scroll speed.
ScrollExit
rts
ScrollMap
lda SCROLLX
sec
sbc #MAPSCROLLSPEED
and #$07
sta SCROLLX
bcs ScrollExit
;Shift a byte from each character on screen
;then move it to the next character on screen.
;Split this into four different loops. (5 rows per
;loop)
ldx #00 ;Grab last value of char - then add it
MoveRow1
lda SCRN+1,x ;Grab one screen column higher
sta SCRN,x ;pull it to the previous column
lda SCRN+41,x
sta SCRN+40,x
lda SCRN+81,x
sta SCRN+80,x
lda SCRN+121,x
sta SCRN+120,x
lda SCRN+161,x
sta SCRN+160,x
inx
cpx #$28
bne MoveRow1
ldx #00 ;Do the same thing for the next set of rows
MoveRow2
lda SCRN+201,x
sta SCRN+200,x
lda SCRN+241,x
sta SCRN+240,x
lda SCRN+281,x
sta SCRN+280,x
lda SCRN+321,x
sta SCRN+320,x
lda SCRN+361,x
sta SCRN+360,x
inx
cpx #$28
bne MoveRow2
ldx #00 ;Once again do the same for the next set of rows
MoveRow3
lda SCRN+401,x
sta SCRN+400,x
lda SCRN+441,x
sta SCRN+440,x
lda SCRN+481,x
sta SCRN+480,x
lda SCRN+521,x
sta SCRN+520,x
lda SCRN+561,x
sta SCRN+560,x
inx
cpx #$28
bne MoveRow3
ldx #00 ;Finally for the last 5 rows
MoveRow4
lda SCRN+601,x
sta SCRN+600,x
lda SCRN+641,x
sta SCRN+640,x
lda SCRN+681,x
sta SCRN+680,x
lda SCRN+721,x
sta SCRN+720,x
lda SCRN+761,x
sta SCRN+760,x
inx
cpx #$28
bne MoveRow4
;Now place the self-mod stored character on to the
;last byte of each row.
mapSM1
lda MAPROW1
sta SCRN+39
mapSM2
lda MAPROW2
sta SCRN+79
mapSM3
lda MAPROW3
sta SCRN+119
mapSM4
lda MAPROW4
sta SCRN+159
mapSM5
lda MAPROW5
sta SCRN+199
mapSM6
lda MAPROW6
sta SCRN+239
mapSM7
lda MAPROW7
sta SCRN+279
mapSM8
lda MAPROW8
sta SCRN+319
mapSM9
lda MAPROW9
sta SCRN+359
mapSM10
lda MAPROW10
sta SCRN+399
mapSM11
lda MAPROW11
sta SCRN+439
mapSM12
lda MAPROW12
sta SCRN+479
mapSM13
lda MAPROW13
sta SCRN+519
mapSM14
lda MAPROW14
sta SCRN+559
mapSM15
lda MAPROW15
sta SCRN+599
mapSM16
lda MAPROW16
sta SCRN+639
mapSM17
lda MAPROW17
sta SCRN+679
mapSM18
lda MAPROW18
sta SCRN+719
mapSM19
lda MAPROW19
sta SCRN+759
mapSM20
lda MAPROW20
sta SCRN+799
;Now to get a new character fetched from the map, increment
;the lo/byte of the self-modifying addresses in order to
;allow all 256 bytes to update the last character that was
;used after every frame scrolled.
inc mapSM1+1
inc mapSM2+1
inc mapSM3+1
inc mapSM4+1
inc mapSM5+1
inc mapSM6+1
inc mapSM7+1
inc mapSM8+1
inc mapSM9+1
inc mapSM10+1
inc mapSM11+1
inc mapSM12+1
inc mapSM13+1
inc mapSM14+1
inc mapSM15+1
inc mapSM16+1
inc mapSM17+1
inc mapSM18+1
inc mapSM19+1
inc mapSM20+1
lda mapSM1+1
bne InitMapPosition
rts
Now, if you wanted to initialise the map so it starts again you would need to LOAD the LO-BYTE of the map address, and then STORE it to self-mod code. For example, if MAPROW address of map to be read = $4000. We place the low byte of MAPROW to the self mod one byte after the address where the label pointer mapSM1 is. Also we place the hi byte of MAPROW to the self mod address 2 bytes after the address where the label pointer mapSM1+1 is. To get the whole 20 rows cycling like the first MAPROW, we select every 256th address of low and hibyte to set up the map row / column.
InitMapPosition
lda #<MAPROW
sta mapSM1+1
lda #>MAPROW
sta mapSM2+2
lda #<MAPROW+$100
sta mapSM2+1
lda #>MAPROW+$100
sta mapSM2+2
lda #<MAPROW+$200
sta mapSM3+1
lda #>MAPROW+$300
sta mapSM3+2
VIEW COMPLETE SOURCE
but don't forget to use charpad to draw your own test charset and map (Export your test project as charset, and map). For this example, your map needs to be 20 rows by 256 columns with tiles disabled.
Now, should you wish to try and build scrolling background using BLOCKS+MAPS, instead. I strongly recommend that you check out Achim Volker's chapter on column map extraction, on Codebase64.
BACK TO TOP
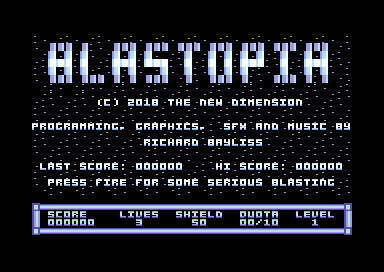
GAME 10 - BLASTOPIA
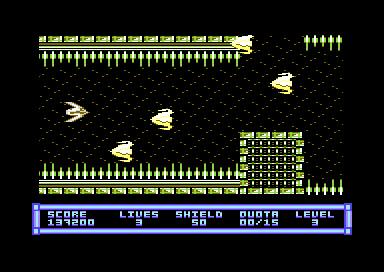
Now I have covered a lot of tips in the previous few sub chapters that are in this chapter. I have decided to come up with a brand new game project, for us to play with. As a fan of the retro blasting shoot 'em up genre. I have come up with a new shoot 'em up specially for this project. If you want to just play the original game, without the source, you will find it on the TND games page, under BLASTOPIA :). This awesome game features a short front end and end screen, 8 fast paced levels of alien blasting mayhem (all controlled by pointers), 24 different alien sprites, camels (which you must rescue during play), sprite/sprite collision, sprite/background collision (Based on Achim Volker's codebase example). There's also plenty of thumping trance music and sound effects. Hopefully you should have loads of fun playing this game (or maybe exploring through the code). Full instructions on how to play the game, can be found in the RELEASE folder. Which also consists with a finally compiled disk and .tap version (with tape master if you want to write this game to a real tape).
About the project:
THE SPRITES
These are the game sprites, that I will be using for Blastopia. There are 4 frames for each sprite, except for the bullet and the explosion animation. The player ship sprite animation are the first 4 sprites, a bullet is the second. The explosion sprites, followed by all of the aliens. The last 4 sprites are the camels which the player will have to rescue. Each sprite has its own colour and animation scheme.
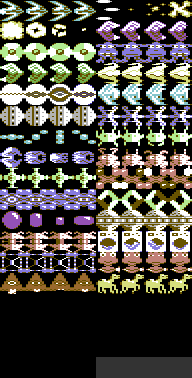
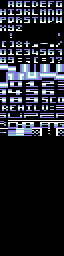
THE GRAPHICS
This is the complete character set for BLASTOPIA. It represents all of the characters that builds each level map screen. If you load in one of the example level files into charpad and then use IMPORT RAW/BIN FILE / CHARSET, select the folder FILES and select gamecharset.bin. You should get this set of characters. The characters 0 - 3 have been chosen to be animated as a star field (More on this in the tutorial). Character 42 has been chosen as the lazer gate character. Characters 33 and 38 represent the flashing lights for the landing pad. The rest of the graphics (Except for the letters, symbol and numbers) are deadly characters - The landing pad characters 35-40 (except for character 38) are special characters.
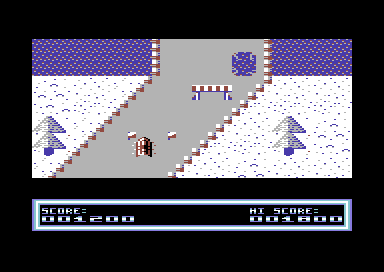
Below, you can see the whole map of LEVEL 1, which consists of 256 characters per row and 20 rows. There are also additional charpad level files where each map is built by 5 rows and 64 columns of 4x4 tiles. Disabling the tile mode gives you tiles. The last 5 rows are saved for a blank gap, and the game's status panel.

LEVEL MAP CRUNCHING / ADDING A BACKWARDS DECRUNCHER
In the files DIR are all of the example maps (Un-Compressed). These maps have been extracted as RAW binary format. However, if you're making a full game, you'll want to consider crunching each level map. So that they will fit in the game code. To crunch each exported map. You can use the EXOMIZER to crunch the memory down, and use a DECRUNCHER source program to extract the data. The command used as an example:
exomizer mem -l $b400 level1map.bin,$9ffe -o level1map_cr.prg -P0
Please also note, if you are not using Exomizer V3, but V2 instead you won't need to -P0 prefix
$b400 has been set for the address where to place the crunched data.
$a000 is where the data should decrunch to ($9ffe is 2 bytes offset before the actual decrunch address for raw files. PRG source files can use $a000 instead of $9ffe).
The -P0 is a prefix for using V2.0 level compression. As V3 hasn't got an actual decrunch source yet. For the decruncher, you will need DASM cross assembler, and edit wrap.s (That comes with Exomizer inside the exodecrs folder). in notepad to set the address of the decruncher. Then in the command prompt enter
DASM wrap.s -oleveldecruncher.prg
I edited the wrap.s to set the address of the exomizer decruncher at $c400. Once assembled through DASM to leveldecruncher.prg, the file gets copied over to the FILES folder, along with the other binary data, including sprites, alien sprite formation data, charset, uncrunched maps, etc.
SETTING UP SPRITE FORMATION
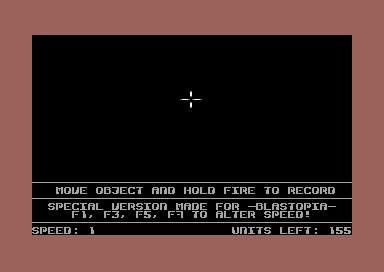
Also provided with the binary and source code. I have provided an exclusively modified version of my Alien Formation Maker V1.0+, which has been made for BLASTOPIA. So you can have a go at creating your own alien formation, and then import it into the game code later on (if you want to that is). The aliens should have a selected movement during the game. While using the editor press F1, F3, F5, F7 to alter the formation speed. Select inside the red border (where the cursor cannot be seen) by placing the cursor as the start position. Then hold down the fire button to record the path movement by playing around with the joystick. You have 256 units to use up per formation. These will be used quite quickly with slower movements. Watch you don't make too any mistakes. 256 bytes of the alien formation are stored for X ($3000-$30ff) and Y ($3100-31ff). If you are finished with an alien formation and you still have units spare - make sure it ends inside the red border. Otherwise the alien formation will look very odd indeeed :)
THE GAME MUSIC
I have chosen three tunes crammed to one file, done in Goat Tracker V2.7. For this example. The theme is once again, like with a few of my latest space shoot 'em ups, TRANCE themed. The game is intending to be a fast-paced game, and the music is set to be fast and very trance like. The game also will feature SFX, based on the instrument editor made in Goat Tracker. The three tunes picked are title music, in game music and end screen music. Game Over has sound effects.
NOW LET'S CREATE THE GAME

Download the complete source (or view each source separately in TXT format by clicking on the link, corresponding to the code. If you choose to download the code and the source. Load the project in to C64Studio V5.8, or higher. The filename is BLASTOPIA.S64. The project folder contains multiple files which are as follows You are also required EXOMIZER V2 or higher, in c:\EXOMIZER\WIN32 directory, otherwise delete the postbuild from blastopia.asm and manually compress the program with a cross platform or native C64 packer/cruncher of your own choice :).
blastiopa.asm - This is the main file that needs to be assembled
variables.asm - A list of variables, that has been linked to the code
titlescreen.asm - Quick code for the front end
gamecode.asm - The main game code
pointers.asm - Series of pointers and text that the game code uses for varied tasks
OUTSIDE BLASTOPIA.ASM
compressmap.asm - This is a command, which was set to import a charpad map, and in post-build properties. A command to Exomizer is used to level crunch the imported map. (exomizer -l mem $xxxx loadname.prg -o packedname.prg).
The project also has a series of binary and PRG files which have also been included in the ZIP archive. These are part of the game project. The selected binary/program files are read in blastopia.asm
I won't go through the entire source individually, as the code is all there is self-detailed. I'll just give you a brief explanation about each source file. Simply click on the source file to view the code in .txt format (Or go all the way to the bottom of this chapter and download the entire C64Studio project.
blastopia.asm
This source consists of importing/linking the binary data files and possibly additional source code. First a starting level is set in the code (Default is 0). We then generate the program file to assemble to called "BLASTOPIA.PRG". Then link the source variables.asm to the source code.
CHARSET MEMORY
$0800-$0fff is the address where the game graphics charset data is being imported to.
FORMATION TABLE WRITING
$1000-$1200 has been reserved for the copied set level X and Y alien formation data. This is self-modified in the game's code for every time an alien formation is complete, a new one gets copied over to that specific address. $1000 = X formation, and $1100 = Y formation
SPRITE DATA
$2000-$3c00 is being used for all of the sprites. I'm using default memory BANK $03 for the screen memory.
STARTING MAP (Plain Stars)
$3C00 inserts the game's starting map (The plain starfield), which is used for the title screen, the main game starting point, level complete and also the game's ending.
TITLE CODE, GAME CODE, TABLES AND POINTERS + ALIEN FORMATION DATA
$4000 - $8EFF consists of the main code and pointers. The address starts by switching the KERNAL mode, to be allowed to use addresses exceeding $9000, and before $D000. The game will be using standard KERNAL interrupts. Also we call one time code that checks the C64's system (PAL/NTSC) and also checks for a hidden cheat. Which if detected BIT out the decrementing LIVES counter. Also imported into the code area (as additional pointers) are all 24 different alien formation tables (extracted from a .D64 which consists of the BLASTOPIA ALIEN FORMATION MAKER). Also the low/hi byte of the title screen code is set to the RESTORE pointers. So that every time the RESTORE key is pressed, the title screen restarts.
MUSIC DATA
$8F00 - $9fff is the Goat Tracker music player. You may use any other music player, but the SFX won't work, and will probably crash the player. Zeropage for GoatTracker tunes is best set to $fd-$ff.
DECOMPRESSED MAP (Full Level Map)
$a000-$b3ff is the game map (after it has been decompressed by Exomizer's decrunch routine). The LEVELSTART+LEVELEND labels represent the starting and ending position of the compressed map data. If you look at C64Studio V5.8, and assemble the program. The specific addresses of where the data/code lies is displayed on the left of the screen.
EXOMIZER COMPRESSED LEVEL MAPS
$b400-$c3ff contains all of the crunched level maps. Each level map has labels with END. Which is used as the low/hi-byte address for decrunching the level data.
EXOMIZER DECRUNCHER SOURCE
$c400-$c5ff is the Exomizer's level backwards decruncher source code.
STATUS /SCORE PANEL SCREEN
$c600-$c6c8 is the game status panel / scoring matrix
TITLE SCREEN LOGO
$c700-$c900 is the title screen logo matrix
variables.asm
A list of variables/labels set for specific addresses, values and zeropage pointers
gamecode.asm
First of all the source code imports the titlescreen.asm code, which indicates the code for the main front end for the game. More on this later. After the title screen code has finished running. GAMESTART is called which does a fresh start of the game.
GAMESTART sets up all of the graphics data, resets the quota, score and other bits, should a new game start. Test background multi colours are set - although for the game start that isn't really needed, since a table of colours is normally read. Level pointers are set, and the score is zeroed (Probably yet again not required, since the titlescreen code does all that).
NEWLEVEL initialises any existing interrupts in the background. This basically kills all IRQs while trying to set up new levels . The shield count is reset to 50 on the player's shield counter. The alien X and Y formation table is cleaned up with padded zeroes. Specific pointers are reset, so that the correct aliens and formation are used when starting a brand new game or level. Then we call a loop, which prepares the level. LEVELPOINTER cycles through the level properties. If the level is OVER the last level, then the code automatically jumps to the end screen code. Otherwise, all low and high bytes of the MAP DECRUNCH END ADDRESSES are stored to the self-mod area of the EXOMIZER decrunch routine. The LOW+HI BYTE values of the colour table are read and stored to specific colour areas - so that each level has its own set colour. LEVEL SELECT TABLES, set up the selection of aliens and their formation according to level. Finally CAMELQUOTADIGITLEFT and CAMELQUOTADIGITRIGHT will set up the camel rescue quota according to level.
After the level selection code process has been made. The code then writes the new LEVEL ALIEN SELECT table, to the ACTUAL alien select table. There are 24 bytes stored since each level uses 24 attack formations. The SID chip is initialised, so during the map decrunch process everything is silent. The level map is then decrunched.
GAMECOMPLETE redraws the status panel and the starfield, which will afterwards display the game complete text. It will also prompt the player to press fire. Then records the final score and checks if it is a new high score. If the player's score is a new high score, then the title screen will display the new high score. The end screen also resets the game interrupts and set the END MUSIC to initialise and play. Also if after pressing fire to exit the well done screen. If the cheat mode has been detected then the player will NOT have a new high score. The cheat mode is then disabled and the code will run back to the title screen.
DECRUNCHLEVELMAP will decrunch the level map data which the end low/hi byte address has been set to decrunch the program backwards until the decruncher reaches the load address of the file. The map is extracted in full to $a000-$b400.
The game code continues by initialising the starting position of ALL ROWS AND COLUMNS of the map. Also alien properties are reset for the chosen level. The default starting position for sprites are set, along with the colour settings . Additional pointers for indicating the player dead, lazer time and lazer on are also initialised. The game IRQs are set up initialising the in game music and playing it. The frame of the player's sprite is set by default.
MAINGAMESTART disables the launch pad, also draws the starfield starting map, and also sets the game char colour redraws the status panel.
GAMELOOP Synchronizes the game timer and expands the screen position so that sprites can use the full screen area.. A pause key (CONTROL) is checked to see whether on not the key is pressed. If CONTROL is pressed. The game is paused. If FIRE on joystick in port 2 is pressed then the game can continue to run its main body of the code.
SCROLLMAP - Scrolls the game map. This is made by pulling 20 rows of characters from the last character position to the previous character position. The map code then positions the current pointer position of the map to the very last character. Then the code increments the position of the low byte of each character. Basically after one full draw, the map will move on to the next map draw column. Then resets after 256 bytes has been read. After all a single byte can be from 0 - 255.
STARFIELD - Animates the starfield. Basically it scrolls the selected bytes of pixels over each character, depending on which byte has been chosen. ASL, ROL will roll bytes to the left, LSR ROR will roll bytes to the right.
TESTLAZER - Checks whether or not the lazer character is switched on or off. If the lazer is off, then a blank char replaces the lazer char. Otherwise if it is on, the char is switched on. The lazer is controlled by a looping timer and two logic switches (LAZERON = 0 represents OFF, LAZERON = 1 represents ON)
ANIMSPRITES - Creates animation frames from sprite value tables and stores those to custom pointers - The speed of the animation is controlled by a delay. Max of 4 bytes is read for the sprite animation.
PLAYERPROPERTIES - Sets up the properties of the player. It checks whether or not the player is alive or dead. If the player is dead, then the explosion animation takes place. Otherwise if the player is alive, the player can move, and animate. There's also code for bullet properties included in the PLAYERPROPERTIES, which allows the player to shoot fast bullets unless one bullet sprite is on screen. If the bullet is offset, then it can be fired again.
TESTALIENPROPERTIES - Tests alien properties. Macro code is created to check for each alien property, control its formation, etc. If the alien is alive (ALIENDEAD = 0) and ALIENOFFSET = 0 and ALIENSPAWNED = 1. This means that the alien is able to move around the screen. ALIENDEAD will trigger the explosion of the alien (if enabled) then resets the alien to ALIENOFFSET mode. The macro code is LINKED to all 5 aliens that are being blasted. If all aliens are OFFSET. A spawn timer is reset, then after the timer expired, spawns the aliens on to the screen with their own attack formation.
TESTCAMELPROPERTIES - Tests whether or not a complete fleet of aliens have been destroyed. If so, then the camel is released from the last alien shot.
SPRITETOSPRITE - This tests the sprite to sprite collision. The values of the collision co-ordinates (from variables) are set from the player and bullet. Then some macros are made to check each alien collision. For example if ALIEN1DEAD = 1, then no collision should take place. If the alien hits the player, then the shield should decrease (If the player is not invulnerable). If an alien hits a bullet and is not dead. The bullet is removed, and then the alien is triggered to be dead. Where TESTALIENPROPERTIES will then force the alien to explode. The alien shot is stored to a pointer, which the camel gets released from if all 5 aliens of the same fleet have been shot.
SPRITETOBACKGROUND - This tests the position of the player. The player collision position has been set to the central area of the ship (1 single character). If that area of the player's hit hits any background while the player is invulnerable. Nothing should happen. However, if the player hits the background, and it isn't a specific character. Like with the sprite to sprite collision, the background drains the player's shield. Only chars 0-3 are excluded from the deadly background, and aware classed as safe chars. The landing pad 34-40 (excluding 38) is checked - If PADENABLED = 1 then the landing pad is NOT a deadly background. It is used to detect that the level is complete (Where the background flash and level complete message is triggered). The lazer character (42) is only deadly when the pointer LAZERON = 1. Otherwise if LAZERON=0, the lazer is removed and collision with that specific char is ignored.
ANIMATEPAD- Checks whether or not the landing pad is enabled or not. If the landing pad is enabled, it calls out a timed animation to set the lights flashing (Simply by swapping two char animation frames from two addresses.).
CHECKMATCHINGQUOTAS - Checks to see whether or not the camel pickup quota has been reached. If it has, then the camels cannot be released, and also the code will trigger the landing pad for availability. The camel quota check code will check fro a direct match between CAMELQUOTA and PICKEDQUOTA. The landing pad will not be enabled quota doesn't match. Therefore the player has to keep on blasting.
pointers.asm consists of all pointers that support the code in the entire game project. For example sprite animation frames, level settings, etc. A lot of the stuff in the code and pointers have its own explanation. So there's no need for me to go through it all again :)
titlescreen.asm
Initialises the interrupts, displays the credits and also shows the previous and high score. The status panel is then reset to zero
And there you go. A quick and brief explanation of some of the source code. I recommend you explore it, as you'll probably won't grasp it straight away, but at least you'll know how to code a basic horizontal scrolling shoot 'em up with its own limitations.
BACK TO TOP
VERTICAL SCREEN SCROLLING
In this part of the chapter. We are going to learn a little bit about vertical scrolling. Unlike using horizontal scrolling, the trick to making vertical scrolling is slightly more trickier. Should you already know how to scroll a background horizontally. Vertical scrolling works in a pretty much similar way. but instead of controlling $D016 (Horizontal Screen Position (HSP)). You need to control the value $D011, (Vertical Scroll Position(VSP)). A smooth vertical scroller is controlled in a similar way as a horizontal scroller would be controlled. You can basically create a hard scroller going up, or scrolling down. First the control of a VSP pointer is calculated. Should the value of the counter reach the 8th byte, it should reset and then call a subroutine to perform a hard scroll. In C64 terms, a vertical hardscroll is formed by fetching a full row (or a row of a chosen number of characters), and then pasting it to the next row. Then you perform the row pulling forwards or backwards.
SCROLLING A SCREEN UPWARDS
For a start off, we are going to make a simple program which can scroll a map upwards:
;Simple full screen upscroll by Richard Bayliss
;2019 - Assemble It tutorial
;http://tnd64.unikat.sk
row = $0400
colr = $d800
row0 = row
row1 = row+40
row2 = row+80
row3 = row+120
row4 = row+160
row5 = row+200
row6 = row+240
row7 = row+280
row8 = row+320
row9 = row+360
row10 = row+400
row11 = row+440
row12 = row+480
row13 = row+520
row14 = row+560
row15 = row+600
row16 = row+640
row17 = row+680
row18 = row+720
row19 = row+760
row20 = row+800
row21 = row+840
row22 = row+880
row23 = row+920
row24 = row+960
;Please feel free to use this source should you wish to.
!to "upscroll.prg",cbm
*=$0801 ;BASIC SYS 2064 call
!basic 2064
*=$0810
sei
;Black out screen,
lda #$00
sta $d020
sta $d021
lda #$18
sta $d018
;fill the screen with the spacebar character
;and colour white.
ldx #$00
fillscreen
lda #$20
sta row,x
sta row+$100,x
sta row+$200,x
sta row+$2e8,x
lda #$01
sta colr,x
sta colr+$100,x
sta colr+$200,x
sta colr+$2e8,x
inx
bne fillscreen
;Setup an IRQ Raster interrupt for code.
ldx #<irq
ldy #>irq
lda #$00
stx $0314
sty $0315
sta $d012
lda #$7f
sta $dc0d
lda #$1b
sta $d011
lda #$01
sta $d01a
cli
;Perform a synchronized timer before performing
;an upward scroller.
LOOP lda #0
sta SYNCTIMER
lda SYNCTIMER
cmp SYNCTIMER
beq *-3
jsr UpScroll ;Call upward scroller
jmp LOOP
;Perform Upscroll
UpScroll
lda YPOS ;Read pointer YPOS
sec
sbc #$01 ;Speed of YPOS scroll
and #7 ;Values can only be forced to 0 - 7 to control smoothness
sta YPOS ;Update the position of YPOS.
bcs NoScroll ;YPOS=0, read do main scroll, if over - don't do hard scroll yet
jmp HardScroll ;Call hardscroll routine
NoScroll
rts
;The main hard scroll - this is how NOT to
;implement an up scroll
HardScroll
jsr DoHardScroll
;Pick the screen map location, and then write it to the last row on screen.
ldx #$27
MapRead lda Map,x
sta row24,x
dex
bpl MapRead
;Now calculate the position of the 40 column map.
lda MapRead+1
clc
adc #$28 ;Shift to the next row
sta MapRead+1
lda MapRead+2 ;After all rows of map memory read
adc #$00 ;shift to the next hibyte address. (i.e. $1000 = $2000)
sta MapRead+2
lda MapRead+2
cmp #>MapEnd ;Reached end of map?
bcc SkipEnd
;Re-initalise the map position.
ResetMap
lda #<Map
sta MapRead+1
lda #>Map
sta MapRead+2
SkipEnd
rts
;Hard Scroll screen layer 1 (Read one char, and shift it up)
DoHardScroll
ldx #$27 ;Calculate loops backwards, saves cycles
HardLoop1
lda row1,x ;Fetch a bottom row of characters on screen
sta row0,x ;Shift them up one row.
lda row2,x
sta row1,x
lda row3,x
sta row2,x
lda row4,x
sta row3,x
lda row5,x
sta row4,x
lda row6,x
sta row5,x
lda row7,x
sta row6,x
lda row8,x
sta row7,x
lda row9,x
sta row8,x
lda row10,x
sta row9,x
lda row11,x
sta row10,x
dex
bpl HardLoop1
ldx #$27
HardLoop2
lda row12,x
sta row11,x
lda row13,x
sta row12,x
lda row14,x
sta row13,x
lda row15,x
sta row14,x
lda row16,x
sta row15,x
lda row17,x
sta row16,x
lda row18,x
sta row17,x
lda row19,x
sta row18,x
lda row20,x
sta row19,x
lda row21,x
sta row20,x
lda row22,x
sta row21,x
lda row23,x
sta row22,x
lda row24,x
sta row23,x
dex
bpl HardLoop2
rts
;Multiple IRQ raster interrupts (Synchronize timer, and
;also setup the blank screen position at the screen bottom area
irq inc $d019
lda #$00 ;Raster position set
sta $d012
lda #$70 ;Stable illegal opcode, to make a black line
sta $d011 ;cover a row
lda #1 ;Force sync timer to switch on.
sta SYNCTIMER
ldx #<irq2;Move to next interrupt
ldy #>irq2
stx $0314
sty $0315
jmp $ea7e
;IRQ Raster interrupt 2 - The main smooth vertical scroller
irq2 inc $d019
lda #$fa
sta $d012
lda YPOS ;GRAB position Y
ora #$10 ;Output mode to screen on
sta $d011
ldx #<irq ;
ldy #>irq
stx $0314
sty $0315
jmp $ea7e
SYNCTIMER !byte 0
YPOS !byte 0
*=$2000 ;experimental custom charset
!bin "charset.bin" (Or if C64 charset !bin "charset.prg",,2)
*=$3000
!bin "map.bin" (Or if C64 charset !bin "map.prg",,2
Map
MapEnd
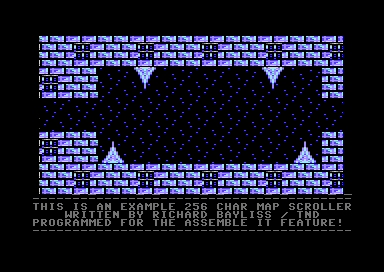
My test scroller looks like this:

I know, it looks really basic and naff, but this is only a test map :)
SCROLLING DOWNWARDS
Scrolling a screen upwards is usually a simple way to go. Especially if you wanted to do something like an upwards scroll for moving text messages for an intro or demo parts, or maybe something like a dowhill skiing simulator, etc. This isn't really all that feasible for writing many scrolling games, unless you wanted to do something like a platform jumper, where a player is contuously falling, until reaching a platform, which pushes the player upwards. Usually a lot of C64 games, for example SEUCK games, and great commercial titles in C64's history use a down scroller. Let us take Slap Fight, Dragon Spirit, Light Force, Denarius (I'd better be careful how I pronounce it and not mistake it for Katakis) and the original SEUCK, etc. as an example. Unlike the upscroller example (above), the process has to be reversed in order to do a downwards scroll. We add the value of a position of a soft scroll instead of subtract a position, but there is more than meets the eye. Using the same map and example above. We try to do a simple downwards smooth scroll:
;Simple full screen down by Richard Bayliss
;2019 - Assemble It tutorial
;http://tnd64.unikat.sk
row = $0400 ;Declare screen RAM starting row.
row0 = row ;Each row is set manually where the screen line for a 1x1 charset
row1 = row+40 ;is rowN = row + y*40. For example row7 = 280, which is (row7 = row + 7 * 40 = 280)
row2 = row+80
row3 = row+120 ;We deal with 24 rows for this scroller. The last row will be
row4 = row+160 ;reseved
row5 = row+200
row6 = row+240
row7 = row+280
row8 = row+320
row9 = row+360
row10 = row+400
row11 = row+440
row12 = row+480
row13 = row+520
row14 = row+560
row15 = row+600
row16 = row+640
row17 = row+680
row18 = row+720
row19 = row+760
row20 = row+800
row21 = row+840
row22 = row+880
row23 = row+920
row24 = row+960
;Please feel free to use this source should you wish to.
!to "downscroll.prg",cbm
*=$0801 ;BASIC SYS 2064 call
!basic 2064
*=$0810
sei
;Blackout the border and screen
lda #$00
sta $d020
sta $d021
;Setup charset @ $2000
lda #$18
sta $d018
;Pad the screen with the spacebar character
;and colour white.
ldx #$00
fillscreen
lda #$20
sta row,x
sta row+$100,x
sta row+$200,x
sta row+$2e8,x
lda #$01
sta colr,x
sta colr+$100,x
sta colr+$200,x
sta colr+$2e8,x
inx
bne fillscreen
;Setup a synchronized IRQ Raster interrupt for the smooth downscroller
;routines.
ldx #<irq
ldy #>irq
lda #$00
stx $0314
sty $0315
sta $d012
lda #$7f
sta $dc0d
lda #$1b
sta $d011
lda #$01
sta $d01a
cli
;Perform a synchronized timer before performing
;an upward scroller.
LOOP lda #0
sta SYNCTIMER
lda SYNCTIMER
cmp SYNCTIMER
beq *-3
jsr DownScroll ;Call upward scroller
jmp LOOP
;Perform down scroller
DownScroll
lda YPOS
clc
adc #$01
sta YPOS
lda YPOS
and #$07 ;Value of YPOS should read only $00-$07
sta YPOS+1 ;Store to an additional pointer YPOS+1
cmp #$00 ;Check if value of YPOS has reset to 0
beq HardScroll ;Yes, we can do the hard scroll
rts ;otherwise stop
HardScroll
jsr DoHardScroll
;After performing the hardscroll (Where each row is shifted)
;Pick the screen memory map location and then
;write it to the very first column
ldx #$27
MapRead lda MapEnd-40,x
sta row0,x
dex
bpl MapRead
;Now calculate the position of the 40 column map.
lda MapRead+1 ;Grab current row of map data
sec
sbc #$28 ;Shift to next row by 40 columns (1 whole 1x1 char row)
sta MapRead+1
lda MapRead+2 ;After all rows of map memory are read
sbc #$00 ;shift to the next hibyte address. (i.e. $1000 = $2000)
sta MapRead+2
lda MapRead+2
cmp #>Map ;Have we reached end of map? (The very top)
bcs SkipEnd ;no. Skip end... Otherwise ...
;Re-initalise the map position.
ResetMap
lda #<MapEnd-40
sta MapRead+1
lda #>MapEnd-40
sta MapRead+2
SkipEnd
rts
;The main hard scroll. This will fetch a chosen row on screen, and then
;shift it one row below. We simply start from the second last row
;of the character and place it one row down to the last row. We work each
;row copy all the way to the very first row.
DoHardScroll
ldx #$27 ;Calculate loops backwards, saves cycles
HardLoop1
lda row23,x
sta row24,x
lda row22,x
sta row23,x
lda row21,x
sta row22,x
lda row20,x
sta row21,x
lda row19,x
sta row20,x
lda row18,x
sta row19,x
lda row17,x
sta row18,x
lda row16,x
sta row17,x
lda row15,x
sta row16,x
lda row14,x
sta row15,x
dex
bpl HardLoop1
ldx #$27
HardLoop2
lda row13,x
sta row14,x
lda row12,x
sta row13,x
lda row11,x
sta row12,x
lda row10,x
sta row11,x
lda row9,x
sta row10,x
lda row8,x
sta row9,x
lda row7,x
sta row8,x
lda row6,x
sta row7,x
lda row5,x
sta row6,x
lda row4,x
sta row5,x
lda row3,x
sta row4,x
lda row2,x
sta row3,x
lda row1,x
sta row2,x
lda row0,x
sta row1,x
dex
bpl HardLoop2
rts
;Multiple IRQ raster interrupts (Synchronize timer, and
;also setup the blank screen position at the screen bottom area
irq inc $d019
lda #$ff ;Raster position set
sta $d012
lda #1 ;Force synchronised timer to switch on.
sta SYNCTIMER
lda #$70 ;Stable opcode value, to make a black line
sta $d011 ;cover a row or two
ldx #<irq2 ;Move to next interrupt
ldy #>irq2
stx $0314
sty $0315
jmp $ea7e
;IRQ Raster interrupt 2 - The main smooth vertical scroller
irq2 inc $d019
lda #$e2
sta $d012
lda YPOS+1 ;GRAB position Y
ora #$10 ;Output mode to screen on (Because if we didn't use
sta $d011 ;ORA #$10 the screen would have been switched off completely)
ldx #<irq ;
ldy #>irq
stx $0314
sty $0315
jmp $ea7e
SYNCTIMER !byte 0
YPOS !byte 0,0
*=$2000 ;experimental custom charset
!bin "charset.bin" (Or use !bin "charset.prg",,2
*=$3000 ;Screen map data
Map
!bin "testmap.bin" (Or use !bin "testmap.prg",,2
MapEnd
You can also view the complete source code
If you assemble and run the program above in C64Studio or ACME cross assembler. You will notice that this scroll will work smoothly on PAL machines. However on NTSC machines, the first row will flicker like hell. If you were to do a scroller like this for PAL machines, you'd be okay. However NTSC machines are pretty much more difficult to handle, if you are more used to PAL. Let's patch the scroll to work on NTSC. Simply alter the routine, to the hard scroll below and also add a new pointer called ROWTEMP. Simply go to the label DoHardScroll and replace it with this handy routine:
DoHardScroll ;(PAL+NTSC COMPATIBLE)
ldx #$27 ;Calculate loops backwards, saves cycles
HardLoop1
lda row10,x ;Grab the 11th row
sta ROWTEMP,x ;Store to a self-modyfying pointer ROWTEMP.
lda row9,x ;Grab 10th row,
sta row10,x ;Store to 11th row.
lda row8,x ;and so on, all the way to the very first row (row0)
sta row9,x
lda row7,x
sta row8,x
lda row6,x
sta row7,x
lda row5,x
sta row6,x
lda row4,x
sta row5,x
lda row3,x
sta row4,x
lda row2,x
sta row3,x
lda row1,x
sta row2,x
lda row0,x
sta row1,x
dex
bpl HardLoop1
ldx #$27
HardLoop2
lda row23,x ;In the second loop work from the second bottom, and
sta row24,x ;paste to the next row - working the row calculation
lda row22,x ;up 1 row at a time.
sta row23,x
lda row21,x
sta row22,x
lda row20,x
sta row21,x
lda row19,x
sta row20,x
lda row18,x
sta row19,x
lda row17,x
sta row18,x
lda row16,x
sta row17,x
lda row15,x
sta row16,x
lda row14,x
sta row15,x
lda row13,x
sta row14,x
lda row12,x
sta row13,x
lda row11,x
sta row12,x
lda ROWTEMP,x ;Grab stored row from ROWTEMP (Copied from the 11th row)
sta row11,x ;store it to the 12th Screen Row.
dex
bpl HardLoop2
rts
ROWTEMP !fill $28,$00 ;Self-Modifying consisting of 40 pointers (We filled this are with 40 @'s exclusively)
View downscroll example listing
Okay, so by now, by looking at the routines, you probably might now know a bit on how a downscroll works. (We did about upward scrolling in chapter 3). The examples which I showed you are quite practical, but why don't we do something more interesting with an upscroll ... Well look below, because it's GAME MAKING TIME :)
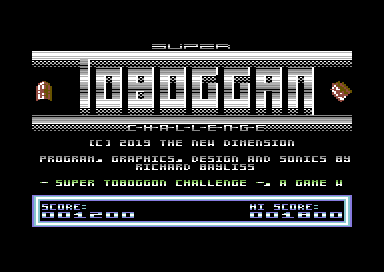
GAME 10 - SUPER TOBOGGAN CHALLENGE
CLICK DISK ABOVE TO DOWNLOAD COMPLETE SOURCE + BINARY DATA
The complete package comes with the game binary data, charpad work graphics and also the complete game project source, which can be loaded into C64Studio. There is also a RELEASE folder, which contains the public D64 and TAP release of the game which has respectively been put together.
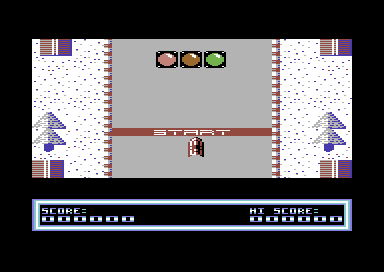
We are going to make a little game. Also for a change, we are not going to make another of those space blasters. Instead, I came up with an alternative idea. We are going to create a winter sports game. I remember reading a book many years ago, while I was a teenager, called Commodore Omnibus, which I used to borrow at the local library for type in games. It had a type in game called Toboggan Run (I think that might have been the name) which was all in BASIC. For this edition of Assemble It, I have decided to create my own toboggan run, but nothing like in the book. First of all it isn't a BASIC type in game. The second thing is that it has a few additional ideas I came up with. So there you go. Anyway, what's this game going to be all about? ... Read on to find out more.
Super Toboggan Challenge is a smooth vertical scrolling dodge and collect game, in the mode of winter sports. This is a score attack challenge in which you have to guide your tobaggon through an infinite course. You must pick up flags as you slide throughout the course. For every flag picked up, you will score 150 points. However, should you reach near the end of the course, you will be given a bonus of 1000 points added to your score. This may sound like an easy challenge, but not exactly. The course has been poorly maintained. Parts of the slope are broken, and additional random objects are placed on the slope, such as barriers, rocky debris and tree logs. If you crash into any obstacles or hit the water, you will lose the challenge. Try to score as many points as you possibly can, before losing. Also try and challenge friends to see who can get a high score, while playing the game.
Controls:
LEFT and RIGHT on Joystick port 2 to move your tobaggon.
So there you go. Do you accept the challenge?
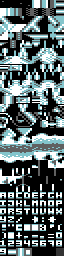
THE GRAPHICS/ASSETS
Before we start building this game. We want some graphics. First of all, because of the size of my map. I decided not to show a snapshot of the entire map on this page. However, here are the game charsets, which sort of represent the map. If you take a look at the filename, ST_Graphics, in Charpad V2.0 The first 20 chars (0 - 19) will be representing the safe chars, which the player is allowed to move across. Character 179 represents the collectible flag, and the rest of the characters all are classed as deadly chars. The deadly chars are there to force the player in losing the Super Toboggan Challenge (As you may have guessed).

I also provided two different map types in this tutorial. The first (ST_Graphics.ctm) represents the map, which consists of a map made with 5x5 tiles (Similar size to what you get with SEUCK). However, since we don't want to program the game using tiles, but using chars only. Select the option 'Disable Tiles'. This will then remove the tiles, and replace them with single chars. I have also done a second file (ST_Graphics_No_Tiles.ctm).
There's a BIN folder, which consist of the following attributes for the game code:
gamecharset.bin - The game's charset data
gamemap.bin - The game's map data (charset based, not tiled based)
The second set of graphics, (ST_Title_Logo.ctm) represents the front end and score panel.
There are 3 special chars in which are being used for the logo's scrolling effect. The chars are 129,130,131. These all represent the scrolling inside the TOBOGGAN logo.
The logo looks a bit like THIS:

The chars between 64 and 110 represent the score panel characters. This has been made in a slightly different way, compared to a normal 1x1 char. A subroutine in masking the score panel will show how 2 sides of a score char is formed. More on that later. Here's how the score panel should show up as:

The exported filenames for the title screen charset, and score panel screens are:
textcharset.bin (Title screen, logo + panel charset)
logomatrix.bin (Title screen logo screen data)
stauspanel.bin (Score panel screen data)
The Game Sprites:
The game sprites look something like this:

Sprites 0 and 1 - represent animation of the player's toboggan
Sprites 2 - 9, represent the animation of the explosion.
Sprites 10,11 and 12 are the Ready, Set Go lights for the start of the game
Sprites 13 - 20 are the GAME OVER word sprites
Sprites 21 - 28 are the title screen sprites, where the toboggan sprites rotate.
The Music:
The music file was done in Goat Tracker, and it consists of 7 different tracks. These are as follows:
TRACK 0 - In game music
TRACK 1 - LIGHT Red, Yellow
TRACK 2 - LIGHT Green
TRACK 3 - Crash
TRACK 4 - Game Over jingle
TRACK 5 - Get Ready jingle
TRACK 6 - Front End music (Title Screen)
The filename of course is music.prg
The code:
First of all if you wish:
DOWNLOAD THE C64STUDIO SOURCE + BINARY DATA
Extract it to a directory of your choice (as usual). Load in C64Studio V5.9 (or whichever version you have installed on your HDD on your PD). then open the filename Super_Toboggan_Challenge_-_Assemble_It
You will notice something different regarding this project. I have highlighted toboggan.asm as the main target assembly source. This is done in order to allow this file to be assembled FIRST before any other linked files. This saves me having to click tabs before re-compiling the data and source. The game has 3 different source files (Which you can also view by clicking on the links to the files below). As usual, the code is self-explainable.
toboggan.asm - The main target file to be assembled, including importing of binary files.
titlecode.asm - Complete code for the title screen/front end
gamecode.asm - Complete code for the main game and main game pointers]
Right, let's divide everything to each section for this game project:
toboggan.asm
There isn't much by the way of code to explain about here. However, let me tell you what is in this source file.
First of all, as well as the introductory comments, we have some variables:
Hardware screen based variables:
split1 - split4 = (value) represents the set position of where raster splits will be placed inside multiple IRQ interruptys/
screen = $0400 is the starting VIDEO RAM area in which screen data should be displayed to. It is also the default screen RAM position
rowtemp = $0100 is where a self-modifying row read from the map data is placed.
ScoreMask = $0771 is the screen position where the player's score is placed.
HiScoreMask = $078b is the screen position, where the High Score is placed.
Status Message = $0756 is the screen position, where we place WELL DONE, or BAD LUCK after game over takes place.
row0 = screen to row24 = screen +19*40 represents the screen row position where the scrolling map is stored to.
Software charset based variables:
SafeArea = 20 represents the safe char area, in which is based on the software based sprite/background collision detection routine
Flag = 179 - As indicated earlier on in this game tutorial, char 179 represents the flag, which the player has to pick up.
Sprite based variables:
LeftStopPosition = $0e is the minimum area which the player can move to when moving to the left of the screen.
RightStopPosition = $9e is the maximum are which the player can move to when moving to the right of the screen
zp = $70 is the zeropage based value, which corresponds to the software based sprite/background collision
Game screen based variables:
ypos = $05 is the zeropage set for controlling the smooth down scroll inside a raster split in order to perform a soft scroll while cycling through the game's map and storing it to the screen.
GameMapStartPosition = MapEnd-25*40 represents the starting position of where the map is on screen. Since after all when scrolling through a map using a down scroll, the map scrolls from the bottom position, all the way to the top of the end point.
GameMapDefaultPosition = MapEnd-26*40 represents the default starting position of the map on screen.
Music based variables:
GameMusic = 0 is the value of the in game music
LightRed = 1 is the Get Ready light sound (Low beep)
LightGreen = 2 is the Green light sound (Long high beep)
Bang = 3 is the sound for the player smashing into an obstacle.
GameOverTune = 4 is the game over jingle
GetReadyTune = 5 is the get ready tune
TitleMusic = 6 is the title / front end music
MusicInit = $1000 is the address, which the music initialise/restarts during programming
MusicPlay = $1003 is the address which the music plays (Usually inside an IRQ raster interrupt.
At $0800, we import the game charset graphics data, then $1000 import the music data. $2000 has sprites imported. followed by the status panel and title screen charset at $2800. Following that, a status/score panel charset is inserted into spare memory $2d00 (Since the title screen charset isn't all that huge in size).
At $3000. A one-time code which is run to test between PAL and NTSC machines.
Titlecode.asm, is then added to the source code. Followed by gamecode.asm. Then 256 bytes are filled to make a clean space before importing the title screen code. (Which titlecode.asm then gets added).
Next the game map data is imported. MapStart = $5000, and MapEnd = where the map ends after importing.
Finally we complete the main project file by importing the main title screen logo.
titlecode.asm
This is the main code for the front end. First off, we kill off all of the existing interrupts. Then we disable any existing sound that is playing, switch off the the screen and initialise pointers for example ANIMDELAY and ANIMPOINTER. These two pointers are for the front end and in game sprite animation. We also initialise the COLOURBARDELAY and COLOURBARPOINTER so that it runs from the start. Also we do a reset of the colour bar, by calling the subroutine, which does the colour bar swap. So that at the start of the front end the scrolling logo multi colours are light blue and cyan
Next the title screen graphics are set up. Simply the charset for the front end (Read from $2800) is poked to the $0400-$07e7 screen RAM and also the border and background is set to black. The screen is cleared using the usual filling $0400-$07e7 with spacebar character loop. The scroll text is initialise (Simply by storing the low and high bytes of ScrollText to the self modifying loop value MessRead, which by now you should already know by heart. The sprite positions (Well, the virtual object positions, also known as ObjPos) are all initialized. Object positions and values for the two toboggans (which are set to spin on the title screen) are put in place, and formed, painted red. Only two sprites are enabled 0 and 1. Also we disable all sprite expansions and priorities. This is just in case a program linked to this program has sprites which expand or go behind the background, and not yet been initialized on an intro, loader or something similar.
Now we draw the main title screen, by reading from the LogoMatrix, row by row, until it has been drawn to the 12th row (row11) using a loop of 40 characters per row. Then we draw the credits from the text pointers line1 to line3 to the screen RAM. Finally before setting up any interrupts, we draw the masked score panel and place to the bottom area of the title screen. The FIREBUTTON trigger pointer is then initialized. After all, after pressing fire on a game over screen, we need to control the fire pressing. The sensitivity of the fire button can be very high, even when you do a simple tap. The trigger is there to prevent the sensitivity of the fire button.
We now setup the multiple IRQ interrupts (Well, initialise those), and the title music, before calling a synchronized loop for the main title code, that calls 6 subroutines. The 6 subroutines expands the sprite area and stores virtual sprite position to actual hardware sprite X,Y positions. Other routines call the a score conversion subroutine, the title screen scroll text, scrolling colour bar behind the logo, animate/rotate the title sprites and then A fire press check is also in place. If fire is pressed, but not let go, the synchronized loop (TitleLoop) will continue running. Otherwise, leaves the title screen loop and runs the start of the game code (gamecode.asm) by calling jmp GameCode.
The Title Screen looks something like this:
gamecode.asm
This is the main code for the game. Like with the front end, we start off by initializing everything. We set the $01 value to $36 in order to allow memory $a000-$bfff to be read as well as memory $0100-$9fff and $c000-$cfff. The VIC2 registers for border, background, multi colours, charset mode, and horizontal screen default position are set. Also we initialise the pointer LIGHTMODE to 0. This is used to time, and then select which get ready light should be displayed before the player can race off on the track. More on this shortly. A loop is also called to reset the player's score and draw the main starting screen, read from GameMapStartPosition The score panel is re-drawn and initialized, along with some unnecessary screen junk being cleared away. game sprite defaults (frame, colour and positions) are set. The game map is initialized .
A multiple interrupt routine is set up, initializing the GET READY theme tune. We clear the IRQ flag, and then create a synchronized timed loop. So that the music will play, and control which starting light should commence before allowing the main game to start. We use 3 different lights. Red, Amber and Green. Once all 3 have lit up, the game can the progress on to the next synchronized loop.
Now we start the game from StartTheGame this will set up the main in game music. Then call a new synchronized loop, which will expand the sprite screen area (ExpandMSB), scroll the screen (using the vertical scrolling hard+soft scroll subroutine (Scroller), similar to the one in the previous sub chapter). Also the player control (PlayerControl) is called, in order to allow use of joystick in port 2 left/right. So that the player can move the toboggan. Followed by animations on the player (AnimatePlayer), which uses a two sprite frame to look as if ice is being sprayed from the course. Followed by background animation (AnimateWaterChar), which picks the chosen characters that scrolls the water char continuously. An additional subroutine RemoveLights, simply scroll the lights off screen to the right until out. Then there is the score masking code (ScoreConvert) that converts the scoring value pointers into the status panel characters, like in the main front end.
A lot of the source is pretty much straight forward, so I need not explain everything, but of course if you look at the subroutine SPRBGRCollision, which indicates the player's sprite/background collision. You will notice something slightly different here. I have done two different calculations, and called the CollisionTest subroutine twice. The reason for this is because the collision for the toboggan should take place at the top middle, and direct central sprite area. Collision should not take place elsewhere. It is important to start with a collision = good char (even if it is over the safe char range). That is because rest assured, we get a fair non-deadly collision (if a char is mixed with deadly characters). Then a range of deadly chars should be read lastly. If we did this the other way round. There would be a bug in the collision code, and the player will lose if it tries to pick up a flag. And this is what would happen:
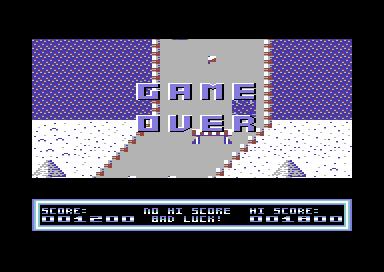
Yes, that's right. The player will die, and the GAME OVER screen will run and play the GAME OVER jingle.
Scoring:
For scoring, I have based it in two different ways. First of all, if a flag is picked up, a score subroutine inside a loop (Value will calculate amount of points to be added to the panel) is read. Also after the map has restarted after the GOAL memory position has been read. The score routine will give 1000 points to the player as a bonus, before the player has to go through the entire course again. The way to calculate a score is simply like this:
ldy #ScoreValue (x*10 points-1)
ForceScore jsr AddScore
dey
bpl ForceScore
or
ldx #$00
ForceScore jsr AddScore}
inx
cpx #ScoreValue (x*10 points)
bne ForceScore
rts
Okay. I can now leave it to you to check out the code and explore it. Oh, and try to make your own cool games using the existing source. If you do manage to make something from it, please feel free to share it with me. If you'd like it to be published on the TND web site. I might consider to add something to the contributors page for you.
If you are feeling ambitious and would like to try using tiles + maps approach to your up/down scrolling programs. I strongly recommend that you check out Achim Voilker's excellent tile/map decoding tutorial on CodeBase64.
Coming soon:
CHAPTER 7 - Mastering your final production to different physical/digital media + tips
Probably the most boring subject in the Assemble It feature, but it can be a good option for you to learn from. Although there is nothing to download from this little chapter. There are some example games which also use the housekeeping method anyway. So how helpful is this part of the chapter supposed to be for you?. Let us put things this way. If you were to create a bigger game project, and use just one assembly file to program your game. There could be very long strings of code, and you can easily get yourself lost. (Like you probably are already in this part of the chapter).
Let us say for example, you are writing a new C64 game, it has a title screen, the main game, and fully animated end sequence. You should create SEPARATE assembly files in which should be linked to your project. Let us take for example, Missile Blasta (from the previous chapter) for example. The game should be split into separate assembly files: The main project code (to assemble to should be MISSILEBLASTA.ASM TITLESCREEN.ASM, GAMECODE.ASM, ENDING.ASM. (To create your own assembly source code, simply do the same as you did before when you created a new project. (ADD, NEW ASSEMBLY FILE, enter name of your assembly code). It will be placed in the project.
Now what if you wanted to link the entire source together, which you already done - placed into separate files?
Simple:
You enter !source "assemblyfile.asm"
An example for setting a Missile Blasta V2, project with additional ASM files would sort of look something like this:
;Missile Blasta - Remastered V2
;by Richard Bayliss
;For Assemble It 2018
!to "MISSILEBLASTA.PRG",CBM
;setup basic / sys start address (since nothing
;is overlapping memory $0801)
*=$0801
!basic 2018,$3800
*=$0c00
attribs
!bin "bin/attributes.bin"
;insert the sprites
*=$2000
!bin "bin/sprites.bin"
;insert the status screen (pre-built from older build)
*=$2700
!bin "bin/status.prg",,2
;insert the game binary charset
*=$2800
!bin "bin/charset.bin"
;insert the game screen binary (made from charpad)
*=$3000
gamematrix
;insert the game screen matrix (made from charpad)
!bin "bin/screen.bin"
*=$3400
titlematrix
;Insert the title screen matrix (made from charpad)
!bin "bin/titlescreen.bin"
;Main game code
*=$3800
!source "GAMECODE.ASM"
;Insert title screen code
!source "TITLECODE.ASM"
;Insert end sequence code
!source "ENDCODE.ASM"
scorebackup
!bin "bin/status.prg",,2
;insert the music (,,2 prg)
*=$8000
!bin "bin/music.prg",,2
;goat tracker custom sound effects table
So remember, any time you create a new C64 project (Which you will discover in the next few chapters on this page), always organize your project into separate parts. It isn't all that hard.
BACK TO TOP
Custom Sprite Movement
There are several different ways in which you can make a custom based movement of an object. Let us say for example rather than a sprite going one specific direction, you can alter directions for each sprite.
The directional detection movement
Example: Honey Bee
There is also another method to sprite movement. Let us take for example you are writing a game, such as Honey Bee, Balloonacy or any sort of single screen dodge, collect and platform game. You would want to have objects moving in a fixed direction, then flip from one direction to another. This is probably the most simplest approach to custom sprite movement. A subroutine is called to first check the value of a pointer, for example ObjDir is set as the object direction. If the value of ObjDir is set to a specific value, called, for example 0 = Up, 1 = Down, 2 = Left, 3 = Right then the code should call the sprite object to move that specific direction. That is of course until it reaches the set limited position, from either a fixed value, or a value from a custom pointer. Then the code forces the object to change direction. The code snipped below shows an example of how to move a single sprite object using that specific method.
;Move sprite, according to direction snippet
TestObjectDirection
lda ObjDir
cmp #UP
bne NotUp
jmp MoveUp
NotUp
cmp #DOWN
bne NotDown
jmp MoveDown
NotDown
cmp #LEFT
bne NotLeft
jmp MoveLeft
NotLeft
cmp #RIGHT
bne NotRight
jmp MoveRight
;Move sprite UP, then once set at limited position,
;switch the direction to DOWN.
MoveUp
lda ObjPos+1 ;Grab position of object Y
sec
sbc #2 ;Movement speed backwards
cmp #$32 ;Stopping position
bcs UpdateUp ;Not reached destination yet
lda #DOWN ;Force DOWN to pointer ObjDir
sta ObjDir
rts
UpdateUp ;Store new position to object Y
sta ObjPos+1
rts
;Move sprite DOWN, then once set at limited position,
;switch the direction to UP.
MoveDown
lda Objpos+1 ;As before, grab position of object Y
clc
adc #2 ;Movement speed forwards
cmp #$f2 ;Has sprite reached the bottom?
bcc UpdateDown ;Not reached destination yet
lda #UP ;Force UP to pointer ObjDir
sta ObjDir
rts
UpdateDown ;Store new position to object Y
sta ObjPos+1
rts
;Move sprite LEFT, then once set at limited position,
;switch the direction to RIGHT.
MoveLeft
lda ObjPos ;This time we are using X
sec
sbc #1 ;Movement speed backwards
cmp #$0c ;Has sprite reached left most limit
bcs UpdateLeft ;Not reached destination yet
lda #RIGHT ;Force RIGHT to pointer ObjDir
sta ObjDir
rts
UpdateLeft ;Store new position to object X
sta ObjPos
rts
;Move sprite RIGHT, then once set at limited position
;set the direction to LEFT.
MoveRight
lda ObjPos ;Grab current position of sprite
clc
adc #1 ;Movement speed forwards
cmp #$a2 ;Has the sprite reached right most limit?
bcc UpdateRight ;Not reached destination yet
lda #LEFT ;Force direction LEFT to pointer ObjDir
sta ObjDir
rts
UpdateRight ;Store now position to object X
sta ObjPos
rts
This code snippet above shows only an example of moving one sprite back and forth, depending on which direction you have set the pointers. But what if you wanted to do this to ALL 8 sprites? Well, it is possible to move each sprite individually using multiple routines and macros. Simply define some pointers for direction for each sprite, also define macros correctly and call a few subroutines to test each sprite movement. Also have a play around with the example source snippet and see what you can make from it.
View source code
BACK TO TOP
GAME 8: Granny's Teeth (The original 4K Craptastic Compo version)
Although I have showed you an example of the code above to allow all 8 sprites move according to path/direction. We are going to show you an example game, which uses a similar approach, although it is quite an old game. Back in 2016 I entered the C64 craptastic game making compo, which was to create and develop a game that squeezed into 4K (after compression through the ALZ64 compressor). It was a platform game, inspired by one of those games creator games, from back in the early-mid 1980's. This game was made to look a bit like one of those Games Creator/Creations games, only just for fun. However, to prove that this game was NOT made with the games creator. A complete project binary+source has been provided to accompany this chapter on fixed sprite movement and changing directions.
So what's this game all about?. You play the role of Granny, who has tucked her grandchildren into bed. Locked all of the doors, and placed her teeth safely into her room and went to sleep. The next morning, Granny wakes up to find her teeth had gone missing. Also, she finds that her house has been ransacked. The floorboard had collapsed revealing that her house was built over a swimming pool. Her cat and dog are on the loose, a bird has flown in, and who the heck let that spider in?. If all was that bad? Her teeth had gone missing. The kids were playing with her teeth and thrown them into the fishbowl. It is now up to you to try and fish your teeth out.
Granny must jump from platform, to platform, avoiding contact with any tacks strewn on the floor. She cannot swim either. She has to avoid any moving objects or pets in sight and pick up her teeth. You will score bonus points and move on to the next level for every time teeth have been picked up.
This game also features an implementation of Achim Volker's useful Sprite/Background collision which calculates the X, Y position of the player sprite, and checks whether or not the lower part of the sprite is touching the pixel of the background (When using software sprite/background based collision, X and Y position of the player sprite must be accurately set to the pixel which the player object lands. This game also uses the directional control of the sprite movement, similar to very first example in this category. A software sprite/sprite collision detection is used. The project also uses the project housekeeping method which helps organize the program files and code. The active assembly file is of course Granny.asm. So this file should be marked as active source when compiling the binary data and code.
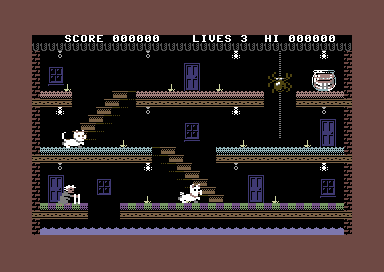
Download the full C64 Studio binary + source code to Granny's Teeth
BACK TO TOP
You are writing a space shoot 'em up. You have a player which is controlled by a joystick. The player can fire, but there are also enemies that can move around. There are two different ways in which you could create an attack movement pattern for an enemy sprite. They are as follows:
Recorded Path Movement
Example: X-Force

The recorded path movement is simply created utility based. The utility based path movement, is where you record and create the movement, according to the position of a sprite you set it. A maximum of 256 units is used for making your own alien path movement. One particular tool which can produce custom object movements, based on sprite position is the TND Alien Movement Maker V1.0+ (Available in the utilities section). This tool allows you set a starting position to a sprite and then record its movement. Be very careful when using this. You'll need to remember the screen size which you plan your game project. I first created my own source code to do this for the game X-Force (pictured above). A small code example for moving an object based on table movement would look something like this:
;Example path movement code (based on reading the table)
MoveEnemy1
ldx Enemy1MovePointer ;Pointer to set position of enemy
lda PositionTable,x ;Read PositionTableX to grab a X position
sta EnemySpritePosX ;Write the position to the sprite X position
lda PositionTable+$100,x ;Read PositionTableY to grab a Y position
sta EnemySpritePosY ;Write the position to the sprite Y position
inx ;Increment value of pointer loop for moving object
beq RemoveEnemy1 ;Until all 256 byts are read
inc Enemy1MovePointer ;Increment EnemySpritePos X+Y table by 1 byte
rts
RemoveEnemy1 ;All 256 bytes from X+Y position table complete.
ldx #0 ;Reset the pointer of the enemy movement
stx Enemy1MovePointer
jsr SetNextTable ;Call a subroutine to move the next table.
rts
;Example binary file (inside project)
*=$7000 ;Or where to put the movement data
PositionTable
!bin "movement.prg",,2
Please also note that this method uses slightly more memory. Alternatively, if you cannot wait all that long .... You can check out issue 27 of Scene World, and check out the source code for Zap Zone
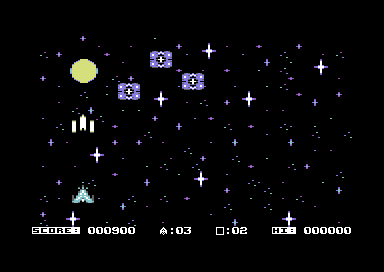
Alternatively, if you want to learn an even bigger/advanced phase in game programming. You could always try Star Toast from issue 28 of Scene World magazine. Please note that both games were coded in 64ASM, which means that you will need to alter some of the pseudo commands, should you wish to port those games to C64STUDIO, and tweak the code for fun. (Or make your own game from it).
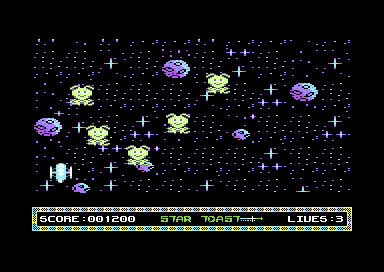
BACK TO TOP
The Timed Control Movement
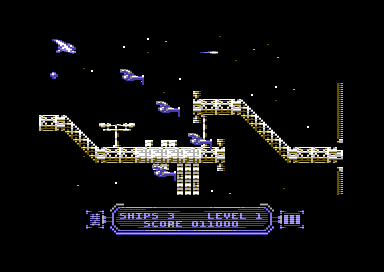
Example: Starfysh
There is also another example, which is slightly trickier, compared to the option (above). Especially if you want to have objects using timed movement, based on behaviour patterns. This is because you need to use MORE pointers, although it does use up less memory. The trick does work a treat. You first set the starting X, Y position of a sprite outside the border. Set the pointer/delay and then another pointer read, to read the table position, also your read the speed table of the sprite. After the time of one position has expired, the table read pointer increments to the next position on the table, recording the next X,Y speed (direction) of the object. Then store it to the sprite position. Sometimes this can result into awkward consequences, but eventually you can get some great enemy movement patterns - and not just going one straight direction. Of course, you will need to create/generate a table of bytes that set the time value for each movement, X-Speed, Y-Speed of moving sprite, and of course some other bits. You will be able to see a full implementation of enemy movement code in GAME 9 - BLASTOPIA. Which is also available on this chapter.
;Example timed speed object movement
MoveEnemy1
lda objpos+4There are several different ways in which you can make a custom based movement of an object. Let us say for example rather than a sprite going one specific direction, you can alter directions for each sprite.
The directional detection movement
Example: Honey Bee
There is also another method to sprite movement. Let us take for example you are writing a game, such as Honey Bee, Balloonacy or any sort of single screen dodge, collect and platform game. You would want to have objects moving in a fixed direction, then flip from one direction to another. This is probably the most simplest approach to custom sprite movement. A subroutine is called to first check the value of a pointer, for example ObjDir is set as the object direction. If the value of ObjDir is set to a specific value, called, for example 0 = Up, 1 = Down, 2 = Left, 3 = Right then the code should call the sprite object to move that specific direction. That is of course until it reaches the set limited position, from either a fixed value, or a value from a custom pointer. Then the code forces the object to change direction. The code snipped below shows an example of how to move a single sprite object using that specific method.
;Move sprite, according to direction snippet
TestObjectDirection
lda ObjDir
cmp #UP
bne NotUp
jmp MoveUp
NotUp
cmp #DOWN
bne NotDown
jmp MoveDown
NotDown
cmp #LEFT
bne NotLeft
jmp MoveLeft
NotLeft
cmp #RIGHT
bne NotRight
jmp MoveRight
;Move sprite UP, then once set at limited position,
;switch the direction to DOWN.
MoveUp
lda ObjPos+1 ;Grab position of object Y
sec
sbc #2 ;Movement speed backwards
cmp #$32 ;Stopping position
bcs UpdateUp ;Not reached destination yet
lda #DOWN ;Force DOWN to pointer ObjDir
sta ObjDir
rts
UpdateUp ;Store new position to object Y
sta ObjPos+1
rts
;Move sprite DOWN, then once set at limited position,
;switch the direction to UP.
MoveDown
lda Objpos+1 ;As before, grab position of object Y
clc
adc #2 ;Movement speed forwards
cmp #$f2 ;Has sprite reached the bottom?
bcc UpdateDown ;Not reached destination yet
lda #UP ;Force UP to pointer ObjDir
sta ObjDir
rts
UpdateDown ;Store new position to object Y
sta ObjPos+1
rts
;Move sprite LEFT, then once set at limited position,
;switch the direction to RIGHT.
MoveLeft
lda ObjPos ;This time we are using X
sec
sbc #1 ;Movement speed backwards
cmp #$0c ;Has sprite reached left most limit
bcs UpdateLeft ;Not reached destination yet
lda #RIGHT ;Force RIGHT to pointer ObjDir
sta ObjDir
rts
UpdateLeft ;Store new position to object X
sta ObjPos
rts
;Move sprite RIGHT, then once set at limited position
;set the direction to LEFT.
MoveRight
lda ObjPos ;Grab current position of sprite
clc
adc #1 ;Movement speed forwards
cmp #$a2 ;Has the sprite reached right most limit?
bcc UpdateRight ;Not reached destination yet
lda #LEFT ;Force direction LEFT to pointer ObjDir
sta ObjDir
rts
UpdateRight ;Store now position to object X
sta ObjPos
rts
This code snippet above shows only an example of moving one sprite back and forth, depending on which direction you have set the pointers. But what if you wanted to do this to ALL 8 sprites? Well, it is possible to move each sprite individually using multiple routines and macros. Simply define some pointers for direction for each sprite, also define macros correctly and call a few subroutines to test each sprite movement. Also have a play around with the example source snippet and see what you can make from it.
View source code
BACK TO TOP
GAME 8: Granny's Teeth (The original 4K Craptastic Compo version)
Although I have showed you an example of the code above to allow all 8 sprites move according to path/direction. We are going to show you an example game, which uses a similar approach, although it is quite an old game. Back in 2016 I entered the C64 craptastic game making compo, which was to create and develop a game that squeezed into 4K (after compression through the ALZ64 compressor). It was a platform game, inspired by one of those games creator games, from back in the early-mid 1980's. This game was made to look a bit like one of those Games Creator/Creations games, only just for fun. However, to prove that this game was NOT made with the games creator. A complete project binary+source has been provided to accompany this chapter on fixed sprite movement and changing directions.
So what's this game all about?. You play the role of Granny, who has tucked her grandchildren into bed. Locked all of the doors, and placed her teeth safely into her room and went to sleep. The next morning, Granny wakes up to find her teeth had gone missing. Also, she finds that her house has been ransacked. The floorboard had collapsed revealing that her house was built over a swimming pool. Her cat and dog are on the loose, a bird has flown in, and who the heck let that spider in?. If all was that bad? Her teeth had gone missing. The kids were playing with her teeth and thrown them into the fishbowl. It is now up to you to try and fish your teeth out.
Granny must jump from platform, to platform, avoiding contact with any tacks strewn on the floor. She cannot swim either. She has to avoid any moving objects or pets in sight and pick up her teeth. You will score bonus points and move on to the next level for every time teeth have been picked up.
This game also features an implementation of Achim Volker's useful Sprite/Background collision which calculates the X, Y position of the player sprite, and checks whether or not the lower part of the sprite is touching the pixel of the background (When using software sprite/background based collision, X and Y position of the player sprite must be accurately set to the pixel which the player object lands. This game also uses the directional control of the sprite movement, similar to very first example in this category. A software sprite/sprite collision detection is used. The project also uses the project housekeeping method which helps organize the program files and code. The active assembly file is of course Granny.asm. So this file should be marked as active source when compiling the binary data and code.
Download the full C64 Studio binary + source code to Granny's Teeth
BACK TO TOP
You are writing a space shoot 'em up. You have a player which is controlled by a joystick. The player can fire, but there are also enemies that can move around. There are two different ways in which you could create an attack movement pattern for an enemy sprite. They are as follows:
Recorded Path Movement
Example: X-Force
The recorded path movement is simply created utility based. The utility based path movement, is where you record and create the movement, according to the position of a sprite you set it. A maximum of 256 units is used for making your own alien path movement. One particular tool which can produce custom object movements, based on sprite position is the TND Alien Movement Maker V1.0+ (Available in the utilities section). This tool allows you set a starting position to a sprite and then record its movement. Be very careful when using this. You'll need to remember the screen size which you plan your game project. I first created my own source code to do this for the game X-Force (pictured above). A small code example for moving an object based on table movement would look something like this:
;Example path movement code (based on reading the table)
MoveEnemy1
ldx Enemy1MovePointer ;Pointer to set position of enemy
lda PositionTable,x ;Read PositionTableX to grab a X position
sta EnemySpritePosX ;Write the position to the sprite X position
lda PositionTable+$100,x ;Read PositionTableY to grab a Y position
sta EnemySpritePosY ;Write the position to the sprite Y position
inx ;Increment value of pointer loop for moving object
beq RemoveEnemy1 ;Until all 256 byts are read
inc Enemy1MovePointer ;Increment EnemySpritePos X+Y table by 1 byte
rts
RemoveEnemy1 ;All 256 bytes from X+Y position table complete.
ldx #0 ;Reset the pointer of the enemy movement
stx Enemy1MovePointer
jsr SetNextTable ;Call a subroutine to move the next table.
rts
;Example binary file (inside project)
*=$7000 ;Or where to put the movement data
PositionTable
!bin "movement.prg",,2
Please also note that this method uses slightly more memory. Alternatively, if you cannot wait all that long .... You can check out issue 27 of Scene World, and check out the source code for Zap Zone
Alternatively, if you want to learn an even bigger/advanced phase in game programming. You could always try Star Toast from issue 28 of Scene World magazine. Please note that both games were coded in 64ASM, which means that you will need to alter some of the pseudo commands, should you wish to port those games to C64STUDIO, and tweak the code for fun. (Or make your own game from it).
BACK TO TOP
The Timed Control Movement
Example: Starfysh
There is also another example, which is slightly trickier, compared to the option (above). Especially if you want to have objects using timed movement, based on behaviour patterns. This is because you need to use MORE pointers, although it does use up less memory. The trick does work a treat. You first set the starting X, Y position of a sprite outside the border. Set the pointer/delay and then another pointer read, to read the table position, also your read the speed table of the sprite. After the time of one position has expired, the table read pointer increments to the next position on the table, recording the next X,Y speed (direction) of the object. Then store it to the sprite position. Sometimes this can result into awkward consequences, but eventually you can get some great enemy movement patterns - and not just going one straight direction. Of course, you will need to create/generate a table of bytes that set the time value for each movement, X-Speed, Y-Speed of moving sprite, and of course some other bits. You will be able to see a full implementation of enemy movement code in GAME 9 - BLASTOPIA. Which is also available on this chapter.
;Example timed speed object movement
MoveEnemy1
clc
adc Alien1XSpeedStore
sta objpos+4
lda objpos+5
clc
adc Alien1YSpeedStore
sta objpos+5
;Calculate flip properties - So that
;the movement can be triggered to change
;direction
jsr Alien1FlipTest
rts
;Actual flip test for alien 1
Alien1FlipTest
lda Alien1FlipDelay ;Alien flip delay test ... Counter
cmp Alien1_FlipTime
beq Alien1SwitchToNextMotion ;Switch to next motion from table
inc Alien1FlipDelay
rts
;Switch alien motion
Alien1SwitchToNextMotion
lda #$00 ;Reset alien flip delay
sta Alien1FlipDelay
ldx Alien1FlipPointer ;Read pointer
lda Alien1_XSpeed,x ;Read selected X direction/speed from table
sta Alien1XSpeedStore ;Store it to alien speed X (Alien1SpeedStore)
lda Alien1_YSpeed,x ;Read selected Y direction/speed from table
sta Alien1YSpeedStore ;Store it to alien speed Y (Alien1SpeedStore)
inx
cpx #$04 ;Has the table reached the last byte on each speed table?
beq Alien1SpeedReset ;Yes ... Reset the speed table.
inc Alien1FlipPointer ;Then move to next table setup (To be Self-modified)
rts
;Reset flip table and delay for alien 1
Alien1SpeedReset
ldx #$00
stx Alien1FlipPointer
lda #$00
sta Alien1FlipDelay
rts
;Time alien 1's movement. Has it reach its movement deadline
;if so. Switch over to the next set of properties for the next
;alien. Then spawn the next alien object.
TimeAlien1Movement
lda Alien1MovementPointer
cmp Alien1_MoveTime
beq Alien1WaveComplete
inc Alien1MovementPointer
rts
Alien1WaveComplete
lda #$00
sta Alien1MovementPointer
lda #1
sta Alien1Offset
rts
BACK TO TOP
Background Character Animation and Starfields
When producing a game or a demo, it is possible to generate animation through character sets. There are different methods in which you can animate a character. You could scroll a character, (or a set of characters) to form an effect, or maybe roll through a set of characters one after another by using frames. Here are a few examples to try in C64Studio.
The scrolling character
The most easiest way to scroll a character would be to scroll it left/right. Or alternatively you could scroll the character up or down. The concept would be to pick out the address of the 8 bytes of a character you wish to scroll and produce a simple loop to roll the character along. Scrolling characters left/right are the most simplest way to move them. However if you wanted to scroll characters UP/DOWN then you would need to generate some pointers for those.
A small example of scrolling a char left:
;Small example of scrolling a character left
!to "scrollcharleft.prg",,2
*=$0801
!basic 2064 ;SYS2064
*=$0810
lda #$18 ;Set character mode to $2000-$2800
sta $d018
;Fill the entire screen with zeroed character
ldx #$00
FillScreenWithChar
lda #$00 ;Very first char (@)
sta $0400,x
lda #1
sta $d800,x
inx
bne FillScreenWithChar
TestLoop
lda #$80
cmp $d012
bne *-3
jsr ScrollCharsLeft
jmp TestLoop
ScrollCharsLeft
;Scroll the very first character
;to the left.
ldx #$00
ScrollLeft
lda $2000,x ;Each char = 8 bytes.
asl ;
rol $2000,x ;Rotate char to the left by one byte
inx
cpx #8 ;8 bytes read
bne ScrollLeft
rts
;Let's make a custom character for char 0 (Alternatively
;as a shortcut, you can import a charset using the !bin command
*=$2000
!byte %11111111
!byte %10000001
!byte %10111101
!byte %10100101
!byte %10100101
!byte %10111101
!byte %10000001
!byte %11111111
;End of program
Without changing the additional source in GREEN. Copy the code and change the YELLOW example to this next example below.
A small example of scrolling a character to the right
ScrollCharRight
ldx #$00
CharRight:
lda $2000,x ;Each char = 8 bytes.
lsr
ror $2000,x ;Rotate char to the right
inx
cpx #8
bne CharRight
rts
Rotating the characters left/right are much easy to perform. A word of warning however. If you try and scroll multicolour chars, they will change colour. In order to solve this problem. You could add and extra LSR ROR $CHAR, or ASL ROL $CHAR. This should prevent colour shifts of each character.
Moving Charsets Up / Down
What if you wanted to move characters up or down? It works completely differently. You would need to make a temp byte to store the current character byte to. Scroll the character in a forward or backward loop (depending on the direction your character is scrolling) then store the stored loop to either the FIRST or LAST byte of the character that is being read.
A small example of scrolling a character up
ScrollCharUp
lda $2000
sta CharByteStore
ldx #$00
ShiftCharUp
lda $2001,x ;Fetch last char
sta $2000,x ;move to the next char
inx
cpx #8
bne ShiftCharUp
lda CharByteStore
sta $2007 ;Grab last character
rts
CharbyteStore !byte 0
A small example of scrolling a character down
ScrollCharDown
lda $2007
sta CharByteStore ;We just reverse the above
ldx #$07 ;process
ShiftCharDown
lda $2000-1,x
sta $2000,x
dex
bpl ShiftCharDown
lda CharByteStore
sta $2000
rts
Swapping Frames
It is also possible to animate charsets by swapping their own frames. You will want to work out how many frames your animation charset should use and how to come about with them. We simply copy 8 bytes of the first character, and paste it to the last character. Then call a simple loop which pulls each of the 8 bytes of each character frame. So that there is an actual character animation. This works like this:
AnimChars
lda AnimDelay
cmp #4
beq AnimOK
inc AnimDelay
rts
AnimOK
lda #0
sta AnimDelay
ldx #$00
CopyAndPaste1
lda $2000,x
sta $2040,x
inx
cpx #8 ;8 bytes = 1 char
bne CopyAndPaste1
ldx #$00
CopyAndPaste2
lda $2008,x
sta $2000,x
inx
cpx #$40 ;Max, 8 charaacter frames!
bne CopyAndPaste2
rts
AnimDelay !byte 0
Star Fields
Generating char-based star fields can be quite awkward, but are actually VERY EASY to implement. All you need is to know the memory address of where the frames for your char star field is. Then roll each byte forward or backwards and follow on, for the other charsets. Here is a small example on how a star field animation is formed (Using different layers). The example code below uses a star field that consists of four characters in the char set. $2000-$2020. A pixel skip is placed in the code, in order to rotate the same byte of the whole 4 characters. It is possible to increase the size of the star field. Simply by generating additional characters.
;Character based wrap-around animation. Produce
;a starfield, by rolling the bytes of the
;selected layers to be animated at different speeds
StarField
jsr AnimPixel1
jsr AnimPixel2
jsr AnimPixel2
jsr AnimPixel3
jsr AnimPixel3
jsr AnimPixel3
jsr AnimPixel4
jsr AnimPixel4
rts
;Animate the first chosen pixel on the
;current charset - Scroll it to the left.
AnimPixel1
lda CHARSET+1
asl
rol CHARSET+1+24
rol CHARSET+1+16
rol CHARSET+1+8
rol CHARSET+1
rts
AnimPixel2
lda CHARSET+3
asl
rol CHARSET+3+24
rol CHARSET+3+16
rol CHARSET+3+8
rol CHARSET+3
rts
AnimPixel3
lda CHARSET+5
asl
rol CHARSET+5+24
rol CHARSET+5+16
rol CHARSET+5+8
rol CHARSET+5
rts
AnimPixel4
lda CHARSET+7
asl
rol CHARSET+7+24
rol CHARSET+7+16
rol CHARSET+7+8
rol CHARSET+7
rts
That covers this section on character animation.
BACK TO TOP
SCREEN HORIZONTAL SCROLLING
In an earlier chapter, I showed you how to scroll text messages. This time round, I am going to show you how to scroll more than just text. Let us assume you are writing a new C64 game, and you want to scroll a background for the first time, without having to generate blocks/maps. Well, it is possible. What you have to do is set a speed of a scrolling pointer. Then we pull characters back through a loop. Once that has been done, a memory read of the map area is then placed as last character for each row. Then we update the code to increment to the next LO-BYTE of the map column address on the picked row. A code snippet below shows this simple example.
;Simple Screen Horizontal Scrolling
;by Richard Bayliss
!to "horizscreenscrl.prg",cbm
SCRN = $0400
jsr InitMapPosition
TestLoop
lda #$f8
cmp $d012
bne *-3
jsr ScrollMap
lda SCROLLX
sta $d016
jmp TestLoop
;Start by setting the scroll speed.
ScrollExit
rts
ScrollMap
lda SCROLLX
sec
sbc #MAPSCROLLSPEED
and #$07
sta SCROLLX
bcs ScrollExit
;Shift a byte from each character on screen
;then move it to the next character on screen.
;Split this into four different loops. (5 rows per
;loop)
ldx #00 ;Grab last value of char - then add it
MoveRow1
lda SCRN+1,x ;Grab one screen column higher
sta SCRN,x ;pull it to the previous column
lda SCRN+41,x
sta SCRN+40,x
lda SCRN+81,x
sta SCRN+80,x
lda SCRN+121,x
sta SCRN+120,x
lda SCRN+161,x
sta SCRN+160,x
inx
cpx #$28
bne MoveRow1
ldx #00 ;Do the same thing for the next set of rows
MoveRow2
lda SCRN+201,x
sta SCRN+200,x
lda SCRN+241,x
sta SCRN+240,x
lda SCRN+281,x
sta SCRN+280,x
lda SCRN+321,x
sta SCRN+320,x
lda SCRN+361,x
sta SCRN+360,x
inx
cpx #$28
bne MoveRow2
ldx #00 ;Once again do the same for the next set of rows
MoveRow3
lda SCRN+401,x
sta SCRN+400,x
lda SCRN+441,x
sta SCRN+440,x
lda SCRN+481,x
sta SCRN+480,x
lda SCRN+521,x
sta SCRN+520,x
lda SCRN+561,x
sta SCRN+560,x
inx
cpx #$28
bne MoveRow3
ldx #00 ;Finally for the last 5 rows
MoveRow4
lda SCRN+601,x
sta SCRN+600,x
lda SCRN+641,x
sta SCRN+640,x
lda SCRN+681,x
sta SCRN+680,x
lda SCRN+721,x
sta SCRN+720,x
lda SCRN+761,x
sta SCRN+760,x
inx
cpx #$28
bne MoveRow4
;Now place the self-mod stored character on to the
;last byte of each row.
mapSM1
lda MAPROW1
sta SCRN+39
mapSM2
lda MAPROW2
sta SCRN+79
mapSM3
lda MAPROW3
sta SCRN+119
mapSM4
lda MAPROW4
sta SCRN+159
mapSM5
lda MAPROW5
sta SCRN+199
mapSM6
lda MAPROW6
sta SCRN+239
mapSM7
lda MAPROW7
sta SCRN+279
mapSM8
lda MAPROW8
sta SCRN+319
mapSM9
lda MAPROW9
sta SCRN+359
mapSM10
lda MAPROW10
sta SCRN+399
mapSM11
lda MAPROW11
sta SCRN+439
mapSM12
lda MAPROW12
sta SCRN+479
mapSM13
lda MAPROW13
sta SCRN+519
mapSM14
lda MAPROW14
sta SCRN+559
mapSM15
lda MAPROW15
sta SCRN+599
mapSM16
lda MAPROW16
sta SCRN+639
mapSM17
lda MAPROW17
sta SCRN+679
mapSM18
lda MAPROW18
sta SCRN+719
mapSM19
lda MAPROW19
sta SCRN+759
mapSM20
lda MAPROW20
sta SCRN+799
;Now to get a new character fetched from the map, increment
;the lo/byte of the self-modifying addresses in order to
;allow all 256 bytes to update the last character that was
;used after every frame scrolled.
inc mapSM1+1
inc mapSM2+1
inc mapSM3+1
inc mapSM4+1
inc mapSM5+1
inc mapSM6+1
inc mapSM7+1
inc mapSM8+1
inc mapSM9+1
inc mapSM10+1
inc mapSM11+1
inc mapSM12+1
inc mapSM13+1
inc mapSM14+1
inc mapSM15+1
inc mapSM16+1
inc mapSM17+1
inc mapSM18+1
inc mapSM19+1
inc mapSM20+1
lda mapSM1+1
bne InitMapPosition
rts
Now, if you wanted to initialise the map so it starts again you would need to LOAD the LO-BYTE of the map address, and then STORE it to self-mod code. For example, if MAPROW address of map to be read = $4000. We place the low byte of MAPROW to the self mod one byte after the address where the label pointer mapSM1 is. Also we place the hi byte of MAPROW to the self mod address 2 bytes after the address where the label pointer mapSM1+1 is. To get the whole 20 rows cycling like the first MAPROW, we select every 256th address of low and hibyte to set up the map row / column.
InitMapPosition
lda #<MAPROW
sta mapSM1+1
lda #>MAPROW
sta mapSM2+2
lda #<MAPROW+$100
sta mapSM2+1
lda #>MAPROW+$100
sta mapSM2+2
lda #<MAPROW+$200
sta mapSM3+1
lda #>MAPROW+$300
sta mapSM3+2
VIEW COMPLETE SOURCE
but don't forget to use charpad to draw your own test charset and map (Export your test project as charset, and map). For this example, your map needs to be 20 rows by 256 columns with tiles disabled.
Now, should you wish to try and build scrolling background using BLOCKS+MAPS, instead. I strongly recommend that you check out Achim Volker's chapter on column map extraction, on Codebase64.
BACK TO TOP
GAME 10 - BLASTOPIA
Now I have covered a lot of tips in the previous few sub chapters that are in this chapter. I have decided to come up with a brand new game project, for us to play with. As a fan of the retro blasting shoot 'em up genre. I have come up with a new shoot 'em up specially for this project. If you want to just play the original game, without the source, you will find it on the TND games page, under BLASTOPIA :). This awesome game features a short front end and end screen, 8 fast paced levels of alien blasting mayhem (all controlled by pointers), 24 different alien sprites, camels (which you must rescue during play), sprite/sprite collision, sprite/background collision (Based on Achim Volker's codebase example). There's also plenty of thumping trance music and sound effects. Hopefully you should have loads of fun playing this game (or maybe exploring through the code). Full instructions on how to play the game, can be found in the RELEASE folder. Which also consists with a finally compiled disk and .tap version (with tape master if you want to write this game to a real tape).
About the project:
THE SPRITES
These are the game sprites, that I will be using for Blastopia. There are 4 frames for each sprite, except for the bullet and the explosion animation. The player ship sprite animation are the first 4 sprites, a bullet is the second. The explosion sprites, followed by all of the aliens. The last 4 sprites are the camels which the player will have to rescue. Each sprite has its own colour and animation scheme.
THE GRAPHICS
This is the complete character set for BLASTOPIA. It represents all of the characters that builds each level map screen. If you load in one of the example level files into charpad and then use IMPORT RAW/BIN FILE / CHARSET, select the folder FILES and select gamecharset.bin. You should get this set of characters. The characters 0 - 3 have been chosen to be animated as a star field (More on this in the tutorial). Character 42 has been chosen as the lazer gate character. Characters 33 and 38 represent the flashing lights for the landing pad. The rest of the graphics (Except for the letters, symbol and numbers) are deadly characters - The landing pad characters 35-40 (except for character 38) are special characters.
Below, you can see the whole map of LEVEL 1, which consists of 256 characters per row and 20 rows. There are also additional charpad level files where each map is built by 5 rows and 64 columns of 4x4 tiles. Disabling the tile mode gives you tiles. The last 5 rows are saved for a blank gap, and the game's status panel.
LEVEL MAP CRUNCHING / ADDING A BACKWARDS DECRUNCHER
In the files DIR are all of the example maps (Un-Compressed). These maps have been extracted as RAW binary format. However, if you're making a full game, you'll want to consider crunching each level map. So that they will fit in the game code. To crunch each exported map. You can use the EXOMIZER to crunch the memory down, and use a DECRUNCHER source program to extract the data. The command used as an example:
exomizer mem -l $b400 level1map.bin,$9ffe -o level1map_cr.prg -P0
Please also note, if you are not using Exomizer V3, but V2 instead you won't need to -P0 prefix
$b400 has been set for the address where to place the crunched data.
$a000 is where the data should decrunch to ($9ffe is 2 bytes offset before the actual decrunch address for raw files. PRG source files can use $a000 instead of $9ffe).
The -P0 is a prefix for using V2.0 level compression. As V3 hasn't got an actual decrunch source yet. For the decruncher, you will need DASM cross assembler, and edit wrap.s (That comes with Exomizer inside the exodecrs folder). in notepad to set the address of the decruncher. Then in the command prompt enter
DASM wrap.s -oleveldecruncher.prg
I edited the wrap.s to set the address of the exomizer decruncher at $c400. Once assembled through DASM to leveldecruncher.prg, the file gets copied over to the FILES folder, along with the other binary data, including sprites, alien sprite formation data, charset, uncrunched maps, etc.
SETTING UP SPRITE FORMATION
Also provided with the binary and source code. I have provided an exclusively modified version of my Alien Formation Maker V1.0+, which has been made for BLASTOPIA. So you can have a go at creating your own alien formation, and then import it into the game code later on (if you want to that is). The aliens should have a selected movement during the game. While using the editor press F1, F3, F5, F7 to alter the formation speed. Select inside the red border (where the cursor cannot be seen) by placing the cursor as the start position. Then hold down the fire button to record the path movement by playing around with the joystick. You have 256 units to use up per formation. These will be used quite quickly with slower movements. Watch you don't make too any mistakes. 256 bytes of the alien formation are stored for X ($3000-$30ff) and Y ($3100-31ff). If you are finished with an alien formation and you still have units spare - make sure it ends inside the red border. Otherwise the alien formation will look very odd indeeed :)
THE GAME MUSIC
I have chosen three tunes crammed to one file, done in Goat Tracker V2.7. For this example. The theme is once again, like with a few of my latest space shoot 'em ups, TRANCE themed. The game is intending to be a fast-paced game, and the music is set to be fast and very trance like. The game also will feature SFX, based on the instrument editor made in Goat Tracker. The three tunes picked are title music, in game music and end screen music. Game Over has sound effects.
NOW LET'S CREATE THE GAME
Download the complete source (or view each source separately in TXT format by clicking on the link, corresponding to the code. If you choose to download the code and the source. Load the project in to C64Studio V5.8, or higher. The filename is BLASTOPIA.S64. The project folder contains multiple files which are as follows You are also required EXOMIZER V2 or higher, in c:\EXOMIZER\WIN32 directory, otherwise delete the postbuild from blastopia.asm and manually compress the program with a cross platform or native C64 packer/cruncher of your own choice :).
blastiopa.asm - This is the main file that needs to be assembled
variables.asm - A list of variables, that has been linked to the code
titlescreen.asm - Quick code for the front end
gamecode.asm - The main game code
pointers.asm - Series of pointers and text that the game code uses for varied tasks
OUTSIDE BLASTOPIA.ASM
compressmap.asm - This is a command, which was set to import a charpad map, and in post-build properties. A command to Exomizer is used to level crunch the imported map. (exomizer -l mem $xxxx loadname.prg -o packedname.prg).
The project also has a series of binary and PRG files which have also been included in the ZIP archive. These are part of the game project. The selected binary/program files are read in blastopia.asm
I won't go through the entire source individually, as the code is all there is self-detailed. I'll just give you a brief explanation about each source file. Simply click on the source file to view the code in .txt format (Or go all the way to the bottom of this chapter and download the entire C64Studio project.
blastopia.asm
This source consists of importing/linking the binary data files and possibly additional source code. First a starting level is set in the code (Default is 0). We then generate the program file to assemble to called "BLASTOPIA.PRG". Then link the source variables.asm to the source code.
CHARSET MEMORY
$0800-$0fff is the address where the game graphics charset data is being imported to.
FORMATION TABLE WRITING
$1000-$1200 has been reserved for the copied set level X and Y alien formation data. This is self-modified in the game's code for every time an alien formation is complete, a new one gets copied over to that specific address. $1000 = X formation, and $1100 = Y formation
SPRITE DATA
$2000-$3c00 is being used for all of the sprites. I'm using default memory BANK $03 for the screen memory.
STARTING MAP (Plain Stars)
$3C00 inserts the game's starting map (The plain starfield), which is used for the title screen, the main game starting point, level complete and also the game's ending.
TITLE CODE, GAME CODE, TABLES AND POINTERS + ALIEN FORMATION DATA
$4000 - $8EFF consists of the main code and pointers. The address starts by switching the KERNAL mode, to be allowed to use addresses exceeding $9000, and before $D000. The game will be using standard KERNAL interrupts. Also we call one time code that checks the C64's system (PAL/NTSC) and also checks for a hidden cheat. Which if detected BIT out the decrementing LIVES counter. Also imported into the code area (as additional pointers) are all 24 different alien formation tables (extracted from a .D64 which consists of the BLASTOPIA ALIEN FORMATION MAKER). Also the low/hi byte of the title screen code is set to the RESTORE pointers. So that every time the RESTORE key is pressed, the title screen restarts.
MUSIC DATA
$8F00 - $9fff is the Goat Tracker music player. You may use any other music player, but the SFX won't work, and will probably crash the player. Zeropage for GoatTracker tunes is best set to $fd-$ff.
DECOMPRESSED MAP (Full Level Map)
$a000-$b3ff is the game map (after it has been decompressed by Exomizer's decrunch routine). The LEVELSTART+LEVELEND labels represent the starting and ending position of the compressed map data. If you look at C64Studio V5.8, and assemble the program. The specific addresses of where the data/code lies is displayed on the left of the screen.
EXOMIZER COMPRESSED LEVEL MAPS
$b400-$c3ff contains all of the crunched level maps. Each level map has labels with END. Which is used as the low/hi-byte address for decrunching the level data.
EXOMIZER DECRUNCHER SOURCE
$c400-$c5ff is the Exomizer's level backwards decruncher source code.
STATUS /SCORE PANEL SCREEN
$c600-$c6c8 is the game status panel / scoring matrix
TITLE SCREEN LOGO
$c700-$c900 is the title screen logo matrix
variables.asm
A list of variables/labels set for specific addresses, values and zeropage pointers
gamecode.asm
First of all the source code imports the titlescreen.asm code, which indicates the code for the main front end for the game. More on this later. After the title screen code has finished running. GAMESTART is called which does a fresh start of the game.
GAMESTART sets up all of the graphics data, resets the quota, score and other bits, should a new game start. Test background multi colours are set - although for the game start that isn't really needed, since a table of colours is normally read. Level pointers are set, and the score is zeroed (Probably yet again not required, since the titlescreen code does all that).
NEWLEVEL initialises any existing interrupts in the background. This basically kills all IRQs while trying to set up new levels . The shield count is reset to 50 on the player's shield counter. The alien X and Y formation table is cleaned up with padded zeroes. Specific pointers are reset, so that the correct aliens and formation are used when starting a brand new game or level. Then we call a loop, which prepares the level. LEVELPOINTER cycles through the level properties. If the level is OVER the last level, then the code automatically jumps to the end screen code. Otherwise, all low and high bytes of the MAP DECRUNCH END ADDRESSES are stored to the self-mod area of the EXOMIZER decrunch routine. The LOW+HI BYTE values of the colour table are read and stored to specific colour areas - so that each level has its own set colour. LEVEL SELECT TABLES, set up the selection of aliens and their formation according to level. Finally CAMELQUOTADIGITLEFT and CAMELQUOTADIGITRIGHT will set up the camel rescue quota according to level.
After the level selection code process has been made. The code then writes the new LEVEL ALIEN SELECT table, to the ACTUAL alien select table. There are 24 bytes stored since each level uses 24 attack formations. The SID chip is initialised, so during the map decrunch process everything is silent. The level map is then decrunched.
GAMECOMPLETE redraws the status panel and the starfield, which will afterwards display the game complete text. It will also prompt the player to press fire. Then records the final score and checks if it is a new high score. If the player's score is a new high score, then the title screen will display the new high score. The end screen also resets the game interrupts and set the END MUSIC to initialise and play. Also if after pressing fire to exit the well done screen. If the cheat mode has been detected then the player will NOT have a new high score. The cheat mode is then disabled and the code will run back to the title screen.
DECRUNCHLEVELMAP will decrunch the level map data which the end low/hi byte address has been set to decrunch the program backwards until the decruncher reaches the load address of the file. The map is extracted in full to $a000-$b400.
The game code continues by initialising the starting position of ALL ROWS AND COLUMNS of the map. Also alien properties are reset for the chosen level. The default starting position for sprites are set, along with the colour settings . Additional pointers for indicating the player dead, lazer time and lazer on are also initialised. The game IRQs are set up initialising the in game music and playing it. The frame of the player's sprite is set by default.
MAINGAMESTART disables the launch pad, also draws the starfield starting map, and also sets the game char colour redraws the status panel.
GAMELOOP Synchronizes the game timer and expands the screen position so that sprites can use the full screen area.. A pause key (CONTROL) is checked to see whether on not the key is pressed. If CONTROL is pressed. The game is paused. If FIRE on joystick in port 2 is pressed then the game can continue to run its main body of the code.
SCROLLMAP - Scrolls the game map. This is made by pulling 20 rows of characters from the last character position to the previous character position. The map code then positions the current pointer position of the map to the very last character. Then the code increments the position of the low byte of each character. Basically after one full draw, the map will move on to the next map draw column. Then resets after 256 bytes has been read. After all a single byte can be from 0 - 255.
STARFIELD - Animates the starfield. Basically it scrolls the selected bytes of pixels over each character, depending on which byte has been chosen. ASL, ROL will roll bytes to the left, LSR ROR will roll bytes to the right.
TESTLAZER - Checks whether or not the lazer character is switched on or off. If the lazer is off, then a blank char replaces the lazer char. Otherwise if it is on, the char is switched on. The lazer is controlled by a looping timer and two logic switches (LAZERON = 0 represents OFF, LAZERON = 1 represents ON)
ANIMSPRITES - Creates animation frames from sprite value tables and stores those to custom pointers - The speed of the animation is controlled by a delay. Max of 4 bytes is read for the sprite animation.
PLAYERPROPERTIES - Sets up the properties of the player. It checks whether or not the player is alive or dead. If the player is dead, then the explosion animation takes place. Otherwise if the player is alive, the player can move, and animate. There's also code for bullet properties included in the PLAYERPROPERTIES, which allows the player to shoot fast bullets unless one bullet sprite is on screen. If the bullet is offset, then it can be fired again.
TESTALIENPROPERTIES - Tests alien properties. Macro code is created to check for each alien property, control its formation, etc. If the alien is alive (ALIENDEAD = 0) and ALIENOFFSET = 0 and ALIENSPAWNED = 1. This means that the alien is able to move around the screen. ALIENDEAD will trigger the explosion of the alien (if enabled) then resets the alien to ALIENOFFSET mode. The macro code is LINKED to all 5 aliens that are being blasted. If all aliens are OFFSET. A spawn timer is reset, then after the timer expired, spawns the aliens on to the screen with their own attack formation.
TESTCAMELPROPERTIES - Tests whether or not a complete fleet of aliens have been destroyed. If so, then the camel is released from the last alien shot.
SPRITETOSPRITE - This tests the sprite to sprite collision. The values of the collision co-ordinates (from variables) are set from the player and bullet. Then some macros are made to check each alien collision. For example if ALIEN1DEAD = 1, then no collision should take place. If the alien hits the player, then the shield should decrease (If the player is not invulnerable). If an alien hits a bullet and is not dead. The bullet is removed, and then the alien is triggered to be dead. Where TESTALIENPROPERTIES will then force the alien to explode. The alien shot is stored to a pointer, which the camel gets released from if all 5 aliens of the same fleet have been shot.
SPRITETOBACKGROUND - This tests the position of the player. The player collision position has been set to the central area of the ship (1 single character). If that area of the player's hit hits any background while the player is invulnerable. Nothing should happen. However, if the player hits the background, and it isn't a specific character. Like with the sprite to sprite collision, the background drains the player's shield. Only chars 0-3 are excluded from the deadly background, and aware classed as safe chars. The landing pad 34-40 (excluding 38) is checked - If PADENABLED = 1 then the landing pad is NOT a deadly background. It is used to detect that the level is complete (Where the background flash and level complete message is triggered). The lazer character (42) is only deadly when the pointer LAZERON = 1. Otherwise if LAZERON=0, the lazer is removed and collision with that specific char is ignored.
ANIMATEPAD- Checks whether or not the landing pad is enabled or not. If the landing pad is enabled, it calls out a timed animation to set the lights flashing (Simply by swapping two char animation frames from two addresses.).
CHECKMATCHINGQUOTAS - Checks to see whether or not the camel pickup quota has been reached. If it has, then the camels cannot be released, and also the code will trigger the landing pad for availability. The camel quota check code will check fro a direct match between CAMELQUOTA and PICKEDQUOTA. The landing pad will not be enabled quota doesn't match. Therefore the player has to keep on blasting.
pointers.asm consists of all pointers that support the code in the entire game project. For example sprite animation frames, level settings, etc. A lot of the stuff in the code and pointers have its own explanation. So there's no need for me to go through it all again :)
titlescreen.asm
Initialises the interrupts, displays the credits and also shows the previous and high score. The status panel is then reset to zero
And there you go. A quick and brief explanation of some of the source code. I recommend you explore it, as you'll probably won't grasp it straight away, but at least you'll know how to code a basic horizontal scrolling shoot 'em up with its own limitations.
BACK TO TOP
VERTICAL SCREEN SCROLLING
In this part of the chapter. We are going to learn a little bit about vertical scrolling. Unlike using horizontal scrolling, the trick to making vertical scrolling is slightly more trickier. Should you already know how to scroll a background horizontally. Vertical scrolling works in a pretty much similar way. but instead of controlling $D016 (Horizontal Screen Position (HSP)). You need to control the value $D011, (Vertical Scroll Position(VSP)). A smooth vertical scroller is controlled in a similar way as a horizontal scroller would be controlled. You can basically create a hard scroller going up, or scrolling down. First the control of a VSP pointer is calculated. Should the value of the counter reach the 8th byte, it should reset and then call a subroutine to perform a hard scroll. In C64 terms, a vertical hardscroll is formed by fetching a full row (or a row of a chosen number of characters), and then pasting it to the next row. Then you perform the row pulling forwards or backwards.
SCROLLING A SCREEN UPWARDS
For a start off, we are going to make a simple program which can scroll a map upwards:
;Simple full screen upscroll by Richard Bayliss
;2019 - Assemble It tutorial
;http://tnd64.unikat.sk
row = $0400
colr = $d800
row0 = row
row1 = row+40
row2 = row+80
row3 = row+120
row4 = row+160
row5 = row+200
row6 = row+240
row7 = row+280
row8 = row+320
row9 = row+360
row10 = row+400
row11 = row+440
row12 = row+480
row13 = row+520
row14 = row+560
row15 = row+600
row16 = row+640
row17 = row+680
row18 = row+720
row19 = row+760
row20 = row+800
row21 = row+840
row22 = row+880
row23 = row+920
row24 = row+960
;Please feel free to use this source should you wish to.
!to "upscroll.prg",cbm
*=$0801 ;BASIC SYS 2064 call
!basic 2064
*=$0810
sei
;Black out screen,
lda #$00
sta $d020
sta $d021
lda #$18
sta $d018
;fill the screen with the spacebar character
;and colour white.
ldx #$00
fillscreen
lda #$20
sta row,x
sta row+$100,x
sta row+$200,x
sta row+$2e8,x
lda #$01
sta colr,x
sta colr+$100,x
sta colr+$200,x
sta colr+$2e8,x
inx
bne fillscreen
;Setup an IRQ Raster interrupt for code.
ldx #<irq
ldy #>irq
lda #$00
stx $0314
sty $0315
sta $d012
lda #$7f
sta $dc0d
lda #$1b
sta $d011
lda #$01
sta $d01a
cli
;Perform a synchronized timer before performing
;an upward scroller.
LOOP lda #0
sta SYNCTIMER
lda SYNCTIMER
cmp SYNCTIMER
beq *-3
jsr UpScroll ;Call upward scroller
jmp LOOP
;Perform Upscroll
UpScroll
lda YPOS ;Read pointer YPOS
sec
sbc #$01 ;Speed of YPOS scroll
and #7 ;Values can only be forced to 0 - 7 to control smoothness
sta YPOS ;Update the position of YPOS.
bcs NoScroll ;YPOS=0, read do main scroll, if over - don't do hard scroll yet
jmp HardScroll ;Call hardscroll routine
NoScroll
rts
;The main hard scroll - this is how NOT to
;implement an up scroll
HardScroll
jsr DoHardScroll
;Pick the screen map location, and then write it to the last row on screen.
ldx #$27
MapRead lda Map,x
sta row24,x
dex
bpl MapRead
;Now calculate the position of the 40 column map.
lda MapRead+1
clc
adc #$28 ;Shift to the next row
sta MapRead+1
lda MapRead+2 ;After all rows of map memory read
adc #$00 ;shift to the next hibyte address. (i.e. $1000 = $2000)
sta MapRead+2
lda MapRead+2
cmp #>MapEnd ;Reached end of map?
bcc SkipEnd
;Re-initalise the map position.
ResetMap
lda #<Map
sta MapRead+1
lda #>Map
sta MapRead+2
SkipEnd
rts
;Hard Scroll screen layer 1 (Read one char, and shift it up)
DoHardScroll
ldx #$27 ;Calculate loops backwards, saves cycles
HardLoop1
lda row1,x ;Fetch a bottom row of characters on screen
sta row0,x ;Shift them up one row.
lda row2,x
sta row1,x
lda row3,x
sta row2,x
lda row4,x
sta row3,x
lda row5,x
sta row4,x
lda row6,x
sta row5,x
lda row7,x
sta row6,x
lda row8,x
sta row7,x
lda row9,x
sta row8,x
lda row10,x
sta row9,x
lda row11,x
sta row10,x
dex
bpl HardLoop1
ldx #$27
HardLoop2
lda row12,x
sta row11,x
lda row13,x
sta row12,x
lda row14,x
sta row13,x
lda row15,x
sta row14,x
lda row16,x
sta row15,x
lda row17,x
sta row16,x
lda row18,x
sta row17,x
lda row19,x
sta row18,x
lda row20,x
sta row19,x
lda row21,x
sta row20,x
lda row22,x
sta row21,x
lda row23,x
sta row22,x
lda row24,x
sta row23,x
dex
bpl HardLoop2
rts
;Multiple IRQ raster interrupts (Synchronize timer, and
;also setup the blank screen position at the screen bottom area
irq inc $d019
lda #$00 ;Raster position set
sta $d012
lda #$70 ;Stable illegal opcode, to make a black line
sta $d011 ;cover a row
lda #1 ;Force sync timer to switch on.
sta SYNCTIMER
ldx #<irq2;Move to next interrupt
ldy #>irq2
stx $0314
sty $0315
jmp $ea7e
;IRQ Raster interrupt 2 - The main smooth vertical scroller
irq2 inc $d019
lda #$fa
sta $d012
lda YPOS ;GRAB position Y
ora #$10 ;Output mode to screen on
sta $d011
ldx #<irq ;
ldy #>irq
stx $0314
sty $0315
jmp $ea7e
SYNCTIMER !byte 0
YPOS !byte 0
*=$2000 ;experimental custom charset
!bin "charset.bin" (Or if C64 charset !bin "charset.prg",,2)
*=$3000
!bin "map.bin" (Or if C64 charset !bin "map.prg",,2
Map
MapEnd
My test scroller looks like this:
I know, it looks really basic and naff, but this is only a test map :)
SCROLLING DOWNWARDS
Scrolling a screen upwards is usually a simple way to go. Especially if you wanted to do something like an upwards scroll for moving text messages for an intro or demo parts, or maybe something like a dowhill skiing simulator, etc. This isn't really all that feasible for writing many scrolling games, unless you wanted to do something like a platform jumper, where a player is contuously falling, until reaching a platform, which pushes the player upwards. Usually a lot of C64 games, for example SEUCK games, and great commercial titles in C64's history use a down scroller. Let us take Slap Fight, Dragon Spirit, Light Force, Denarius (I'd better be careful how I pronounce it and not mistake it for Katakis) and the original SEUCK, etc. as an example. Unlike the upscroller example (above), the process has to be reversed in order to do a downwards scroll. We add the value of a position of a soft scroll instead of subtract a position, but there is more than meets the eye. Using the same map and example above. We try to do a simple downwards smooth scroll:
;Simple full screen down by Richard Bayliss
;2019 - Assemble It tutorial
;http://tnd64.unikat.sk
row = $0400 ;Declare screen RAM starting row.
row0 = row ;Each row is set manually where the screen line for a 1x1 charset
row1 = row+40 ;is rowN = row + y*40. For example row7 = 280, which is (row7 = row + 7 * 40 = 280)
row2 = row+80
row3 = row+120 ;We deal with 24 rows for this scroller. The last row will be
row4 = row+160 ;reseved
row5 = row+200
row6 = row+240
row7 = row+280
row8 = row+320
row9 = row+360
row10 = row+400
row11 = row+440
row12 = row+480
row13 = row+520
row14 = row+560
row15 = row+600
row16 = row+640
row17 = row+680
row18 = row+720
row19 = row+760
row20 = row+800
row21 = row+840
row22 = row+880
row23 = row+920
row24 = row+960
;Please feel free to use this source should you wish to.
!to "downscroll.prg",cbm
*=$0801 ;BASIC SYS 2064 call
!basic 2064
*=$0810
sei
;Blackout the border and screen
lda #$00
sta $d020
sta $d021
;Setup charset @ $2000
lda #$18
sta $d018
;Pad the screen with the spacebar character
;and colour white.
ldx #$00
fillscreen
lda #$20
sta row,x
sta row+$100,x
sta row+$200,x
sta row+$2e8,x
lda #$01
sta colr,x
sta colr+$100,x
sta colr+$200,x
sta colr+$2e8,x
inx
bne fillscreen
;Setup a synchronized IRQ Raster interrupt for the smooth downscroller
;routines.
ldx #<irq
ldy #>irq
lda #$00
stx $0314
sty $0315
sta $d012
lda #$7f
sta $dc0d
lda #$1b
sta $d011
lda #$01
sta $d01a
cli
;Perform a synchronized timer before performing
;an upward scroller.
LOOP lda #0
sta SYNCTIMER
lda SYNCTIMER
cmp SYNCTIMER
beq *-3
jsr DownScroll ;Call upward scroller
jmp LOOP
;Perform down scroller
DownScroll
lda YPOS
clc
adc #$01
sta YPOS
lda YPOS
and #$07 ;Value of YPOS should read only $00-$07
sta YPOS+1 ;Store to an additional pointer YPOS+1
cmp #$00 ;Check if value of YPOS has reset to 0
beq HardScroll ;Yes, we can do the hard scroll
rts ;otherwise stop
HardScroll
jsr DoHardScroll
;After performing the hardscroll (Where each row is shifted)
;Pick the screen memory map location and then
;write it to the very first column
ldx #$27
MapRead lda MapEnd-40,x
sta row0,x
dex
bpl MapRead
;Now calculate the position of the 40 column map.
lda MapRead+1 ;Grab current row of map data
sec
sbc #$28 ;Shift to next row by 40 columns (1 whole 1x1 char row)
sta MapRead+1
lda MapRead+2 ;After all rows of map memory are read
sbc #$00 ;shift to the next hibyte address. (i.e. $1000 = $2000)
sta MapRead+2
lda MapRead+2
cmp #>Map ;Have we reached end of map? (The very top)
bcs SkipEnd ;no. Skip end... Otherwise ...
;Re-initalise the map position.
ResetMap
lda #<MapEnd-40
sta MapRead+1
lda #>MapEnd-40
sta MapRead+2
SkipEnd
rts
;The main hard scroll. This will fetch a chosen row on screen, and then
;shift it one row below. We simply start from the second last row
;of the character and place it one row down to the last row. We work each
;row copy all the way to the very first row.
DoHardScroll
ldx #$27 ;Calculate loops backwards, saves cycles
HardLoop1
lda row23,x
sta row24,x
lda row22,x
sta row23,x
lda row21,x
sta row22,x
lda row20,x
sta row21,x
lda row19,x
sta row20,x
lda row18,x
sta row19,x
lda row17,x
sta row18,x
lda row16,x
sta row17,x
lda row15,x
sta row16,x
lda row14,x
sta row15,x
dex
bpl HardLoop1
ldx #$27
HardLoop2
lda row13,x
sta row14,x
lda row12,x
sta row13,x
lda row11,x
sta row12,x
lda row10,x
sta row11,x
lda row9,x
sta row10,x
lda row8,x
sta row9,x
lda row7,x
sta row8,x
lda row6,x
sta row7,x
lda row5,x
sta row6,x
lda row4,x
sta row5,x
lda row3,x
sta row4,x
lda row2,x
sta row3,x
lda row1,x
sta row2,x
lda row0,x
sta row1,x
dex
bpl HardLoop2
rts
;Multiple IRQ raster interrupts (Synchronize timer, and
;also setup the blank screen position at the screen bottom area
irq inc $d019
lda #$ff ;Raster position set
sta $d012
lda #1 ;Force synchronised timer to switch on.
sta SYNCTIMER
lda #$70 ;Stable opcode value, to make a black line
sta $d011 ;cover a row or two
ldx #<irq2 ;Move to next interrupt
ldy #>irq2
stx $0314
sty $0315
jmp $ea7e
;IRQ Raster interrupt 2 - The main smooth vertical scroller
irq2 inc $d019
lda #$e2
sta $d012
lda YPOS+1 ;GRAB position Y
ora #$10 ;Output mode to screen on (Because if we didn't use
sta $d011 ;ORA #$10 the screen would have been switched off completely)
ldx #<irq ;
ldy #>irq
stx $0314
sty $0315
jmp $ea7e
SYNCTIMER !byte 0
YPOS !byte 0,0
*=$2000 ;experimental custom charset
!bin "charset.bin" (Or use !bin "charset.prg",,2
*=$3000 ;Screen map data
Map
!bin "testmap.bin" (Or use !bin "testmap.prg",,2
MapEnd
You can also view the complete source code
If you assemble and run the program above in C64Studio or ACME cross assembler. You will notice that this scroll will work smoothly on PAL machines. However on NTSC machines, the first row will flicker like hell. If you were to do a scroller like this for PAL machines, you'd be okay. However NTSC machines are pretty much more difficult to handle, if you are more used to PAL. Let's patch the scroll to work on NTSC. Simply alter the routine, to the hard scroll below and also add a new pointer called ROWTEMP. Simply go to the label DoHardScroll and replace it with this handy routine:
DoHardScroll ;(PAL+NTSC COMPATIBLE)
ldx #$27 ;Calculate loops backwards, saves cycles
HardLoop1
lda row10,x ;Grab the 11th row
sta ROWTEMP,x ;Store to a self-modyfying pointer ROWTEMP.
lda row9,x ;Grab 10th row,
sta row10,x ;Store to 11th row.
lda row8,x ;and so on, all the way to the very first row (row0)
sta row9,x
lda row7,x
sta row8,x
lda row6,x
sta row7,x
lda row5,x
sta row6,x
lda row4,x
sta row5,x
lda row3,x
sta row4,x
lda row2,x
sta row3,x
lda row1,x
sta row2,x
lda row0,x
sta row1,x
dex
bpl HardLoop1
ldx #$27
HardLoop2
lda row23,x ;In the second loop work from the second bottom, and
sta row24,x ;paste to the next row - working the row calculation
lda row22,x ;up 1 row at a time.
sta row23,x
lda row21,x
sta row22,x
lda row20,x
sta row21,x
lda row19,x
sta row20,x
lda row18,x
sta row19,x
lda row17,x
sta row18,x
lda row16,x
sta row17,x
lda row15,x
sta row16,x
lda row14,x
sta row15,x
lda row13,x
sta row14,x
lda row12,x
sta row13,x
lda row11,x
sta row12,x
lda ROWTEMP,x ;Grab stored row from ROWTEMP (Copied from the 11th row)
sta row11,x ;store it to the 12th Screen Row.
dex
bpl HardLoop2
rts
ROWTEMP !fill $28,$00 ;Self-Modifying consisting of 40 pointers (We filled this are with 40 @'s exclusively)
View downscroll example listing
Okay, so by now, by looking at the routines, you probably might now know a bit on how a downscroll works. (We did about upward scrolling in chapter 3). The examples which I showed you are quite practical, but why don't we do something more interesting with an upscroll ... Well look below, because it's GAME MAKING TIME :)
GAME 10 - SUPER TOBOGGAN CHALLENGE
CLICK DISK ABOVE TO DOWNLOAD COMPLETE SOURCE + BINARY DATA
The complete package comes with the game binary data, charpad work graphics and also the complete game project source, which can be loaded into C64Studio. There is also a RELEASE folder, which contains the public D64 and TAP release of the game which has respectively been put together.
We are going to make a little game. Also for a change, we are not going to make another of those space blasters. Instead, I came up with an alternative idea. We are going to create a winter sports game. I remember reading a book many years ago, while I was a teenager, called Commodore Omnibus, which I used to borrow at the local library for type in games. It had a type in game called Toboggan Run (I think that might have been the name) which was all in BASIC. For this edition of Assemble It, I have decided to create my own toboggan run, but nothing like in the book. First of all it isn't a BASIC type in game. The second thing is that it has a few additional ideas I came up with. So there you go. Anyway, what's this game going to be all about? ... Read on to find out more.
Super Toboggan Challenge is a smooth vertical scrolling dodge and collect game, in the mode of winter sports. This is a score attack challenge in which you have to guide your tobaggon through an infinite course. You must pick up flags as you slide throughout the course. For every flag picked up, you will score 150 points. However, should you reach near the end of the course, you will be given a bonus of 1000 points added to your score. This may sound like an easy challenge, but not exactly. The course has been poorly maintained. Parts of the slope are broken, and additional random objects are placed on the slope, such as barriers, rocky debris and tree logs. If you crash into any obstacles or hit the water, you will lose the challenge. Try to score as many points as you possibly can, before losing. Also try and challenge friends to see who can get a high score, while playing the game.
Controls:
LEFT and RIGHT on Joystick port 2 to move your tobaggon.
So there you go. Do you accept the challenge?
THE GRAPHICS/ASSETS
Before we start building this game. We want some graphics. First of all, because of the size of my map. I decided not to show a snapshot of the entire map on this page. However, here are the game charsets, which sort of represent the map. If you take a look at the filename, ST_Graphics, in Charpad V2.0 The first 20 chars (0 - 19) will be representing the safe chars, which the player is allowed to move across. Character 179 represents the collectible flag, and the rest of the characters all are classed as deadly chars. The deadly chars are there to force the player in losing the Super Toboggan Challenge (As you may have guessed).
I also provided two different map types in this tutorial. The first (ST_Graphics.ctm) represents the map, which consists of a map made with 5x5 tiles (Similar size to what you get with SEUCK). However, since we don't want to program the game using tiles, but using chars only. Select the option 'Disable Tiles'. This will then remove the tiles, and replace them with single chars. I have also done a second file (ST_Graphics_No_Tiles.ctm).
There's a BIN folder, which consist of the following attributes for the game code:
gamecharset.bin - The game's charset data
gamemap.bin - The game's map data (charset based, not tiled based)
The second set of graphics, (ST_Title_Logo.ctm) represents the front end and score panel.
There are 3 special chars in which are being used for the logo's scrolling effect. The chars are 129,130,131. These all represent the scrolling inside the TOBOGGAN logo.
The logo looks a bit like THIS:
The chars between 64 and 110 represent the score panel characters. This has been made in a slightly different way, compared to a normal 1x1 char. A subroutine in masking the score panel will show how 2 sides of a score char is formed. More on that later. Here's how the score panel should show up as:
The exported filenames for the title screen charset, and score panel screens are:
textcharset.bin (Title screen, logo + panel charset)
logomatrix.bin (Title screen logo screen data)
stauspanel.bin (Score panel screen data)
The Game Sprites:
The game sprites look something like this:
Sprites 0 and 1 - represent animation of the player's toboggan
Sprites 2 - 9, represent the animation of the explosion.
Sprites 10,11 and 12 are the Ready, Set Go lights for the start of the game
Sprites 13 - 20 are the GAME OVER word sprites
Sprites 21 - 28 are the title screen sprites, where the toboggan sprites rotate.
The Music:
The music file was done in Goat Tracker, and it consists of 7 different tracks. These are as follows:
TRACK 0 - In game music
TRACK 1 - LIGHT Red, Yellow
TRACK 2 - LIGHT Green
TRACK 3 - Crash
TRACK 4 - Game Over jingle
TRACK 5 - Get Ready jingle
TRACK 6 - Front End music (Title Screen)
The filename of course is music.prg
The code:
First of all if you wish:
DOWNLOAD THE C64STUDIO SOURCE + BINARY DATA
Extract it to a directory of your choice (as usual). Load in C64Studio V5.9 (or whichever version you have installed on your HDD on your PD). then open the filename Super_Toboggan_Challenge_-_Assemble_It
You will notice something different regarding this project. I have highlighted toboggan.asm as the main target assembly source. This is done in order to allow this file to be assembled FIRST before any other linked files. This saves me having to click tabs before re-compiling the data and source. The game has 3 different source files (Which you can also view by clicking on the links to the files below). As usual, the code is self-explainable.
toboggan.asm - The main target file to be assembled, including importing of binary files.
titlecode.asm - Complete code for the title screen/front end
gamecode.asm - Complete code for the main game and main game pointers]
Right, let's divide everything to each section for this game project:
toboggan.asm
There isn't much by the way of code to explain about here. However, let me tell you what is in this source file.
First of all, as well as the introductory comments, we have some variables:
Hardware screen based variables:
split1 - split4 = (value) represents the set position of where raster splits will be placed inside multiple IRQ interruptys/
screen = $0400 is the starting VIDEO RAM area in which screen data should be displayed to. It is also the default screen RAM position
rowtemp = $0100 is where a self-modifying row read from the map data is placed.
ScoreMask = $0771 is the screen position where the player's score is placed.
HiScoreMask = $078b is the screen position, where the High Score is placed.
Status Message = $0756 is the screen position, where we place WELL DONE, or BAD LUCK after game over takes place.
row0 = screen to row24 = screen +19*40 represents the screen row position where the scrolling map is stored to.
Software charset based variables:
SafeArea = 20 represents the safe char area, in which is based on the software based sprite/background collision detection routine
Flag = 179 - As indicated earlier on in this game tutorial, char 179 represents the flag, which the player has to pick up.
Sprite based variables:
LeftStopPosition = $0e is the minimum area which the player can move to when moving to the left of the screen.
RightStopPosition = $9e is the maximum are which the player can move to when moving to the right of the screen
zp = $70 is the zeropage based value, which corresponds to the software based sprite/background collision
Game screen based variables:
ypos = $05 is the zeropage set for controlling the smooth down scroll inside a raster split in order to perform a soft scroll while cycling through the game's map and storing it to the screen.
GameMapStartPosition = MapEnd-25*40 represents the starting position of where the map is on screen. Since after all when scrolling through a map using a down scroll, the map scrolls from the bottom position, all the way to the top of the end point.
GameMapDefaultPosition = MapEnd-26*40 represents the default starting position of the map on screen.
Music based variables:
GameMusic = 0 is the value of the in game music
LightRed = 1 is the Get Ready light sound (Low beep)
LightGreen = 2 is the Green light sound (Long high beep)
Bang = 3 is the sound for the player smashing into an obstacle.
GameOverTune = 4 is the game over jingle
GetReadyTune = 5 is the get ready tune
TitleMusic = 6 is the title / front end music
MusicInit = $1000 is the address, which the music initialise/restarts during programming
MusicPlay = $1003 is the address which the music plays (Usually inside an IRQ raster interrupt.
At $0800, we import the game charset graphics data, then $1000 import the music data. $2000 has sprites imported. followed by the status panel and title screen charset at $2800. Following that, a status/score panel charset is inserted into spare memory $2d00 (Since the title screen charset isn't all that huge in size).
At $3000. A one-time code which is run to test between PAL and NTSC machines.
Titlecode.asm, is then added to the source code. Followed by gamecode.asm. Then 256 bytes are filled to make a clean space before importing the title screen code. (Which titlecode.asm then gets added).
Next the game map data is imported. MapStart = $5000, and MapEnd = where the map ends after importing.
Finally we complete the main project file by importing the main title screen logo.
titlecode.asm
This is the main code for the front end. First off, we kill off all of the existing interrupts. Then we disable any existing sound that is playing, switch off the the screen and initialise pointers for example ANIMDELAY and ANIMPOINTER. These two pointers are for the front end and in game sprite animation. We also initialise the COLOURBARDELAY and COLOURBARPOINTER so that it runs from the start. Also we do a reset of the colour bar, by calling the subroutine, which does the colour bar swap. So that at the start of the front end the scrolling logo multi colours are light blue and cyan
Next the title screen graphics are set up. Simply the charset for the front end (Read from $2800) is poked to the $0400-$07e7 screen RAM and also the border and background is set to black. The screen is cleared using the usual filling $0400-$07e7 with spacebar character loop. The scroll text is initialise (Simply by storing the low and high bytes of ScrollText to the self modifying loop value MessRead, which by now you should already know by heart. The sprite positions (Well, the virtual object positions, also known as ObjPos) are all initialized. Object positions and values for the two toboggans (which are set to spin on the title screen) are put in place, and formed, painted red. Only two sprites are enabled 0 and 1. Also we disable all sprite expansions and priorities. This is just in case a program linked to this program has sprites which expand or go behind the background, and not yet been initialized on an intro, loader or something similar.
Now we draw the main title screen, by reading from the LogoMatrix, row by row, until it has been drawn to the 12th row (row11) using a loop of 40 characters per row. Then we draw the credits from the text pointers line1 to line3 to the screen RAM. Finally before setting up any interrupts, we draw the masked score panel and place to the bottom area of the title screen. The FIREBUTTON trigger pointer is then initialized. After all, after pressing fire on a game over screen, we need to control the fire pressing. The sensitivity of the fire button can be very high, even when you do a simple tap. The trigger is there to prevent the sensitivity of the fire button.
We now setup the multiple IRQ interrupts (Well, initialise those), and the title music, before calling a synchronized loop for the main title code, that calls 6 subroutines. The 6 subroutines expands the sprite area and stores virtual sprite position to actual hardware sprite X,Y positions. Other routines call the a score conversion subroutine, the title screen scroll text, scrolling colour bar behind the logo, animate/rotate the title sprites and then A fire press check is also in place. If fire is pressed, but not let go, the synchronized loop (TitleLoop) will continue running. Otherwise, leaves the title screen loop and runs the start of the game code (gamecode.asm) by calling jmp GameCode.
The Title Screen looks something like this:
gamecode.asm
This is the main code for the game. Like with the front end, we start off by initializing everything. We set the $01 value to $36 in order to allow memory $a000-$bfff to be read as well as memory $0100-$9fff and $c000-$cfff. The VIC2 registers for border, background, multi colours, charset mode, and horizontal screen default position are set. Also we initialise the pointer LIGHTMODE to 0. This is used to time, and then select which get ready light should be displayed before the player can race off on the track. More on this shortly. A loop is also called to reset the player's score and draw the main starting screen, read from GameMapStartPosition The score panel is re-drawn and initialized, along with some unnecessary screen junk being cleared away. game sprite defaults (frame, colour and positions) are set. The game map is initialized .
A multiple interrupt routine is set up, initializing the GET READY theme tune. We clear the IRQ flag, and then create a synchronized timed loop. So that the music will play, and control which starting light should commence before allowing the main game to start. We use 3 different lights. Red, Amber and Green. Once all 3 have lit up, the game can the progress on to the next synchronized loop.
Now we start the game from StartTheGame this will set up the main in game music. Then call a new synchronized loop, which will expand the sprite screen area (ExpandMSB), scroll the screen (using the vertical scrolling hard+soft scroll subroutine (Scroller), similar to the one in the previous sub chapter). Also the player control (PlayerControl) is called, in order to allow use of joystick in port 2 left/right. So that the player can move the toboggan. Followed by animations on the player (AnimatePlayer), which uses a two sprite frame to look as if ice is being sprayed from the course. Followed by background animation (AnimateWaterChar), which picks the chosen characters that scrolls the water char continuously. An additional subroutine RemoveLights, simply scroll the lights off screen to the right until out. Then there is the score masking code (ScoreConvert) that converts the scoring value pointers into the status panel characters, like in the main front end.
A lot of the source is pretty much straight forward, so I need not explain everything, but of course if you look at the subroutine SPRBGRCollision, which indicates the player's sprite/background collision. You will notice something slightly different here. I have done two different calculations, and called the CollisionTest subroutine twice. The reason for this is because the collision for the toboggan should take place at the top middle, and direct central sprite area. Collision should not take place elsewhere. It is important to start with a collision = good char (even if it is over the safe char range). That is because rest assured, we get a fair non-deadly collision (if a char is mixed with deadly characters). Then a range of deadly chars should be read lastly. If we did this the other way round. There would be a bug in the collision code, and the player will lose if it tries to pick up a flag. And this is what would happen:
Yes, that's right. The player will die, and the GAME OVER screen will run and play the GAME OVER jingle.
Scoring:
For scoring, I have based it in two different ways. First of all, if a flag is picked up, a score subroutine inside a loop (Value will calculate amount of points to be added to the panel) is read. Also after the map has restarted after the GOAL memory position has been read. The score routine will give 1000 points to the player as a bonus, before the player has to go through the entire course again. The way to calculate a score is simply like this:
ldy #ScoreValue (x*10 points-1)
ForceScore jsr AddScore
dey
bpl ForceScore
or
ldx #$00
ForceScore jsr AddScore}
inx
cpx #ScoreValue (x*10 points)
bne ForceScore
rts
Okay. I can now leave it to you to check out the code and explore it. Oh, and try to make your own cool games using the existing source. If you do manage to make something from it, please feel free to share it with me. If you'd like it to be published on the TND web site. I might consider to add something to the contributors page for you.
If you are feeling ambitious and would like to try using tiles + maps approach to your up/down scrolling programs. I strongly recommend that you check out Achim Voilker's excellent tile/map decoding tutorial on CodeBase64.
Coming soon:
CHAPTER 7 - Mastering your final production to different physical/digital media + tips