
/ Object Spawning / Game 7 - Rogue Ninja
/ Sprite Properties with Macros / GAME 3B: Missile Blasta Remastered V2
What is a Sprite?
A sprite is a small object that can be moved around the C64 screen. A sprite can be often used in games and demos. They are often used as actors or objects inside a game production. Sprites can be all shapes and sizes, and they can be repositioned, moved and / or also use hi-res or multicolour. They can also be overlayed. Later on we are going to try and make a few games. A later chapter will be showing you advanced game techniques. First of all, a sprite looks something like this:
Hi-res sprite:

Multicolour sprite:

If two sprites are combined together overlapping each other. It is also known as a sprite overlay.
Turning On/Off Sprites
We
use $D015 to turn on sprites. To turn a sprite on we can use LDA #$01,
STA $D015, or if you wanted all 8 sprites turned on, we use LDA #$FF,
STA
$D015. This will be easy to remember. Binary is also helpful to switching on/off sprites.
EXAMPLE:
LDA #%00000001 ;Enable sprite 0, and disable sprites 1 to 7
STA $D015
LDA #%10101010 ;Enable sprites 1,3,5 and 7, and disable sprites 0,2,4 and 6
STA $D015
LDA #%11111111 ;Enable ALL of the sprites
STA $D015
It is also possible to use decimal/hexadecimal codes to switch on/off sprites. The best way to find out those values would be to use a BINARY/DECIMAL/HEX calculator program. There maybe one or two on the CSDB web site.
Setting Sprite Properties (Sprite Type)
Also, setting up your sprite correctly would be quite tricky. Anyway, because we are using bank $03 on the C64, we will use $07F8 - $07FF for our sprites. However, because our sprite data is loaded at $2000, we will need to use LDA #$80, STA $07F8 (for sprite 1), STA $07F9 (for sprite 2),etc. LDA #$80 reads from the first few lines at $2000 and then pastes it into $07F8, etc to perform a perfect display for your sprites.
EXAMPLE: SPRITE 0 TYPE, BANK #$03, FRAME AT $2000, SCREEN AT $0400-$07E8
LDA #$80
STA $07F8
EXAMPLE 2: SPRITE 0 TYPE, BANK #$02, FRAME AT $6000, SCREEN AT $5C00-$57E8
LDA #$80
STA $5CF8
EXAMPLE 3: SPRITE 4 TYPE, BANK #$03, FRAME AT $3000, SCREEN AT $0400,$07E8
LDA #$88
STA $07F8
You will get to know this, when you go on to the first example game, which follows this part of the chapter.
Sprite Positioning
To position sprites, we use $D000 - $D00F. Why are there 16 instead of 8 values? Well, the reason for this is because $D000, $D002, $D004, $D006, $D008, $D00A, $D00C, $D00E use the sprite's x-axis, while $D001, $D003, $D005, $D007, $D009, $D00B, $D00D, $D00F all use sprite's y-axis, both of these are according to the sprite number. Here is a simple routine to get you started on how to position, display and turn on sprites. Call out a start (*=xxxx) and SEI then enter the following.
There are 2 different ways how to position sprites, basically you can use the HARDWARE values, or use ghost bytes then store those to HARDWARE values. If you don't need to expand sprite positioning, then hardware is simple enough to position sprites. (Take a look at the table from earlier for more info about the hardware pointers for Sprite position X, Sprite position Y for each sprite (Sprites 0 - 7).
HARDWARE EXAMPLE (Positioning a sprite at #$70, and #$89)
LDA
#$70
STA
$D000
LDA
#$89
STA
$D001
RTS
LDA #$70
STA SPRITEX
LDA #$89
STA SPRITEY
;Selfmod sprite positioning table
SPRITEY=SPRITEX+1 ;SPRITEY is the next byte after SPRITEX
SPRITEX !BYTE $00,$00,$00,$00,$00,$00,$00,$00
!BYTE $00,$00,$00,$00,$00,$00,$00,$00
Called by an infinite loop inside a game loop or IRQ raster interrupt. This subroutine reads the ghost bytes/or self-mod bytes of the sprite position values and stores the X,Y position to the hardware sprite position.
FULLMOVE:
LDX #$00
XLOOP
LDA SPRITEY,X
STA $D001,X
LDA SPRITEX,X
ASL
;Double the X-screen position
size for sprites
ROL $D010
STA $D000,X
INX ;Read the next sprite's
INX ;X,Y position
CPX #16 ;or #$10 - Max of 16 pointers to use ($D000-$D00F for sprites)
BNE XLOOP
RTS
SPRITEY=SPRITEX+1
SPRITEX !BYTE $00,$00,$00,$00,$00,$00,$00,$00
!BYTE $00,$00,$00,$00,$00,$00,$00,$00
Moving sprites are usually done by incrementing/decrementing the position of each sprite.X or Y position. The best way to calculate a movement of a position for a sprite would be to one of two methods:
MOVING SPRITE 0 X POSITION WITH ONLY HARDWARE
LDA $D000
CLC
ADC #$01 ;Number of pixels to move an object
STA $D000
or
LDA $D000
SEC
SBC #$FF
STA $D000
or
INC $D000
MOVING SPRITE 2 Y POSITION USING SELF MOD TABLE (From one of the above examples)
LDA SPRITEX+3
CLC
ADC #$01
STA SPRITEX+3
or
LDA SPRITEX+3
SEC
SBC #$FF
STA SPRITEX+3
or
INC SPRITEX+3
Sprite Colours
This is something which we have not looked at in this feature. Sprite's colours are simple. We have a hi-res sprite which needs a touch of colour, so here's how it is done. The colour refers from $D027 (sprite 1) to $D02E (sprite 8)
LDA
#$colour
STA
$D027
You can even toggle multicolour sprites, using LDA #$FF, STA $D01C (Multi colour) and to change the 2 multi-colours, we use STA $D025 and STA $D026. $D025 uses multicolour 1, and $D026 uses multicolour 2. To get these to work, we need to set LDA #$colour before STA. The 'colour' has to be between #$00 - #$0F, as these are the main 16 colours. (Please refer to your C64 user guide).
Priorities
Sprites have their own priorities. You can put certain sprites in front or behind the characters on screen. This can be toggled by using $D01B. For example LDA #$00, STA $D01B puts all sprites over the text, and LDA #$FF, STA $D01B puts all sprites under the text. The thing is that you can actually toggle the sprites moving over and under the screen (like in a classic intro screen, which involves a green sprite bar going under and over the logo), however, advanced techniques would be required. We'll be taking a look at this later on in the feature.
EXAMPLE: Sprite 0 behind background, using binary
LDA #%00000001
STA $D01B
EXAMPLE: Sprite 0,2,4,6 behind background, using binary. Other sprites in front
LDA #%01010101
STA $D01B
Sprites can also use
MSB $D010 to expand the position, so that the sprites can go across a
full screen rather than miss the last part of the screen. The game code
example will show you how this works.
Expanding Sprites
Another priority, which sprites have is expanding in two different ways x, and y axis. This transformation can sometimes be a good laugh to try (like I did in a BASIC demo called Biblet Land in 1996), but how do we expand our sprites? We use LDA #$FF (for all sprites), STA $D017, and STA $D01D. $D017 expands 'x' and $D01D expands 'y' for the sprites. You can turn one expansion off and another on.
EXAMPLE: Sprite 1 Expanded X,Y
LDA #%00000010
STA $D017
STA $D01D
EXAMPLE: Sprite 2 Mixed expansion
LDA #%00000100STA $D017
LDA #%00000000
STA $D01D
Sprite/Sprite hardware
collision is used with $D01E. But we will be using SOFTWARE
sprite/sprite collision
Sprite/Background collision is used with $D01F. Collision detection is
slightly different. You need to check a value for an object to have hit
another object. You also need to compare a value of whether or not a
sprite has crashed into another sprite. For example. Sprite 0 hitting
any other sprite:
LDA $D01E
CMP #%0000001 ;Any sprite hitting the player.
BNE NOCOLLISION
JMP PLAYERDEAD
NOCOLLISION
RTS
Software collision
Sprite/Sprite
collision is used by
creating and storing values according to the virtual sprite position
co-ordinates. The collision subroutine checks whether or not one sprite
is in range of another sprite. It uses a one size fits all approach.An
Example of this is set out on GAME 1 and 2's example. Basically something like:
LDA $D01E
CMP #$01 ;Other Sprites collided into SPRITE 0
BCS NOTHIT
INC $D020
NOTHIT
RTS
Hardware Sprite/Background Collision
This
is a very simple approach to detecting a sprite hits a background,
using hardware $D01F. This is used exactly the same way as the player
colliding into a sprite. Give a Dog a Bone will show you this.
LDA $D01F
CMP #$01 ;Other Sprites collided into SPRITE 0
BCS NOTHIT
INC $D020
NOTHIT
RTS
Software Sprite/Background collision is more complex where checks through a table for a killer char on screen, and then processes a collision. Most games use the software collision, than the hardware collision, as it is more reliable and handles collisions well - depending on the program. We will be showing you this in the 2 player game 'Universal Blaster'.
BACK TO TOPPROGRAMMING YOUR FIRST SPRITE PROGRAM
Just for fun, we are going to program our first sprite program. I should warn you, it is NOT going to be all that exciting, but it will give you a basic idea of how easy it is to display and move sprites around the screen. Simply draw 1 single sprite in C64Studio's sprite editor (or use Charpad) then EXPORT your single sprite as a frame and then IMPORT it into the source code.
;Sprite fun by Richard Bayliss
;An introduction to drawing and moving
;sprites (Using non-expanded MSB mode)
!TO "SPRITEFUN.PRG",CBM
*=$0801
!BASIC 2018,2064 ;Generate SYS 2064 call
*=$0810
SEI
JSR $E544
LDA #$0C ;Grey border
STA $D020
LDA #$0B ;Grey background
STA $D021
LDA
#%11111111 ;Enable all sprites (You can use #$FF or 255 if
your wish)
STA $D015
LDA
#%00000000 ;Disable other sprite properties which are:
STA $D017
;Sprite
Y-EXPANSION
STA
$D01B ;Sprite behind
background
STA
$D01D ;Sprite X-EXPANDSION
;Draw all sprites as same sprite from $2000
LDX #$00
DRAWSPRITES
LDA
#$80 ;Frame to read
STA $07F8,X ;SPRITE0-7 TYPE
LDA #$01
STA $D027,X ;SPRITE0-7 COLOUR
INX
CPX #$08
BNE DRAWSPRITES
;Now sprites have been drawn. Set a default position where all sprites
;a placed at the centre of the screen.
LDX #$00
POSITIONSPRITES
LDA #$78 ;SELECTED X POSITION
STA $D000,X ;SPRITE0-SPRITE7 X POSITION SET
LDA #$88 ;SELECTED Y POSITION
STA $D001,X
INX ;ADD
2 TO READ TO THE NEXT POSITION
INX
CPX #16 ;ALL 16 POSITIONS READ?
BNE POSITIONSPRITES ;MAYBE NOT
;All sprites are positioned, let's make a simple raster delay
;then allow sprites to move according to a sprite position read table
LOOP
LDA #$FA ;RASTERLINE
CMP $D012
BNE LOOP
;Move all sprites via a loop
LDX #$00
MOVESPRITES
LDA $D000,X
CLC
ADC MOVETABLE,X
STA $D000,X
INX
CPX #$10
BNE MOVESPRITES
JMP LOOP
;Sprite movement / speed table
MOVETABLE
!BYTE $00,$FF ;SPRITE 0 X/Y SPEED - NORTH
!BYTE $01,$FF ;SPRITE 1 X/Y SPEED - NORTH EAST
!BYTE $01,$00 ;SPRITE 2 X/Y SPEED - EAST
!BYTE $01,$01 ;SPRITE 3 X/Y SPEED - SOUTH EAST
!BYTE $00,$01 ;SPRITE 4 X/Y SPEED - SOUTH
!BYTE $FF,$01 ;SPRITE 5 X/Y SPEED - SOUTH WEST
!BYTE $FF,$00 ;SPRITE 6 X/Y SPEED - WEST
!BYTE $FF,$FF ;SPRITE 7 X/Y SPEED - NORTH WEST
;Import binary (SPRITE DATA)
*=$2000
!BINARY "MYSPRITE.SPR"
RESULT:
![]()
This was quite a basic example on sprites being moved inside a loop. So how were the sprites being able to move? A loop controlled inside a raster, calls a routine to pick up a current position of a sprite. It then reads a positive or negative value from the sprite movements table (MOVETABLE) and then updates the position of a sprite by adding or subtracting by the value of the sprite table.
CHALLENGE 1:
By
playing around with the tables. Reverse the process, but double the
speed of the sprite movement. Also enable expanded sprites.
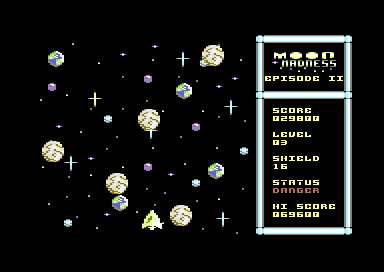
GAME 1: Moon Madness - Episode 2 - Infinite destruction
Back in the year 2000, I wrote a simple, but rather buggy game called Moon Madness. Now 18 years later a sequel features in this chapter, we are going to replicate the naff game, but make it much better. First of all, you will need to draw your own title and game screen (Or if you want to, you can just download the data+source that has been implemented into this example, simply by clicking on the image). This example game will be using no expanded sprite MSB positioning and the collision detection is just going to be plain hardware, using D01E - allowing ALL sprites to collide into the player.
- Player ship is located at the bottom of the screen and will only be allowed to move left / right
- A series of planets will be screaming down the screen.
- A score will be achieved for every moon passed off screen
- A hardware collision detection ($D01E) will be used for every time a moon which hits the player
- A shield counter - to indicate the damage status of the player
- Animated sprites for player + explosion.
Setting up the game:
First
of all, only 1 tune is being used for this game, so I initialised the
music player. It is of course a tune I wrote exclusively for this game.
Addresses are set for displaying the sprites (Sprite data at
$2000-$2800, Charset data at $2800,$3000, Game Screen data at
$3000-$3400, Colour Attributes at $3400 - $3500, and Game Title
Screen/Matrix at $3500-$3900.
The
next step was to create the title screen, which was able to mask the
current score into the screen position which was intended to be read
for the scoring and hi-score. The fire button is initialised. An IRQ
interrupt is called, playing the music. After clearing the IRQ flag. A
simple loop waiting for the player to press fire to start the game is
in place. Following that. The game code commences.
The main game
screen gets drawn, the sprites are initialised and repositioned. A
GAMELOOP is called with a few subroutines linked to the game loop.
Which are as follows:
- SYNCTIMER: Synchronise the timer linked to the IRQ interrupt, in order to allow movement/delay of the code run more smoothly. It's actually better than linking subroutines inside the actual interrupt anyhow :)
- ANIMPLAYER: Animate the player, according to the delay and amount of frames to be read. The animation subroutine reads all of the valid bytes from a table, until it reaches the end of the table. A pointer is then reset to make the sprite animation restart from the very first byte on table.
-
PLAYERCONTROL: Tries to read the joystick in port 2, and controls the
player. If LEFT/RIGHT are pushed on the joystick. The player's ship
will update it's current position on to the next position at 3x the
speed set in the MOVELEFT / MOVERIGHT subroutine.
- MOVEMOONS:
This subroutine picks up the current position of a moon through a loop,
and updates it to the next Y position, according to the value of the
LEVEL zeropage. This controls the speed of the game. The moons will
wrap down the screen consistantly.
-SCORING: This checks whether
one of the 8 moons (which is checked through a loop) have reached a
certain position #$F0 (250). If it has reached that position and is
leaving the screen. Another subroutine is called to score points, via
DOSCORE. The subroutine DOSCORE reads all 6 digits of the score, and
then does some score adding according to the position of the SCORE
table.
- MASKSCORE: Copies all 6 digits from the SCORE table,
and HISCORE table and positions these on to the screen position, which
was planned for the score/hi score digits.
-LEVELTIME: Game play time, before setting up the next level. This subroutine Does two tests. First it checks whether or not LEVELTIME1 has reached its maximum time limit. If it has, it updates LEVELTIME2 to go up one byte. After time has elapsed. It adds a value to the zeropage LEVEL, which speeds the game up. However after the next check If the LEVEL counter = 8, and the time is up on that level. The game will jump straight on to the ENDSEQUENCE. Which is another loop, that animates the player flying off the screen, displays the END SCREEN text, and finally updates the score + hiscore and waits for Fire to be pressed to restart the program.
-TESTCOLLISION:
Tests the player's sprite/sprite collision with the rest of the
sprites. If a collision value has been detected (Value above 1), a
collision from all of the other sprites have been found. A subroutine
is called to flash the player ship (incrementing the sprite 0 colour)
and also drain the player's shield. When the player's shield is drained
a subroutine is called to update the digit values of the two zeropages
SHIELDDIGIT1 and SHIELDDIGIT2. (In the game loop, the SHIELDDIGIT1 and
SHIELDDIGIT2 are stored to the screen position of the 2 digits to be
used). The collision subroutine also checks whether or not the player's
shield counter has reached 00. If it has, another loop is called which
will destroy the player ship, using another loop for explosion
animation. Then the GAMEOVER prompt and hi-score check is performed.
The game then refreshes the FIREBUTTON zeropage and waits for the
press of the fire button before restarting the program again.
However, if you want to see just the source code. Since code can be quite lengthy at times. I have decided to just provide links for you to view the code. If you want to play the game (Or play around with the binaries and source for this game). You click on the image below to download it all :)
VIEW SOURCE
BACK TO TOP
Allowing Sprites to move MORE than 256 pixels
You may have spotted that the previous 2 sections in this tutorial only limited the number of pixels for a sprite to move as 256. There are many C64 games, which allowed sprites to move further. How was this done? Basically a hardware pointer of $D010 does this trick. $D010 can be used in different ways.
Example 1 - Checking the sprite range:
LDA $D000
CLC
ADC #$01
CMP #$FF ;256TH byte reached
BCC NOTREACHED
LDA #$00
STA $D000
LDA #$10
STA $D010
NOTREACHED
STA $D000
RTS
Checking for a X position of a sprite in order to expand the position, allowing full screen can be hard work. The most simplest method, which is my favourite method, is EXAMPLE 2 for just a single sprite and EXAMPLE 3 for additional sprites.
Example 2 - The sprite pointers to hardware method for a single sprite
EXPANDMSB
LDA VSPRY ;Grab Y position of sprite pointer
STA $D001 ;Store it directionally on to the Hardware Sprite Y
LDA VSPRX ;Grab X position of sprite pointer
ASL ;8 bit multiplication
ROL $D010 ;for screen expansion / sprite position
STA $D000 ;Store it directionally on to the Hardware Sprite X
RTS
Example 3 - Using MORE sprites to hardware sprite position method (USE JSR EXPANDMSB inside your program loop in an IRQ or Rasterline):
EXPANDMSB
LDX #$00 ;Start a loop with X=0
LOOP
LDA VSPRTABLE+1,X ;Grab Y position of sprite pointer from table
STA $D001,X ;Store it to hardware Y sprite position
LDA VSPRTABLE,X ;Grab X position of sprite pointer from table
ASL ;Multiply the no/pixels
ROR $D010 ;To generate the size of the screen the sprite can move
STA $D000,X ;Store to X hardware sprite position
INX ;Shift code to read 1 table up 1 byte
INX ;Shift code to read 1 table down 1 byte
CPX #16
BNE EXPANDMSB
RTS
You have already seen some of these example code snippets, but wouldn't it be better if it was used using the similar grey screen sprite demo, as I gave you earlier above CHALLENGE 1? :) Well, why not? ;) Here it comes:
MOVING SPRITES - DEMO 2 - (Using Expanding MSB, with $D010)
;Sprite fun 2 by Richard Bayliss
;An introduction to drawing and moving
;sprites (Using expanded MSB mode)
!TO "SPRITEFUN2.PRG",CBM
*=$0801
!BASIC 2018,2064 ;Generate SYS 2064 call
*=$0810
SEI
JSR $E544
LDA #$0C ;Grey border
STA $D020
LDA #$0B ;Grey background
STA $D021
LDA #%11111111 ;Enable all sprites (You can use #$FF or 255 if your wish)
STA $D015
LDA #%00000000 ;Disable other sprite properties which are:
STA $D017 ;Sprite Y-EXPANSION
STA $D01B ;Sprite behind background
STA $D01D ;Sprite X-EXPANDSION
;Draw all sprites as same sprite from $2000
LDX #$00
DRAWSPRITES
LDA #$80 ;Frame to read
STA $07F8,X ;SPRITE0-7 TYPE
LDA #$01
STA $D027,X ;SPRITE0-7 COLOUR
INX
CPX #$08
BNE DRAWSPRITES
;Now sprites have been drawn. Set a default position where all sprites
;a placed at the centre of the screen.
LDX #$00
POSITIONSPRITES
LDA #$58 ;SELECTED X POSITION
STA VSPRPOS,X ;SPRITE0-SPRITE7 X POSITION SET via custom
;sprite positioning table (VSPRPOS)
LDA #$88 ;SELECTED Y POSITIIN
STA VSPRPOS+1,X
INX ;ADD 2 TO READ TO THE NEXT POSITION
INX
CPX #16 ;ALL 16 POSITIONS READ?
BNE POSITIONSPRITES ;MAYBE NOT
;All sprites are positioned, let's make a simple raster delay
;then allow sprites to move according to a sprite position read table
LOOP
LDA #$FA ;RASTERLINE
CMP $D012
BNE LOOP
JSR EXPANDMSB ;Subroutine to expand MSB sprite area
JSR MOVESUBR ;Subroutine to move sprites by calculating movement
JMP LOOP
;Expand the position of the sprites, according to the
;position of a proposed sprite position then store
;the pointers to the hardware position
EXPANDMSB
LDX #$00 ;Start of a loop for reading tables
EXPANDREAD
LDA VSPRPOS+1,X ;Grab the next current table position of VSPRPOS
STA $D001,X ;Store it to Sprite Y Hard ware sprite
LDA VSPRPOS,X ;Grab the previous current table position of VSPRPOS
ASL ;16 bit multiplication
ROR $D010 ;Expand the sprite position screen
STA $D000,X ;Store the new position to hardware Sprite X
INX ;read next byte of table for VSPRPOS (Y)
INX ;read next byte of table for VSPRPOS (X)
CPX #16 ;16 bytes ($10) read (There are 16 pointer max for sprite positioning)
BNE EXPANDREAD ;If not, read the next table
RTS ;Finished
;Move all sprites via a loop
MOVESUBR
LDX #$00
MOVESPRITES
LDA VSPRPOS,X ;Grab virtual sprite position from table
CLC
ADC MOVETABLE,X ;Add a positive/negative value according to the movetable
STA VSPRPOS,X ;Store the value as a speed directly to the virtual sprite posiion
INX ;Add a value to X loop(1 byte)
CPX #16 ;Have all 16 bytes of the speed table been read?
BNE MOVESPRITES ;No, read next byte from table
JMP LOOP ;Exit subroutine
;Sprite position table (VSPRPOS) - Virtual Sprite Position
VSPRPOS
!BYTE $00,$00 ;SPRITE 0 X/Y
!BYTE $00,$00 ;SPRITE 1 X/Y
!BYTE $00,$00 ;SPRITE 2 X/Y
!BYTE $00,$00 ;SPRITE 3 X/Y
!BYTE $00,$00 ;SPRITE 4 X/Y
!BYTE $00,$00 ;SPRITE 5 X/Y
!BYTE $00,$00 ;SPRITE 6 X/Y
!BYTE $00,$00 ;SPRITE 7 X/Y
;Sprite movement / speed table
MOVETABLE
!BYTE $00,$FF ;SPRITE 0 X/Y SPEED - NORTH
!BYTE $01,$FF ;SPRITE 1 X/Y SPEED - NORTH EAST
!BYTE $01,$00 ;SPRITE 2 X/Y SPEED - EAST
!BYTE $01,$01 ;SPRITE 3 X/Y SPEED - SOUTH EAST
!BYTE $00,$01 ;SPRITE 4 X/Y SPEED - SOUTH
!BYTE $FF,$01 ;SPRITE 5 X/Y SPEED - SOUTH WEST
!BYTE $FF,$00 ;SPRITE 6 X/Y SPEED - WEST
!BYTE $FF,$FF ;SPRITE 7 X/Y SPEED - NORTH WEST
;Import binary (SPRITE DATA)
*=$2000
!BINARY "MYSPRITE.SPR"
RESULT:
BACK TO TOP
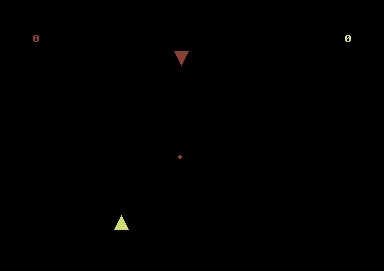
GAME 2: UNIVERSAL BLAST DUEL
We
are going to create a small 2 player game, where you have two ships.
We'll
be using three sprites for this tutorial, but in chapter 11, we will
enhance
the game more. Here is what to do. Using the sprite editor, draw 2
triangles
(not in multi-colour) One pointing up, and the other pointing down,
then
draw 1 small circle. The two triangles will be the two players and the
circle will be the player's bullet. Save your sprite data, and rip or
compose
your own demo tune using any music composer which initialize your tune
at $1000 and play at $1003. Save your music to disk. However, If this
is
too much hassle to get you started then I have attached a .D64 image
with
the data and code. You'll just need Turbo Assembler. Please read the 2
note files supplied with the code and data. There is also a runnable
file
for you so you can see the sort of game, we're teaching you to create
:).
The runnable file should look something like this. Yeah, I know. I used
basic shapes, but what the heck?
.... and now, the
code, fully documented:
GET FULL BINARY+PROJECT SOURCE
Quite
a lot of code there eh?. Well, more to come :)
Enhancing Your Game, using Bitmap/Hires Graphics
I wont add the whole listing to the game again, but not to worry, I've added another .D64 image, which consists of the game code and extras. What I've done for the enhanced game is add a picture, converted into Vidcom Paint format, as that way it is easy to remember what banks and charset memory to use. You could save your picture using KOALAPaint, but you would need to use the Comic Pirates' Picture Splitter program, which can be downloaded from the CBM64 FTP sites. Anyway, let me tell you about Vidcom paint images shall I?
First of all, the Vidcom Paint images are compressed to 40 blocks and uses the following locations for the image. First of all, the image uses BANK #$02 so that memory from $4000 - $8000 can be read. If this is the case then a sprite has to move to a newer location. We use $5800 - $5be8, where the data for our colours to be pasted into the main color RAM (If you don't know where the colour RAM is, take a look at an earlier chapter. We use $5C00 - $5FE8 for the colour data, which is indicated by the charset memory using $D018. Finally we use $6000 - $7F3F for the bitmap, where that also uses $D018. We need to use a correct POKE for $D018 to display the screen accurately.
Right, now I have mentioned the technical part about Vidcom Paint graphic images, it is time to show you how to actually display them. First of all, load up your image, load Turbo Assembler, use G9000 in Action Replay M/C monitor or SYS36864 and enter * = (spare memory location you want to use), enter a loop which will clear the screen now enter the listing, which is as follows:
LDX #$02
LDA
#$02
LDY #$78
STA $DD00
LDA #$3B or
LDA #$78
STX $DD00
STA $D018
STY $D018
LDA #$3B
STA $D011
STA $D011
Now that we have set $D011 in bitmap mode, if you display the Vidcom picture, it looks a sort of mess - colour wise, so now we do an additional routine, which will copy all data from $5800-$5BE8 to the screen RAM. Here's how it's done:
LDX #$00
PAINT LDA
$5800,X
STA $D800,X
LDA $5900,x
STA $D900,X
LDA $5A00,X
STA $DA00,X
LDA $5AE8,X
STA $DAE8,X
INX
BNE PAINT
Now let's add HOLD JMP HOLD, assemble and then test. Viola, an accurate bitmap picture displayed at last :o).
Okay, what
about
our game? Well, I have attached a zipped complete C64 project image, so you can
download it. It consists of all the data, for music, sprites and
bitmap. The
assembler and also the game code. There is also a runnable file of this
game too. :o) Beware, because of the size of the code in Turbo
Assembler, the bitmap will mess up. All you need to do is load your
bitmap, once the assembly is complete and everything works. :o)
RESULT:
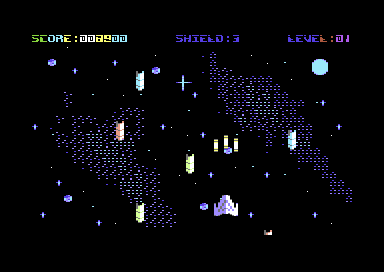
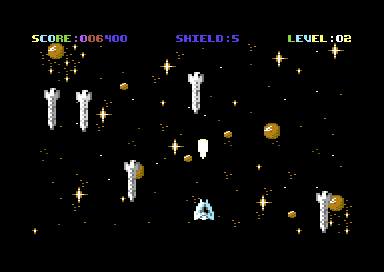
GAME 3: MISSILE BLASTA - (Remastered Edition)
In this chapter, we are going to be working on a 1 player blasting game. First of all. We are going to have a player, bullet and also enemy. This game is going to feature sprite animation (unlike the previous game example). Animating sprites are not that easy, unless we created a routine, which would read from the sprite table and animate these. Here's what you need to do (or just look at the example .d64 image). We are going to be placing music at $1000, sprites at $2000, charset at $2800. Now using a screen editor or any other tool, draw a nice little space background (Blueaugh! My background screen and sprites suck big time - the data and code was very old anyhow.
So how will this game work?
First of all, the game will consist of 8 different sprites. One sprite for the player. A sprite for the player's bullet. Also 6 sprites for missiles. Each sprite (apart from the bullet) is to be animated. Also for the timebeing the bullet can explode every time it hits a missile. Once a missile has reached the very bottom of the game screen. It gets repositioned at a different horizontal position, according to a simple randomizer (table constantly pulled all the time).
The sprite/sprite collision uses a software based collision with the player. The collision is based on a 'one size fits all' where the X and Y co-ordinates of a current position of the player is read. Should any part of a sprite reach the area within the range of the player. A collision is formed, and the player will lose a shield. After the player has lost its shield. It will explode, and the game is over.
Grab the C64STUDIO Project and Binary Data
RESULT:
CHALLENGE 2:
By looking at the game code. See if you can add some more random sprite position tables. Also add a GAME OVER and ENDING SCREEN. I deliberately left those out for you as a challenge.
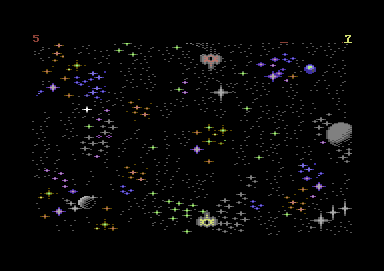
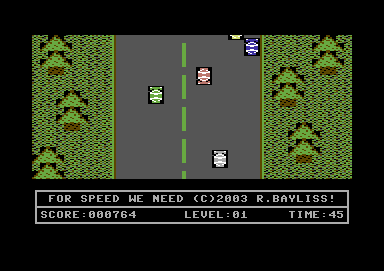
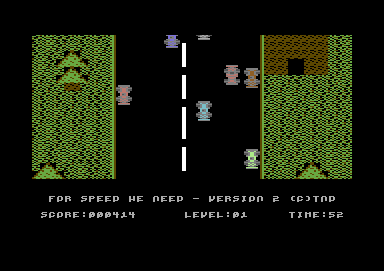
FOR SPEED WE NEED
In this chapter, we take a look at For Speed We Need V2 game. Well before I give you the code let me tell you more about this simple game. First of all, it is one of those simple dodge and avoid games, which consist of 4 levels of different speeds. It also involves each level being timed by a clock. Plus simple sprite to sprite coliisions using $D01E (It is better to not use this function if you're doing more advanced game programming). Also this features a rough background scroller, which loops if '@' is detected in the M/C using very old code. Well, it was originally made in 2003 in Turbo Assembler. The code and program files have now been ported to C64 Studio.
There
are
different parts of the code which you should be familiar with, but not
everything is as familiar as it could have been for you. There are some
newer routines, such as making the game more stable, instead of using
raster splits that use CMP $D012. A double interrupt has been used
instead. I haven't really mentioned much about double interrupts, but
they are very handy - especially if you want to SAVE some raster time.
You might have also
noticed that I have added a
SYNC routine, which tries to
synchronize the main body of the game code, instead of using JSR
routines for the game inside an IRQ raster interrupt. This is mainly
because the IRQ raster interrupt can slow down if too many Ioops or subroutines are placed inside
an IRQ. So it is best to clear the IRQ flag and
syncrhonize the timing, so that sprites and data work accurately.
Sometimes the SYNC mode is a pain in the backside, but if you use it
right, it should work fine. I have however, deliverately put some
sprite routines inside the IRQ, as the movements did not synchronize
properly while music was playing. Other routines work fine :)
The Scroller: If
you take a look at (11.) properly you will notice that the game
scroller is not a smooth scroll. But a rough scroll routine. Where you
see the $0400+(N*n),x bit in the rough scroll. This is where 40 chars
($28 chars) is read from the bottom, and is then pulled to the upper 40
chars row. After all rows are pulled. A new row of data is visible on
screen from the map buffer, and the pulling routine continues.
Like myself,
you'd find this routine
difficult, but later on you should
be able to get the hang of it :).
O.k. now
here's the code
And here is the full C64 Studio Binary and Source Code
CHALLENGE 3:
Gee whizz. This code is ever so old, and the game looks really ugly and horrible. Your challenge is to simply implement some new game graphics, and screen and also add a front end to the game and link it to the source. Let's see what you can do with it.
Hardware sprite to background collision + animated chars
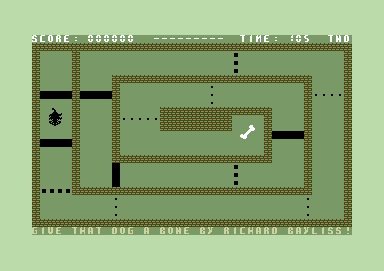
GAME 5: GIVE THE DOG A BONE
We
are going to write another little mini game. This time it is a game which
uses sprite to background collision detection. Before we get started, I
need to point out that there are actually two different types of sprite
/ background collisions. They are the hardware collision and also the software
collision.
For this example, we will be using the hardware sprite to background collision, which is more simple. In
the next chapter, we'll be using the software
sprite/background collision, which is all to do with
the char type and also collision char tables. The hardware collision
uses the $D01F value, which means if a sprite hits a visible char
anywhere on the screen, a collision is made. This is pretty simple to
detect by using the following statement in your source code:
SPRCOL
LDA $D01F ;Read sprite/char hardware
LSR
A ;Remove A if you are NOT using Turbo Assembler
BCC HIT
RTS ;Player is not
hit, so terminate the routine
HIT
INC $D027 ;Flash
sprite colour to show collision
RTS
;End
Pretty simple huh? Well, it is pretty
boring to look at as code. You would want a practical example wouldn't
you?. Well, thankfully, you can download the example and the source
code below to look at it in a more practical kind of way. The program
below was programmed in Turbo Assembler, and shows the whole example
code for the sprite/background collision. It does not look anything too
exciting. It shows a blank screen with a line of the reverse on +
spacebar chars and a square sprite, which will move until it hits the
visible charset.
;Assemble
IT - Chapter 21, part 1
;
;Sprite
to
background collision
;By
Richard Bayliss
;Global
labels/constants
objpos
= $0370
sync
= $0380
*= $4000
sei
;Clear
the
screen
lda #$00 ;Blacken screen
sta $d020
sta $d021
ldx #$00
wipe
lda #$20
sta $0400,x
inx
bne wipe
;Draw a
line somewhere at the bottom
;using
RVS
on + SPACEBAR char.
ldx #$00
draw
lda #$a0
sta $06d0,x
lda #$02
sta $dad0,x
inx
cpx #$28 ;(Or use #40 instead)
bne draw
;Fill
$2000 so we can make a square as
;the
test
sprite.
ldx #$00
mksquare
lda #$ff
sta $2000,x
inx
bne mksquare
;Turn
the
only sprite on
lda #$01
sta $d015
;Put
square object into sprite memory
lda #$80
sta $07f8
;Now set
up only one sprite and its
;default
position (for expansion)
lda #$58
sta objpos+$00 ;Default xpos
lda #$42
sta objpos+$01 ;Default ypos
;Set the
sprite colour to white
lda #$01
sta $d027
;Make
our
interrupt
lda #<irq1
ldx #>irq1
sta $0314
stx $0315
lda #$00
sta $d012
lda #$7f
sta $dc0d
lda #$1b
sta $d011
lda #$01
sta $d01a
cli
mainloop
lda #$00
sta sync
cmp sync
beq *-3
jsr expand ;Call expansion rt
jsr readjoy ;Call joy read rt
jsr bgrcol ;Call bgr.coll rt
jmp mainloop
;Expand
the sprite x position for only
;the
first
sprite
expand
lda objpos+$01
sta $d001
lda objpos+$00
asl a
rol $d010
sta $d000
rts
irq1
inc $d019
lda #$01
sta sync
jmp $ea7e
;Move
the
square slowly around the
;screen
with a joystick plugged into
;port 2
readjoy
lda $dc00
up
lsr a ;Remove 'a' if not
bcs down ;using Turbo Assembler
ldx objpos+$01
dex
dex
stx objpos+$01
down
lsr a
bcs left
ldx objpos+$01
inx
inx
stx objpos+$01
left
lsr a
bcs right
ldx objpos+$00
dex
stx objpos+$00
right
lsr a
bcs fire
ldx objpos+$00
inx
stx objpos+$00
fire
rts ;Ignore firebutton as
;we don't really need
;it.
;The
hardware sprite/background
;collision
routine
bgrcol
lda $d01f;Hardware detect
lsr a ;If sprite 1 touches
bcs hit ;visible char then
;collision detected.
;else sprite stays white
lda #$01
sta $d027
rts
;Sprite
hits a visible char so for now
;we'll
make the sprite flash.
hit
inc $d027
rts
Okay. So now you seem to have the grasp of what is going on here, it is
time make a game, but before you do, I want to show you a new trick,
which will be implemented into the source code. Do you remember my
games such as Balloonacy and Balloonacy 2? These games used the same
type of technique as above, but you also notice how the game uses
animated chars. It is tricky at first, but after a while you will get
the hang of the routine. It is quite nice and handy to use.
charanim
lda chrptr
cmp #$0c ;Our actual delay
beq enddelay ;for the anim
inc chrptr ;basically, the
rts ;speed.
enddelay
lda #$00
sta chrptr
ldx #$00
wrap1
lda
$2a00,x ;Copy the whole
;char data and
sta $2a40,x ;paste it to $2040
inx ;8 times
cpx #$08
bne wrap1
ldx #$00
wrap2
lda
$2a08,x ;Copy chars from
sta $2a00,x ;$2a08 to $2a00
inx ;for a perfect
cpx #$40 ;working charset
bne wrap2 ;animation.
rts
Now the background animation and that is sorted out. We are going to do
a little game. Actually I have done an example of a simple game, which
uses both the background char animation and also the hardware sprite to
background collision routine. The game is called "Give The Dog A Bone".
The concept is pretty simple, and you'll see the example source below.
Okay, so it is not really much of a game, but we'll look into expanding
the game and the source code in the next chapter, which I'm sure you
will find interesting.
SOURCE CODE
DOWNLOAD C64 STUDIO PROJECT, BINARY AND SOURCE
CHALLENGE 4:
You seen how basic this game is. Why not re-designing the same type of game, but with new graphics, sprites and music.
Software related sprite/background Collision
Last time in this section, we were showing examples on making sprite/background collision, using the $D01F register. However, there's also another method (but longer method as well), which is the use of sprite/character collision. How is this usually done? Well, it is different compared to using $D01F. When we used $D01F, it could only detect a collision if a sprite hit a visible character. This method was used a lot, with some of my games, such as Balloonacy 1 and 2, Grid Zone, and a few others. However, we shall be taking a look at the software sprite/background collision - and even come up with a little example game for you to try out.
The software programmed sprite/collision register will detect whether or not a sprite hits a selected character value on screen. This is based on the Racked Off sprite/background collision routine by Kenho, and a few other people on the CSDB who has also contributed the routine on the CSDB forums. Before we start. We shall be making a simple game, here's my implementation of the routine (using the same square and line example) which will flash the square if it collides into the INVERTED SPACEBAR character.
SOURCE CODE (TASS Format)
Little quiz:
Taking a look at the example, above. Change the line from the inverted SPACEBAR character to a different character and then assemble and run the program to see what will happen. That's correct, no collision at all. That is how the Software related sprite/background collision works, while $D01F uses any visible character on screen.
Okay folks it's now GAME MAKING time. Today we are very proud to bring you an example game called:
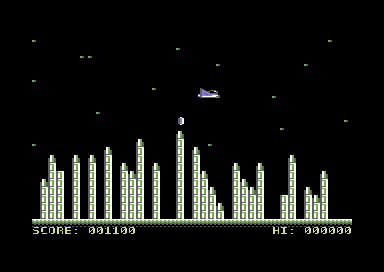
HYPER BLITZ
We are going to make a well known retro game, which may have been programmed in BASIC so many times either from books, magazines, toilet walls. Okay, maybe not. Anyway don't get too excited because we're pushing BLITZ even further and program our own. This is an example game which will be using the software related sprite/background collision feature, but this time round we are using this feature TWICE. Anyway, let me explain more about the game code before you decide - LET'S MAKE SOME BLITZ GAMES AND SHOW RICHARD WHAT WE CAN DO.
For a start off, before entering the machine code into Turbo Assembler or possibly one of the assemblers. Draw some sprites, the game charset. Make build your own level design and then compose some music (Unless you want to use my music of course). Now load in the assembler (or export what you done and place it where your cross assembler lies). Then load up the source. Feel free to modify it if you like :)
The source:
Just a quick explanation about what happens in the source (As the source is documented itself). We start the code by setting up the graphics type and colours. Simply by switching on the sprite/charset multicolour. Next comes the initializing of the IRQ interrupt routine. Where we try and hack a raster interrupt to work as a continues. After clearing the flag. We switch on only sprites, where the player is a space ship and the bullet is a simple bomb. After this, we create our own sync timer so, when an IRQ raster interrupt is playing, we can synchronize the timer to get all movements and subroutines synchronized. Then comes the JSR subroutines, which will do various checks. We also have subroutines that will constantly move the player until it hits one of the buildings. Routines to reposition the player once in a certain position off screen. Check for a sprite to char collision, according to whether the player hits the building or whether a bomb hits the building, making the play score points. There are also routines which will animate the player's ship as well. And the finalize the code, we have the main IRQ raster interrupt in action as well. You best take a look at the source code to see what I mean.
SOURCE CODE
DOWNLOAD C64 STUDIO PROJECT SOURCE AND BINARY FILES
Object Spawning (Shape Changing)
When it comes to assembly programming. The Commodore 64 is limited to 8 sprites. However, when you play any C64 game, such as a shoot 'em up or any other classic / modern day C64 game. After a destroyed object (or an object leaves the screen) a new object is produced - or how I would like to call it, spawned. How is this done? Well, there are different ways in which you could spawn a new object/animation. Either produce a single table of bytes and compare a value of a table for each object or generate a self-mod table in which generates a new object. Here is a small example:
EXAMPLE: A sprite leaves the very right of the screen, then morphs into a new object
;MOVE SPRITE UNTIL IT LEAVES THE SCREEN. AFTER IT HAS
;LEFT THE SCREEN. TURN THE OBJECT INTO A DIFFERENT SPRITE
!TO "SPRITESPAWN",CBM
*=$0801
!BASIC 2018,2064
*=$0810
SEI
JSR $E544
LDA #$01
STA $D015
STA $D01C
STA $D020
STA $D021
LDA #<HEXAGON ;Fetch lowbyte of HEXAGON
STA SPRANIM1+1 ;Store to Self-Mod sprite anim
LDA #>HEXAGON ;Fetch hibyte of HEXAGON
STA SPRANIM1+2 ;Store to Self-Mod sprite anim
LDA #$06
STA SPRCOLOUR+1 ;Store new colour to sprite
LDA #$88
STA OBJ_Position+1 ;Virtual Y sprite position
LDA #$00
STA OBJ_Position ;Virtual X sprite position
;Create a test loop
TESTLOOP
LDA #$32
CMP $D012
BNE *-3
LDA OBJ_Position+1
STA $D001
LDA OBJ_Position
ASL
ROL $D010
STA $D000
JSR SPRITE0PROPERTIES
JMP TESTLOOP
;Animate, display colour and also move sprite across the screen.
;As soon as the sprite has moved outside the screen into the border.
;Spawn a new sprite frame and colour, by reading the SPAWNNEXT
;subroutine. Then reposition the sprite horizontal position
SPRITE0PROPERTIES
SPRANIM1
LDA SQUARE ;Default SQUARE for sprite type
STA $07F8 ;store to SPRITE0 type
SPRCOLOUR
LDA #7 ;Yellow square
MOVESPRITE1
LDA OBJ_POSITION ;Since expanded sprite movement,
CLC ;move the sprite 1 byte to the right
ADC #1 ;The speed for movement
CMP #AC ;Has the object left the screen?
BCC UPDATERIGHT ;Still below, update new sprite position
JMP SPAWNNEXT ;Jump to subroutine SPAWNNEXT to set new object properties
UPDATERIGHT
STA OBJ_POSITION ;Linked to movement, store the new position of object
RTS
;Subroutine which will spawn a new object. First a pointer (Spawn Pointer) is read
;in order to read the next byte table SPAWNTABLE. SPAWNTABLE is a simple series of
;numbers in which will read a selected table position (according to the second counter
;SELECTPOINTER. Here's how it is done.
SPAWNNEXT
LDX SPAWNPOINTER ;Set Pointer SPAWNPOINTER (X Value)
LDA SPAWNTABLE,X ;Read a byte from SPAWTABLE
STA SELECTPOINTER ;Store it to the SELECTPOINTER
INX ;Add 1 to value of SPAWNPOINTER (For reading the next table)
CPX #16 ;Total number of bytes in random sequence (16)
BEQ RESETSPAWNTABLE ;Yes. Reset the spawn table.
INC SPAWNPOINTER ;Otherwise increment the spawn pointer
JMP SELECTNEXT
RESETSPAWNTABLE
LDX #$00
STX SPAWNPOINTER
JMP SELECTNEXT
;Select the next object to be spawned in order to generate new
;sprite properties.
SELECTNEXT
LDY SELECTPOINTER ;Set pointer SELECTNEXT (Y Value)
LDA SHAPELOW,Y ;Select lo byte frame from table SHAPELOW
STA SPRANIM1+1 ;Store byte from SHAPELOW into self-mod low byte of SPRANIM
LDA SHAPEHI,Y ;Select hi byte frame from table SHAPEHI
STA SPRANIM1+2 ;Store byte from SHAPEHI into self-mod hi byte of SPRANIM
LDA COLOURTABE,Y
STA SPRCOLOUR,Y
LDA #0 ;Reset X Position of sprite
STA OBJ_POSITION
INY
RTS
;A couple of pointers for the subroutine (You can use Zeropage if you want)
OBJ_POSITION !BYTE 0,0
SPAWNPOINTER !BYTE 0
SELECTPOINTE !BYTE 0
;Series of tables to select each object.
SPAWNTABLE ;Selects the object type value (This will indicate
;object type for SELECTPOINTER (Which will pick
;one of the 4 specific objects)
;KEY:
;0 = Square
;1 = Circle
;2 = Triangle
;3 = Hexagon
!BYTE 0,1,2,3,2,3,1,0
!BYTE 2,1,3,2,1,3,1,2
SHAPELOW ;Sets lowbyte of shape object (4 Objects)
!BYTE <Square, <Circle, <Triangle, <Hexagon
SHAPEHI ;Sets hibyte of shape object (4 Objects)
!BYTE >Square, >Circle, >Traingle, >Hexagon
COLOURTABLE ;4 Objects - 4 colours
!BYTE 2,7,5,6 ;Red, Yellow, Green, Blue
SQUARE
!BYTE $80
CIRCLE
!BYTE $81
TRIANGLE
!BYTE $82
HEXAGON
!BYTE $83
*=$2000 ;Sprite objects
!BIN "SHAPES.PRG",,2
Now, what if you wanted to play around with the speed of an object, or add more properties? Simple, all you would need to do is create some new tables (Depending what you are trying to do) - Then store to self-modifying code or pointers. The next game will show you how to do exactly that - and a few other tricks.
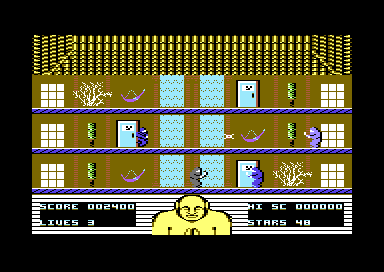
GAME 7: ROGUE NINJA
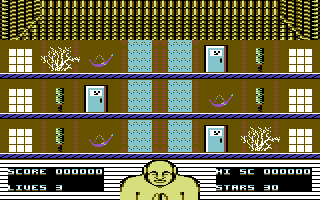
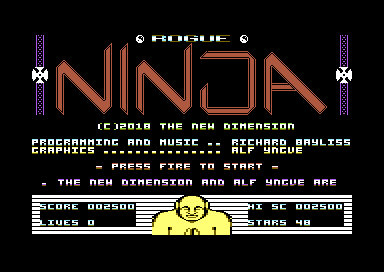
In this part of the tutorial, related to spawning new objects. A new example game (And it's a full game also) has been created. For a change it doesn't involve space ships and aliens. Instead, we have gone oriental with a simple Ninja platform (without sprite/char collision) game called Rogue Ninja. Written by Alf Yngve, and myself. Before I tell you what this game does and give you the source here are the instructions:
You are a Rogue Ninja, who has been captured by the evil master, Chow Mein. You have been thrown into his temple for a challenge. - A challenge of survival, skill and courage. . You have been chosen to face an army of ninjas and samurai's who are out to stop you. If you survive this ordeal, you will be set free. You start the game with 50 ninja stars, and a shield. After your shield runs out, you will no longer be invulnerable. Every time you lose a life, and respawn your ninja stars amount will NOT be restored. However help is at hand. Chests will magically appear on to the screen. Pick up these in order to gain 10 extra stars. You had better be quick otherwise they will disappear again. Try to survive as long as you can.
Time to explain the layout of how the game code has been set out. Once again, I have set it out as a full game. It comes complete with front end presentation, main game, and ending. Also the game consists of two different tunes, one of which is used as the title music (Music at $9000), and in game music (Music at $1000). Self-mod pointers are set to play the correct tune every time you switch to the title and the game.
Now let's look at the code. At the start there are some variables, which control either the title or the game. Some are used as pointers, values or code position and some are used as zeropages. The zeropages $02 and $03 have been chosen as the charset animation store pointer ($02) and the title screen smooth scrolling control ($03).
There are some additional values selected for the boxed sprite/sprite collision area. Should any sprite reach the range of the player or bullet, it will either kill the player, or kill the bullet (and/or possibly die, itself).
There are also some values to indicate the floor position for enemies or chest to appear. Some player and bullet speed properties also have been set. Enemy direction values (0 = left, 1 = right). There is code in the game that will check which direction enemies are facing.
Some screen pointers have also been set for the value of the font, which represents the custom numeric counters. Also some screen pointers for which area of the screen storing the values of the score should be made.
Next we add some PSEUDO commands in order to import the binary/PRG files of all of the graphics and music data. No !BASIC pseudo has been used this time, due to the memory location $0800 being used. So instead, I call Exomizer to decrunch and run at $4000. The memory has been set as follows:
- Game charset: $0800
- Title music: $1000
- Game sprites: $2000
- Game screen matrix (Which gets copied to the screen RAM): $2800
- Game screen colour attributes (Which gets copied to the colour RAM): $2C00
- Title screen and logo charset (combined): $3000
- Logo screen matrix: $3800
- Code and pointers: $4000
- In game music: $9000
The code starts by running the title screen. Then the main game killing off any existing interrupts to make a fresh start for every time the game refreshes. The main game code will draw the game screen, initialise a multi-raster interrupt, linking to each other, and of course init and play the music through a PAL/NTSC timer.
A lot of the code is pretty much what you have already learned so far from previous chapters. So I won't need to go through everything, but there are some other things you may need to familiarise yourself to. This game has PROPERTIES for each object. They are the PLAYER, the BULLET, the ENEMIES and the CHEST. Each of the properties test for each sprite individually.
Player Properties (PlayerProperties)
The game starts with a check to see whether the player is alive or dead. This is indicated by using a conditional pointer, PlayerDead. If this value = 0 this is classed as FALSE. This will mean that the player is alive, and it will continue to the code which reads the player being alive. Otherwise, the code will jump straight to the player dead code.
Player Death Sequence (PlayerDead)
The code at PlayerDead, uses two pointers PlayerToss, which throws the player to the top of the screen, and PlayerFall, which changes the player's frame to player upside down, and falls through into the masked raster screen position. The lives counter is then decreased by one. If the lives counter = 0 then the GAME OVER routine is called (Which clears the screen, masks GAME OVER on screen and awaits the fire button to be pressed). If the number of lives are above 0 then the player is respawned to its original starting position (The central platform) with a shield enabled for a short time.
Player Alive (PlayerAlive)
The code at PlayerAlive will first call a collision calculation subroutine. This will setup the boxed collision boundary for the player and enemies. Also the player control checks pointer PlayerFalling. If this is true, then the player cannot pull down on the joystick, until the player has reached one of the set floor positions (See variables). Also the same effect occurs, if the player is still moving up, or has reached the very top floor. The control, up on joystick cannot be used. The player can still move left or right and throw stars (If he still has them). While the player is moving left or right, a pointer is set to a value of 0 or 1, indicating which direction the player is facing. PlayerDir is selected. Also according to the direction the player is moving (If not jumping/falling) a set animation pointer from the Animation code is stored to the player's sprite frame.
There is also a Fire Press function, which will test whether or not the player can throw ninja stars. There are two checks to this code. If the bullet object Y position (Obj_Position+3) is NOT at position 0. Then the bullet cannot be fired. Since it is still visible. Also if this is bypassed, a counter check is performed. The counter checks both digits of the Stars pointers. If Stars and Stars+1 equal 0, then the player cannot fire the stars. Otherwise if enough stars, and the stars are offset. A new star is spawned on to the player's sprite position. The direction of the player is also checked, for which direction the stars should fire. The PlayerDir pointer is copied to the BulletDir pointer. The number of stars is then deducted by 1. There's also some code to check whether the value of stars gets lower than 00 on both digits - if so, the No of stars = 00.
Player Jumping (DoJump)
A subroutine is called to make the player jump, until it reaches its specific destination floor. The player should jump from a lower floor to an upper floor. The JumpSource and JumpDest, FallSource, and FallDest is controlled by a Player Y position check subroutine. This will then store the new values of the player's Jump and Fall targets to pointers JumpSource, JumpDest, FallSource, FallDest. A frame is also set to show the back of the player. So it does look as if the player is actually jumping.
Player Falling (DoFall)
The player falling subroutine is called a similar way to making the player fall to the target floor position. A frame is also set to show the front of the player. So it does look as if the player is falling (Or has been repositioned).
Bullet Properties (BulletProperties)
The code BulletProperties sets up the properties of the player's bullet. It starts by calling a subroutine to test the bullet to enemy collision (Sets up the box-based sprite/sprite collision boundary as done before with the player properties). The code also checks whether or not the bullet is moving left or moving right. This is tested by checking the value of the pointer BulletDir. The bullet direction position is then calculated by moving the object, until the bullet has reached its limit before it is taken off screen.
Enemy Properties (EnemyProperties)
You may have remembered that with previous game builds, such as Missile Blasta, etc the game featured a loop, which killed each enemy, and masked a bullet as the explosion. Well, there is a much more better and feasible way to deal with enemy properties. Simply by giving EACH enemy an individual test. 5 subroutines have been called to test each of the enemies' properties. These are called as TestEnemy(x). Where (x) = the enemy value being tested.
Testing an enemy individually (TestEnemy(x))
For each subroutine. We start by testing whether or not a current enemy, which is being tested is dead. This is tested by calling a pointer Enemy(x)Dead and checking whether the value is true or false (0 or 1). For example if Enemy1Dead = 1 then call Enemy1IsDead. Otherwise call the enemy alive functions.
Enemy Dead subroutines (Enemy(x)IsDead))
Enemy1Dead was formed as 12. Therefore the command Enemy1IsDead was called. This doesn't really do much, apart from makes the enemy object fall from the game floor to the outer screen at a speed of 3. After the enemy has moved from the screen, it is placed at the top of the screen. Set to alive, and will move in the border, until it has reached the X target position outside the right border.
Enemy Alive subroutine (Enemy(x)Alive))
Enemy(x)Alive will test whether or not the player is already dead, before it checks the enemy to player collision. If the enemy is in range of the player then a collision is checked. If the player is invincible, then the enemy just stops moving if targeting the player - Unless the player moves away from it. Otherwise the player gets killed. However, if the enemy hits the boundary of the player's bullet sprite (the ninja star), a number of lives is decreased (dec Enemy(x)Lives)) and then checked whether or not the number of lives = 0. If the enemy lives = 0. Then Enemy(x)Hit subroutine is called to turn the sprite colour to RED, and then set Enemy(x)Dead to true (or 1). The player is awarded points. Every hit to the enemy homes the bullet off screen. If the enemy is not dead, a self-mod animation is used for the enemy frame and enemy colour. This is used by calling a table. Also MoveEnemy(x) subroutine is called to move the enemy across the screen.
Moving enemies (MoveEnemy(x)
Like with testing which direction the player faces, a test function is called to check for enemy direction. For example If Enemy1Dir = 1 then allow the enemy sprite to move right. Otherwise make it move LEFT. The enemy has to move to the outer screen before the next enemy can be spawned. JMP SpawnNextEnemy(x) shows this.
Spawning a new enemy (SpawnNextEnemy(x))
The subroutine SpawnNextEnemy1 calls a JSR routine to read from a series of spawn tables and store those as new object properties, via self-mod routines. A table is read to store a new colour (NewEnemyColour) for the enemy, it is then stored to a self-mod pointer (E1Colour+1). A new delay of the enemy speed (Enemy1DelayLimit), new floor position for where the enemy should start on (NewFloorPosition and SMStartXPosition). This is then stored to the actual object Y, and X position. Self-mod animation frames (SMFrameLow and SMFrameHi) the low+hi byte of those frames are stored to the selfmod enemy frame pointer at E1Frame, number of hits to kill (SMHitsToKill) which is stored to Enemy1Lives, scoring value (SMScoreValue), and direction of enemy to read (SMDirection) is stored to Enemy1Dir. Also the enemy dead pointer should always be set to 0 after spawning has finished.
Main loop to spawn a new enemy (SpawnNewEnemy)
You may have remembered that in a previous chapter I showed you a subroutine that allowed to spawn different shapes. Well, in this game code I did something simular, but called two different loops. The first loop loads X to the SpawnPointer, reads the bytes from the table SpawnTable and stores it to an additional pointer SelectPointer. Then the loop continues to read other tables, which are EnemyColourTable (Stored to NewEnemyColour), EnemyDelayTable (Stored to NewEnemyTable), EnemyStartTable (Stored to NewFloorPosition). These set values for the colour, delayed speed and starting floor position for the next object spawned. The table is read 254 times. After 254 spawns, the game is complete (GameIsWon) and the Well Done screen appears.
The second loop is loaded as Y from the SelectPointer, which reads the bytes of the tables from EnemyTypeTableLo, and stores to SMFrameLow (The low byte selfmod pointer for animation), EnemyTypeTableHi to SMFrameHi (The hi byte selfmod pointer for animation), EnemyKillTable to SMHitsToKill, EnemyScoreTable to SMScoreValue, EnemyDirTable to SMDirection, StartXTable to SMStartXPosition then finished.
Chest Properties
ChestCanSpawn is checked to see whether or not the chest is allowed to appear on not. Once again it uses a true/false check. If ChestCanSpawn = 1 then ChestCanAppear. Otherwise a timed delay through the pointer ChestWaitDelay is called. After 3 steps the ChestWaitDelay pointer will reset, and increment the ChestWaitTime, until the timer has reached value of 100. Then set a new position for the chest.
Setting the Chest position SetNewPosition
After the timer has finished, and reset. A loop is called to set a position of the chest, simply by reading the enemy start position (EnemyStartTable) and chest X start position table (ChestStartTable). These are then stored to the object position (Obj_Position+15, Obj_Position+14). The loop is then incremented by 1. A pointer ChestCanSpawn is then set to true.
Making the chest appear (ChestCanAppear)
The next subroutine is quite a clever one. As you might have guessed the chest is allowed to spawn, but it also calls its own animation subroutine. The explosion table is read, but during explosion. The chest to player collision cannot be read. However after the explosion has finished, and the chest has appeared. A collision subroutine (Similar to the player/enemy collision) is then called. After the player has made contact with the chest, it will simply disappear.
The ChestWaitDelay and ChestWaitTime command is called once again to keep the chest in play (unless the player touched it). After 20 intervals, the chest is moved off screen, and disables ChestCanSpawn. You would then have to wait another 100 iterations for the next chest to reposition and also appear. The chest only appears to the far left, middle or right of the screen. If the player hits the chest, a subroutine is called to increase the value of points and give 10 ninja stars to the player.
And that's practically it. :)
Have fun with the game, and the source code.
VIEW SOURCE
DOWNLOAD C64STUDIO BINARY+SOURCE DATA
SPRITE PROPERTIES - Using MACRO's
Whenever you want to write code for a game, and create things such as object properties. There are two different ways to go about writing individual properties for each object. You can either call multiple JSRs and type in the first object properties code (followed by RTS at the end of the code). Then copy and paste and rename your labels and set the properties for a next object. And so on.
There is also an alternative way in which this could be done - and probably a short cut, compared to copy/pasting and spending a long time to re-label your code. The !MACRO command, and set the macro values/properties for each item. Let us give out a simple example on setting out a sprite frame and colour for every sprite. We lay out a macro to do exactly that
!MACRO setsprite spritetype, selectedframe, frame, selectedcolour, colour {
lda #selectedframe
sta sprframe
lda #selectedcolour
sta sprcolour
rts
}
Then you would need to call a command and properties that READS the macro
+setsprite $80,$07f8,$0a,$d027
This piece of code calls to automatically set the frame of a sprite at $2000 and store it to the hardware sprite0 type, then set the colour and store it to sprite0 colour. Then exits the code inside a macro with an RTS. Works a charm. Now what if you wanted to do a similar code for the rest of the sprites, but set the next sprite type and colour without having to type long strings of code? Simply add another small command.
+setsprite $80,$07f8,$0a,$d027 ;Sprite 0
+setsprite $81,$07f9,$0d,$d028 ;Sprite 1
+setsprite $82,$07fa,$03,$d029 ;Sprite 2
+setsprite $83,$07fb,$0e,$d02a ;Sprite 3
+setsprite $84,$07fc,$04,$d02b ;Sprite 4
+setsprite $85,$07fd,$07,$d02c ;Sprite 5
+setsprite $86,$07fe,$0f,$d02d ;Sprite 6
+setsprite $87,$07ff,$08,$d029 ;Sprite 7
Macro commands can also be expanded to do other things. with sprite properties. Remember the sprite movement example MSB we did earlier on (The expanded sprite exercise)? There is a loop in the code, which makes the sprites move, by reading a table X, Y and updating the speed X,Y of the moving sprite. Here is a new example, which uses a different method - The macros:
WHERE YOU FIND THIS CODE (From chapter ALLOWING SPRITES TO MOVE MORE THAN 256 PIXELS)....
;Move all sprites via a loop
MOVESUBR
LDX #$00
MOVESPRITES
LDA VSPRPOS,X ;Grab virtual sprite position from table
CLC
ADC MOVETABLE,X ;Add a positive/negative value according to the movetable
STA VSPRPOS,X ;Store the value as a speed directly to the virtual sprite posiion
INX ;Add a value to X loop(1 byte)
CPX #16 ;Have all 16 bytes of the speed table been read?
BNE MOVESPRITES ;No, read next byte from table
RECREATE THE CODE ABOVE TO THIS:
;Move all sprites via an individual macroGAME 3B: MISSILE BLASTA - REMASTERED V2
MOVESUBR
;An actual MACRO code, which will read the current position of a sprite,
;then reposition the sprite according to speed.
;HINT ... INSIDE !MACRO command ... NEVER add RTS at the end of the MACRO, otherwise the next
;code read will be ignored.
!MACRO movesprite posx,speedx,posy,speedy {
lda posx
sec
sbc speedx
sta posx
lda posy
clc
adc speedy
sta posy
}
;Calls macro routine (from above) to move all 8 sprites accordingly.
;Simply by reading the bytes of even values of VSPRPOS table, to indicate the X position,
;MOVETABLE (X position table), and ODD values of VSPRPOS table, to indicated the Y position
;and set the MOVETABLE+1 (Or odd value) for Y movement speed.
+movesprite VSPRPOS, MOVETABLE, VSPRPOS+1, MOVETABLE+1
+movesprite VSPRPOS+2, MOVETABLE+2, VSPRPOS+3, MOVETABLE+3
+movesprite VSPRPOS+4, MOVETABLE+4, VSPRPOS+5, MOVETABLE+5
+movesprite VSPRPOS+6, MOVETABLE+6, VSPRPOS+7, MOVETABLE+7
+movesprite VSPRPOS+8, MOVETABLE+8, VSPRPOS+9, MOVETABLE+9
+movesprite VSPRPOS+10, MOVETABLE+10, VSPRPOS+11, MOVETABLE+11
+movesprite VSPRPOS+12, MOVETABLE+12, VSPRPOS+13, MOVETABLE+13
+movesprite VSPRPOS+14, MOVETABLE+14, VSPRPOS+15, MOVETABLE+15
rts
Following the previous source, I have decided to remaster Missile Blasta for the second time. There have been comments, and suggestions, in relation to improved game play. This example is going to do exactly that. So then what are we going to do. As you may have noticed with the build I produced earlier on. The game originally used the player bullet, as an explosion, also the missiles are moving at one particular speed, and are just moving downwards. You won't want that to happen all the time. This was how it looked before hand:
This new build is a final build - for this game that is. It is much different. It features brand new graphics, slightly more new music, some in game sound effects (which the data can be pushed through the Goat Tracker music player), which may interrupt the in game music when in use. Also there is much better gameplay. You will see after you have downloaded the game with source code. The game still uses the same concept as the example above. The missiles are larger and the second level will show a difference in game play.
So then, what about the code. How does it differ compared to the original Missile Blasta? In V1, the missiles movement, and collision were all linked to a loop inside a small subroutine. The bullet sprite was set to mask an explosion every time a missile was hit by it. The bullet was the removed and placed elsewhere on the screen. V2 is completely different. For each missile property, it's movement, animation and its collision, etc. is controlled by a !MACRO command, and the pointers are linked to each missile. Here are some MACRO examples that you will find in the code:
EXAMPLE MACRO: Test Missile to Bullet Collision
;Tests whether a missile is already dead, if so. Ignore
;collision. Otherwise, check whether or not the bullet is
;in range of the missile. If it is within range of the
;collision area, the missile gets destroyed, and the player
;will score 100 points.
!macro missiletobullet missiledead, bulletx, bullety, speedx {
lda missiledead ;Is the missile alread destroyed?
cmp #1 ;Yes?
beq .nomissilecollision ;Do not read missile collision
lda bulletx ;bullet x range to missile
cmp collision+$00 ;Left range
bcc .nomissilecollision ;no collision
cmp collision+$01 ;Right range
bcs .nomissilecollision ;no collision
lda bullety ;bullet y range to missile
cmp collision+$02 ;Top range
bcc .nomissilecollision ;no collision
cmp collision+$03 ;bottom range
bcs .nomissilecollision ;no collision
lda #0
sta spritepos+2 ;move bullet out of screen
sta speedx ;also stop missile speed x
lda #1 ;then destroy the missile.
sta missiledead
jsr playmissileexplosionsfx ;play explosion sound effects
jsr doscore ;call score adding routine.
.nomissilecollision
}
A little example, linked to the macro
+missiletobullet missile6dead, spritepos+14, spritepos+15, missile6speed
rts
What this does is calls the macro, linked to the macro labels (Next to !MACRO) that helps you shorten the code to give each missile an independent property. The one above tests the collision of each missile. A quick key will tell you what each macro property for this example above looks like:
+missiletobullet - This is the macro which is being called inside a routine
missile6dead = missiledead - This is the pointer missile6dead being used to check if the missile is destroyed or not
spritepos+14 = bulletx - The missile sprite 8 x position, to be read by the player's bullet collision
spritepos+15 = bullety - The missile sprite 8 y position, to be read by the player's bullet collision
missile6speed = speedx - Horizontal speed of the missile if it is to be moving across the game screen. If hit by the player bullet it will be zeroed in order to stop moving the missile.
MACRO 2: Missile to Player
!macro missiletoplayer missiledead, spritex, spritey {
lda missiledead ;is the missile already dead?
cmp #1 ;yes? ...
beq .noplayercollision ;no player collision
lda spritex ;read collision of missile x pos
cmp collision+$04 ;check collision boundary left
bcc .noplayercollision
cmp collision+$05 ;check collision boundary right
bcs .noplayercollision
lda spritey ;read collision of missile y pos
cmp collision+$06 ;check collision boundary top
bcc .noplayercollision
cmp collision+$07 ;check collision boundary bottom
bcs .noplayercollision
jsr playplayershieldhitsfx ;play player shield hit
lda #1
sta missiledead
jmp loseshield ;exit macro and make player lose
}
m6p
+missiletoplayer missile6dead, objpos+14, objpos+15
rts
After the macro code, you will discover a few JSR commands, followed by RTS. This is so that each independant missile is operating correctly. When everything is put together without the JSR commands, for some strange reason the game goes out of sync, due to too perhaps, too many cycles from the C64 being wasted. Like with the example before hand. Here's what each pointer to macro label represents
missiletoplayer = Macro that is being called. Which should link the missile to player collision.
missile6dead = missiledead - Missile 6 death pointer (Is the missile dead)
spritepos+14 = spritex - Virtual X sprite position of missile 6
spritepos+15 = spritey - Virtual Y sprite position of missile 6
MACRO Example 3 - Object properties
The next macro tests properties / animation, position/movment and speed of a chosen missile
!macro missile_properties missiledead, explodedelay, explodepointer, sprframe, missilex, speedx, missiley, speedy, occupiedposition {
lda missiledead ;is the missile already dead?
cmp #1 ;yes ...
bne .missileok ;else continue to missile move code
;otherwise do enemy death animation
lda explodedelay
cmp #$03
beq .resetexplode
inc explodedelay
jmp .exit
.resetexplode
lda #$00
sta explodedelay
ldx explodepointer
lda expltbl,x
sta sprframe
inx
cpx #8
beq .explodeend
inc explodepointer
rts
.explodeend ;reset explosion for the next enemy death.
ldx #0
stx explodepointer
lda #0
sta missiley
lda #0
sta missiledead
jmp .updatemissilex
;the missile is not dead, so we can move the missiles
;according to selected speed from tables.
.missileok
lda missileframe ;grab animation frame for missile
sta sprframe
;store it to selected sprite frame
lda missiley ;grab y position of missile sprite
clc
adc speedy ;move it according to speed counter
cmp #$12 ;below position #12 should call a
bcs .updatemissiley ;update Y position of missile
;randomizer subroutine to select next X position of missile
.newposition
jsr random ;position/sprite properties
lda ranyspeed ;set random speed from table for y missiles
sta speedy
lda ranxspeed ;set random speed for x missiles
sta speedx
.occupytest
ldy #$00
.occupyloop
lda ranpos
cmp xposoccupied,y ;Is position already occupied by another missile?
bne .occupynext ;Yes it is ... Else, NO store new position.
jsr random
jmp .occupytest
.occupynext
iny
cpy #6
bne .occupyloop
.updatemissilex
sta missilex ;then set new position of sprite
sta occupiedposition
lda #$12 ;and reset y position of missile
.updatemissiley
sta missiley ;update new y position of missile
.exit
} ;end of macro
m6props ;Linked to macro: Missile 6 properties
+missile_properties missile6dead, missile6expdelay, missile6exppointer, $07ff, spritepos+14, missile6speed, spritepos+15, missile6speed+1, xposoccupied+5
rts
missile_properties = MACRO being called in the game code
missile6dead = missiledead - pointer to check whether or not a missile is already destroyed
missile6expdelay = explodedelay - delay of missile explosion animation
missile6exppointer = explodepointer - counter of missile explosion
$07ff = sprframe - sprite frame through hardware selected to animate
spritepos+14 = missilex - missile X position
missile6speed = speedx - x-speed of missile
spritepos+15 = missiley - missile Y position
missile6speed+1 = speedy - y speed of missile
xposoccupied+5 = occupiedposition
The additional xposoccupied code is used in order to try and prevent a non-rocking missile from appearing on the same Y position as any other missiles.
MACRO Example 4: Rocking missiles
Although we have straight moving missiles from the very first Missile Blasta. The game play needs to be somewhat better. Therefore I have added a subroutine, which uses a CUSTOM movement pattern. Known as a TIMED MOVEMENT. You might have noticed I used a similar method with Starfysh, but the code for Starfysh was slightly more complex. I have chosen a simple rocking method for this game, which uses yet another macro and also a couple more pointers. The rocking missiles are based on an individual timer, then after an interval has expired, the timer is reset. The missile then changes its direction. The X-Speed of a rocker varies, according to a randomizer and level of course.
!macro rockingmissile missiledead, missiletime, direction, missilex, speedx {
lda missiledead ;is the missile already destroyed?
cmp #1 ;yes ... leave it and then
beq .skipxtimer ;exit the code.
jsr .readtime ;call subroutine to set time calculation
lda direction ;which direction are the missiles moving?
cmp #1 ;right? ...
beq .moveright ;yes, they are moving right ... else:
lda missilex ;code to make individual missile move
sec ;to the left.
sbc speedx
cmp #$0c ;does the missile reach the very left
bcs .missileleftok
jmp .timeexpired
.missileleftok
sta missilex ;of the screen?
jmp .readtime
.moveright
lda missilex ;code to make individual missile move
clc ;to the right.
adc speedx
cmp #$a2 ;does the missile reach the end of
;the screen? if so, change direction
bcc .missilerightok
jmp .timeexpired
.missilerightok
sta missilex
.readtime ;timer code (calculates time, and also
lda missiletime ;switches direction the sprites move.
cmp #$70
beq .timeexpired
inc missiletime
jmp .skipxtimer
.timeexpired ;missile time reset and direction checked
lda #0
sta missiletime
lda direction
cmp #1 ;direction right?
beq .setleft ;yes, right. Switch to LEFT!
lda #1
sta direction
jmp .skipxtimer
.setleft
lda #0
sta direction
.skipxtimer
}
;call the pointers in which control the value of the
;rockers - for some reason without the jsr's the macro
;combined goes really crazy :)
;as a failsafe, add multiple jsrs for the rocking missiles
;code.
Another snippet with info for you:
rocker6
+rockingmissile missile6dead, missile6xtime, missile6direction, spritepos+14, missile6speed
rts
rockingmissile = Macro being used to call the independant rocking missile code
missile6dead = missiledead - Death pointer to check if chosen missile is already dead
missile6xtime = missiletime - Selected pointer which calculates the interval of a missile direction
missile6direction = direction - Which way is the X direction for missile going to be 0 = Left, 1 = Right
spritepos+14 = missilex - Missile X position
missile6speed = speed - The speed of the rocking to take place
The macro code might be quite confusing at first, but eventually you should get used to it. I strongly recommend that in order to understand this game code. You spend a while studying the code, especially the MACRO.
CREATING LEVELS:
I showed you some macros, but what about creating levels in this game? Well, it has been simply done by creating a series of tables, which tweaks the game play slightly. The code for creating new levels look something like this:
A level pointer is used as the loop, which reads a series of bytes from the low byte and hibyte table of level data, then stores it into a self-modifying level set up code. The background mulicolour scheme is changed according to the level which the player is at. Once the pointer has reached 9 (Since there are 8 levels in total), the game is finished. After the low and high bytes of level tables (For example x-speed of missile, and y-speed of missile) have been stored respectably to the specific self-mod pointers. The selected X / Y random table is written to the random table ranxspeed, ranyspeed.
levelsetup
ldx levelpointer ;Read pointer position according to level
lda levelxtbllo,x ;Read low-byte of xspeed table for missiles
sta levelsm1+1 ;store to selfmod low-byte for random xspeed of missile
lda levelxtblhi,x ;Read hi-byte of xspeed table for missiles
sta levelsm1+2 ;store to selfmod hi-byte for random yspeed
lda levelytbllo,x ;Read low-byte of yspeed table for missiles
sta levelsm2+1 ;store to selfmod low-byte for random yspeed
lda levelytblhi,x ;Read hi-byte of yspeed table for missiles
sta levelsm2+2 ;store to selfmod hi-byte for random missiles
lda mcol1,x ;Read selected byte from level colour table 1
sta $d022 ;then place it to char multicolour #1
lda mcol2,x ;Read selected byte from level colour table 2
sta $d023 ;then place it to char multicolour #2
inx
cpx #9 ;Level over - No more levels to play!
beq gamecomplete
inc levelpointer ;Increment next position of level pointer
;Simple self-mod code, for setting up the level speed table
;for the x and y speed of missiles
ldy #$00
levelsm1
lda $ffff,y ;Self-mod position for missile randomxspeed
sta ranxspeed,y
levelsm2
lda $ffff,y ;Self-mod position for missile randomyspeed
sta ranyspeed,y
iny
cpy #24
bne levelsm1
gamecomplete
rts
Look further into the whole source code to see how the level setup is linked to the level counter, and how the game is completed.
GoatTracker SFX Support
This game also features additional sound effects support for Goat Tracker V2 tunes. The in game music uses a 3 channel sound. Although if you decide to write music. I would strongly recommend a 1 or 2 channel sound is used. INS2SND was used in order to generate a table for the custom sound effects, which can play/interrupt a channel inside the music, Here's a small example: The player shooting a bullet.
;Play sound effect - Player shooting a laser
playplayershootsfx
lda #<shootsfx ;Low byte of sound
ldy #>shootsfx ;Hi byte of sound
ldx #7 ;Sound channel (2)
jsr sfxplay ;Play SFX
rts
Table to match it:
;Sound for player shooting
shootsfx
!byte $0E,$EE,$00,$CC,$21,$cc,$ca,$c8,$c6,$c4,$c2,$10
!byte $90,$00
The first 2 bytes represent attack/decay, sustain/release, pulse, and then a series of values are detected. $90-$ff represent the octave of the sound effects, and $11, $21, $31, $41, $51 ,$61 represent the wave form for the sound effects. INS2SND doesn't always need to be used if you know what type of SFX you can create. End the byte SFX with a 0.
And that's basically the important bits in the game. As mentioned before, I strongly recommend you take a look at the whole source code in C64Studio, in order to know what is happening. The code is briefly self-explained and shows what is happening.
Download C64Studio V5.7a Project and Binary data
View source code
CHALLENGE 4:
Try to make an EVEN better version of this type of game, by building some new graphics, using more animation frames and also try to build a new background for each level (and set it up by modifying the level setup code).