
MASTERING YOUR PRODUCTIONS TO MEDIA
DISK MASTERING
Mastering games to disk - Making them presentable / The Picture Linker Method / Basic disk loader / Kernal M/C disk loader / IRQ Disk loader / Multi-load: Quick Exomizer tutorial
TAPE MASTERING
Mastering programs to tape /
AudioTap and WAVPRG / LoadOne / R-Load / S-Load / TapeToolBuild
(Including Richard's Upgrade) / PRG2TAP with Freeload / Writing back to real TAPE media
/ Native C64 Tape Mastering Utilities
CARTRIDGES
Building your own 16KB Cartridge
Please note that this is not an actual game programming chapter, but more on the theory/practical way on mastering your own creations to real C64 media, with some example snippets containing some of my additional implementation to existing subroutines.
Do you write, or have you ever written your own C64 games, or do you want to be an active developer, designing and creating your own productions for either fun, or submit them to software like Protovision, K&A Plus, Psytronik Software, etc?. Do you have a game you or a friend has made, and would like to create a disk or tape master for your own productions? If the answer is yes. Then may I suggest this chapter should be a helpful guide to help you develop disk/tape masters for your own productions? If you want to make cartridge ROM files out of your productions, then may I suggest you take a look at this handy chapter at CODEBASE64? I am sure that will help you out a bit.
MASTERING GAMES TO DISK - MAKING THEM PRESENTABLE
If you are to create a C64 game, and you would like to make the game presentable with a loader picture on a disk. You could present your production in different ways. These ideas are as follows:
SINGLE LOAD - PICTURE LINKER (SUITABLE FOR SMALL FILES)
A new game production can be presented without a loading bitmap, but of course if you want to really push the boat out. It would be even cooler to display a loading picture. There are different methods on linking pictures to your own programs. The easiest would be to use a C64 picture linker program from the public domain. There are plenty of those. Some of those have cool effects, can play music, and do other cool things. However, the best way would be to create your very own picture linker - and make it do things you want to. For example, you could add your own transition effects to the bitmap (This can be based on sprites or triggering the screen + colour RAM to do a cool effect.
The example code (via the link below) shows an example of a standard picture linker, I created, which displays a koala paint picture.
VIEW PICTURE + MUSIC LINKER SOURCE
At $0801, we place a BASIC SYS start address (SYS2064), then at $0810 the main program's code is implemented. I created some self-mod pointers, in order to generate a smooth drawing transition effect on the raster splits inside the IRQ raster interrupt. Music is placed at $1000. The Koala paint picture is placed at $2000, where video RAM is copied from a relocated address and pasted to the default colour and screen RAM. Then at the end of the source file, at $4800 a program file is linked. The code is self-explained on how it works.
Back to top
DISK MASTERING VIA LOADING
There are different types of method in which you can master your very own C64 game to disk. Say you have written a game which is huge in size. A picture linker probably won't work for you. Instead you would need to implement your own disk loader. It is purely simple to implement a kernal disk loader, with a loading picture. There are some great DOS examples available for you to check out here in this chapter on CODEBASE64. Adding a loading picture and linking a KERNAL loader is really easy to do using any kind of C64 or crossplatform assembler.
THE BASIC LOADER METHOD
BASIC commands can be used to generate a loader to load in data from disk to your C64, then run it. BASIC can be used to create a very simple loader system, although some machine code may be required as well to display a loading picture.
A basic command tends to be used to load some data, split picture data, run the machine code to display a loading picture, blank the screen again and then run the last part of the code where the game was executed. A simple BASIC loader for you. Example is: Loading a Koalapaint picture, running a picture displayer, then load BLAP 'N BASH! with a BASIC run.
10 REM BLAP 'N BASH BASIC DISK LOADER
20 DV=PEEK(186):REM READ ANY DISK DEVICE NO
30 I=I+1
40 IF I=1 THEN GOTO 1000
50 IF I=2 THEN GOTO 1100
60 IF I=3 THEN GOTO 1200
1000 POKE53280,:POKE53281,0:PRINTCHR$(147):LOAD "A",DV,1:REM BLACK SCREEN, LOAD KOALAPIC
1100 LOAD"B",DV,1:LOAD CUSTOM KOALAPAINT PIC DATA MOVER/DISPLAY CODE
1200 SYS20480:LOAD"C",DV,1:REM RELOC/DISPLAY PIC DATA, LOAD GAME
Please also note that although this loading trick does work, after finished loading/decrunching. The bitmap will be messy during decompaction. A good solution would be to trigger a START + FINISH command in exomizer's decruncher to switch off the screen, before running the main decruncher (before compression of your game in Exomizer). For example:
Call exomizer to compress blapnbash.prg, set jump address to game start at $4000, set output name as blapnbash.prg (overwriting the previous filename). No decrunch effect set. Start decruncher by blanking the screen (#$0b set to $d011), then after decrunching finish the decruncher by restoring the screen (#$1b sta $d011) then run the game.
exomizer sfx $4000 blapnbash.prg -o blapnbash.prg -n -s "lda #$0b sta $d011" -f "lda #$1b sta $d011"
THE M/C KERNAL LOADER METHOD (SDIEC Compatibility/Cartridge Fastload, etc).
If you are writing a C64 game, and you wanted to have a loading picture display while loading without using any BASIC commands. A simple picture displayer, with a kernal load call disk loader will work - especially for SDIEC devices, etc. However one thing you should be careful about, when calling your own loader program is that the program should not OVERWRITE your loader code. Transferring loader code has always been the simplest solution to this sort of problem. Another advantage with the kernal loader is that it can be used on fastload cartridges, such as Action Replay, Retro Replay, 1541Ultimate 2, etc, if not blocked with the call JSR $ff84 - which will just override external fastloaders with the slow Kernal loader. Some software actually did that.
Here are some easy examples of disk access available in Codebase. Also if you own a real disk drive, then please also refer to your disk drive manual there are some DOS examples provided in the book. It should have some assembly m/c commands in the book. However, below is a small example of a simple disk picture loader with ultra thin loading stripes.
Anyway, I have made a custom loader example in C64Studio, in which allows you to import a koalapaint picture, relocate the picture and load in Zap Fight 2. The routine automatically disables fastload, to give chance for the person loading the game to see the picture. Fastload always switches the screen off during loading (Unless you are using TLR's SuperFluid freezer cartridge ROM). If you download the project. Load in the D64 image example.d64, then type LOAD"*",8 and RUN. The loading picture will appear on screen, and load with a flashing border.
Download the Pic + Kernal disk loader C64studio project
or
Just view the source code
IRQ / Custom Loaders
Adding IRQ/Custom loaders are another good alternative way to load programs through Disk. You can have great speed with some of these loader systems. Unfortunately this is not always a great idea, if the games are to be SDIEC compatible - Unless a basic kernal loading routine is added as an option for SDIEC devices. If options for SDIEC loading is set up, the disk loading phase can bypass the IRQ loader and use the standard KERNAL loader. IRQ loaders are very good for presentation, trackmos, etc. For example, Let's Invade uses my implementation of Martin Piper's IRQ disk loader system. An option is displayed on screen asking if the user would like to enable the IRQ disk loader. If 'Y' is pressed, then the IRQ loader is enabled, loading the game to a specific load address, with music - followed by the PRESS SPACEBAR sprite afterwards. If 'N' is pressed, then the standard KERNAL loader is used instead, then the music plays and the PRESS SPACEBAR command is displayed. If using an IRQ disk loader.
There are plenty of those IRQ loader systems available on the internet. It just takes some time to learn to implement an IRQ loading system to load in your specific program.
Back to top
TAPE MASTERING
Have you written a game and you wanted to master the game to tape/.tap format with a loading picture, etc then run the game so that your game has a spiffy loading picture and then run (or prompt the user to press spacebar). There are different methods in which can be used to master your programs to .tap or tape. Some not recommended, and some which are highly recommended.
PC TAPE TOOL BUILDING PROGRAMS
The easiest method (without having to create a tape master disk) is to use a PC-based tape tool building utility. There are a few of these available which help you master your tape images. The only way to master these to real hardware would be to use a 1541Ultimate 2, or by recording soundwaves of the .tap accurately through AUDIOTAP to tape, via a tape deck or to PC with external hardware that supports the C2N tape deck. I'll tell you more about this later. Here are a few example PC based tools, which create tape loader systems for your own programs.
Important:
If you are converting a .tap image to .wav file and writing it to CD then record it to a cassette tape. You may need to use trial and error. Depending on the duplication device you are using, you may need to invert the waveform. It could be the case that on some sound systems/sound cards, waveforms transfer differently.
Please note that this method can also be unreliable when recording to real media. PC tape tool building programs do not put pause gaps in between successful loads of other programs. This is mainly because it could lead to bad results and more load errors on a C64 tape. The more sensible approach would be to generate a tape master which can have gaps between each tape loader. PRG2TAP by the Chaos Engineer can put programs together with FREELOAD and also includes gaps in between loads.
Recording from WAVEFORM to a real tape: AudioTap and WAVPRG
AudioTap is a tool that respectably writes TAP files through an audio device on to a real tape. The program allows you to load a .tap file and either record the waveform to a real tape through the soundcard.
WAVPRG is slightly similar, except for that it will allow you to convert data in TAP files into PRG files. Or PRG files into Tap/Wav files. You can simply stream the .tap file to a CD and use that on a HiFi stereo system to record your TAP file to a real tape. WAVPRG has its own special turbo loader, which looks something like this below:

The turbo loader system allows you to copy your standard program (PRG) or a program inside a T64 file. Then will generate a wave form or a .tap image with an autostart turbo. The turbo handles the BASIC run address in order to run a normal program.
I tried this tape loader system and find it to work quite well, for small single file programs. It doesn't display any loading pictures or play music as such, but the turbo speed is very good.
Back to top
LoadONE by Joonas Lindberg

Inspired by Burner. The second of the easiest of all PC based tape mastering tools, is LoadONE by Joonas Lindberg. This is a nice classic colourful turbo tape loader, which allows you to master single programs to tape. It cannot display any loading pictures as such, but it can load your own programs at a good speed. Programs are quite easy enough to transfer to a real tape from this tape loader if you have an Ultimate 64, 1541U2 or AudioTap, a working SD card and a hi-tape deck plugged to the sound card.
This tape loader is compatible with a real C64 and the 1541Ultimate and Ultimate 64
Back to top
TAPGEN by Enthusi/Onslaught
TAPGen is a simple command line tape mastering utility, in which generates .tap with a tape loader, scroll text, koala paint picture with SID music. The loader first starts with a blank screen with black + white stripes. Then it displays a scroll text. After the scroll text has finished. A bitmap will display. The tape loader also has a clever progress bar.
This tool requires python run time/scripts. The tape loader will only work on C64 emulators or a stand alone Commodore 64. It is not compatible with the 1541Ultimate 2 or Ultimate 64.
Make R-LOAD by TLR Design
If you have written programs which require no loading picture or loading music, during loading. Make R-Load is a command line tool, which jazzes up the turbo tape loader appearance. It displays a nice purple and black loading scheme, with some cool raster bars scrolling. The tape loader code can be customized to load multiple parts. It is also possible to create some code that will change the loading stripes colour and the raster bars and display loading pictures during loading. Loading time is not as fast as some tape loaders, but speed is pretty good.
You can also use tapmaster 0.4 to write the built .tap file to a real C64 tape via a full program. Filesize restrictions of your program apply!
This tape loader is compatible with a real C64 and the 1541Ultimate and Ultimate 64
Back to top
Make S-Load by TLR Design

This is yet another alternative command line tape mastering loader system for displaying a bitmap with loading music with thin loading stripes. Make S-Load allows included source code, and a .cnf file (which can be edited in notepad) to setup the loader. The source files can be modified to create IRQ loading to load programs the way you want to. It doesn't aways have to be a loading picture with music. I managed to implement my thunderload loader games into this program as well. DASM cross assembler is also required for this program.
Like with R-Load, you can also use tapmaster 0.4 to write the built .tap to a real C64 tape via a full program. Yet again, filesize restrictions apply.
S-Load is currently incompatible with the Ultimate 64. Loader just remains on blank screen and crashes.
Back to top
TAPE TOOL BUILD by Martin Piper
TapeToolBuild (AKA Thunderload) by Martin Piper
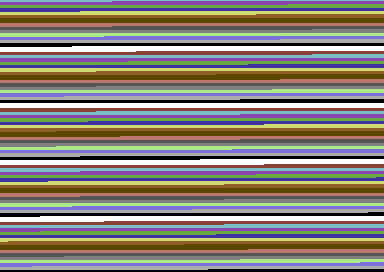
This is the tape loader system I use a lot for my own / contributors productions. It is an ACME cross assembler coder's friendly tape mastering system, which allows you to generate .tap loaders any kind of way. You can basically edit any part in the IRQ tape loader's source code to enable it to display loading picture, music, run programs. The tape loader also comes with an intelligent load error detection, which will automatically stop the tape and display a red border. Rewinding the tape will hunt for the missing byte, and if found, the loader continues loading the data. Like with S-Load The main raster code can also be modified to add very cool screen effects, link additional code to the loader system. Also unlike S-Load. This tape loader allows you to custom the tape loading stripes. It also comes with a few different loader type features:
SmallLoader is a fun implementation of the classic Martech boot loader, which makes weird noises during loading. It sounds a bit like the old screeching Novaload, which I have fond memories about. :)
Novaishloader is a nice implementation of the flashing border version of the Novaload tape loader. Basically, you have a grey screen, with a filename in white, and the NOVAISHLOAD 123456 text in grey at the bottom.
Martyload is a fun implementation of the Cyberload's opening tape loader (The black bar, with cycling charset). The only difference is the colouring, also the loader (if border cycle enabled) will cycle the border colour per block loaded.
The default loader is a plain black screen with the filename text in white.
This loader also allows you to open the borders during loading. Simply remove ; in ScrollerMusicLoader.a OpenBorders = 1 and you'll get that cool feature.
To test for no errors in the loader source, after changes have been made, use:
ACME -v3 loaders.a
To test that your files (music, picture, game) are successfully converted to loadertune, picture, linkedgame use the command
ACME -v3 setmusic.a
ACME -v3 makepic.a
ACME - v3 linker.a
Always do this to check for errors.
For building the complete .tap image with the autoboot, tape turbo, etc, use:
ExampleBuild.bat
Generating a .tap imaged with TapeToolBuild is very simple, but writing to a real tape can be quite a challenge. I tend to create some additional separate assembly files for loading in the music, picture and game, and then link it all together inside a D64, with the assembled IRQTAPE1.A source.
Please note that the IRQ tape loader system has its own default code. If you would like to display a loading picture as well as play music. Simply edit ScrollerMusicLoader.a to how you want it to work. Also edit the EXAMPLEBUILD.BAT file to add your extra files. A description of some of the commands is input inside the source.
TapeToolBuild and IRQ tape loader consist of the following source code (Either created or modified by me). Martin has given me kind permission to release these :)
The files in my TAPE TOOL BUILD UPGRADE are as follows:
UPDATED: LOADERS.A - The main boot loading setup (which blacks out the screen).
NEW: LOADINGSTRIPES.TXT - The loading stripes scheme for the boot and irq turbo loader
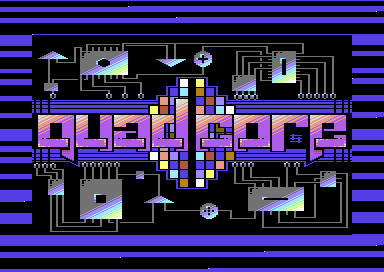
UPDATED: TAPELOADERCIASMALL.A - Modified code I have made for the Quad Core tape loader, short and sweet, no silly Martech loader style noise :) You can make it how you like if you wish to.
UPDATED: TAPELOADERCIACOMMON.A - Modified code, in which I have made for the appearance of the tape loader system. Also links LOADINGSTRIPES.A sample code for the flashing border style
UPDATED: TAPELOADERCIAIRQ.A - Modified code I have added to the original turbo. Also links LOADINGSTRIPES.A code for the flashing border style
UPDATED: SCROLLERMUSICLOADER.A - Modfied code in order to display cool flashy effects in the IRQ raster routines, scroll a text, play music and also allow to show a picture before loading and running the main game, itself.
NEW: SETMUSIC.A - Assembly source file, in which sets up the loadname of the music to be linked to the loader.
NEW: MAKEPIC.A - Assembly source file in which sets up the position of the bitmap data to be forced into the loader. It also sets the filename of the bitmap
UPDATED: IRQTAPE.A - Assembly source that generates a manual tape master (Reading files A,B,C (A= Music, B=Koala Picture, C=Game) from disk, and writing everything manually to tape with the turbo loader as set by you) - This is useful for those of you who have problems writing .tap files to a real tape when mastering.
UPDATED: EXAMPLEBUILD.BAT - A batch file in order to assemble and run all of the files. Use the COMMAND PROMPT to check for errors in the code. This version puts up the assembled music, picture and game and puts it into tapetoolbuild.
Make sure you download the program with ACME cross assembler, etc on to your PC first. Then download my SCROLLER PICTURE MUSIC additional upgrade to the same directory as the original tape tool build. This will replace some of the older files, so make sure you have backed up the original TapeToolBuild directory Also, rename the EXAMPLEBUILD.txt to ExampleBuild.bat (or recreate it).
Quick update 12th July 2019: Someone on lemon64 contacted me to inform me about the missing assembly files, for linking binaries to form file names for the tape turbo. The files missing were:
SETMUSIC.A, MAKEPIC.A, LINKER.A
These example files have now been added to the .zip archive.
If you are using TAPETOOLBUILD for your own productions. It is probably recommended that you also use the source file IRQTAPE1.A and code your own disk/tape transfer tool. There are software publishers that cannot handle mastering through audio, and can only rely on using a real C64 datasette for good performance. If your program is small, it is possible to squeeze all of the files together and make a straightforward tape master.
DOWNLOAD RICHARD'S TAPE TOOLBUILD UPGRADE
PRG2TAP and Freeload
Earlier on in the Summer of 2019, I discovered a tape mastering tool by The Chaos Engineer called PRG2TAP. It is a commandline tool, that allows you to master a tape image out of a program, with an example loader and converts programs into tape pulses inside .tap files (Which can also be appended). There are three different loader choices at the moment. These are standalone kernal, Turbo 250 or Freeload. Freeload was originally a specially made as a commercial tape loader, that appeared on different software titles from various software companies around the UK. Mastertronic's MAD loader (Found in Binary Design titles), Invade A Load and Load 'n Play used a build of Freeload, and so did Rack It/Hewson titles, Alleykat, Orion and Uridium used a strange boot loader, which then launched an IRQ loader with an animated presentation before running the game.
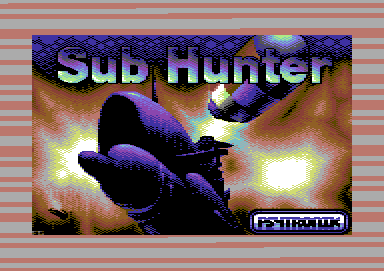
The most important part of the Freeload tape loader was probably that it was most famous for its Ocean and Imagine tape loaders. Those of which were featuring the famous Ocean Loader 4 and 5 by J.Dunn and anti-expert cartridge protection. It really was something very special. The author, Paul Hughes released Freeload as DASM source code on his web site, and welcomes the use of the loader. If I recall correctly, I first had permission to use the loader when mastering Stranded and Balloonacy 2 and Grid Zone for Cronosoft back in 2005. I also remember making a tool called the Freeload Master Maker, but it never got released and is lost.. Earlier Psytronik Software titles were also mastered with Freeload, before Martin Piper's tape loader came along, which I generated a tool from. The loader appeared in different forms. It was pretty much something very special. (Pictured, the Ocean Loader using Sub Hunter which can be found on the TND games downloads page). You were able to make cool effects out of the tape loader, by creating a raster loop, linked to the loader to do amazing things, such as Open top/bottom borders. Make a tape-loading demo, and much more. Imagine what you can do with Freeload, just like with TapeToolBuild :)
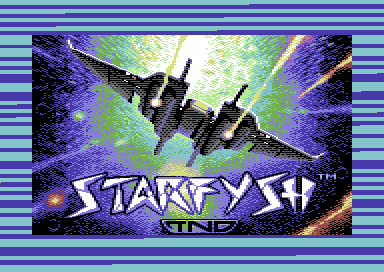
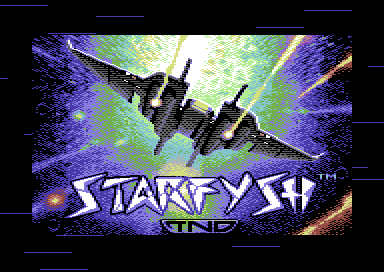
Enough about the history of this special tape loader. In this chapter, I'm going to help make tape mastering easier for you, by providing the source code I implemented in FREELOAD when I mastered Space Quarry X. We are not going to master that particular game. Instead, we are going to master Starfysh (The original game version from Christmas 2017, not Starfysh Remix) complete with loading picture and music.
The whole idea is to create a similar Ocean style loader, but to make tape mastering less complex. We are going to have the traditional scroll text, some music playing and a picture display, but no protection is needed. For this example I have experimented with the Freeload Standalone Loader source (Which the original can be found on Paul's site) and I edited it to play a raster routine so that it will smooth scroll the same type of message, then after the music is switched on, play the music, load a relocated Koalapic as a whole file. Load the game, and then load in a final piece of code which restores the C64 to its own state and runs the game that uses a BASIC run address from screen memory to the end address. So yes, there is additional code to the new Freeload loader, but you don't have to type it all in. I have provided it for you.
Before you attempt to master a tape, you may need the following tools (Unless you already have those stored on your PC):
DirMaster by Style (Optional, if your program is inside a D64)
DASM - Cross assembler/compiler
PRG2TAP - Converts PRG files into tape master files
TAPCLEAN FRONTEND (Optional, if you want to extract source/binary data and export to PRG format or copy/paste the turbo loader source)
FREESAVE - Should you wish to actually create a tape mastering disk
Do you want to make a tape multiload game for youe C64? Well, check out Making Multi-Load Games using Freeload
Making your own Tape Multi Loader
This version of the FREELOAD tape master can handle programs up to 202 blocks!
The source code for building the loader is as follows:
makebitmap.txt - Linker source to relocate loading picture saved in Koala Paint format to a higher memory, so that the picture won't disappear too soon if loading a program that reaches under $8400. Compiles to bitmap.prg
freeloadboot.txt - Freeload tape turbo boot loader (Assembles as bootturbo.prg). This boot loader source was extracted from Sub Hunter and modified to run the new loader code. Compiles to bootturbo.prg
freeloadheader.txt - Freeload tape header source (Assembles as header.prg). Once again, extracted from Sub Hunter. Compiles to header.prg.
freeloadpicmusicloader.txt - Based on Paul Hughe's Freeload standalone loader, this loader has additional code which I have added that scrolls a message, plays music and display a loading picture. (Assembles as freepic.prg). Compiles to freepic.prg
basicstarter.prg - Martin Piper's BASIC Run starter code, for tricky/older programs
All PRG files have been included in the zip.
Click disk to download example .txt and prg files
What to do next:
1. Download all the tools indicated above and the example files (Example files can be downloaded by clicking on the disk above). Extract it to a same folder for usage. D64 with your game and picture and music in DIRMASTER and export it to the bin directory in your tape master folder.
2. Create a bin directory for your program files (Music, loading picture, game) and place loading picture, music and game into the bin directory. If you want to use one of your own programs rather than Starfysh, relocate a tune to $F000 (Can be moved to a different address if tune is longer than 16 blocks, but you will need to alter freeloadpicmusicloader.txt to change the address, init and play).
3. Open the .txt files and explore through theses. freeloadboot.txt, and freepicmusicloader.txt can have its appearance adjusted to how you would like the program to load. You don't always have to have a colour cycle border if you don't want to. You'll also notice the scroll text at the very bottom in freeloadpicmusicloader.txt
Note: if you're editing the scroll text for your own game, make sure the loop counter DC.B 0 is placed at the end, just like my example.
4. Create a batch file maketap.bat using Notepad, and save your master file as a .bat (not .txt). Now type in the following commands in the batch file:. Note, your PRG files, for example: starfyshtune.prg, starfyshpic.prg (assembled through makebitmap.txt), and starfysh.prg should be in the BIN folder.
dasm freeloadboot.txt -obootturbo.prg
dasm freeloadheader.txt -oheader.prg
dasm freeloadpicmusicloader.txt -ofreepic.prg
dasm makebitmap.txt -opicbitmap.prg
prg2tap -h "FREELOAD" -n "STARFYSH" -p "bootturbo.prg" "header.prg" test.tap
prg2tap -a -f -s "freepic.prg" test.tap
prg2tap -a -f -s "bin\starfyshtune.prg" test.tap
prg2tap -a -f -s "picbitmap.prg" test.tap
prg2tap -a -f -s "bin\starfysh.prg" test.tap
prg2tap -a -f -s "basicstarter.prg" test.tap
5. Run the batch file maketap.bat
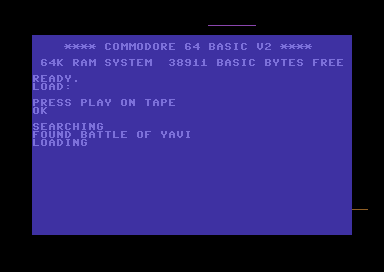
6. Load in VICE, CCS, Ultimate 64, or theC64 Mini and run TEST.TAP and the result should look something like this:
So then, how does it work. First, the batch file called DASM to assemble loader sources, then transform the loading picture to a new program, picbitmap.prg, which strafyshpic.prg is moved to $a000-$c710 (Although $9ffe has been set as the offset). Then the batch file calls PRG2TAP create a .tap image with a KERNAL header, then each of the other commands are put together using a built in FREELOAD turbo command -f. Therefore, test.tap is appended several times, in order to fit a complete mastered tape.
It is also possible to make tape multiloaders with PRG2TAP, but you'll need to have a standalone freeload tape turbo source added to your game code, in order for it to do the job. This example doesn't use a level multiload system. Building a level system with freeload, in PRG2TAP is pretty much similar.
Freeload normally starts with a clear screen and white text, but this tap image doesn't seem to do that, but it works anyhow. :)
Now you know how easy(ish) it is to make a digital tape image, but what if you want to write it to real media.
WRITING BACK TO REAL TAPE MEDIA
What about putting my master on to real tape?
ALSO CORRESPONDS TO OTHER TAPE LOADERS, AS WELL AS FREELOAD
This method Requires a good aligned cassette tape and a healthy tape.
Method 1: 1541 Ultimate with Tape Adapter / Ultimate 64
Writing a .tap to tape is pretty much straightforward if you own a 1541Ultimate 2 with tape adapter or you have replaced your C64 motherboard with an Ultimate 64 board. With those two devices you can simply record the game to tape directly without problems (Unless your C2N or tape is a bit dodgy that is). Go to the menu select starfysh.tap and select Record to Tape then wait patiently. Hint: before you do this, press record+play on your c64 and leave it to record blank memory from counter position 000-005. Then go to the Ultimate's menu and record to tape.
Method 2: Audiotap, CD and Hi-Fi.
It is possible to write a .tap image to a re-writable CD, which can be played through an old HI-FI and record to tape again. However it is not always guaranteed to work. As some PC sound cards may need to invert the waveform while recording. Using AUDIOTAP, allows you to convert your own .tap image into a .wav file. The waveform needs to be set to a correct waveform setting 44100Hz, and possibly inverted. You will need to experiment more on getting a perfect tape mastered using this method. It can be quite time consuming to get the settings correct, but if you get your settings right through you HIFI and your program loads successfully on a real C64/Ultimate 64. Congratulations you have created a working master tape :)
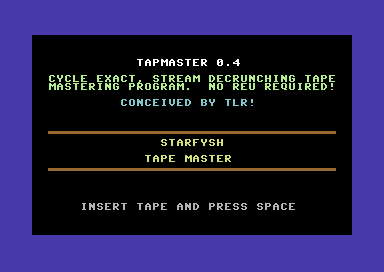
Method 3: TAPMASTER 0.4 by Daniel Kahlin
Before using this method ... Please be warned that the gaps between each load gets filled with large pulses/bleeps
The first method is to try TAPMASTER 0.4 by Daniel Kahlin. This command line program writes .tap files to a single file program (Depending on the size of your program) and will allow you to load the program and run it, and write through tape. This depends on the file size. Exomizer needs to be installed in the same directory as Tapmaster. As Exomizer is used to compress the tape. Let's do this in several steps:
1. Download and extract tapmaster 0.4 and EXOMIZER V2.0.9 (Do not use V3 as it will not work), and place into the same folder
2. Copy your mastered .tap image and paste it into TAPMASTER's directory
3. Enter the command prompt and go to the directory where TAPMASTER, EXOMIZER and TEST.TAP is
4. Enter the following command:
make_tapmaster -ostarfysh_master.prg -t "STARFYSH" -t "TAPE MASTER" test.tap
After a few seconds, a list of results will pop up. If your master program exceeds $CFFF then a warning message " Warning: not loadable without a custom loader! (>202 blocks)" will appear. If this is the case, you will need to put the tape master source on to a .D64, and also use a special disk loader or Action/Retro Replay fast loader to load in and run the tape master.
5. From your C64, enter the fastload menu on your Action Replay cartridge, or use a loader/DOS extension that can load a program from $0801-$fffa and load and run the tape master. It should turn out like this:
6. Insert your tape, press RECORD+PLAY on tape and then wait patiently for the mastering to take place.

7. Loading has finished. Reset your C64 and try out your mastered tape. Hopefully (Fingers crossed) it should work!!!
If your program TAP image is TOO BIG for tapmaster to write to tape:
Freeload Source Example (Starfysh)
If your program doesn't work through TAPMASTER, the second option is to use Freeload's FREESAVE DASM source code. I won't be showing you the whole code, but I'll be showing you what to change in the source code. You'll need to download FREESAVE from Paul Hughe's web site first. Before we can do anything with the FREESAVE source. You'll need to use the TAPCLEAN FRONTEND to explore the compiled .tap image we made earlier on.
1. Load TAPCLEAN + FRONTEND and open the TAP file test.tap (Which I made from Starfysh).
2. Click on the TEST option. If necessary, you can optimize/clean the .tap file simply by selecting OPTIMIZE should you wish to.
3. Go to the PRG option, select the files to examine the necessary files by clicking on the RIGHT mouse button, and select SAVE PRG. The files you want for a freesave master are as follows:
- A (Freepic)
- B (Loader tune)
- C (Loader pic)
- D (Game)
- E (BASICStarter code)
Right, we don't need to extract these from the TAPCLEAN front end, but we want to take browse at these, to get the starting and the ending address.
Click on each file and you'll see the addresses to take note of. The files are recognized as:
($033c-$03fb) - Boot turbo loader
($02a7-$03fb) - Kernal Header
($e000-$e3c7) - Turbo loader with scroller, picture and music player subroutines
($f000-$fe76) - Starfysh loader tune
($9ffe-$c710) - Starfysh Koalapaint loading picture
($0801-$77ad) - Main game
($0400-$0800) - System, Zeropage init and basic RUN routine
4. Create a D64 and rename the files highlighted in yellow as A, B, C, D make sure the filenames are NOT expanded inside the D64.
5. Using the FREESAVE source from Paul's site, In Notepad Lookup FLNAME and change the filename RAINBOW to your game filename:
FLNAME dc.b $05,$93 ; White text, Clear screenHOWMANY EQU 5
dc.b "STARFYSH " ; Game file name 13 Letters MAX
dc.b $1F ; Blue text
Look up ;Freeload file data (Which looks something like this):
;-----------------------------------------------------------------------------
; Freeload file data
;
; WHICHDISK & FLNAM are read backwards !
;-----------------------------------------------------------------------------
HOWMANY EQU 14
FILEDATA dc.w $0800,$0C40 ;A Freeloader control software
dc.w $4000,$5000 ;B $D000-$E000
dc.w $0800,$0C40 ;A Overload of control software
dc.w $B43E,$C800 ;C Music
dc.w $4000,$43FF ;D Colram
dc.w $C800,$CBFF ;E Scrcol
dc.w $E000,$FF40 ;F Bitmap
dc.w $0C40,$B43E ;G Game Code
dc.w $C800,$CFFF ;H Game Code
dc.w $E000,$FFFA ;I Game Code
dc.w $0200,$02A6 ;J Stack destroyer
dc.w $0800,$0C40 ;A Overload again !
dc.w $B43E,$C800 ;K Game Code
dc.w $0400,$0C40 ;L Game Code
FLNAM dc.b "LKAJIHGFEDCABA"
WHICHDISK dc.b 0,0,0,0,0,0,0,0,0,0,0,0,0,0
STARTUP EQU $0800
Delete all of above and make a new shorter version, which should look like this
FILEDATA dc.w $e000,$e3c7 ;Turbo music, pic loader
dc.w $f000,$fe76 ;Loading music
dc.w $9ffe,$c710 ;Relocated Loading picture (KOALA)
dc.w $0801,$77ad ;Game
dc.w $0400,$0800 ;SYSTEM init BASIC Run software
FLNAM dc.b "EDCBA"
WHICHDISK dc.b 0,0,0,0,0
STARTUP EQU $E000 ;Turbo music pic Loader start address
Finally, change the text for the master
Lookup intro:
TEXTChange to "SYSTEM INITIALISED FOR STARFYSH"
INTRO dc.b AT,4,2,"F R E E L O A D - BY PAUL HUGHES"
dc.b AT,5,4,"CASSETTE MASTERING SYSTEM V5.0"
dc.b AT,5,7,"SYSTEM INITIALISED FOR RAINBOW"
dc.b AT,8,23,"PRESS SPACE TO CONTINUE",0
6. Assemble freesave using DASM, with the command
dasm freesave.asm -ofreesave.prg
7. Run master through exomizer
exomizer sfx $c000 freesave.prg -o freesave.prg
8. Import master on to D64, then load it into your C64 and run. You are now ready to master your game to tape.
Back to top
NATIVE C64 TAPE MASTERING UTILITIES
(Tape mastering from a Ultimate 64 / real C64 to datasette)
Tape Loaders with Loading Music and Picture
Before using these, you might want to ask this question:
How do I find a hex jump address to run my main program, from an SYS run address?
If you are a games coder, then it is common sense. However, if you are just a games creator / SEUCK user and know nothing about jump addresses. Help is at hand. Action Replay freezer is $080D. We tend to use that if using a cruncher/packer. If however you choose to use a cruncher on your game, you would need to grab the hex SYS address for the decruncher before running the game. An easy method is to load your own program, the LIST it.
For example I freeze a SEUCK game with Action Replay. Then crunch it with the Time Cruncher V3.1 by Network.
The result would be:
1988 SYS 2072 'NET/MAT'
The address we would be keen on would be the SYS address. Use the M/C monitor to convert the number 2072 to hexadecimal. This is called by using:
N 2072
Resulting in $0818 as the jump address.
We have now gone past the PC based tape mastering utilities, so now it is on to the native C64 tape mastering utilities.
Laze Ristoski's IRQ Tape Turbo Loader example (Bugfixed version)
Back in the early 2000's. Laze Ristoski had created an IRQ Turbo Tape loader, which he showed me, and it was pretty damn slow and hard to put together. That was unless you had JCASS with Multi-Save and Multiload sample code - Which was a real nightmare. The loader was able to display a loading picture and play music in the background, with a black border and very thin loading stripes. The source code was free to use and very customisable, but I couldn't really get the example code to work when assembling it at the time.
That was until 2018. :) I implemented a working version of the same code example as in the Codebase64 example, but I also modified the loader a little. It now can cycle the border per block loaded, in the style of Cyberload. I also generated a simple DISK/TAPE transfer routines as separate source files. So now I was able to master a loading tune, koalapaint picture and the game, itself from disk, and then master it to tape. The loading scheme was also altered slightly. So here's the working project and source for you to play around with, just for fun.
The files are as follows:
LOADER.ASM - The main turbo tape loader Compile this first, before compiling the other assembly files
LOADERINSTALL.ASM - Some additional code I added in order to automatically install the tape loader after linked to saver. Remember LOADER.ASM must be compiled first.
SAVER.ASM - The main mastering program. It puts everything together. Use the filenames in upper case, followed by * to change the name of the files to master from disk to tape.
INSTRUCTIONS.ASM - Just some handy instructions on how to get this program assembled and running.
After assembling, placing filenames on a master D64, running VICE and manually recording to .tap (Or through a real C64 tape). The result should turn out like this:
DOWNLOAD IRQ Turbo Tape C64Studio Project and source
Tapetool Build converted C64 Tape Mastering Programs
Tape Master Pro V1.0 / Tape Master Pro V2.0 / Tape Master Pro V3.0 / Tape Master Pro V4.0 / Totally Tape / Loader Game Tape Master Kit
by Richard Bayliss (Turbo by Martin Piper)
All of these utilities can be found on the Download Utils page
If you have no experience in making your own tape masters, and the PC tools are really difficult to use. There is always an easier option. The New Dimension specializes in tape mastering kit utilities which allows you to create and generate your own tape masters for your own game productions for use commercially or non-commercially. If you use any of these. Please remember to credit the people who made the tape mastering tools somewhere on your release or on the tape loader scroll text (if there is enough room for it).
Please note that the tape loader used is an IRQ loader sytstem, which I named as Thunderload. The tape loader expects you to master your own games with a loading picture saved in Koala Paint format, play loading music and run a suitable game with a suitable jump address. Finding tape loading music is very easy enough. You can use SIDPLAY to example the music init/play address and then convert it from SID to C64 prg format but music must be load from $1000 and not go over $2000.
Tape Master PRO V1.0, and V2.1 expects a jump address for your own programs, but The Tape Master Pro V3.0, and V4.0 doesn't expect you to input any jump address for your program and just commands a basic RUN. (Each screen shot features the game which was mastered by each version of Tape Master Pro (V1.0, V2.1 (V2.0 was bugged in the boot loader), V3.0, V4.0). The tape mastering tools normally come with a manual or note file that should help you make use out of these tools.

Another good thing about TAPE MASTER PRO is that you can also custom the colour scheme of the loading stripes, and enable/disable the colour cycling process per full block loaded. The program allows you to type in your own loading scroll text and a few other things. It results to something pretty spectacular for the audience to enjoy whilst loading a game from tape.
Note: The earlier versions of Tape Master Pro were made for mainly smaller files. V4.0 (Which is the latest version) allows tape mastering of all programs runnable from BASIC from $0801-$c800. Basically up to 193 blocks. If your program sizes up past 193 blocks. Please try crunching it before using this tool :)
MASTERING USAGE: (Complies to most versions):
Example: Mastering programs frozen with an Action Replay cartridge (without crunching) or crunched with programs using sys 2061. Using a koalapaint picture, and tune composed in JCH, DMC, GoatTracker, CheeseCutter at $1000. Tape master requires use of * at the end of filename. Also all programs must be present on the same disk as the saved tape master (After you have done all the input and saved the tape master tool).
MUSIC NAME: MUSIC*
MUSIC INIT: $1000 (This option only appears in V1, V2, V3. V4 has a choice of most used players)
MUSIC PLAY: $1003
PICTURE NAME: ?PIC MYPIC*
GAME NAME: MYGAME*
JMP ADDRESS: (Only valid in V1, and V2)
On some versions, you will be asked if you would like a tape loading sprite. Versions 3 + 4 has it as a built in menu option. V1 can also make noise during loading.
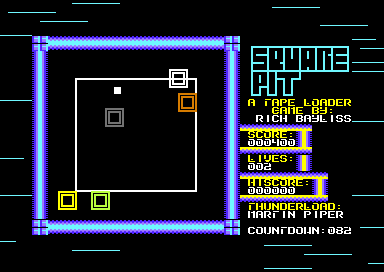
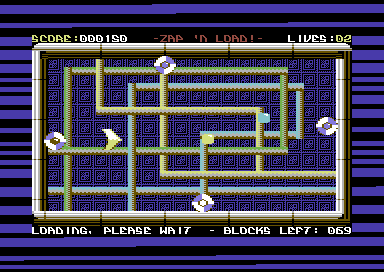
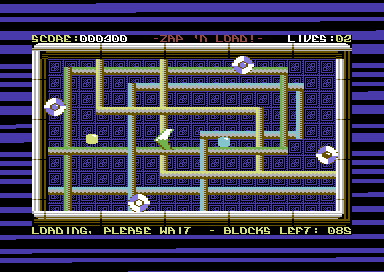
Loader Game Tape Master Kit by Richard Bayliss (Turbo by Martin Piper)
The other utilities, Loader Game Tape Master Kit is another fun tape mastering tool which allows you to master your own programs with a loading game, then once loaded. You can either carry on playing the game, or press a specific key where prompted to run the game. There are six different tape loader games that have been used while loading your own single file game projects. The games are as follows (pictured from top left to bottom right). Unlike Tape Master Pro V1.0-V4.0. This utility doesn't require you to enter a loading picture or loading music file name, but it does ask for a game start jump address for after loading.
MOOTILATION - Mini score attack shoot 'em up
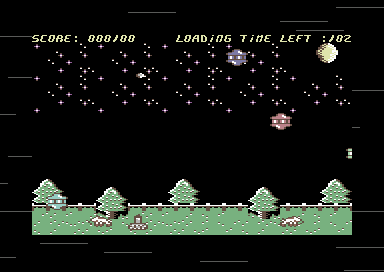
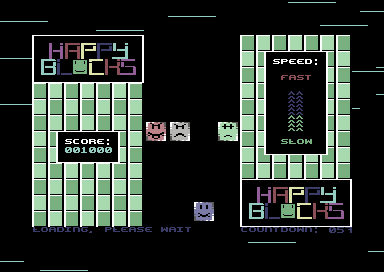
HAPPY BLOCKS - Block dodging score attack inspired by Block Dodge
SQUARE PIT - Mini score attack dodge 'em up
BLITZ-A-LOAD - Tape loader game inspired by the all time classic Blitz.
BREAK FREE - Joonas Lindber's crazy breakout loader game
ZAP 'N' LOAD - Fun little multi-direction firing shoot 'em up
 by Richard Bayliss (Turbo by Martin Piper)
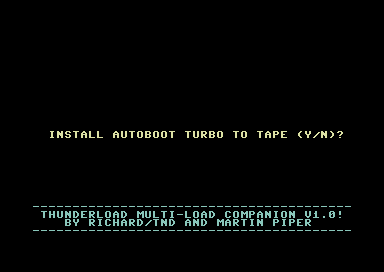
Thunderload Multiload Companion Tool
This is not really a tape multi-loader, but it was actually designed for that purpose - although mastering tape multi loaders is a headache. If you write a C64 game that is split into multi-loading levels. It is highly recommended that you DO NOT MASTER MULTILOAD TO TAPE. Not only is it HORRIBLE, but it makes tape mastering even SLOWER as a process altogether. The TMC, can handle making autoload and running of single program files. Which is really handy for just mastering a game which loads from disk to tape and then run it from a specific jump address. Loading scheme also feature error detection, by stopping the tape and forcing a red border.
Totally Tape by Richard Bayliss (Turbo by Martin Piper)
The Totally Tape series is a re-creation of the appearance of classic C64 tape loaders. The main engine is Tape Master Pro V4.0, but without the need of typing in a loading scroll text. The loader system loads tunes at $1000-$1fff, which can init $1000 and play $1003 during loading. Also requires a Koala Paint picture. The 4 tape loaders created were Totally Mad (Pictured), a Mastertronic looking tape loader, Totally Wild (Inspired by Wild Save), Totally Gold, inspired by U.S Gold's classic tape loader (Pictured below) and Totally Alpha (Based on Alpha Omega/CRL loader which I used on GTW64's Battle Ball). Like with all Tape Master Pro tape loaders. These have load error detection, and allow rewinding of the tape slightly if something goes wrong on your tape).

Spectactular Copy by Stephen Senz
Spectacular copy is handy for recording your programs from disk or from tape. This is a public domain tool, which utilizes an autoboot with turbo tape or just a standaone turbo tape loader. There is no need for programming knowledge if you're using this tool. Simply load in your disk and view the directory, and mark the files you wish to save to tape with an '*' and then type 's' to start. The turbo loader will run programs from a BASIC run address. It doesn't allow playing music or displaying a loading picture. However it is very good for general fast disk to file copying.
BWB Tape Mastering System by Radwar
This was the tape mastering system used on games such as GEM-X and IRON LORD and possibly a later version used on Flimbos Quest, and PP Hammer? I don't know to be honest. This tape loader system can also be used for single and multi files. In the early 2000's, the creators of the tape mastering system released this tool in to the public to download and have fun with. It requires a lot of programming knowledge in order to use an IRQ tape loader (You will have to make one of your own). Also you need to know jump addresses when using it.
Disk to Tape Tools by DoSoft
One of the most know Public Domain tape mastering utilities has been DoSoft's Disk to Tape mastering tools. It creates an autoboot tape turbo loader, which can also use a BASIC extension. It cannot play music as such, but it is possible to display a loading picture while loading your main file.
You would need to program your own picture loader if you need one. Here's an example of a picture loader which can be linked to this loader.
10 REM BLAP 'N BASH BASIC TAPE LOADER
30 I=I+1
40 IF I=1 THEN GOTO 1000
50 IF I=2 THEN GOTO 1100
60 IF I=3 THEN GOTO 1200
1000 POKE53280,:POKE53281,0:PRINTCHR$(147):LOAD "A",1,1:REM BLACK SCREEN, LOAD KOALAPIC
1100 LOAD"B",1,1:LOAD CUSTOM KOALAPAINT PIC DATA MOVER/DISPLAY CODE
1200 SYS20480:LOAD"C",1,1:REM RELOC/DISPLAY PIC DATA, LOAD GAME
Back to top
BUILDING YOUR OWN 16KB CARTRIDGE
You may have discovered that I have mainly been talking about mastering programs to disk, and also to tape. However, what about making your own 16KB cartridge? Especially if you want to write a game that fits 16KB for RGCD 16KB cartridge competitions or maybe just for fun. So then how do we make a digital cartridge? There are two different ways. You could either code your own cartridge ROM boot code in your chosen assembler. Make it a raw .bin file and then master a cartridge using CARTCONV . Or, there is the alternative way, which I find to be a whole lot easier for me. Especially since I am very much used to C64Studio. Simply program your own cartridge ROM framework in C64Studio - without needing to use external tools. As C64Studio has its own 16KB cartridge build function.
When coding the cartridge ROM/BOOT up, it should aways start with the following command in your code:
!to "mycart.crt",cart16crt
Now another thing you should ALWAYS remember to do, is to place the cartridge header at the address $8000. Then add a few of these commands below, to accurately make a cartridge ROM boot.
*=$8000
!word launcher
!word launcher
!byte $c3,$c2,$cd,$38,$30 ;CBM 80
launcher
sei
stx $d016
jsr $fda3 ;prepare irq
jsr $fd50 ;input memory
jsr $fd15 ;initialise i/o
jsr $ff5b ;initialise video memory
The above code creates a launcher, in which sets up the cartridge configuration. Now Let's do an experiment. At the end of this source. Add the following code:
lda #$35
sta $01
inc $d020
jmp *-3
*=$c000 ;End address of 16KB cartridge
Compile and run through C64Studio's compiler.... Congratulations, you have made a simple cartridge with a flashing border - Although that is rather pointless..
Now, let's try a different program. This time LINKING a program to the cartridge ROM, instead of flashing the border.
Before you do this, you MUST remember to set EXOMIZER to crunch your program using a specific command. This is because a cartridge ROM can overwrite memory $8000-$c000 with the incorrect code, if the decruncher is set to default. Your game data gets linked from the end of the cartridge code, through to $bfff. Which means your program should be 15KB or less.
exomizer sfx $4000 rogueninja.prg -o rogueninja.prg -x -Di_ram_entry=$37 -Di_ram_during=$34
You might want to add an optional command to exomizer, if your game doesn't have a default $01 status set before running the main program. That command is -f "lda #$36 sta $01" (Well, for my example that is).
Right, now copy your crunched game over to your cartridge framework project in C64Studio, and type in the following code:
;*****************************************
;* *
;* 16kb cartridge framework *
;* c64 studio v6.0 version *
;* for the rgcd 16kb cartridge compo *
;* *
;*****************************************
!to "my16kcart.crt",cart16crt
Decrunch_Address = $080d ;Exomizer decrunch address
*=$8000
!word launcher
!word launcher
!byte $c3,$c2,$cd,$38,$30 ;CBM 80
launcher
sei
stx $d016
jsr $fda3 ;prepare irq
jsr $fd50 ;input memory
jsr $fd15 ;initialise i/o
jsr $ff5b ;initialise video memory
;No interrupts or CIA should be enabled.
;disable these
lda #0
sta $d019
sta $d01a
lda #$81
sta $dc0d
sta $dd0d
;Copy the relocator code to $0100-$01ff
ldx #$00
CopyRelocator
lda Relocator,x
sta $0100,x
inx
bne CopyRelocator
;If you want, set the border + background colour to the background colour of your game.
lda #0
sta $d020
sta $d021
sta $dbe7 ;Hide the single byte char if using a custom border flash code with '-x "border flash code"
jmp $0100
;The move code, which has been copied to $0100-$01ff
Relocator
ldx #$00
RelocLoop lda GameData,x
sta $0801,x
inx
bne RelocLoop
inc $0104 ;Self-mod code position
inc $0107 ;for data relocation
lda $0104
cmp #$c0
bne Relocator
lda #$35 ;All kernal disabled, but this can be removed
sta $01 ;if you don't think you need it!
jmp Decrunch_Address
;import main game (Crunched with Exomizer or other packer)
GameData
!bin "rogueninja.prg",,2
GameDataEnd
!if GameDataEnd > $c000 {
!error "GAME IS TOO LARGE TO FIT A 16KB CARTRIDGE"
}
*=$c000
;Cartridge end!
Compile, then RUN...
 MIX
MIXIf your program compiles and runs and WinVice runs your game 100% after fully testing. Congratulations, you now have a working 16KB cartridge. Otherwise you may need to configure Exomizer to allow the program to decrunch. If you get an ERROR during compiling "GAME IS TOO LARGE TO FIT A 16KB CARTRIDGE", you may need to trim down some of your data or code in your game.
Alternatively, I have also supplied the framework which you can use in C64Studio, it also consists of some instructions inside the code, that should help you link your 15KB or less game into the 16KB cartridge slot.
Click on the Disk icon to download the framework
Oh, and before I go. It is possible to also add additional code for fadeout and other bits before relocating and decrunching your own game - providing that you have enough memory in the Cartridge boot header code before importing your relocated game code data.
That's it. The end of this chapter!
Credit also goes to Enthusi for the original cartridge ROM example which has inspired me to create my own version of the 16KB cartridge framework