TND Productions, C64 News + Updates

SEUCK ENHANCING TIPS
(Last updated 28th September 2025)
MAIN MENU
Important Information/SEUCK Title Screen Maker/Introduction
1. STORAGE AND FILE COMPRESSION
Saving your finished game / all data on RGL's theC64 mini/full size computer / Action Replay freezer and backup tips / Housekeeping; Cleaning, Packing/Crunching SEUCK with Sledegehammer 2 and Fast Cruel / Using the VICE Monitor and Exomizer
2. BUG FIXING S.E.U.C.K
Fixing the Sideways SEUCK Flicker Bug - Method 1: A single POKE and a Raster trick / Fixing Sideways SEUCK Flicker - Method 2 - $D011 tricks / Fixing Player 2's score per object collected / Working the PAL score on NTSC machines / Making NTSC only SEUCK games work with PAL
3. PLAYER PROPERTIES AND TRICKS
/ Controlling 2 Players with 1 joystick / Peek-A-Boo Hide and Seek / Decorate my Score Panel / Hires/Multicolour Sprites / Player Re-Spawn tips (Assembly) / Player Re-Spawn Tips (Action Replay) / Adding an Invincibility Cloak to the Player
4. SCORE PANEL TRICKS
Linked Players and Score + Lives Sharing/ Status Panel Hack trick / Making a brand new score panel / Directional Movement using More than 2 frames
5. ENEMY OBJECTS AND ENEMY DEATH TRICKS
Looping enemy attack movement / Power Ups and Detecting an enemy hit /Detecting an enemy hit based by object / Detecting an enemy hit based on score / Destroying boses or all Enemies on screen in one go
6. LEVEL TRICKS
/ Level Detection - Colour changing / Level Detection - Colour Changing - The table method / Level Detection - Changing Music / Full Level Control (Stopping a timed STILL level)
7. BACKGROUND TIPS
/ Background Animation and Push Parallax Scrolling Making Jumping/Platform style games out of SEUCK / Flip Screen Techniques/ Background Terrain Tricks (Detecting Background Char type)
8. PRESENTATION, SOUND AND MUSIC
/ Getting to know the Front End / Extending colours on raster bars / Adding some music / Switching between in game music and sound effects / SEUCK Front End - Hi Score Detection
/Triggering SFX / Making a simple new front end with SEUCK and Action Replay
9. ROUTINE TRICKS
Common SEUCK Subroutine Tricks / Editor Tricks: Drawing Hires sprites
10. CROSS DEVELOPMENT SEUCK FRAME WORK
Dark Force Disected / SEUCK Framework / SEUCK REDUX / Kick Assembler SEUCK Framework V1 / Kick Assembler SEUCK Framework V2 / Kick Assembler SEUCK Framework V3 / Kick Assembler SEUCK Framework V4
11. MEDIA VIDEOS AND OTHER S.E.U.C.K RELATED RESOURCES
The SEUCK Vault and SEUCK Enhancing
Videos
IMPORTANT INFORMATION
The tips in SEUCK School are used for modifying/enhancing standalone games that were created using the Shoot Em Up Construction Kit and probably might work on the Sideways scrolling adapted versions of the application.
For legal reasons, TND does not provide the actual "Shoot 'em Up Construction Kit" or modifications of it, as it was a commercial application for the Commodore 64 back in 1987 and is (C)1987 Sensible Software. As far as I know, or may be aware of there are no major restrictions in enhancing the game creations or releasing games into the public domain or as covermount creations. Since the 1990s, there have been SEUCK games appearing commercially worldwide in the 1980s/1990s, featured on magazine cover tapes and cover disks. Some of which were enhanced. Please read the introduction to find out more about the purpose of this SEUCK School web site.
You will also need a freezer cartridge such as Action Replay / Retro Replay cartridge or plugin. These tips might work on Expert and Super Snapshot cartridges.
If you cannot code SEUCK enhancements yourself, but you would like to make new front ends featuring music. You can check out my SEUCK Title Screen Maker which is available from the TND Web site, from the Utilities page and also my itch.io page (see link above). It comes complete with a PDF manual to help you make great use of this utility. Please note that in the future this utility could feature updates such as additional improvements, features, etc.
Are you bored with the old standard front end SEUCK provides? If the answer is "yes" then the SEUCK Title Screen Maker can help you develop great new front ends for your standalone SEUCK games with optional 1x1 standard or animated characters,1x2 or 2x1 character sets, an 8 x 40 char sized hires bitmap logo (Art Studio) or multicolour bitmap logo (Koala Paint), complete with an optional high score table and play relocated music (from music editors used such as Goat Tracker V1 or V2, Cheese Cutter, SIDWizard, Sid Factory 2, DMC, JCH Newplayer, EMS V7.03, Future Composer, Music Mixer, Music Assembler or any other music editors perhaps not mentioned that I never used). If you are not a composer or connected with a composer. The manual features tips on how to extract a SID tune from my HVSC directory and relocate it using cross-development tools. There are also additional in game enhancement snippets which you can modify, assemble and install into your production using Turbo Assembler. Although no programming knowledge is needed for making a new front end, this tool requires a freezer cartridge or plugin, such as the Action Replay or Retro Replay with an optional native C64 packer and cruncher, or use with VICE M/C monitor for linking the new title screen to your standalone SEUCK game creation. Please remember to refer to the user manual provided.
Introduction
Welcome to the SEUCK School. The purpose of this web site is to help you learn to enhance your very own standalone games, created using the Shoot Em Up Construction Kit. Back in December 1990 I first had the Shoot Em Up Construction Kit, which came with my Commodore 64C when I had it for Christmas. I had a few replacement C64s until that last one died. Now I use an Ultimate 64 which replaces the old board of the C64 hardware, but still use the old C64C case and keyboard (as those still operate well). The C64 scene is active although today it is all online and emulator based.
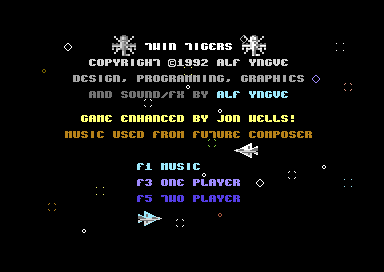
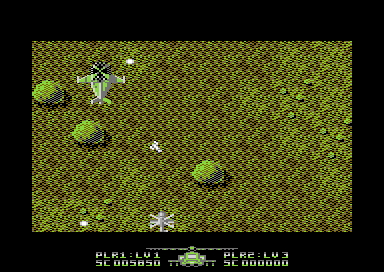
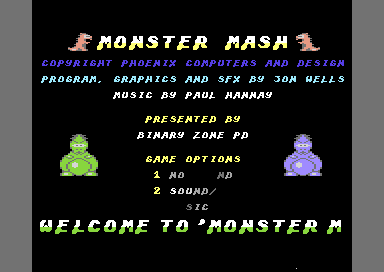
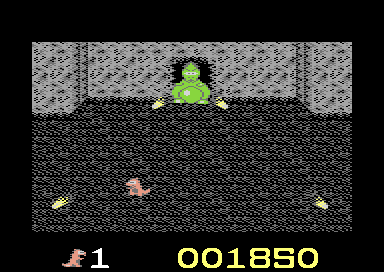
For many years I have been making games using the Shoot Em Up Construction Kit. What made me interested in enhancing SEUCK game creations was due to a magazine publication, Commodore Format which I read since issue 8 until the very last issue 61. The magazine came with a cover tape. In issue 26 and 31 of the magazine, there were two great reader games created using the Shoot Em Up Construction Kit. They are "Twin Tigers" and "Monster Mash". Both cover tape games featured a new front end, and also in game enhancements. Both games were also published as Public Domain games by Binary Zone PD.
Twin Tigers by Alf Yngve
Monster Mash by Jon Wells
After seeing both of those games, it made me say "Wow! I wish I could do that.". Issues 39 - 45 of Commodore Format published tips and hacks that allowed you to enhance SEUCK games in BASIC. In the late 1990s and early 2000s I learned basic machine code using Turbo Assembler and used my Action Replay cartridge M/C monitor, along with sprite editors, graphics tools, music players, packers and crunchers that were provided on Public Domain disks and fan based C64 magazine cover disks. During the start of the public internet era, I contacted a few people who were involved with SEUCK enhancements and I managed to achieve coding a new front end on standalone SEUCK games. This started originally in 1999 when I made a small compilation called "Game 2000" which featured"Orcan Legend of the Realm", "Nyaaaah! 2000" and "Millenium Shblib". I then moved on further to learn how to enhance SEUCK games further and have been doing this since 1999. Why do I do this? Because I love doing it and it is great fun as well.
One of my later SEUCK enhancement examples (exhibit 1: VIOS by Carl Mason, exhibit 2: Yauzeras by Gibranx)
If like myself, you have been, or are still making games using the Shoot Em Up Construction Kit, but you would like to push things further with it. You have come to the right place. This web site contains many fun tips that involve enhancing your game creations made with SEUCK, or any sideways scrolling versions of the Shoot Em Up Construction Kit. For the beginners all the way to experts, there are many simple and cool tips, including changing the raster bars on the title screen, adding music, and doing cool things with sprites. There are also really cool tips for those who wish to enhance their own finished SEUCK games, which include adding full boss enemy objects, adding a new score panel and even coding a new front end. There are also advanced SEUCK enhancement tips, and frameworks included. These tips are possible to be done in VICE M/C monitor and a cross-development tool, like ACME cross assembler or C64 Studio. Otherwise you can enhance your own SEUCK games using an Action Replay/Retro Replay cartridge/plugin on your C64, theC64 or Ultimate 64). There are also tips that support the SEUCK Redux and framework like my Kick Assembler SEUCK Framework.
By checking out SEUCK School, you should be able to learn how to add some oomph to your game creation made with the Shoot Em Up Construction Kit. For example:
- Adding title or in game music
- Fun with colour bars
- Making cool new front ends, get ready, game over, endings and possibly hi score readers
- Animating background (including parallax scrolling)
- Full boss explosions
- Power Ups / Weapon upgrades
- Link two players as one player with score sharing
- Making new score panels
- Di-secting finished enhanced SEUCK game productions (i.e. Darkforce)
- Making a full project in SEUCK Redux
- + Much more
For those who want to use cross platform programming for enhancing general SEUCK games. It is highly recommended that you download SEUCK Framework, C64Studio, the Exomizer, PuCrunch or TS Crunch ) and Style's DIR Master. If you want to use the KickAssembler frame work, you will need to have Java installed, and download KickAssembler.
If you are using theC64 or theVIC20 in C64 mode, make sure you enable accurate disk function (or mark as _ADFH on your source and target disk with your project).
The tips might work on other programming software, such as cross-development tools, but syntax may be different. TND tries to make SEUCK enhancement tips as easy where possible. - This is an ongoing web site, which hopes to be updated, and split into separate pages (according to category) some time in the near/distant future.
SAVING SEUCK / Sideways scrolling SEUCK GAMES on theC64
If you own a theC64 mini or theC64 full size. You'll notice how different saving a program on a digital disk image is compared to the original Commodore 64 1541 disk drive, the 1541Ultimate or Ultimate 64. If you are making a SEUCK game, and you want to save it onto your D64 image. Avoid using _AD or accuratedisk (True drive emulation). This is because on all versions of theC64 firmware exists a bug. If you use _AD or cjms with accuratedisk included (which is cross-linked to all other folders), you *must* verify your disk by loading the file directly after saving it. Otherwise you will get a:
0 "NAMEOFBROKENFILE" *PRG
This is known as a splat file, and may not be recoverable.
It is also advised that you backup your project using snapshots by attaching the SEUCK utility disk/tape image and storing into one of the four boxes. (Please read theC64 manual on how to do this)
Luckily the Shoot Em Up Construction Kit and Sideways Scrolling SEUCK does not need the accuratedisk, or _AD functions for game development as it does not use any specific form of software fast loader. theC64 can also save the finished games quickly. Using your PC/laptop, place your D64 onto a root directory of your USB or make a new directory and copy & paste the previous cjm file, delete accuratedisk from there and then save it all in notepad. Note: you can make a D64 using VICE, CCS64 or using Style's Dir Master, which is strongly recommended.
Now go back and plug your USB into theC64.
Go to save finished game (or save all data if you have not yet finished your game).
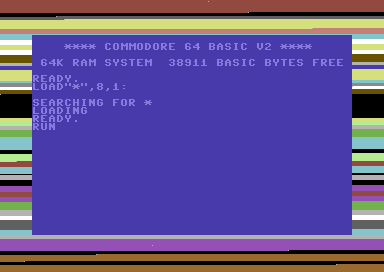
To test load your finished game, Reset theC64 (from the menu) while the D64 is attached. Type in LOAD"*",8,1. The screen will flash, and then the game will load and run. (If not loading from accurate disk, the stripes will be a lot thinner, but of course the game will still work).

This should then load in your game and run it automatically.
Click here for main Menu
ACTION REPLAY FREEZER SAVING TIPS (1-filing)
1-Filing Seuck Games with a Freezer Cartridge
Method 1:Saving a SEUCK game as one file with the Action Replay / Retro Replay freezer cartridge
This is probably the most simplest approach of them all. Most SEUCK users have used this method for many years or so. First of all load in your SEUCK game by typing in LOAD "MYGAME",8,1 and wait a few minutes for the game to load and run.
Now after the game has loaded, press the FREEZE button on your Action Replay / Retro Replay Freezer Cartridge, then press F1 to go to the backup menu. Select the disk save method you wish to use (Turbo is best for speed - not warp mode, as not everybody can run Warp mode!). Reset your C64 and load in the game, and type in RUN. The program will unfreeze your SEUCK game.
Method 2: Saving a SEUCK game as one file with the Action Replay freezer cartridge more professionally
Although a SEUCK game will unfreeze, you might see some mess on the screen while the C64 is setting its state to your SEUCK game. There is a more professional approach to freezing, known as the black screen method. Load up your SEUCK game as normal. Once loaded, press the freeze button on the title screen with your cartridge. Now this time don't go into the backup menu yet. Go to the screen editor option, then press F3 to change the background colour until everything is black on your title screen. Press return and then go to the backup menu (F1) and save your finished game with the fast disk (not warp) save option. Now reset your C64, load and run the game like normal. You will see that this time round the screen is black while unfreezing and restoring your game to its original state.
Click here for main Menu
CLEANING, SAVING AND COMPRESSING A SEUCK GAME WITH A M/C MONITOR
Tools required: (C64)
- Any freezer cartridge like Action Replay/Retro Replay cartridge
- packer and cruncher (optional)
- 1541 disk drive (or equivalent)
Tools required (PC)
- VICE (or any emulator)
- Any cartridge plugin (optional)
- Dir Master
- Cruncher (Exomizer)
Have you written a SEUCK game? Have you seen the file size of your game. Eurgh. Horribly huge isn't it?. Finished game states saved from SEUCK on disk consist of 2 files. You may have already noticed this before.
MY DISK 64 00
1 "MYGAME"
249 "MYGAME "
The size is huge. You probably might want to consider to reduce the file size and be able to load the game quicker. So the first thing to do, is load your game on disk. Grab a cup of tea or something while waiting for the loader to load in your saved game. As soon as your game has loaded. You may ask why is the game data huge in size?. That is because SEUCK saves the editor data and code along with the finished SEUCK game. Pretty much a wast of memory. So what we are going to do is CLEAN up the mess. Press the FREEZE button (or emulate it).
Before we clean the data, a quick fix should be made in order to allow enemy random fire take place. Enter the M/C monitor and change the load value of $8000 (random firing) to $5000. The reason behind this is so that the random firing isn't clear. Zero filling the unwanted memory will fill the random shooting data. So it has to be read elsewhere.
> 54EF lda $5000,y
Now let us Zero fill the unwanted data to make room for additional data / code, should you wish to enhance the game further.
F 6580 B6C0 00
There you go. A clean SEUCK game. You may want to save everything out and then crunch the data.
Packing and Crunching a SEUCK game unfrozen on a C64/Ultimate 64
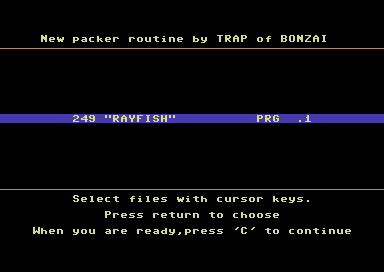
If you ever wanted to make your Shoot Em Up Construction Kit game shorter than a long loading two file system on a stock C64 and you have an Action Replay/Retro Replay freezer cartridge. It is possible to transform your SEUCK game to run as an executable from BASIC. However, there is a process known as packing and crunching. This process takes some time, but fast packers and crunchers will speed up the crunching phase. For this method I have chosen Sledgehammer V2.0+ and Fast Cruel V2.5. Of course you can choose any packer and cruncher you would like to use for your production. (You can find various packers and crunchers available from the C64 Scene Data Base).
1. Load in your finished SEUCK game like normal (From disk or tape). Wait a few minutes for the game to load and run automatically

2. Press the FREEZE BUTTON on your cartridge and enter the Machine Code Monitor from the freezer menu.
3. Save out the memory from $0900-$FFFA using the following command:
s "nameofgame",8,0900,fffa (Some other freezer cartridges behave differently)
4. Load up your packer, and enter the filename in which you wish to pack.
5. Now enter the filename parameters in which to save your filename.Use $4245 as jump address $37 as $01 value.
6. Once done save your packed game to disk.
7. Reset your C64 and test load your packed program. You will want to type LIST to see whether or not the packer uses a basic SYS run. If it does, and you don't know Decimal/Hexadecimal conversion, use the Action Replay/Retro Replay M/C monitor (type in MON in fastload, then N xxxx to work it out for you. It will be the jump address of the packed file).
If your packer has no BASIC header, then $0801 is most likely to be the jump address. Simply type in SYS2049 to test run.
If your game depacks, it is now time to use acruncher on the packed file.
8. Load in your chosen cruncher (I have chosen Fast Cruel V2.5)
9. Type in the filename properties $01 value = $37, JMP = $xxxx (080d is Sledgehammer 2's depacker, note that different packers jump addresses differ). If you get options like SEI/CLI, just pick any of the two, also the decruncher set $2d,$2e is optional. I normally select "S" in SEI/CLI option and "Y" to set decruncher $2D/$2E.
10. Wait patiently for your packed version of the game to crunch. (Use VICE or the Ultimate 64's speed boost option to speed up the crunching if you cannot wait long for the crunching process to finish).
11. Load the game and run it.

Brilliant, the game is working.
And that is how you use a packer and cruncher on SEUCK games...
Click here for main Menu
Using VICE Monitor and Exomizer
You don't have to use Exomizer if you don't want to, you can choose Martin Piper's LZMPI cruncher, PuCrunch, Subsizer or Byte Boozer V2. However if you use TSCrunch you might experience corrupt background graphics unless the cruncher has been correctly configured It is advised to use Exomizer, due to its high compression rate.
I have showed you an example of how to pack and crunch your SEUCK games with Zipper and Abuze crunch. This was pretty much a traditional oldschool method of saving a finished SEUCK game and making it into a C64 executable. If you are a general user of VICE however, you can save a lot of time by using VICE machine code monitor, and Exomizer. The method is as follows.
1. Load your SEUCK game from the save finished state, frozen or whatever. Ensure it is running.
2. Go to the VICE monitor (ALT+M in Vice V2.4 - 3.2 using GTK, ALT+H if using the GTK V3.3 or above).
3. Like with command prompt, change directory to the Exomizer Win32 directory. For example:
cd\c64\tools\exomizer\win32. (Yes, you can do this in VICE monitor)
4. Type in "bank ram" and then save the game from $0900-$fffa using the VICE monitor (e.g. s "rayfish.prg" 0 0900 fffa
When done, type x to exit monitor.
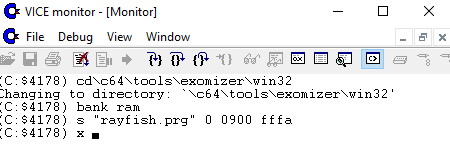
5. Using the command prompt, go to the Exomizer directory and then run the program through exomizer via the command line (Alternatively, you can create a command line batch file that could crunch the file by simply clicking on the batch filename).
| cd\exomizer\win32 c:\exomizer\win32> exomizer.exe sfx $4245 rayfish.prg -o rayfish.prg -x2 |
After a few seconds, Exomizer will compress the saved project and then make a C64 executable of the finished game. After completed the Exomizer method. Load and run your compressed program in VICE. The border will flash on decrunch, then the game will run. (If you don't like decrunch effects, you can use -n instead of -x2 ).
Click here for main Menu
BUG FIXING S.E.U.C.K
Fix Sideways SEUCK map flicker bug - Method 1 - One POKE and a raster trick
by Richard Bayliss
The Sideways scrolling SEUCK is fun to use, but sometimes it can be very annoying when it is flickering like hell at times. For a slightly more STABLE version of the the Sideways scrolling SEUCK engine. Use:
POKE 17651,25
WARNING although this kills the constant map flicker bug - it can make the upper border look pretty odd - unless default background colour used is set to BLACK (#00), otherwise you may need to create a raster split after saving your finished game. This example is what I used for Sarada Doja to stabilize the scroll more.
Note: In order to INIT this subroutine into the code. You will need to change $44F4 to:
>44F4 JSR $6900 ;JSR FIXSCROLL
... or wherever you want to put the code.
FIXSCROLL: $6900
>6900 LDA #$00
>6902 STA $D020
>6905 STA $D021
>6908 LDA #$19 ;STABILIZE VERTICAL SCREEN POSITION
>690A STA $D011 ;HARDWARE VSP
>690D LDA #$32
>690F CMP $D012 ;COMPARE RASTER POSITION
>6912 BNE $690F ;If using assembly instead of M/C monitor. Change to BNE *-3 instead
>6914 LDA #$09 ;PLACE YOUR SEUCK GAME BACKGROUND COLOUR HERE
>6916 STA $D021
>6919 STA $D021 ;ERM WHY DID I DO THIS TWICE? HEHEHEH.
>691C RTS
The only disadvantage to using this method on a standalone sideways SEUCK game, however is that it moves sprites the Y position of all the game sprites out of place. Therefore it is recommended that you type POKE 17651,25 or use in a machine code monitor (in SEUCK's editor)
> 44F2 LDA #$19
> 44F5 STA $D011
Click here for main Menu
Fixing the Sideways SEUCK map flicker bug - Method 2 - Fixing $D011 timers
by Stephan Lesch of Out of Order Softworks
Note: These tips should only be used on the standalone game, not the editor, itself. Hint: Save as finished game first, load the game up then try these tips.
Adding the tips / POKES to the Sideways SEUCK editor, and saving the finished game will crash the finished game after loading it from BASIC.
If using the tips in the SEUCK editor and you wish to save your finished game. Use POKE 16964,0 to disable the editor and then use either the M/C monitor and the crunch it to an executable, or use the Action Replay freeze frame backup menu to save your finished game.
(If using crunch method, S "GAME",8,0900,FFFA then set $4245 as jump address in Exomizer).
Tested on Nyaaaah! 11
I mentioned how it is possible to fix the Sideways SEUCK map flicker bug (Method 1) by attempting to make the VIC2 hardware stable, by triggering the position of VIC Vertical Screen Position ($D011) but unfortunately this triggers the SEUCK game to shift sprites down slightly a number of pixels. In this part, Stephan Lesch has an even better method on fixing the Sideways SEUCK map flicker bug which I have tested on one of my old games.
The examples highlighted in *red* are what you do NOT need to type in as code. The example code hilighted in *green* are what you can do. At the end of this feature are some POKES which you can use to fix the Sideways SEUCK flicker in your standard Sideways scrolling SEUCK game:
Here's his explanation:
load
a seuck "finished game/raw version" (without enhancements) into
(Win)Vice. After the title screen press fire start the game then press Alt+M to go to the monitor (If you are using VICE V3.3 and higher (GTK versions) press Alt+H instead.
enter w store $d011
x
Then it interrupts every time $d011 is changed.
The first number after Stop on store d011 is the grid line, the second is the cycle in the line.
#1 (Stop on store d011) 003 017
.C:461a 8D 11 D0 STA $D011 - A:7E X:1C Y:15 SP:ee ..-..I.. 18240974
.C:461d AD 8A 40 LDA $408A - A:7E X:1C Y:15 SP:ee ..-..I.. 18240974
At the top of line 3, $d011 is set to $7e. This means:
Bit 7=0 (bit 8 of the line for raster interrupt)
Bit 6=1 Extended background color mode on
Bit 5=1 Bitmap mode on
Bit 4=1 Screen on
Bit 3=1 25 lines
bit 2-0 (yscroll)= 6
The combination of Bitmap mode and Extended background color mode
causes the VIC to output black pixels that cover the background color.
Yscroll is set to 6. In this state, the first graphic line would not start until start in line 48+6.
(C:$461d) x
#1 (Stop on store d011) 048 002
.C:44f4 8D 11 D0 STA $D011 - A:18 X:1E Y:00 SP:e7 ..-..I.C 18243794
.C:44f7 EA NOP - A:18 X:1E Y:00 SP:e7 ..-..I.C 18243794
In line 48 (beginning of the graphic) it is set to $18. I.e.
Bit 7=0
Bit 6=0 Extended background color mode off
Bit 5=0 Bitmap mode off
Bit 4=1 Screen on
Bit 3=1 25 lines
bit 2-0 (yscroll) = 0
The display is switched to normal and Yscroll is set to 0. This triggers a badline and the graphic display starts.
(C:$44f7) x
#1 (Stop on store d011) 248 013
.C:4520 8E 11 D0 STX $D011 - A:F7 X:50 Y:15 SP:ed N.-..I.. 18256405
.C:4523 A9 C0 LDA #$C0 - A:F7 X:50 Y:15 SP:ed N.-..I.. 18256405
In line 248 it is set to $50. I.e.
Bit 7=0
Bit 6=1 Extended background color mode on
Bit 5=0 Bitmap mode off
Bit 4=1 Screen on
Bit 3=1 24 lines
bit 2-0 (yscroll) = 0
This firstly switches off the frame and replaces it with the
combination of Extended background color mode and Multiolor (in $d016)
switches back to a mode in which the VIC outputs black pixels. However,
sprites can be displayed above it.
Sometimes something like this happens:
#2 (Stop on store d011) 048 059
.C:44f4 8D 11 D0 STA $D011 - A:18 X:1E Y:13 SP:e7 ..-..I.C 36622211
.C:44f7 EA NOP - A:18 X:1E Y:13 SP:e7 ..-..I.C 36622211
This
means that the switchover in line 48, which starts the image display,
happens much too late, only at the end of the line. This can cause
flickering.
If Richard's flicker fix is installed, yscroll is set to 1 in line 48,
i.e. the badline does not happen until line 49 and the graphic is
shifted one pixel down.
#1 (Stop on store d011) 048 022
.C:9c0a 8D 11 D0 STA $D011 - A:19 X:1E Y:1C SP:e6 ..-..I.C 103472230
.C:9c0d A9 32 LDA #$32 - A:19 X:1E Y:1C SP:e6 ..-..I.C 103472230
Okay, now type in the command "disable" in VICE monitor to disable the watch command.
Back to the standard version. Here is the context of what happens in line 3.
.C:4604 AD 11 D0 LDA $D011
.C:4607 29 10 AND #$10
.C:4609 8D 3A 46 STA $463A
.C:460c A9 1E LDA #$1E
.C:460e EA NOP
.C:460f EA NOP
.C:4610 09 08 ORA #$08
.C:4612 0D 3A 46 ORA $463A
.C:4615 8D 71 5E STA $5E71
.C:4618 09 60 ORA #$60 ....... change to: lda #$18
.C:461a 8D 11 D0 STA $D011
Pretty convoluted. I basically replaced all of that with a lda#$18.
Here in line 48 (in the standard version without Richard's fix)
.C:44f2 A9 18 LDA #$18
.C:44f4 8D 11 D0 STA $D011
you don't really need that anymore.
and at the bottom in line 248
.C:4511 AD 11 D0 LDA $D011
.C:4514 29 10 AND #$10
.C:4516 09 40 ....... Change ORA #$40 to: ora #$00
.C:4518 AA TAX
.C:4519 A9 F7 LDA #$F7
.C:451b CD 12 D0 CMP $D012
.C:451e B0 FB BCS $451B
.C:4520 8E 11 D0 STX $D011
effectively writes $08 to disable the frame.
With these changes, yscroll always remains at 0, so it should no longer
jerk horizontally. The display is also no longer switched to black in
the lower margin, so you no longer have to switch back to line 48. In
order to still get a black background in the lower and upper margin, I
set the ghost byte ($ffff) to $ff. In $fffe/ffff, however, there is an
interrupt vector after $56f1. I set the vector to $fff7 ($fffe = $f7,
$ffff = $ff) and in $fff7 a jump instruction jmp $56f1, to the actual
interrupt routine.
The vectors in $fffa-$ffff are set from a table at runtime:
.C:44bf A0 06 LDY #$06
.C:44c1 B9 3F 5E LDA $5E3F,Y
.C:44c4 99 F9 FF STA $FFF9,Y
.C:44c7 88 DEY
.C:44c8 D0 F7 BNE $44C1
.C:44ca 60 RTS
>C:5e40 cb 44 00 00 f1 56
In this table I replace f1 56 with f7 ff.
... And now a for a full explanation about how this code works:
First:
The game strangely changes the Y softscroll register (lower 3 bits of
$d011), although there is no vertical scrolling at all (right?).
At the top of the screen (in the frame) the vertical soft scrolling is
set to 6, then in grid line 48 (where the actual image begins) to 0.
This second switch sometimes happens too late.
As far as I can see, this is the reason why the image sometimes "jumps" horizontally.
Richard's fix sets the soft scroll register to 1 instead, which
prevents the jumping, but the graphic starts 1 grid line further down
and is shifted to the sprites.
I removed the switch to 6 at the top of the screen instead.
I don't know if this causes any problems, but apparently not?
Secondly:
The game displays the scores in the lower frame. The frame is switched
off for this purpose. Normally you would now see the background color
in $d021, if it is not black, and the ghost byte (in $ffff) above it.
To create a black background instead, the game switches to a "graphics
mode" in the lower frame, in which the VIC only displays black pixels,
apart from the sprites. However, this means that it has to switch back
to the normal display when the next frame begins.
If this happens too late, you can see in the first grid line how the
switch from black to the background color jitters back and forth.
I fixed this by setting the ghost byte to $ff, so that black is also displayed in the lower and upper frames.
Now, however, there is an interrupt pointer at the $fffe/ffff position.
I let this pointer point to $fff7, and there is then a jump to the
actual interrupt routine.
This means on the one hand that the second last character (254) cannot
be used, and on the other hand that this interrupt occurs 3 cycles
later.
A note from Richard:
I want to say a special thank you to Stephan for his tips and technical theory on fixing the flicker bug in Sideways SEUCK. Following the explanation, I have cut things short (For the non-technical SEUCKers with an Action Replay M/C monitor) and also for the non-coders, added some POKES that will disable the flickering bug Sideways SEUCK uses (The bug also features in Martin Piper's newer Sideways SEUCK, that scrolls from the right of the screen to the left).
> 4618 LDA #$18
> 461A STA $D011
> 4516 ORA #$00
> 4518 TAX
> 4519 LDA #$F7
> 451b CMP $D012
> 451e BCS $451B
> 4520 STX $D011
M 5E40 cb 44 00 00 f7 ff 0f 00
And now for some POKEs to do the same as above using POKEs on your Action/Retro Replay cartridge:
POKE 17944,169
POKE 17945,24
POKE 17686,9
POKE 17687,0
POKE 24132,247
POKE 24133,255
Click here for main Menu
Fix Player 2's score
by Loflo
SEUCK had a bug left in the score system, where player 2 scored points for every time player 1 collected an object. This bug isn't too serious, but it can be annoying for the opposite player, who would find it to be unfair. There is a simple fix (with thanks to Loflo on Lemon64) which will
While I was working with Alf Yngve on some games in the past, I came across some interesting things, that could be done by aid of some simple pokes. If you have an Action Replay cartridge handy, then here are the POKES which you can type in to modify your game settings. This will also work in the editor itself.
> 54A2 JMP $8000 ;Or wherever you want to put the fix up
> 8000 STA $5DBB
> 8003 LDA #$00
> 8005 STA $09 ;Select correct player
> 8007 JMP $54A5 ; Jump back to main code again
Click here for main Menu
PAL / NTSC compatibility (SEUCK/Assembly)
by Richard Bayliss
Detecting PAL/NTSC the quickest and possible way can be done by detecting the value of hex $02a6. A value of 1 on the hardware classes as PAL and the value of 0 is classed as NTSC. It is possible to use NTSC checks to time SID music players, etc to play at the correct time. Simply by creating an assembly command subroutine, which controls a delay to the music player cycle.
Does the PAL version of SEUCK work on NTSC machines? The answer is simply YES, but you won't be able to see the score panel. It's buried right inside the bottom borders, and NTSC machines cannot cope with it. In order to fix the problem, a simple command could be added before starting the actual title screen. The code look something like this. Place this code anywhere where there is free space between $6580 and $A000, and use a decruncher to call the movement subroutine:
ONETIME LDA $02A6 ;Hardware machine type???
CMP #$01 ;PAL ;PAL Detected - Run title screen immediately
BEQ PAL
NTSC LDX #$00 ;NTSC detected, call the new position for the
MOVELOOP LDA #$FF ;game's status panel to display on NTSC.
STA $5EAF,X
INX
INX
CPX #$12
BNE MOVELOOP
PAL JMP $4245
WARNING: The score display on NTSC machines will flicker at times during playing of the game. At least you get the score display on NTSC, but you wil get only half the lives indicator. . :)
However, should you want to have PAL music playing on a SEUCK front end, and also be NTSC compatible. A little extra coding would need to be made. You would have to STORE the value of $02a6 to a single byte and then init the ONETIME code once again. This time underneath LDA $02a6, add STA MACHINETYPE. This example init shows you how:
ONETIME LDA $02A6
STA MACHINETYPE
LDA MACHINETYPE
CMP #$01 ;PAL ;PAL Detected - Run title screen immediately
BEQ PAL
NTSC LDX #$00 ;NTSC detected, call the new position for the
MOVELOOP LDA #$FF ;game's status panel to display on NTSC.
STA $5EAF,X
INX
INX
CPX #$12
BNE MOVELOOP
PAL JMP $4245
In the music player area, you would need to change the code to time correcty with NTSC machines. For example on the SEUCK title screen:
JSR PALNTSCMUSIC
JMP $4138
or if ingame music at $4503, or inside an interrupting subroutine
JSR PALNTSCMUSICPLAYER
PALNTSCMUSICPLAYER
LDA MACHINETYPE
CMP #$01
BEQ PALM
NTSCM INC MUSPTR
LDA MUSPTR
CMP #$06
BEQ RESETPTR
PALM JSR MUSICPLAY
RTS
RESETPTR LDA #0
STA MUSPTR
RTS
MUSPTR !BYTE 0
Click here for main Menu
Making an NTSC Only SEUCK game work with PAL
You may have an old Public Domain game stored somewhere in your disk collection. I used to have two Megatronix PD disks that contained two SEUCK games. They were "Warriors of the Crown" and "Target U.S.A". When I tried to load those two games, the title screen appears but then, after pressing fire to play, the screen goes black and the game crashed just like below:
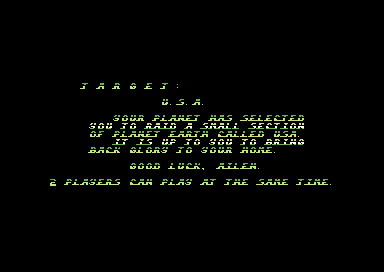

Why is this. This is because the game code works on NTSC C64s only and it does not work on PAL. NTSC users will get enjoy the games that were made in the USA, but it leaves PAL users disappointed since they cannot play the games themselves, due to the game not working - and they deem the file corrupt. Can we actually reverse the process so that NTSC only games made in SEUCK and Sideways scrolling SEUCK can work on PAL? The answer is of course "Yes". This is possible, and it can be done by following these quick and very simple tips.
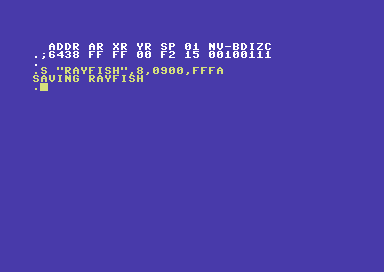
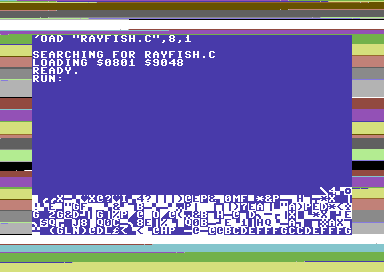
1. First of all, load in a PAL C64 SEUCK / Sideways Scrolling Left V3 SEUCK game and run it. For my example I have picked my very own little beauty, Ray Fish
2. Press the FREEZE button on your Action Replay cartridge and access the Machine Code Monitor. (If you want to use VICE MONITOR instead, you can).
3. Save the PAL code / data from your SEUCK game using the command:
S "PALFIX",8,40cf,6580 (If using VICE Monitor, use S "PALFIX" 1 40CF 6580)
4. Reset your C64 (or VICE) and load in the NTSC only SEUCK game in PAL.
5. Press the FREEZE button on your Action Replay cartridge and access the Machine Code Monitor (again). (If you want to use VICE MONITOR instead, you still can).
6. Load the PAL fix patch using the command:
L "PALFIX",8 (If using VICE Monitor, use L "PALFIX" 1
7. Type in G 4245 to run the title screen and press fire to start the game.
Excellent, this classic PD game is now working on PAL.
8. (Optional) Freeze the game again, save and pack it by following one of these essential tips.
Click here for main Menu
ADDITIONAL POKES, TIPS AND TRICKS
2 Players with one control
By Richard Bayliss
Source: Strike School by Carl Mason (TND Contributors)
Carl Mason's Strike School used this example, where two players are linked to one control, and the player had to shoot a limited number of targets before time ran out, otherwise both players will die. A medal gives out extra lives.
POKE 16578,2
Results can be pretty much interesting if your have more than one player linked to the same joystick. I first noticed this trick, but Carl Mason came up with this clever aspect first.
Should any compo entries use 2 players at the same time, I'll be very happy to add shared score routine. - Make sure extra lives at every 10,000 points milestone is disabled as that will cause some complications.
... should you use 2 Players to 1 control, you might want to consider :)
Click here for main Menu
Peek-A-Boo, Hide and Seek
By Richard Bayliss
Source: Noxus by Alf Yngve (SEUCK Compo 2014)
POKE 17424,0 (IN FRONT) 255 (BEHIND)
POKE 17426,27 ;REPLACE $D020
POKE 17427,208 ;WITH $D01B, AS NOT NEEDED
This will allow the game hide sprites behind certain background chars (the main char colour most of the time). This would be handy for games, which require STEALTH type of action. I.e. hiding behind trees, crawling underneath nets, tunnels etc.. Beware, this will also hide the score panel behind the border. There is an alternative solution - should you wish the sprite panel to always be in front of the screen, without any garbage inside it.
Using the Action Replay / Retro Replay machine code monitor (you should be able to do this in VICE monitor as well if you can). Enter the following code:
> 4503 JSR $6580 ;This is where I am placing the custom enhancement code to hide the sprites behind the background characters.
> 4566 JSR $6600 ;This is where I am placing the custom enhancement to place the sprites back in front of the screen.
This is the code that will hide the sprites
> 6580 LDA #$FF ;All sprites behind game background
> 6582 STA $D01B
> 6585 JSR $5C94 ;Play in game sound effects.
> 6588 RTS
This is the code for the score panel that will put panel sprites in front
> 6600 STA $D01C ;Linked to the code at $4566 to store sprite multicolour mode on/off for panel sprites
> 6603 LDA #$00 ;No sprites behind background/screen
> 6605 STA $D01B
> 6608 RTS
Click here for main Menu
Hires / Multicolour Sprites
By Richard Bayliss
Maybe you wanted to create something like a SEUCK Asteroids clone or something like that. This POKE below makes all GAME sprites single colour. The score panel will not be affected.
POKE 17968,0 (Hires sprites) or 255 (Multicolour sprites (Default)).
Click here for main Menu
Decorate my score panel
By Richard Bayliss
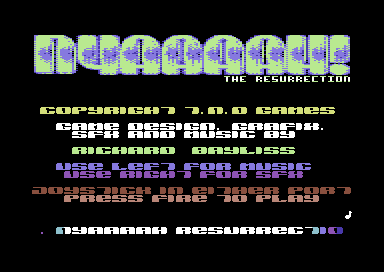
Source: Nyaaaah! 11 by Richard Bayliss (TND Games)
Nyaaaah! 11 usese a multi-coloured scoring charset. Where I originally drew the scoring chars in hires. Saved the charset data $f400-$fc00 and loaded the charset into Dunex Char editor (CSDB ID: 19811), and made a multi-colour version of the score/status. Then loaded my SEUCK game again, loaded the edited charset and added the POKE to enable multicolour.
TIPS:
Load your own SEUCK game. Freeze the game, enter the M/C monitor and type in:
S "font",8,f400,fc00
Now edit the status chars with a Public Domain char editor of your choice - make it multicolour. Then save the full font again.
Now load in your game again, FREEZE it again, enter the M/C monitor and type in:
L "newfont",8,f400,fc00
Type X to exit the M/C monitor and go to the menu. Select POKES and type in the following POKE bellow
POKE 17765,255 (Multicolour) 0 = Hires
This will make the score panel multicolour. Setting it as '0' will restore it back to single colour.
Click here for main Menu
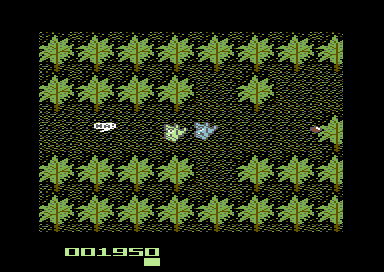
I want BIG aliens
By Richard Bayliss
Source: Gigablast by Alf Yngve (SEUCK Compo 2015)
Alf Yngve's SEUCK Compo used huge sprites which went over the vertical scrolling landscapes. This made less room for the player - and harder, but cooler game play. It is just plain bonkers :)
Want massive sprites? Go to the VICE M/C monitor and edit:
A 4503
> 4503 JSR $0800
> 0800 LDA #$FF
> 0802 STA $D017 ;Expand X
> 0805 STA $D01D ;Expand Y
> 0808 JSR $5C94 ;Play SFX
> 080B RTS
... Would be worthwhile to reduce the status panel sprite size, and disable multicolour. Try this :)
> 080C LDA #$00
> 080E STA $D01C ;NO multicolour
> 0811 STA $D017 ;Expansion X
> 0814 STA $D01D ; Expansion Y
> 0817 RTS
... and to link this routine to work 100% would be:
A 4566
>4566 JSR $080C
This will reduce the size of the score panel back to its correct state. Should the routine $080c - $0818 been added.
Note: If you're saving a final version of your SEUCK game, with the example code placed at $0800-$0900, you will need to save your SEUCK game from $0800-$fffa, instead of from $0900-$fffa.
Example from Action Replay cartridge M/C monitor:
s "mygame",8,0800,fffa
Additional note: It is possible to mix the sprite priorities as well as multicolour, sprite expansion, etc for your game sprites. However you would need to type in some routines linked to $4503, and $4566 to enable and then disable these cool effects.
Click here for main Menu
LEVEL TRICKS
Level Detection (Background colour changer)
By Richard Bayliss
Source: Dark Force by Alf Yngve and Richard Bayliss (TND Games)
Dark Force by TND Games is a prime example of background colour colour changing per chosen level.
On some SEUCK games, background multi-colour schemes are always the same. Should you have wanted the background scheme to change on a different level, you need to check every seventh positrion on the level pointer. Compare the value to that particular pointer. Then make the new colours of the background. Remember that after the game is over, you should RESET the background colour pointer (if using a table to set each colour). Otherwise this trick should work. :)
This trick was used in Dark Force and allows the game to change the colour of the border, according to the level parameters. In order to get this clever trick to work, I linked the routine to the main loop (>4503) with SFX / MUSIC.
You will need to check level parameters for this sort of effect to occur:
>4503 JSR $MYROUTINE;Main loop.
MYROUTINE: $7C00
> 7C00 JSR $7D00 ;JSR CHKLEVEL
> 7C03 JSR $5C94 ;Play sound effects
> 7C06 rts ;Expandable if you wish
Say we use $7D00 for the level check routine. Based on the level parameters - you'll need to look at these before adding this subroutine
CHKLEVEL: $7D00
> 7F00 LDX $5DC9 ;LEVEL POINTER (USED IN MULTIPLES OF 7)
> 7F03 CPX #$00 ;LEVEL 1?
> 7F05 BNE $7F0B ;
> 7F08 JMP $SETCOLOUR1
> 7F0B CPX #$07 ;LEVEL 2?
> 7F0D BNE $7F10 ;
> 7F10 JMP $SETCOLOUR2
> 7F13 ... etc until done enough times.
> 7XXX RTS ;Not equal to any of those levels
SETCOLOUR1: $7E00
>7E00 LDA #$06 ; Colour blue - MCOL1
>7E02 STA $D022
>7E05 LDA #$0E ;Light blue - MCOL2
>7E07 STA $D023
>7E0A RTS
SETCOLOUR2: $7E10
>7E10 LDA #$05 ;Colour Green
>7E12 STA $D022
>7E15 LDA #$0D ;LIGHT GREEN
>7E17 STA $D023
>7E1A RTS
Click here for main Menu
Level Detection - Via Colour tables
By Richard Bayliss
Previously I did a short explanation on how to set a different colour scheme according to a few number of levels, the way I did with Dark Force. That is probably useful for some game developers, but it would be pretty tiring to keep checking the level position pointers manually. While I was programming the SEUCK Title Screen Maker, I wanted to make some in game enhancement code snippets which allowed to do specific things. Well, one of the tricks I included was to allow colours to be changed according to the level which the player enters. This is done by creating a loop, which reads a table of bytes that indicate the colour of each level.
The first thing that needs to be done is to create a table reset routine (for example levct, which is classed as the level counter). For example, at $41A4, before JMP $4260, create a subroutine that jumps to a location where initlvl's code is placed.
;Initialise level counter
initlvl lda #0
sta levct
jmp $4260
You will of course need to create a JSR INIT subroutine before jumping to $4260 to start your game. Why do we need to initialise the pointer levct as zero? Without it the colour table which gets read from the main routine continues the colour scheme of the game background from where it was left off.
playlvl needs to be called inside a custom SEUCK game loop (For example, at $4245 create a subroutine that calls your enhancements, including jsr playlvl and then add the SFX play routine followed by an rts.
Example:
enhancements
jsr playlvl
jsr $5c94 ;SFX play routine
rts
Right, now let's add another routine that calls two routines that will cycle the table of bytes according to colour (cyclelev), and then check the level which the player is at (checklev).
playlvl jsr cyclelev ;Call colour read cycle routine
jsr checklev ;Call level checker routine
rts
Okay, so now the colour table routine. This will first read the value of the level counter (levct) as variable Y and then read the bytes of the current level table (The table of bytes are set as a multiple of 7, where levelstore = 0,7,14,21, etc when each level changes. The routine also reads the bytes of the background colour. After the last level (22) has been reached, the subroutine will reset the level counter. The whole routine for the cycling of bytes look something like this:
Cycle the level read and check
;pointers
cyclelev
ldy levct
lda leveltable,y
sta levelstore
lda bgcoltbl,y
sta bgcol1
lda bgcoltbl2,y
sta bgcol2
lda bgcoltbl3,y
sta bgcol3
iny
cpy #22
beq resetlv
inc levct
rts
resetlv
ldy #0
sty levct
rts
Now that the routine, cyclelev is done, we need to call a level check subroutine. The values of the actual level is stored at $5dc9, and as I have said earlier, they are in multiples of seven. The routine will check if the value of X equals the stored value of the level. If it does, then newcolour is called to update the table of bytes read from the background colour table. The routine looks like this:
;Read SEUCK level position and check
;to see if it matches any of the
;table values, then trigger the new
;colour.
checklev
ldx $5dc9
cpx levelstore
beq newcolour
rts
newcolour
lda bgcol1
sta $d021
lda bgcol2
sta $d022
lda bgcol3
sta $d023
rts
Finally, we make a few pointers.
;The values of each level is set to
;multiples of 7. This table represents
;the values read to the level.
levct .byte 0
levelstore .byte 0
bgcol1 .byte 0
bgcol2 .byte 0
bgcol3 .byte 0
Then we create the tables.
leveltable
.byte 0 ; level 1
.byte 7 ; level 2
.byte 14 ; level 3
.byte 21 ; level 4
.byte 28 ; level 5
.byte 42 ; level 6
.byte 49 ; Level 7
.byte 56 ; level 8
.byte 69 ; level 9
.byte 70 ; level 10
.byte 77 ; level 11
.byte 84 ; level 12
.byte 91 ; level 13
.byte 98 ; level 14
.byte 105 ; level 15
.byte 112 ; level 16
.byte 119 ; level 17
.byte 126 ; level 18
.byte 133 ; level 19
.byte 140 ; level 20
.byte 147 ; level 21
.byte 154 ; level 22
;--------------------------------------
;EDIT COLOUR byte VALUES FOR THE
;LEVEL BACKGROUND COLOUR DATA
;VALUES:
; 0 = black/1 = white/2 = red
; 3 = cyan/4 = purple/5 = d.green
; 6 = d.blue/7 = yellow/8 = orange
; 9 = brown/10 = lt red/11 = d.grey
; 12 = m.grey/13 = l.green
; 14 = l.blue/15 = l.grey
;--------------------------------------
;--------------------------------------
;BACKGROUND COLOUR ($D021)
bgcoltbl
.byte 6 ;Level 1
.byte 2 ;level 2
.byte 11 ;level 3
.byte 5 ;level 4
.byte 6 ;level 5
.byte 2 ;level 6
.byte 11 ;level 7
.byte 5 ;level 8
.byte 6 ;level 9
.byte 2 ;level 10
.byte 11 ;level 11
.byte 5 ;level 12
.byte 6 ;level 13
.byte 2 ;level 14
.byte 11 ;level 15
.byte 5 ;level 16
.byte 6 ;level 17
.byte 2 ;level 18
.byte 11 ;level 19
.byte 5 ;level 20
.byte 6 ;level 21
.byte 2 ;level 22
;----------------
;MULTICOLOUR #1 ($D022)
bgcoltbl2
.byte 14 ;Level 1
.byte 10 ;level 2
.byte 12 ;level 3
.byte 13 ;level 4
.byte 14 ;level 5
.byte 10 ;level 6
.byte 12 ;level 7
.byte 13 ;level 8
.byte 14 ;level 9
.byte 10 ;level 10
.byte 12 ;level 11
.byte 13 ;level 12
.byte 14 ;level 13
.byte 10 ;level 14
.byte 12 ;level 15
.byte 13 ;level 16
.byte 14 ;level 17
.byte 10 ;level 18
.byte 12 ;level 19
.byte 13 ;level 20
.byte 14 ;level 21
.byte 10 ;level 22
;MULTICOLOUR 2 ($D023)
bgcoltbl3
.byte 3 ;Level 1
.byte 7 ;level 2
.byte 15 ;level 3
.byte 1 ;level 4
.byte 3 ;level 5
.byte 7 ;level 6
.byte 15 ;level 7
.byte 1 ;level 8
.byte 3 ;level 9
.byte 7 ;level 10
.byte 15 ;level 11
.byte 1 ;level 12
.byte 3 ;level 13
.byte 7 ;level 14
.byte 15 ;level 15
.byte 1 ;level 16
.byte 3 ;level 17
.byte 7 ;level 18
.byte 15 ;level 19
.byte 1 ;level 20
.byte 3 ;level 21
.byte 7 ;level 22
Click here for main Menu
Level Detection - Changing Music
By Richard Bayliss
Above, I showed you a trick on how to change the background colour and background multicolour of the game world by reading a table of bytes. But what if you wanted to do things like change music for level detection? A similar method is done, however, switching between tunes can be quite complicated when working inside a game control loop. This is because:
1. Your music needs to use a player that can play more than one track. For example (DMC V1.2, V2.0, V3.0, V4.0, V5.0, Goat Tracker, EMS V7.03, Cheese Cutter, etc).
2. Music parameters for initialising music on a level need to be set once
3. Your routine needs full control to prevent music from restarting if in a middle of a game.
4. The game needs to have a one-time "still" level which can be used to change the music once per event (unless there is a workaround elsewhere in the SEUCK code).
Let's say as an example, I have a piece of music that is placed at $8000-$9400 for example composed in DMC for example). I have the following order of music:
00 - Title Music
01 - In game music
02 - Boss stage music
For my examples, SEUCK needs to be configured to *allow* music to be able to change, via a one-time trick.
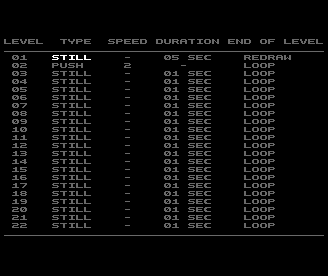
For example a space shooter:
Starting main level
LEVEL 01 - STILL - 00 SECONDS - REDRAW
LEVEL 02 - SCROLL 2 - REDRAW
End of level boss stage
LEVEL 03 - STILL - 00 SECONDS - REDRAW
LEVEL 04 - STILL - 30 SECONDS - REDRAW
We only want to alternate between 01 and 02. Also we want to prevent the music player from changing if we are in the middle of a level, otherwise the sound will get stuck.
First of all, like with the colour changing example, create a subroutine that resets the level counter at $41a4 (jmp initlvl):
;Initialise level counter
initlvl lda #0
sta levct
jmp $4260
Create the enhancements to be linked from $4503 (jsr enhancements).
enhancements
jsr plalvl
jsr $8003 ;Or any other music play address which matches your player and address
rts
Now add the two subroutines that will cycle through the music level tables, and check which level the game is on, and whether or not the game can change between tunes.
playlvl jsr cyclelev ;Call level, music cycle routine
jsr checklev ;Call level checker routine
... continued code from custom SEUCK game loop
Now add the main subroutine that will read the tables according to the level which the game is at, a table which the music track is based at and also the table that allows or disallows the music to trigger that track.
Cycle the level read and check
;pointers
cyclelev
ldy levct
lda leveltable,y
sta levelstore
lda tracktbl,y
sta track
lda tracktrigger,y
sta trigger
iny
cpy #22
beq resetlv
inc levct
rts
resetlv
ldy #0
sty levct
rts
Now that the routine, cyclelev is done, we need call a level check subroutine. The values of the actual level is stored at $5dc9, and as I have said earlier, they are in multiples of seven. The routine will check if the value of X equals the stored value of the level. If it does, then newcolour is called to update the table of bytes read from the background colour table. The routine looks like this:
;Read SEUCK level position and check
;to see if it matches any of the
;
checklev
ldx $5dc9
cpx levelstore
beq musiccheck
rts
musiccheck
lda trigger ;Trigger = 0? No swap
beq noswap
;Trigger = 1, initialise selected track
lda track
jsr musicinit
rts
Now for the pointers and tables to be set:
levelct. byte 0
levelstore .byte 0
track .byte 0
trigger .byte 0
;The complete table values of each level
.byte 0 ; level 1
.byte 7 ; level 2
.byte 14 ; level 3
.byte 21 ; level 4
.byte 28 ; level 5
.byte 42 ; level 6
.byte 49 ; Level 7
.byte 56 ; level 8
.byte 69 ; level 9
.byte 70 ; level 10
.byte 77 ; level 11
.byte 84 ; level 12
.byte 91 ; level 13
.byte 98 ; level 14
.byte 105 ; level 15
.byte 112 ; level 16
.byte 119 ; level 17
.byte 126 ; level 18
.byte 133 ; level 19
.byte 140 ; level 20
.byte 147 ; level 21
.byte 154 ; level 22
;The tunes to be played according to level
;$00 = title music
;$01 = in game music
;$02 = boss fight music
tracktbl
.byte $01 ; level 1 - In game main (init once) [Still 00 seconds]
.byte $01 ; level 2 - In game main [Scroll] - LEVEL 1
.byte $02 ; level 3 - End of level boss (init once) [still 00 seconds]
.byte $02 ; level 4 - End of level boss [still 30 seconds]
.byte $01 ; level 5 - In game main (init once for new level) [still 00 seconds]
.byte $01 ; level 6 - In game main [scroll] - LEVEL 2
.byte $02 ; Level 7 - End of level boss [still 00 seconds]
.byte $02 ; Level 8 - End of level boss [still 30 seconds]
.byte $01 ; level 9 - In game main (init once)
.byte $01; level 10 - In game main [scroll] - LEVEL 3
.byte $02; level 11 - End of level boss (init once)
.byte $02; level 12 - End of level boss
.byte $01 ; level 13 - In game main (init once)
.byte $01; level 14 - In game main - LEVEL 4
.byte $02 ; level 15 - End of level boss (init once)
.byte $02 ; level 16 - End of level boss
.byte $00 ; level 17 - Ending, using Title music [still 00 seconds]
.byte $00; level 18 - Ending - [Still 99 seconds - Loop]
.byte $00 ; level 19 - THE GAME HAS LOOPED, SO IGNORED
.byte $00 ; level 20 - THE GAME HAS LOOPED, SO IGNORED
.byte $00 ; level 21 - THE GAME HAS LOOPED, SO IGNORED
.byte $00 ; level 22 - THE GAME HAS LOOPED, SO IGNORED
;The track trigger settings, used to
;leave or swap music.
;$00 = leave
;$01 = swap
tracktrigger [0 = no change, 1 = change]
.byte $01 ; level 1 - In game main (init once) [Still 00 seconds]
.byte $00 ; level 2 - In game main [Scroll] - LEVEL 1
.byte $01 ; level 3 - End of level boss (init once) [still 00 seconds]
.byte $00 ; level 4 - End of level boss [still 30 seconds]
.byte $01 ; level 5 - In game main (init once for new level) [still 00 seconds]
.byte $00 ; level 6 - In game main [scroll] - LEVEL 2
.byte $01 ; Level 7 - End of level boss [still 00 seconds]
.byte $00 ; Level 8 - End of level boss [still 30 seconds]
.byte $01 ; level 9 - In game main (init once)
.byte $00; level 10 - In game main [scroll] - LEVEL 3
.byte $01; level 11 - End of level boss (init once)
.byte $00; level 12 - End of level boss
.byte $01 ; level 13 - In game main (init once)
.byte $00; level 14 - In game main - LEVEL 4
.byte $01 ; level 15 - End of level boss (init once)
.byte $00 ; level 16 - End of level boss
.byte $01 ; level 17 - Ending, using Title music [still 00 seconds]
.byte $00 ; level 18 - Ending - [Still 99 seconds - Loop]
.byte $00 ; level 19 - THE GAME HAS LOOPED, SO IGNORED
.byte $00 ; level 20 - THE GAME HAS LOOPED, SO IGNORED
.byte $00 ; level 21 - THE GAME HAS LOOPED, SO IGNORED
.byte $00 ; level 22 - THE GAME HAS LOOPED, SO IGNORED
Click here for main Menu
Full Level Control - Timers
by Eleanor Burns
During some exploring around the SEUCK Editor. Eleanor Burns has discovered some cool tricks in which could give you control over the levels inside a SEUCK Game. The actual current level timer is located at $408D and is shortly followed by an instruction.
> 46A9 DEC $408D
By changing this instruction to a simple RTS, you can make a persistant still screen level. By then creating another condition set $408D to a value of ZERO (Eleanor POKEd it in Action Replay). could be set to an object destruction, for example. A boss stage - If a big boss is destroyed, and object detection code is triggered. The end of the level can be set and jump directly to the next level at discretion, instead of having to wait for a new level to come. This could be a way for designers of still-screen SEUCK games to set proper missions and goals, and also for boss levels to actually end once a boss has been destroyed (Rather than the usual survive ten-twenty seconds, boss killing strictly optional scenario). This could be a clue to making non-linear games.
Examples:
Level settings in SEUCK editor. These settings are saved in the program in 22 data sets from $B776 to $B808. When the game runs, the game checks the level pointer ($5DC9) and loads in the corresponding data set accordingly. Among other things, this resets the current level timer to the time limit set for a still screen level in editor.


This short routine checks the current level timer ($408D). If it is zero, the level updates. Otherwise, the timer is decreased.


By removing the decrement instruction from $46A9 and changing it to a simple RTS, thus ending the subroutine prematurely, the level timer is frozen. Now a still screen level can last forever. Not much good by itself, but since the earlier part of the routine is stil lthere, it opens possibilities.


CCS3 = An example game, stuck on level 1, going nowhere.


However, as an example for how this could be used to set conditions in-game, let's POKE the level timer down to zero (memory address $408D = 16525 in Action Replay) ...


 ... and the level changes. Instead of POKEing, one could set an in-game condition to reduce the level timer to zero: killing a boss, collecting an object (both using object detection), or reaching a certain on-screen position by detecting the player's X and Y positions. By carefully manipulating the level pointer as well, it would also be feasible to repeat levels or have them load in unconventional orders (by setting it one level below the level yo uwant loaded before triggering the transition).


Click here for main Menu


PRESENTATION, SOUND AND MUSIC
Getting to know the Front End
Every single SEUCK game, which you load consists of a basic front end, which consists of a logo built with chars, or just plain character text. Some front ends consist of a rolling raster bar behind it. This gets boring, and you might want to consider to code a brand new front end, add music or some additional cool features, like a starfield or something like that. If you can open your imagination for presentation, and invest some time on learning to code a bit (You don't have to know TOO MUCH about code, and how it works for enhancing SEUCK ... More about building a new front end later on.
PICK A COLOUR
Source: Tau Zero by Alf Yngve and Evil Wizard 2 by Pingo (TND Contributors)
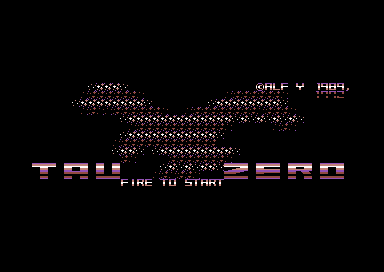
Okay, let's get this straight. The built in rolling raster bars colours are quite ugly and out of place in standard SEUCK. The one used in Alf Yngve's Tau Zero is very nice to look at. Only two nice colours in the raster roller are the red scheme and the silver scheme. The rest of those are just plain ugly.
This is a modified front end colour scheme I did for Pingo's Evil Wizard 2, which splits two colour bars in half. I used to use this more often. Now I am going to show you how to achieve this interesting masterpiece. NOTE: Your game NEEDS to have the colourbar mode on in order to achieve this.
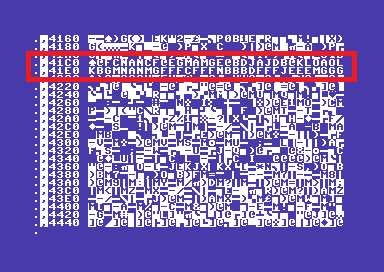
After loading your game press the FREEZER button and enter the M/C monitor. Type I* and scroll down to area $41c0-$4200. You should see this snippet below. Move your cursor to the area, and type in the colour code until you reached $4200. Remember to press the Return key at the end of each line. Have a playaround typing in some letters and characters to see if you can make cool colours. Be very careful to NOT change the first 2 bytes at $41c0 or after $4200 else you will crash your program. I have generated a key to indicate each colour:
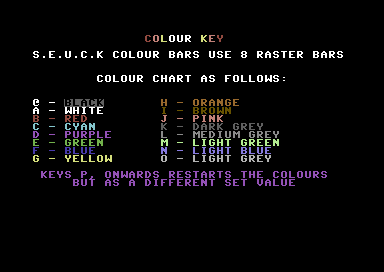
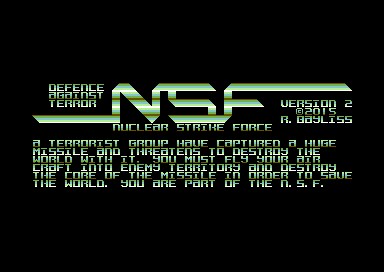
The example uses the front end for Nuclear Strike Force. I originally used the SILVER colour bar scheme. To be able to edit the existing colour bars I had to find the following pattern: @KLOAOLK
Now what happens if change it to IECMAMCEI? ... THIS:
Have a little play around, and see what cool colours you can do. We will be taking a look at making brand new front ends later on.
Click here for main Menu
Extending Colours on Raster Bars
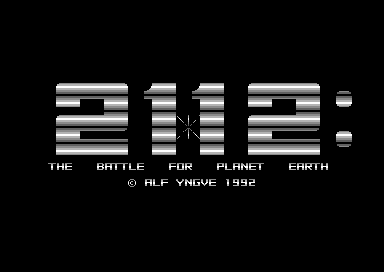
Source: 2112 by Alf Yngve (TND Enhancement)
Okay, so then as we all know. SEUCK games title screen colour bars are very limited to 8 colours. Is it possible to add more than 8 colours onto a SEUCK title screen? The answer to this question is yes. However, you would need to do it the hard way. The front end consists of a raster split, in which unrolls 8 colours to each raster line, and scroll them all the way up. Wouldn't it be nice if we could change this effect to something more colourful? For this trick. I have decided to use Alf Yngve's raw version of the classic space shoot 'em up called 2112 for this experiment. The title screen starts as silver. (See example pic below).
Load in the SEUCK game you wish to remaster, like normal, and run it. Then freeze it with the Action Replay Cartridge. Then enter the machine code monitor
What we are going to do is implement a routine which will scroll more than 8 colours down the screen. However, we are going to have to bypass the SEUCK scrolling code, in order to be able to do this and of course implement our very own fire press routine. Here's how to do it:
First of all, we want to call the SEUCK title screen loop to jump directly to the custom code which we'll be programming at memory $6580. Edit at $41BC the code to jump to $6580 (the area which is being used for the main body of the raster loop).
> 41BC JMP $6580
Easy eh?. Now what about the next routine and what it does? Well, first of all it will bypass the rest of the original SEUCK title screen colour scroller code and then we store a raster position which will draw the new colours onto the front end screen ($D021) and of course an additional subroutine which will also roll the colours nicely over the title screen characters (which is an inverted charset). The main raster code will be placed at $6580, the colour roll routine will be placed at $6800, and of course we also place a colour table at $6900. More on that shortly.
First, here's the main routine at $6580 that creates the raster:
> 6580 JSR $6800 ;Call subroutine for rolling colour bars
> 6583 LDA #$61 ;Starting raster scan line position
> 6585 CMP $D012
> 6588 BNE $6585
> 658a LDY $D012
> 658d LDX #$77 ;Number of colours to read from table (119)
> 658f LDA $6900,X ;Read the colour table,
> 6592 CPY $D012 ;Wait for next scanline
> 6595 BEQ $6592 ;Scanline found
> 6597 STA $D021 ;Store colour to background colour
> 659a INY ;Next scanline
> 659b DEX ;Next colour (going backwards from end of table)
> 659c BPL $658F ;Loop colour scan
> 659e NOP ;Time rasters a little (on NTSC as well?)
> 659f LDA #$00 ;Last line set to black
> 65a1 STA $D021
> 65a4 LDA #$10 ;Wait for fire on joystick port 2 to be pressed
> 65a6 BIT $DC00
> 65a9 BNE $65AE ;No, move to joystick port 1 fire check routine
> 65ab JMP $41A4 ;Jump to the game init setup
> 65ae LDA #$10 ;Check if joystick port 1 fire button is pressed
> 65b0 BIT $DC01
> 65b3 BNE $65B8 ;No, jump to loop this whole routine.
> 65b5 JMP $41A4 ;Yes, init and start game.
> 65b8 JMP $6580
Okay, so now we have the raster code in place, with fire button reading control. What we need to have now is an additional routine in which will scroll the colour table on screen. So that there is a nice scrolling effect.
> 6800 LDA $67FE ;Read pointer delay (This has been set to $67FE)
> 6803 CMP #$01 ;Speed of delay ($01 is fast enough)
> 6805 BEQ $680B
> 6807 INC $67FE
> 680a RTS
> 680b LDA #$00 ;Zero the pointer delay to 0
> 680d STA $67FE
> 6810 LDA $6900 ;Grab the first byte of the colour table
> 6813 PHA ;store it to C64's memory
> 6814 LDX #$00 ;Subroutine to scroll table
> 6816 LDA $6901,X ;Get all bytes from the colour table +1 byte
> 6819 STA $6900,X ;Pull them all back one byte
> 681c INX
> 681d CPX #$77 ;Has the table reached 119 bytes.
> 681f BNE $6816 ;No, read the table pull routine again
> 6821 PLA ;Yes, place the stored byte from memory
> 6822 STA $6976 ;onto the very last byte of the table length
> 6825 RTS
You should initialise the pointer at $67FE by typing in M 67FE and changing the byte.
Finally, you will want the colour table. Use the machine code monitor to enter your bytes at $6900-$6977 that represent the colours for your raster bars. Below is my example of the colour table.
Bytes key:
$00 = black, $01 = white, $02 = red, $03 = cyan, $04 = purple, $05 = green, $06 = blue
$08 = orange, $09 = brown, $0a = pink, $0b = dark grey, $0c = medium grey, $0d = light green, $0e = light blue, $0f = light frey
In your machine code moniitor, type in M 6900 and edit the bytes, until you have created the colour data.
>C:6900 0c 0f 07 01 07 0f 0c 0b ........
>C:6908 00 06 00 06 04 00 06 04 ........
>C:6910 0e 00 06 00 0e 0f 00 06 ........
>C:6918 04 0e 0f 07 00 06 04 0e ........
>C:6920 0f 07 01 07 0f 0e 04 06 ........
>C:6928 00 07 0f 0e 04 06 00 0f ........
>C:6930 0e 04 06 00 0e 04 06 00 ........
>C:6938 04 06 00 0b 0c 0f 07 01 ........
>C:6940 07 0f 0c 0b 09 00 09 02 ........
>C:6948 00 09 02 08 00 09 02 08 ........
>C:6950 0a 00 09 02 08 0a 07 00 ........
>C:6958 09 02 08 0a 07 01 07 0a ........
>C:6960 08 02 09 00 07 0a 08 02 ........
>C:6968 09 00 0a 08 02 09 00 08 ........
>C:6970 02 09 00 02 09 00 0b 60
Now type in G 4245 and you should get a really cool effect as a great result.
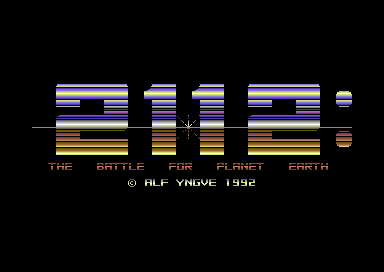
Now, save your game to disk and show it off to your friends with a spiffy new look to the game.
A little bit of extra info for you
Although during the SEUCK School tips I have been showing you machine code monitor tips and giving exact memory locations of where I have placed my code, tables and pointers for the examples. You do not need to use location $6580 or anything like that. The range for free memory before SEUCK enhancement is between $6580 and $B6C0 (as stated by Jon Wells in the SEUCK vault). However you will need to calll the code to jump to that location, if your are writing routines linked to the front end.
A little challenge
Do you like the new front end above? Would you like to add some music to it? Well, here is a pretty easy and also fun challenge for you. After reading the tutorial below, relocate one of my tunes from the DMC music collection (or perhaps HVSC) and relocate it to $9000. Your challenge is to try and implement it onto the stylish front end code I have made above. If you want the solution. I have it below, otherwise, don't read the solution. Try it yourself.
There isn't much you will need to do there. (hint, change the very last JMP $6580 in the raster code to JSR $9003, and then underneath that add a JMP $6580 and of course at $40DD call JSR $9000.
Challenge 2:
Try splitting the colour scroll to see if you can get two halves of the colour table scrolling. One scrolling upwards, and the other scrolling downwards. Clue routines in assembly form are:
;Scroll down
lda tablehalf1end-1
pha
ldx #tablehalf1end-tablehalf1
loop1 lda tablehalf1-1,x
sta tablehalf1,x
dex
bpl loop1
pla
sta tablehalf1
;Scroll up
lda tablehalf2
pha
ldx #$00
loop2 lda tablehalf2+1,x
sta tablehalf2,x
inx
cpx #tablehalf2end-table2half
bne loop2
pla
sta tablehalf2end-1
rts
Click here for main Menu
Adding some Music
Want to learn how to add music to SEUCK games? Well, before you do, you will need to be able to relocate a whole tune first. I strongly recommend that you use the All Round Relocator by Syndrom, and my DMC music collection. Unless you want to use SID tunes that are in HVSC and relocate those. For this part of the tutorial. I am going to show you how to add music to the front end, and also give you the possibility to add in game music as well. Here's what you will need to help you get started.
If using PC
- High Voltage SID Collection (www.hvsc.c64.org)
- SIDPLAY (CSDB ID: 103781)
- Goat Tracker or Cheesecutter (www.covertbitops.c64.org or http://theyamo.kapsi.fi/ccutter/)
- SidReloc (For relocating most players) (CSDB ID: 109000)
If using normal C64
- DMC music collection (TND music section)
- All Round Relocator (Included in the DMC collection) (Relocates some JCH tunes, and DMC V1 - DMC V5 tunes) (CSDB ID: 40005)
- A C64 music editor which can relocate tunes you composed yourself
PC OPTION:
Using SidplayWin32. Pick a SID file, which you wish to play. Before you decide to extract it to SIDReloc's directory. You may want to take a look at the INIT/PLAY address of your tune. If you need to do this then do as follows:
Go to FILE / PROPERTIES
A window will display the information of the player. The ones you need to look out for is the one highlighted in yellow.
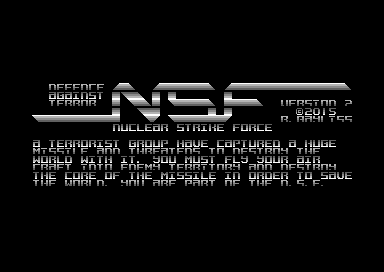
| Name: Nuclear Strike Force Author: Richard Bayliss Released: 2015 The New Dimension Load range: $1000-$1BA6 Init address: $1000 Play address: $1003 Number of songs: 1 Default song: 1 Clock speed: PAL SID model: 8580 Player routine: Vibrants/Laxity Reloc region: Auto |
Now close the file box and then select
FILE / SAVE as
Select the option to save as PSID, then type in the filename which you wish to save in the SideReloc directory.
Go to SIDReloc using the Windows command prompt
c:\>cd\sidreloc
Now type in:
C:\>sidreloc.exe -p 90 mysid.sid myrelocsid.sid
Play the relocated SID music in Sidplay WIN/2, and then save the tune as a .PRG or .DAT file
Load .D64 editor and import the .dat / .prg of the relocated tune into the directory and then save the new .D64
IF USING SIDRELOC METHOD - SKIP THIS PART ... Otherwisee
Load in All Round Relocator and enter the name of one of the tunes which you want to use from my DMC collection. Relocate to $9000 and save the new tune. Nothing else to it.
TITLE MUSIC WITH SFX ONLY
Load in your cleaned up SEUCK game as normal. Freeze it with Action Replay, and then enter the M/C monitor.
Using the M/C monitor, load your music file which you have relocated for example:
L "TITLEMUSIC",8,9000
Music will load at $9000, as we will be using it for the title music. Don't run the game yet, as the music will not play. In order to get the game title to play, we need to initialize the music player data, and then play it continuously in a loop. In order to do this, we need to make some minor alterations to the title screen's code. Some mini subroutines.
If you look at $40DD, it sets the border colour to the title screen as black - but that also happens elsewhere in the title code. So we can remove that bit and change the routine to INIT the title music. In the M/C monitor type in as follows:
>40DD jsr $9000 ;Init Music
Music will initialize, but we still have now loop in the player. So make a new routine, which will play the music inside a loop. To call the music player loop enter the following:
>41BC JMP $6580 ;JMP NEWPLAYER
Not quite there yet. We need to make the player loop now.
NEWPLAYER:$6580
> 6580 JSR $9003 ;Play music
> 6583 JMP $4138 ;Continue to the main title loop
Nearly there. Just a couple of changes. Location $41A4 jumps to the main game code, which starts at $4260. We don't want to jump to the game straight away. We want to clear the SID before SFX can init/play inside the game. If this isn't done, not all 3 channels of the C64's SID will play the sound effects - unless sound pointers are initialized. So where the location calls the main game to run. The following code needs to be added:
> 41A4 JMP $6586 ;JMP INITSID
Now for the main INIT SID code:
INITSID:$6586
>6586 LDX #$00
>6588 LDA #$00 ;ZERO ALL SID REGISTERS
>658A STA $D400,x
>658D INX
>658E CPX #$0F
>6590 BNE $6588
>6592 JMP $4260 ;JMP GAMESTART
Now type in
G 4245
... and you'll get a result of the title music playing in the background.
What about in game music?
Well, you can use the same method as before, but put this time let in game music be located at $a000. Select the tunes like you did above, but select a0 if using sidreloc, or $a000 if using allround relocator. Now alter the INITSID routine at $6592, before adding JMP $4260, add the following:
>6592 LDA #$00
>6594 JSR $A000 ;INIT INGAME MUSIC
>6597 JMP $4260
Now change the SFX player at $4503 to play in game music instead ...
>4503 JSR $A003 ;PLAY INGAME MUSIC
WARNING! There are still SFX registers still trying to play from the SID chip. There is a way to prevent this, and this is required if you need to have in game music uninterrupted by SFX trying to play.
>5C0D BIT $D404
>5C10 BIT $D40B
>5C13 BIT $D412
>5C18 BIT $D400
>5C24 BIT $D403
>5C27 BIT $D40A
>5C2A BIT $D411
>5C2F BIT $D418
>5C52 BIT $D405
>5C55 BIT $D406
>5C58 BIT $D404
This will ignore the SID registers that attempt to play the in game sound effects and music will not be interrupted.
Click here for main Menu
Switching between title and in game music (on the title screen)
When I was doing enhancements for games, such as Rabid Robots and also my game, Dark Destroyer 2117. I did some pretty cool enhancements on the title screen. There was also an additional option, in which required use of a joystick to switch between in game sound effects or in game music. This tip shows you how this can be possible. Also we will be using symbols to display the sound option as well, at the bottom right corner of the title screen.
First of all, we will want to use the old SEUCK work file and make two custom characters for the music and the sound effects icon. I have chosen the F1 and F3 symbols, since these are not really needed in the game. So we can simply draw a music / sfx icon (see image below).
After finishing drawing the two icons (over the F1 and F3 symbol), we need to save as finished game, and prepare a couple of tunes for playing. Since it is not possible to use the SEUCK editor for enhancements otherwise the utility will of course crash. Next we prepare some relocated tunes (example on music relocation is a few paragraphs at the top of this feature. I have picked the original two tunes from Tank Blasta for this option - because that is the game that is being enhanced with the features.
After you have finished loading your SEUCK game. Clear the unwanted memory as usual, and patch the random firing (Replace lda $8000,Y with LDA $5000,y at $54EF). Then use the cartridge memory fill at 6580 - B6C0 (F 6580, B6C0 00).
Now let us program a music/sfx option.
1. At $40DD call JSR $8000. This will initialise the music every time your SEUCK game refreshes back its title screen. (Either by aborting the game or after a loss of your very last life).
> 40DD JSR $8000 ;Music init
2. At $41BC call JSR $6580. This will call the main title loop which we are making to not only play the title music, but also call an option to read the joystick command to select in game sound option.
3. At $6580, enter the following. It will first call the joystick / options subroutine at $6700 and then play the title music ($8003) afterwards.
> 6580 JSR $6700 ;Call subroutine to joystick check (at $6700)
> 6583 JSR $8003 ;Play title music
> 6586 JMP $4138 ;Jump back to title screen loop
At $66ff, we are going to make a sound pointer. Using your machine code monitor on the Action Replay (or VICE) set the value of $66FF byte to $00. This can be done by entering M 66FF, then change the byte value to $00. (See example pic below).
Okay, we have the music player, but we are not quite done with the sounds yet. It is time to make the sound options. At $6700, let's call $6800 as the sound option value check.
> 6700 JSR $6800 ;Call subroutine music/sfx
> 6703 LDA #$04 ;Joystick left
> 6705 BIT $DC00 ; - Port 2
> 6708 BNE $6710 ;not read, skip it.
> 670a LDA #$00 ;Set option value to 0 - This is being set as music
> 670c STA $66FF ;$66FF is sound option pointer
> 670f RTS
> 6710 LDA #$08 ;Joystick right
> 6712 BIT $DC00 ; - Port 2
> 6715 BNE $671D ;not read, skip it.
> 6717 LDA #$01 ;Set option value to 1
> 6719 STA $66FF
> 671c RTS
> 671d LDA #$04 ;Joystick left
> 671f BIT $DC01 ; - Port 1
> 6722 BNE $672A ;not read, skip it
> 6724 LDA #$00 ;Set option value to 0
> 6726 STA $66FF
> 672a LDA #$08 ;Joystick right
> 672c BIT $DC01 ; - Port 1
> 672f BNE $6736 ;not read, skip it
> 6731 LDA #$01 ;Set option value to 1
> 6733 STA $66FF
> 6736 RTS ;Finished
We have the joystick control set. Now it is time to actually set the sound parameters and display the music/sfx icon at the bottom left corner of the title screen. At $6800 we are going to type in a subroutine which checks the value of the sound option and then store the correct code snippets into the sound effects player. If music is being played, the sound effects player playing the SFX bits should be ignored. We simply do this by adding a BIT value, to skip the sfx playing. Then display the music icon. Otherwise the sfx is selected, and its player should be restored. I know it is possible to play music, without having to faff around with the SFX store values, but this usually results to being interrupted and switching off certain channels, when SFX tries to play. This special routine fixes this issue.
> 6800 LDA $66FF ;Sound option read
> 6803 CMP #$01 ;If (Sound option = 1)
> 6805 BEQ $683A ;Call sound effects setup subroutine.
> 6807 LDA #$2C ;Otherwise, POKE all of the sound
> 6809 STA $5C0D ;effects voice pointers to not play
> 680c STA $5C10 ;the effect, when music plays in
> 680f STA $5C13 ;game.
> 6812 STA $5C18
> 6815 STA $5C24
> 6818 STA $5C27
> 681b STA $5C2A
> 681e STA $5C2F
> 6821 STA $5C52
> 6824 STA $5C55
> 6827 STA $5C58
> 682a LDA #$03 ;Set lowbyte of in game music play (<$9003)
> 682c LDX #$90 ;Set hibyte of in game music play (>$9003)
> 682e STA $4504 ;Store to the sound player lo-byte
> 6831 STX $4505 ;Store to the sound player hi-byte
> 6834 LDA #$9C ;Setup character (Music icon (formly the F1 symbol we edited))
> 6836 STA $EBE7 ;Store to the SEUCK bottom right corner on the title screen
> 6839 RTS
> 683a LDA #$8D ;SFX was selected, so restore all SFX channels
> 683c STA $5C0D
> 683f STA $5C10
> 6842 STA $5C13
> 6845 STA $5C24
> 6848 STA $5C27
> 684b STA $5C2A
> 684e LDA #$9D
> 6850 STA $5C2F
> 6853 STA $5C52
> 6856 STA $5C55
> 6859 STA $5C58
> 685c LDA #$94 ;Set lobyte of in game sound effects (<$5C94)
> 685e LDX #$5C ;Set hibyte of in game sound effects (>$5C94)
> 6860 STA $4504
> 6863 STX $4505
> 6866 LDA #$9D ;Setup character (SFX icon (formly the F3 symbole we edited))
> 6868 STA $EBE7 ;Store to the SEUCK bottom right corner on the title screen
> 686b RTS
We are nearly there. All there is to do now is to fix the game start jump at $41A4 and change it to JMP $6900, then add this simple piece of code below. This will initialise the SID chip, and also initialise in game music.
> 6900 LDX #$00 ;Clear out SID chip routine
> 6902 LDA #$00
> 6904 STA $D400,X
> 6906 INX
> 6907 CPX #$18
> 6909 BNE $6902
> 690C LDA #$00 ;Set track number in music and then
> 690E JSR $9000 ;initialise music
> 6911 JMP $4260 ;Jump to main game code
4.We have an issue where the SEUCK status panel gets inverted. If this is the case, here's how to solve it. First of all, at $41A4 call JMP $6A00 and next enter this routine below.
> 6A00 LDX #$00
> 6A02 LDA $F400,X ;TITLE SCREEN CHAR AT $F400
> 6A05 EOR #$FF ;INVERT
> 6A07 STA $F400,X ;Store to char again
> 6A0A LDA $F500,X
> 6A0D EOR #$FF ;INVERT
> 6A0F STA $F500,X
> 6A12 INX
> 6A13 BNE $6A02
> 6A16 JMP $4260 ;Run main game
Now execute $4245 (G 4245) in your machine code monitor. Here's the result. Unless of course you have done something wrong :)

Well, that trick is now complete, however before I class this part as finished. Somebody emailed me and come up with a question asking me whether or not it is possible to mix in game sound effects while in game music is playing in the background. Unfortunately at the moment, it doesn't seem to be possible. This is because, as mentioned in an earlier paragraph, while music is playing in the background, the sound effects which tries to play interrupts the music and just makes one of the channels silent for a split second or so while playing in the background. So for now, this is a case closed.
Click here for main Menu
Playing a specific sound effect
By Eleanor Burns
This is a small tip for the SEUCK School that Martin Piper's YouTube vids led me onto. The following routine:
LDA #$(Insert hex number for a desired sound effect here, starting from "00" for player 1 fire)
JSR $5C33
This will trigger a desired sound effect when placed in an event routine (so obviously not just in runtime, or it will never stop triggering).
Adding High Score Detection to your standard SEUCK Front End
First of all, you will need to DOWNLOAD TANK BLASTA GAME + ENHANCEMENT SOURCE CODE.
The directory consists of the following files:
FB - Filebrowser/Disk menu
TANK BLASTA /TND - Fully enhanced version of the game (Made as a bonus treat to accompany this feature). More about it later on :)
TANKGAME - RAW SEUCK finished game (Crunched with Exomizer). So you know how this game was originally before enhancements were made in place.
TANKRAW .I - SEUCK work data (To be loaded in to the Shoot Em Up Construction Kit)
SCORETEXT - The score text data, which accompanies this feature
HISCORE.CODE - Source code to load into Turbo Assembler (or convert/view into PC text, ASM format). To load the HISCORE.CODE, you need to press BACK ARROW and E. Since the file is sequential
HISCORE.OBJ - Assembled code of the hi-score detection installer and routines
TANK HI - Compiled Tank Blasta, crunched with Exomizer.
TITLEMUSIC .GTK - Relocated title music used for the enhanced version of Tank Blasta
GAMEMUSIC .GTK - Relocated in game music used for the enhanced version of Tank Blasta
TANKENH.CODE - Source code to load into Turbo Assembler that contains complete code of the in game enhancements
TANKENH.OBJ - Assembled source code to load into the machine code monitor.
There has always been something missing inside a standard SEUCK game creation, and I also had a suggestion from someone regarding this particular feature. SEUCK games have a score panel, but they don't have any form of high score detection. In this part of the SEUCK school. We are going to try and implement some code which will check and also display the last score player 1 had, also the same for player 2. Not only that. We are also going to be detecting a high score. You also have a new SEUCK game to play around with for this feature. TANK BLASTA. In order to be able to work on this feature. You will need an assembler and machine code monitor (VICE, U64, 1541U2 users, etc please use the Turbo Action with TASM/Codenet. Alternatively, you can use the SEUCK Framework to add the high score detection code if you have ACME or C64STUDIO :)
STEP 1:
Load in your SEUCK game like normal. Depending on how you saved your game. You should have a front end like you have already right now.
Test the game to ensure it works instead of the file being corrupt.:

STEP 2:
Press the RESET button on your Turbo / Action / Retro Replay freezer cartirgde. Then press F7 to enter the fastload option. Then enter the M/C monitor.
Clear the wasted memory, by using the command F 6580 B6C0 00 (If you want to that is). Otherwise don't worry too much about it :) A clean memory where the editor originally lies is best wiped away, if you want to add additional data and code to your own game productions. Plus we don't need to use the editor anyhow.
The first thing we want to do is prepare a high score (Consisting of 6 digits). You may use any spare memory location you like. I have decided to fill 6 bytes at $6580 (F 6580 6586 00). I decided to use the area $0800-$0806 for the high score. A snippet of the method is shown below:
STEP 3:
Clear the screen. Prepare some text for the score and high score detection. You won't need to enter any number scores in the text. It will simply be added when we do the detection code. After typing in your 3 lines of text (PLAYER ONE SCORE, PLAYER TWO SCORE, HI SCORE) move the cursor to the middle or lower position of the screen. Type in T 0400 07A0 0820 (Or to which spare address you wish to place the text). The text will then be transferred to that position. Please note that it might be wise to save your text, just in case you're lost while entering the code. Simply use S "TEXT",8,0820,08c0 (Or whatever address is used to place your text in place).
STEP 4:
We don't need to use the M/C monitor for now. So what to do now is exit the program. Then enter the Turbo Assembler, that is built in the cartridge's fastload (TYPE IN 'TASS'). If your cartridge doesn't have a built in TASS. Don't worry. It is still possible to use a native turbo assembler, but you'll need to manually assemble and save the object code to disk, then reload the game and prepare the score text again (unless you saved that also). Then load the object code to disk.
We start with a set of variables. The score text is the address of the text which we originally created for the hi score detection program
p1scorepos, p2scorepos and hiscore pos are set to the last 12 chars for each row where score player one, score player two, hi score text is positioned
screenpos is the actual SEUCK title screen RAM position but starts on the next row (We leave the top row of chars as blank).
hi score is positioned at $0800.
;=======================================
;seuck school
;------------
;player scores and hi score detection
;and displayer. by richard bayliss
;=======================================
;variables
;actual text positions to read
scoretext = $0820
;position to place the score digits
p1scorepos = $0820+39-11
p2scorepos = $0820+79-11
hiscorepos = $0820+119-11
;seuck front end screen ram area
;starting one row below top row
screenpos = $e828
;seuck score data, and hi score area
p1score = $5ea3
p2score = $5ea9
hiscore = $0800
The next set of code is part of the onetime init process. (Also fixes a few bugs). First a start address $6700 is set for the onetime code. We then force the code to bugfix the random firing address, to make addresss $54ef to use $5000, instead of $8000 for random firing. This is because if memory $6580 - $B6C0 was zerfilled, the random firing goes to the right instead. A patch for the SEUCK score bug is also added. Then we force the title screen to check for new high scores, before a new game starts. Then force the looping title screen control to display the text.
;---------------------------------------
*= $6700 ;installer / onetime
;fix SEUCK random fire bug
lda #$50
sta $54f1
;fix SEUCK collect bug
lda #$4c ;force jump
ldx #<bugfix
ldy #>bugfix
sta $54a2
stx $54a3
sty $54a4
;force score read, write and
;hi score check code before
;running new front end.
lda #$20 ;jsr
ldx #<hicheck ;low+hi byte of
ldy #>hicheck ;hi score check
sta $40dd ;s.e.u.c.k front end
stx $40de ;init area. usually
sty $40df ;black border set.
;but not needed now.
;íain interrupt on front end
;can have a small routine here
lda #$4c ;jmp
ldx #<dispsc ;display score
ldy #>dispsc ;low+hi bytes
sta $41bc
stx $41bd
sty $41be
;clear all scores + hiscore
ldx #$00
clearsc lda #$00
sta p1score,x
sta p2score,x
sta hiscore,x
inx
cpx #6
bne clearsc
jmp $4245 ;run óåõãë front end
;seuck score bugfix (colletable)
bugfix
sta $5dbb
lda #$01
sta $09
jmp $54a5
The next line calls a loop that will display the score text to the SEUCK title screen. Before the score text is displayed, it has to be converted from PETSCII chars into SEUCK title screen chars. 3 rows of text are read in the loop, then the SEUCK title will loop the colour bar player.
;code to display the score (text)
dispsc
ldx #$00
disploop lda scoretext,x
eor #$80 ;convert to title chrs
sta screenpos,x
inx
cpx #$78 ;3 lines read
bne disploop
jmp $4138 ;òaster rolling code
;and loop.
The next set of code occurs every time the title screen has been refreshed. Basically after finishing playing a game or aborting current game. This code below will do a check on each digit. It compares the score of player 1 or player 2 with the high score. If the 6 bytes on each score are lower on the hi score, compared to the player's score. A new loop is processed to overwrite the 6 bytes of hi score with the 6 bytess of the player's score. Of course both player 1 and player 2 should be checked with the high score.
;code to setup the scores
hicheck
;check player 1 score and
;high score together to see
;which is higher/lower
lda p1score ;grab first byte
sec
lda hiscore+5 ;grab last byte
sbc p1score+5 ;check with 1up
lda hiscore+4 ;and keep
sbc p1score+4 ;comparing all
lda hiscore+3 ;6 bytes of the
sbc p1score+3 ;player score
lda hiscore+2 ;and hi score
sbc p1score+2
lda hiscore+1
sbc p1score+1
lda hiscore
sbc p1score
bpl chkp2sc ;no hi for 1up
;1up score is the new hi score
ldx #$00
newhi1up lda p1score,x
sta hiscore,x
inx
cpx #6 ;6 bytes max/digits
bne newhi1up
;like with player 1's score,
;check it with the current
;hi score.
chkp2sc lda p2score+5 ;grab first byte
sec
lda hiscore+5 ;do same for 2up
sbc p2score+5 ;as we did with
lda hiscore+4 ;1up
sbc p2score+4
lda hiscore+3
sbc p2score+3
lda hiscore+2
sbc p2score+2
lda hiscore+1
sbc p2score+1
lda hiscore
sbc p2score
bpl nohiscore
;2up's score overwrites the
;current high score
ldx #$00
newhi2up lda p2score,x
sta hiscore,x
inx
cpx #6
bne newhi2up
The last part of the code is to convert the player's score and hi score bytes into digits from the SEUCK score panel chars. The score panel digits are 1x2 based, thus the loop should be 1x2 based. We read the score of either player, call subroutine convert to check the actual value of the current score. Then it transforms into the first half of the digit from the score panel. We then read the stored line position and then move one character forward to display the second half of the digit.
;finally convert all score and hiscore
;bytes into the status panel charset.
;íanually position those as specific
;characters
nohiscore
ldx #$00
ldy #$00
convloop lda p1score,x
jsr convert
sta p1scorepos,y
lda p1scorepos,y
clc
adc #1
sta p1scorepos+1,y
lda p2score,x
jsr convert
sta p2scorepos,y
lda p2scorepos,y
clc
adc #1
sta p2scorepos+1,y
lda hiscore,x
jsr convert
sta hiscorepos,y
lda hiscorepos,y
clc
adc #1
sta hiscorepos+1,y
iny
iny
inx
cpx #$06 ;ócore length
bne convloop
rts
;convert bytes into the first half of
;the s.e.u.c.k's score panel chars.
;(this is linked to the loop above)
convert
cmp #$00 ;score digit = 0?
bne not0 ;no. check next
lda #$21 ;otherwise
;convert to cha²
rts
not0 cmp #$01 ;score digit = 1?
bne not1 ;no. check next
lda #$23
rts
not1 cmp #$02 ;score digit = 2?
bne not2 ;no. check next
lda #$25
rts
not2 cmp #$03 ;score digit = 3?
bne not3 ;no. check next
lda #$27
rts
not3 cmp #$04 ;score digit = 4?
bne not4 ;no. check next
lda #$29;convert to char
rts
not4 cmp #$05 ;score digit = 5?
bne not5 ;no. check next
lda #$2b ;convert to char
rts
not5 cmp #$06 ;score digit = 6?
bne not6 ;no. check next
lda #$2d ;convert to char
rts
not6 cmp #$07 ;score digit = 7?
bne not7 ;no. check next
lda #$2f ;convert to char
rts
not7 cmp #$08 ;score digit = 8?
bne not8 ;no. check next
lda #$31 ;convert to char
rts
not8 cmp #$09 ;score digit = 9?
bne not9 ;no. check next
lda #$33 ;convert to char
not9 rts ;no more checks
;end of code
STEP 5:
Type backarrow and 5 to assemble to disk (or alternatively, assemble and run with 3). If you have the TASM/CODENET - Turbo Replay, press back arrow and 3 to assemble and run. After a few seconds your title screen should display like the image below:
If you don't have TURBO REPLAY, and use just a standard C64 cartridge like Action Replay. Load and run your SEUCK game, press the RESET button, load in the score text, and object code enter the MC monitor then type in G 6700. You should have a front end with hi score.
STEP 6:
The final step will be to save the game, complete with front end and update. Enter the M/C monitor and type in the following command:
S "TANKBLASTA",8,0800,FFFA
Now when you use a packer with cruncher (there are plenty of those around, or just use the PC based C64 compression tool Exomizer. Instead of using $4245 as the jump address. Use $6700 (The one time init of high score). Or alternatively, you can just freeze the game title and just save to disk / tape using the freeze menu.
Exomizer users type in:
exomizer sfx $6700 tankblasta.prg -o tankblasta.prg -n
AN EXTRA TREAT FOR YOU
As well as the raw Tank Blasta, with the game code. I am also happy to bring you an enhanced version of Tank Blasta, which also includes some of the code that has been featured in the later chapters of SEUCK School. Have fun with it!
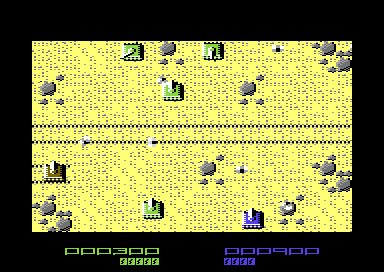
The game consists of title and in game music (with sfx options), power ups, background animation, smart bomb boss explosion effects, and the featured hi-score detection enhancement. A sequel in co-op with Alf Yngve is intended, with SEUCK Redux.
A new war has broken out. It has been caused by an evil spy, who has migrated to the United States in a spy trawler. He has spread chaos across 3 zones, where he sends military forces to cause as much carnage is possible. The 3 zones are the Desert, The Himalayas and The City. The president has called in two highly trained and qualified service people, which are yourself and / or a friend. Your mission is to drive a heavy amoured tank across each of the 3 zones, doing battle against the militia and their defences. At the end of each zone, you will encounter a boss. Once successfully complete one of the 3 missions, you will enter a target range, where you can pick up bonus points. Collect parachute power ups to enhance your shell firing. WARNING: Pick up too many of those, you will restore to the normal state.
Click here for main Menu
Creating a new front end using SEUCK
By Richard Bayliss
Click on disk image to download the work disk
This
is the first of a few tips based on making a new front end for games
created using the Shoot Em Up Construction Kit. As we are all aware.
The SEUCK has its very own front end editor, but with its own
limitations. In this chapter, I am going to show you how to make a new
front end using the resources of the Shoot Em Up Construction Kit
background editor, an Action Replay Catridge Freeze screen editor and
its built in machine code monitor. We are going to have loads of fun
making this new front end. First we need a perfect game for the perfect
title screen transformation. I have chosen SuperStrike by Alf Yngve. It
was a superb Public Domain game that was featured in issue 56 of
Commodore Format's very own cover tape.
Before we get cracking (and linking intros to it - ha, ha) here are the resources you will need:
- Your finished SEUCK game creation
- An Action/Retro
Replay cartridge or Plugin
- The Shoot Em Up Construction Kit (utility itself)
- Relocated music at $8000 for title, optional $9000 for in game music.
- A packer and a cruncher (or one of these cross-dev crunchers Exomizer, Dali, TSCrunch, PuCrunch, etc.)
If you
would like to see everything working. I have added the SuperStrike
workdisk. It comes complete with the raw version of the game, the SEUCK
background data of the logo and text character set, the colour and
screen matrix, the scroll text, the title music which I made using Goat
Tracker Ultra V1.5.5. Also there is the titlescreen code which you can
just bolt on to the game - but I must stress that you should learn to
code the title screen from this feature rather than rip it out. Finally
we have the final result of the game crunched with Exomizer.
Designing the new front end charset
Okay, so what do we do
first?. We first load in the BLANK SEUCK from disk or tape (It depends on which version you own). Now go straight into the
option:
EDIT BACKGROUND
We shall start by editing characters
000-026 (leave char 000 blank and use characters 001-026 as the
letter characters. For the order of the complete character codes,
please check out this useful resource. We need to use those for
things like symbols, let's put it that way. For the letter and symbol
characters you do not need to put those single characters into blocks because we
will be editing the screen manually using the Action/Retro Replay screen editor. But I have nothing against using the block editor for the text characters :)
TOP TIP #1:
Sometimes you might want to use the cross-development method to make
your characters and logo for your creation. Charpad is a good example
for making these type of things for your game. It is possible to import
your background graphics into SEUCK, itself as well.
If
you are using Charpad instead of SEUCK to design your front end
character set graphics and logo, make sure you do as follows.
1.
Max no. of characters = 254 chars
2. Number of blocks = 128
3.
Map size = 8 width x height 512
4. Colouring should be based per
tile
Then you can use FILE / Import/Export / SEUCK / Export as SEUCK Background. Afterwards use Style's DIR Master to import the background work file into D64 image and set a .B prefix at the end of the filename.
TOP TIP 2
If you wish to use thin hi-res characters, you could use the FRONT END character set editor, and draw the characters as inverted (reverse) characters. Go into the Action Replay machine code monitor and then type in T F400 F7FF F800. Then use the remaining characters to design and create your cool logo for your game.
I have decided to use multi-colour characters for the title screen design text characters. I have also chosen black, light blue, cyan and white. Below, you can see the characters I have made for my front end in SEUCK's background editor. This is to give you the basic idea of the order of characters for your new front end.
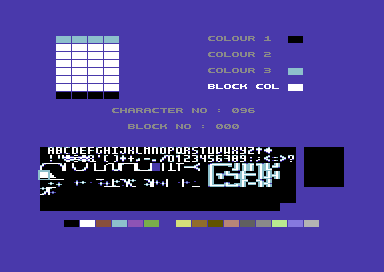
Now that the main text characters are out the way, we shall now use the block editor to create and design a logo for the game. The first thing which you should do is select block 001. Then afterwards you can use either the character editor or the paint block option to design the title screen logo using the empty characters under the characters that have already been drawn.
After you have finished drawing your blocks to create your very own logo. Edit the map by placing your logo at the top area of the screen (or bottom, or both top and bottom). The title screen is to be your own design. Here's what I made using the block and map editor. It looks like this example below.
![]()
Adding the text to the logo
The logo is designed. Now it is time to put in the text onto the screen. It is possible to use the block and map editor to put those in place, but there are too many limitations, for example you cannot mix character set colours with the logo. Instead we make use of our trusty freeze frame menu from the Action Replay / Retro Replay cartridge and edit the screen from the freeze menu. Here's how to do this.
1. Press the FREEZE button on your Action/Retro Replay cartridge.
2. Go to the screen editor option from the freezer menu (Press T). You can press F3 to change the border colour around the screen which you are editing so that you can edit the text page. The cursor will still be in the way, but don't worry it won't exist in the new title screen.
3. (optional) Drag the cursor to the very top of the screen and move the logo to the very top of the screen (by one row).
4. Edit the screen to create the credits page underneath the logo. Remember to leave two spaces at the bottom of the screen for the scrolling text message. You can use the following to change the colour of the cursor. (CTRL+0-8) for hi res char colours, or (CBM+0-8 for multicolour char colours).
5. After you have finished editing the screen press RETURN (ENTER) on your keyboard to return back to the freezer menu (If using Retro Replay, press RUN/STOP).
Okay,
so now we have make our title screen design. What we need to do now is
capture the logo colour and screen data to a specific memory. To do
this, go to the machine code monitor and at $3204 enter this code in
place.
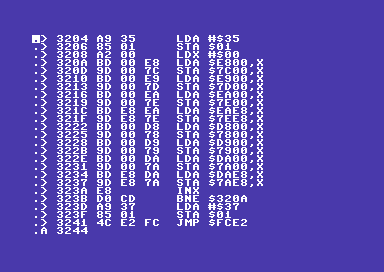
> 3204 A9 35 LDA #$35
> 3206 85 01 STA $01
> 3208 A2 00 LDX #$00
> 320a BD 00 E8 LDA $E800,X
> 320d 9D 00 7C STA $7C00,X
> 3210 BD 00 E9 LDA $E900,X
> 3213 9D 00 7D STA $7D00,X
> 3216 BD 00 EA LDA $EA00,X
> 3219 9D 00 7E STA $7E00,X
> 321c BD E8 EA LDA $EAE8,X
> 321f 9D E8 7E STA $7EE8,X
> 3222 BD 00 D8 LDA $D800,X
> 3225 9D 00 78 STA $7800,X
> 3228 BD 00 D9 LDA $D900,X
> 322b 9D 00 79 STA $7900,X
> 322e BD 00 DA LDA $DA00,X
> 3231 9D 00 7A STA $7A00,X
> 3234 BD E8 DA LDA $DAE8,X
> 3237 9D E8 7A STA $7AE8,X
> 323a E8 INX
> 323b D0 CD BNE $320A
> 323d A9 37 LDA #$37
> 323f 85 01 STA $01
> 3241 4C E2 FC JMP $FCE2
Save the listing using:
S "SCREENCAPTURE",8,3204,3245
Run the listing by typing G 3204 to execute the capture routine and reset the C64. The screen and colour data will have been copied to memory.
6.
Now press FREEZE on your Action Replay / Retro Replay cartridge and go
into the machine code monitor. This time we are going to save out the
colour and screen data together as a whole chunk. Type in:
S "TITLESCREENMATRIX",8,7800,8000
7. Now we are going to transfer the background graphics font we made to $7000 and save the whole thing. We do as follows:
T F800 FFFF 7000
S "TITLEFONT",8,7000,7800.
Knowing the memory for this project.
Okay, it
is time to give you some general information about the data we just
saved. As you may or may not have known standalone SEUCK games have
wasted memory between $6580-$B6C0, which is used by the actual editor
itself. We need to use this for our enhancements. So here
is the plan for this little project.
MEMORY TABLE:
GAME DATA (obtained)
$0900-$657F
NEW TITLE CODE
$6580-$6FFF
TITLE SCREEN CHARSET $7000-$77FF
TITLE SCREEN SCREEN RAM $7C00-$7FFF
TITLE MUSIC
$8000-$8FFF
IN GAME MUSIC [Optional] $9000-$9FFF
TITLE SCREEN + COLOUR DATA $A000-$A7FF
SCROLLTEXT DATA
$A800-$AFFF
Preparing your scroll text
We are now going to write a scrolling message for our title screen. The first thing which you will want to do before we actually do the main project is write a scrolling text message. This is because the new title screen is to use a scrolling text message at the bottom of the screen. For this you will need to use any C64 scroll text editor, such as the Starion Text Editor. Or you can use the other two cool methods. Either way, you should make sure you close the scroll text message with @ before saving. This is being indicated as a wrap marker to restart the scroll text after finishing it. Please also make sure the scroll text is not too long either, ortherwise it could overlap SEUCK graphics data and code at $B6C0-$FFFA.
Another cool method on how to write your own scroll text can actually be done by using the I* method inside the machine code monitor. For example, by entering I* A800, then I* again, and scrolling the cursor down the listing, you can put your text into the memory locations, just like the example below:
Finally one more option which you can use to write your scroll text is to use the C64's BASIC screen. Press FREEZE on the Action Replay / Retro Replay and then write your text using its screen editor. Then afterwards, press RETURN and transfer the short text to $A800, using:
T 0400 07E8 A800
So there are the three of many choices you can choose from to write a scroll text. For options 2 and 3, you can easily prepare the code first then add the scroll text before running the new code.
SETTING UP THE FILES AND PREPARING TO CODE
We do a
hard reset of the Action Replay (Pressing F1 to configure/fill memory),
then press the RESET button on the cartidge and go into FASTLOAD. After
this, we press F8 (or type MONITOR) to enter the machine code monitor.
Hint: Fill memory $6580 to $B6C0 with 00 (using F 6580 B6C0 00) first.
Now that we are in the machine code monitor, we should load in all the data we saved out into memory.
1. First load in the title screen character set using the machine code monitor, using:
L"TITLEFONT",8,7000
2. Now load in the screen and colour RAM data:
L"TITLESCREENMATRIX",8,A000
3. Next load in the relocated title music
L"TITLEMUSIC",8,8000
4. (optional) If you want to include in game music into your game (although I haven't for Super Strike)
L "GAMEMUSIC",8,9000
5. Finally load in the scroll text (or make one at $A800 using the I* feature on your Action Replay/Retro Replay cartridge)
L "SCROLLTEXT",8,A800
All is good so far, so now let's code the title screen using our machine code monitor.
Copy this code listing below ... I have highlighted what the code does in places.
1. Installing the new front end code into SEUCK's restart memory and map loop area.
The first set of code
below disables the RESTORE press to SEUCK menu option (LDA #$00:STA
$4244). Then we install a jump to the new title screen code, at $40DD,
where previously that was storing the border colour (STA $D020) for the
old SEUCK game title screen. Instead, make that location jump straight
to the new title screen code (JMP $65A2). Also the jump to the new
title screen is stored in the location where LOOP is detected in the
SEUCK game map. We then clear out the IRQ flag and then jump to the old
SEUCK title code which will jump to the new SEUCK title code.
.> 6580 78 SEI
.> 6581 A9 00 LDA #$00 ;Disables RESTORE to SEUCK menu
.> 6583 8D 44 42 STA $4244
.> 6586 A9 4C LDA #$4C ;JUMP TO
.> 6588 A2 A2 LDX
#$A2 ;LOW BYTE of new SEUCK Title screen code
.> 658a A0 65 LDY
#$65 ;HI BYTE of new SEUCK Title screen code
.> 658c 8D DD 40 STA $40DD ;Store JUMP to where storing $D020 in old code is
.> 658f 8E DE 40 STX $40DE ;Store LOW BYTE from old title code
.> 6592 8C DF 40 STY $40DF ;Store HI BYTE from old title code
.> 6595 8D A1 47 STA $47A1 ;Store JUMP to where storing loop code
.> 6598 8E A2 47 STX $47A2 ;Store LOW BYTE from map loop code
.> 659b 8C A3 47 STY $47A3 ;Store HI BYTE from map storing loop code
.> 659e 58 CLI
.> 659f 4C 45 42 JMP $4245
;Start old SEUCK title screen code (but will execute the new
code instead)
2. Initialising the hardware pointers
This
is the code which the SEUCK title screen will jump directly to on
startup. What this code does is it first sets up the $01 status to $35,
so that we are using non kernal IRQs in the main title screen code. The
code also sets a new RESTORE PRESS to jump to the new title screen at
NMI pointers $FFFA, and $FFFB. Any existing IRQ raster interrupts from
the game has to be disabled. We clear out the SID chip so no sound is
playing when setting up the title screen. The VIC video hardware is
initialised with zero. This forces a black screen, switches the screen
off, removes all sprites from the screen, etc. Basically we clear
hardware $D000 all the way to $D02F) inside a short loop
.> 65a2 78 SEI
.> 65a3 A9 35 LDA #$35
.> 65a5 85 01 STA $01
.> 65a7 A9 00 LDA #$00 ;Switch off existing non kernal IRQs
.> 65a9 8D 19 D0 STA $D019
.> 65ac 8D 1A D0 STA $D01A
.> 65af A2 A2 LDX #$A2 ;LOW BYTE of new title screen code
.> 65b1 A0 65 LDY #$65 ;HI BYTE of new title screen code
.> 65b3 8E FA FF STX $FFFA ;Store to NMI flag Low
.> 65b6 8C FB FF STY $FFFB ;Store to NMI flag Hi
.> 65b9 A9 81 LDA #$81 ;Disable CIA Timer interrupts
.> 65bb 8D 0D DC STA $DC0D
.> 65be 8D 0D DD STA $DD0D
.> 65c1 A2 00 LDX #$00 ;Clear out the SID
.> 65c3 A9 00 LDA #$00
.> 65c5 9D 00 D4 STA $D400,X
.> 65c8 E8 INX
.> 65c9 E0 18 CPX #$18
.> 65cb D0 F6 BNE $65C3
.> 65cd A2 00 LDX #$00 ;Clear out the VIC
.> 65cf A9 00 LDA #$00
.> 65d1 9D 00 D0 STA $D000,X
.> 65d4 E8 INX
.> 65d5 E0 2F CPX #$2F
.> 65d7 D0 F6 BNE $65CF
3. Initialising the scroll text and setting up the graphics
This
next bit of code initialises the scroll text, by reading the LOW BYTE
and HI BYTE of starting address of the scrolling text. It gets stored
to the self-modifying code that processes the scrolltext message. After
resetting the scroll text start address, the code draws the title
screen and colour matrix to the screen RAM at $7C00-$7FE8. This is at
VIC2 Bank $02 with character set at $7000. The screen is being drawn
256 bytes at a time inside a loop.
.> 65d9 A2 00 LDX #$00 ;Read LOW BYTE of SCROLLTEXT
.> 65db A0 A8 LDY #$A8 ;Read HI BYTE of SCROLLTEXT
.> 65dd 8E 13 67 STX $6713 ;Store to message read position+1
.> 65e0 8C 14 67 STY $6714 ;Store to message read position+2
.> 65e3 A2 00 LDX #$00
.> 65e5 BD 00 A4 LDA $A400,X ;Copy the SCREEN MATRIX data
.> 65e8 9D 00 7C STA $7C00,X ;Place on to the SCREEN RAM at BANK $02
.> 65eb BD 00 A5 LDA $A500,X ;Copy the SCREEN MATRIX data + 256
.> 65ee 9D 00 7D STA $7D00,X ;Place on to the SCREEN RAM + 256 at BANK $02
.> 65f1 BD 00 A6 LDA $A600,X ;... and so on
.> 65f4 9D 00 7E STA $7E00,X
.> 65f7 BD E8 A6 LDA $A6E8,X
.> 65fa 9D E8 7E STA $7EE8,X
C:65fd BD 00 A0 LDA $A000,X ;Copy the SCREEN MATRIX COLOUR data
.> 6600 9D 00 D8 STA $D800,X ;Place on to the COLOUR RAM at VIC $D800
.> 6603 BD 00 A1 LDA $A100,X ;Copy the SCREEN MATRIX COLOUR data + 256
.> 6606 9D 00 D9 STA $D900,X ;Place on to the COLOUR RAM at VIC $D800 + 256
.> 6609 BD 00 A2 LDA $A200,X ;... and so on
.> 660c 9D 00 DA STA $DA00,X
.> 660f BD E8 A2 LDA $A2E8,X
.> 6612 9D E8 DA STA $DAE8,X
.> 6615 E8 INX
.> 6616 D0 CD BNE $65E5
.> 6618 A9 02 LDA #$02 ;Set VIC2 bank $02
.> 661a 8D 00 DD STA $DD00
.> 661d A9 FC LDA
#$FC ;Set Charset screen display $7000
(Charset), $7C00 (Screen RAM)
.> 661f 8D 18 D0 STA $D018
.> 6622 A9 0E LDA
#$0E ;Set CHAR MULTICOLOUR 1 - LIGHT BLUE
.> 6624 8D 22 D0 STA $D022
.> 6627 A9 03 LDA #$03 ;Set CHAR MULTICOLOUR 2 - CYAN
.> 6629 8D 23 D0 STA $D023
4. A short delay
Below is a short loop which delays the title screen for a short time before setting up the IRQ interrupts.
.> 662c A2 00 LDX #$00 ;Delay loop X set as 0 at the start
.>
662e A0 00 LDY #$00
;Delay loop Y set as 0 after setting X loop
.> 6630
C8 INY
;Add one to Y loop until repeated 256
times
.> 6631 D0 FD BNE $6630 ;else loop to $6630
.> 6633
E8 INX
;Add one to X loop until repeated 256
times
.> 6634 D0 F8 BNE $662E ;else loop to $662e
5. Preparing the IRQ raster interrupts.
For the title screen, a double IRQ raster interrupt needs to be set up and initialised.
.> 6636 A9 35 LDA #$35 ;Set $01 to $35 to use non kernal IRQs
.> 6638 85 01 STA $01
.>
663a 78
SEI ;Set allow IRQ flag
.> 663b A2 A0 LDX #$A0 ;Set LO BYTE of IRQ1
.> 663d A0 66 LDY #$66 ;Set HI BYTE of IRQ1
.> 663f A9 7F LDA #$7F ;Set CIA timer flag to $7f,
.> 6641 8E FE FF STX $FFFE ;Store Low byte of IRQ to IRQ Vector low
.> 6644 8C FF FF STY $FFFF ;Store hi byte of IRQ to IRQ Vector hi
.> 6647 8D 0D DC STA $DC0D ;Store $7f to CIA Timer 1
.> 664a 8D 0D DD STA $DD0D ;and CIA timer 2
.> 664d A9 2A LDA #$2A ;Set raster line
.> 664f 8D 12 D0 STA $D012
.> 6652 A9 1B LDA #$1B ;Switch screen back on
.> 6654 8D 11 D0 STA $D011
.> 6657 A9 01 LDA #$01 ;IRQ mode enabled
.> 6659 8D 1A D0 STA $D01A
.> 665c A9 00 LDA #$00 ;Initialise music
.> 665e 20 00 80 JSR $8000
.>
6661 58
CLI ;Clear out IRQ flag
6. Waiting for the fire button to be pressed.
This routine below reads and waits for the fire button on joystick port 1 or port 2 to start the game.
.> 6662 A9 10 LDA #$10 ;$10 = Fire button control
.> 6664 2C 00 DC BIT $DC00 ;Joystick port 2
.> 6667 F0 0A BEQ $6673 ;Jump to GAME SETUP code
.> 6669 A9 10 LDA #$10 ;$10 = Fire button control
.> 666b 2C 01 DC BIT $DC01 ;Joystick port 1
.> 666e F0 03 BEQ $6673 ;Jump to GAME SETUP code
.> 6670 4C 62 66 JMP $6662 ;Nothing pressed, loop back to $6662
7. Fire has been pressed. Setup the game before starting it
This routine first switches off the IRQ raster interrupts, clears the SID and then executes the main game by jumping to $4260
.>
6673 78
SEI ;Set IRQ flag
.> 6674 A9 00 LDA #$00 ;Switch off IRQ raster interrupts
.> 6676 8D 19 D0 STA $D019
.> 6679 8D 1A D0 STA $D01A
.> 667c A9 81 LDA #$81 ;Disable CIA interrupts
.> 667e 8D 0D DC STA $DC0D
.> 6681 8D 0D DD STA $DD0D
.> 6684 A9 00 LDA #$00 ;Switch off screen
.> 6686 8D 11 D0 STA $D011
.>
6689 A2 48 LDX
#$48 ;Set low byte X as $48 to stop IRQ call out at
$FFFE
.> 668b A0 FF LDY
#$FF ;Set hi byte Y as $FF to stop IRQ
call out at $FFFF
.> 668d 8E FE FF STX $FFFE
.> 6690 8C FF FF STY $FFFF
.> 6693 A2 00 LDX
#$00 ;Clear out the SID chip so no sound is playing
.> 6695 9D 00 D4 STA $D400,X
.> 6698 E8 INX
.> 6699 E0 18 CPX #$18
.> 669b D0 F8 BNE $6695
.> 669d 4C 60 42 JMP $4260 ;Execute and start the main game.
8. IRQ raster interrupts
The IRQ raster
interrupt routine is split into two segments. One segment is being used
for executing a smoot scrolling message. The other segment sets the
charset multicolour the calls a subroutine to the scroll code and plays
the music.
.> 66a0 48 PHA ;IRQ 1 - The smooth scroll routine.
.> 66a1 8A TXA
.> 66a2 48 PHA
.> 66a3 98 TYA
.> 66a4 48 PHA
.> 66a5 0E 19 D0 ASL $D019 ; Trigger $D019 IRQ timer to synchronise with CIA
.> 66a8 AD 0D DC LDA $DC0D ; Safe loading and storing of the CIA to CIA 2
.> 66ab 8D 0D DD STA $DD0D
.> 66ae A9 2A LDA #$2A ; End current IRQ at top raster position ($2A)
.> 66b0 8D 12 D0 STA $D012 ;Raster position
.> 66b3 AD 30 67 LDA $6730 ;Read the scroll byte (xpos = $6730)
.> 66b6 09 10 ORA #$10 ;convert to multicolour charset mode
.> 66b8 8D 16 D0 STA $D016 ;Store to C64 horizontal screen position
.> 66bb A2 CB LDX #$CB ;Set low byte of IRQ 2
.> 66bd A0 66 LDY #$66 ;Set hi byte of IRQ 2
.> 66bf 8E FE FF STX $FFFE ;Store IRQ 2 to IRQ flag low
.> 66c2 8C FF FF STY $FFFF ;Store IRQ 2 to IRQ flag hi
.> 66c5 68 PLA
.> 66c6 A8 TAY
.> 66c7 68 PLA
.> 66c8 AA TAX
.> 66c9 68 PLA
.> 66ca 40 RTI ;Return to interrupt
.> 66cb 48 PHA ;IRQ 2 - The still screen, running the
.> 66cc 8A TXA ;the scroll subroutine and playing the music
.> 66cd 48 PHA
.> 66ce 98 TYA
.> 66cf 48 PHA
.> 66d0 0E 19 D0 ASL $D019 ;Trigger $D019 IRQ timer to sync with CIA
.> 66d3 A9 F0 LDA #$F0 ;End current IRQ at bottom raster positin ($F0)
.> 66d5 8D 12 D0 STA $D012 ;Raster position
.> 66d8 A9 18 LDA #$18 ;Set screen multicolour mode to position 24 ($18)
.> 66da 8D 16 D0 STA $D016 ;this is equivalent to POKE 53270,24
.> 66dd 20 F3 66 JSR $66F3 ;Call scroll routine
.> 66e0 20 03 80 JSR $8003 ;Play music
.> 66e3 A2 A0 LDX #$A0 ;Set low byte of IRQ 1
.> 66e5 A0 66 LDY #$66 ;Set hi byte of IRQ 1
.> 66e7 8E FE FF STX $FFFE ;Store IRQ 2 to IRQ flag low
.> 66ea 8C FF FF STY $FFFF ;Store IRQ 2 to IRQ flag hi
.> 66ed 68 PLA
.> 66ee A8 TAY
.> 66ef 68 PLA
.> 66f0 AA TAX
.> 66f1 68 PLA
.> 66f2 40 RTI ;Return to interrupt
7. Fire has been pressed. Setup the game before starting it
This routine first switches off the IRQ raster interrupts, clears the SID and then executes the main game by jumping to $4260
.> 66f3 AD 30 67 LDA $6730 ;Read scroll pointer (xpos)
.>
66f6 38
SEC ;subtract the speed by
.> 66f7 E9 02 SBC #$02 ;2. (normal speed)
.> 66f9 29 07 AND #$07 ;Shift as 8 values
.> 66fb 8D 30 67 STA $6730 ;store to scrollpointer (xpos)
.> 66fe B0 2F BCS $672F ;skip to exit scroll.
.> 6700 A2 00 LDX #$00
.> 6702 BD C1 7F LDA $7FC1,X ;Read all chars from last screen row second column
.> 6705 9D C0 7F STA $7FC0,X ;Write to last screen row first column
.> 6708 A9 0F LDA #$0F ;Use multicolour yellow (light grey)
.> 670a 9D C0 DB STA $DBC0,X ;store colour to whole scroll text row via Colour RAM
.> 670d E8 INX
.> 670e E0 28 CPX #$28
.> 6710 D0 F0 BNE $6702
.> 6712 AD 24 A8 LDA $A800 ;Read scroll text message position ($6712 is messread)
.> 6715 D0 0D BNE $6724 ;@ not found go to store char location
.> 6717 A2 00 LDX
#$00 ;$00 is low byte of current position of message
.> 6719 A0 A8 LDY
#$A8 ;$a8 is hi byte of current position of message
.> 671b 8E 13 67 STX $6713
;store low byte to self-modifying code read at $6712 (messread+1)
.> 671e 8C 14 67 STY $6714
;store hi byte to self-modifying code read at $6712 (messread+2)
.> 6721 4C 12 67 JMP $6712 ;Jump to the message read check routine (messread) at $6712
.>
6724 8D E7 7F STA $7FE7 ;Store
character from message position to last column on last screen row
.> 6727 EE 13 67 INC $6713 ;Increment messread+1
.> 672a D0 03 BNE $672F ;No @ detected skip to exitscroll
.> 672c EE 14 67 INC $6714 ;Increment messread+2
.>
672f 60
RTS ;exitscroll
Now type in M 6730 and change the first byte value to $00 (unless it already is there)
:6730 00 BD BD BD BD BD BD BD
Before we run this routine to test it without the SEUCK game (as we
will be linking it to the game afterwards). Edit the following routines.
> 4245 JMP $65A2
> 4260 INC $D020
> 4263 JMP $4260
What
this will do is set $4245 to jump directly to the new title screen
code, since we are testing it without linking it to the game first. We
want to ensure the title screen is working perfectly before we can
include it in our game.
The second routine at $4260 is suppose to take place after pressing
fire on either joystick in port 1 or port 2. If all is working
correctly, this will exit the title screen and flash the border
continuously. Great.
Now it is time to save out the complete project before we link it to the game.
No... Wait! Just before we do, here is one more hint, which of course is very optional:
Hint: If you want to use in game music. At $669D change JMP $4260 to JMP $6740 and at $6740 add the following:
>.6740 LDA #$20
>.6742 LDX #$03
>.6744 LDY #$90
>.6746 STA $4503
>.6749 STX $4504
>.674C STY $4506
>.674F LDA #$00
>.6781 JSR $9000
>.6784 JMP $4260
Go to the Action Replay / Retro Replay M/C monitor and save everything out using:
S "TITLESCREEN",8,8580,B6C0 (or where scroll text ends)
Putting it all together.
We have finished making
our front end, it is time to have some fun and put the front end
directly onto the SEUCK game using the Action Replay cartridge. Here is
how to do this:
1. Load and run the game created with SEUCK. It does not matter if it
has been frozen, saved as standard SEUCK "Save as finished game" or
crunched. As long as the game has NOT been enhanced.
2. On the front end press FIRE to start the game, and pause it using RUN/STOP
3. Press the RESET button on your Action Replay / Retro Replay cartridge and select F7 (Fastload)
4. Go to the M/C monitor by typing in MON or press F8.
5. Edit the random firing routine at $54EF and change it to
.> 54EF LDA $5000,Y
6. Load in the front end file which you made using
L "FRONTEND",8,6580
7. Save your finished creation using S "GAME",8,0900,FFFA
8. Use a reliable packer that makes a compressed runnable executable of
your game from BASIC (i.e. XTC Packer V2.1 and use the following
parameters):
LOADNAME: GAME
SAVENAME: GAME.P
$01 :$37
JMP :$6580
SEI/CLI: SEI
Also afterwards use a
reliable cruncher that can compress your packed file even further (i.e.
MEGA Crunch V6/Equal Sequence V2.2+ or some other cruncher. The jump
address this time must be the jump address of the packed file. For
example $080B if packed with XTC Packer V2.1).
If you chose to use Exomizer instead, us the following command:
exomizer sfx $6580 game.prg -o game+.prg -n
9. Load in the crunched version of your game to test run it.
10. After checking out the title screen, press fire to start the game to see if all is working.
Let's see ...
Yippee, it's all working.
And that is of course how to make a simple front end a fun practical way for your games, and play music on the title screen.
ROUTINE TRICKS
Common SEUCK Subroutine Area Tricks
By Richard Bayliss
When writing enhancements for SEUCK games. There are certain areas which you need to be aware of, where clever tricks can be placed. The next load of tips below are something to do with those areas. These areas are as follows:
$41A4
Game init and start
In SEUCK $41A4 normally uses the JMP $4260. This will jump straight into the main SEUCK game. If however music was used in the game. A subroutine would need to be called to silence the SID chip, in order for the SFX to play properly. This is usually done at $41a4 as:
JMP INITSID
INITSID ldx #$00
KILLSND lda #$00
sta $d400,x
inx
cpx #$18
bne KILLSND
jmp $4260
$4503
SFX Player (For where enhancements can be linked): - CAN BE USED FOR LINKING SUBROUTINES
This area is usually marked with JSR $5C94 when playing SFX. If you call it to another memory area and say, call a different subroutine to it. Other things can often happen in place in your SEUCK game. For example. Say at $4503 we change JSR $5C94 it to call THIS. Then say at $6580 in the cross assembler, we call a label called ENHANCEMENTS.
JSR ENHANCEMENTS
then ... add a subroutine to FLASH the side border, then play the Sound Effects again. Always RTS each subroutine when it has finished.
ENHANCEMENTS INC $D020
JSR $5C94
RTS
You can call various subroutines in enhancements, to enhance your game even more. For example, background animation, full screen explosion, and other fun features.
$2C80-$2C92
Player 1 object Frame table
This area is where the 18 bytes of sprite data (read from SEUCK) is stored to the actual sprite's frame. By creating custom tables, it is possible to transform the player to something else, simply by duplicating existing table sequences, or altering those. Slightly. This trick was used in Zap Fight.
$2C94-$2CA6
Player 1 bullet Frame table
The same type of feature as above, but this time it takes effect on player 1's bullet object.
$2C93
Player 1 colour, and anim type.
$2CE3
Player 2 bullet colour and anim type
The colour and anim type is set by a byte. The second digit in the byte indicates the colour, and the first digit indicates the object animation type. Thus it is possible to transform from a directional hold animation, to a different type of animation.
$2CCF
Player 2 colour, and anim type.
$2CD0-$2CE2
Player 2 bullet Frame table
$2CCF
Player 2 colour, and anim type.
$47A1
In game Loop process
By triggering this to JMP END SCREEN instead of loop. It will automatically jump directly to the end screen after completing the final game.
$4B0F
Sprite/Sprite Collision Player 1 Lose lives
$4B0F indicates a routine, which will destroy and deduct a number of lives from player 1. It is also possible to do a trick in this area to call a small subroutine, to add some more effects. Say for example, if player 1 is linked to player 2 and both share lives. A trigger should be performed to destroy player 2. The trick I did as a split second for doing Dark Force, as a sprite/background collision for BOTH players. $4B0F look something like this:
STA $5DBF
If changed. The routine above still needs to be stored inside the code.
$4E1E
Sprite / Sprite Collision Player 2 Lose lives
Same as above, but for player 2. STA $5DC0 is used instead of $5DBF to destroy the second player.
$4B6C
Player 1 Re spawn
First the player's life is deducted (after the death). The routine inside that area checks whether or not the player should re spawn after a loss of a life. If so, then it can be re spawned. A custom subroutine linked to $4B6C (JSR INITPLAYER1 for example) could make players lose all power ups, or setup pointers for the player to go invincible at the start of the game. The player 1 re spawn can also be used to reposition the player at exactly the same position where it has died. A subroutine for this trick features in a later chapter.
$4E7C
Player 2 Re spawn
As above, but refers to player 2.
$55C3
Enemy killed, and scoring code
This is a crucial area for where the player destroys an enemy by blasting it, or collecting an object and scoring points for every object picked up. There was a nasty bug in $5E4F, where only one player could be awarded points should another player have collected the object, and it can be patched easily enough. At $55C3, a subroutine could be called in order to check which object type has been picked up / killed, check which player killed the enemy and give out a power up or something similar.
$6580-$B6C0
Spare / Wasted Memory ...
After saving a standalone SEUCK game. The SEUCK editor + code is usually still stored in memory. There is no need for this at all. In fact, memory can be overwritten by extra data, such as enhancements, etc. Since we no longer need the editor. It is possible to zero fill that memory and use it for additional code + data. Of course it does involve having to program raster interrupts, using upper video banks and a lot of additional programming.
Most of the time. I use the following areas for various tricks in SEUCK games:
$6580-$7000 for programming the in game enhancements (which are linked as subroutines to the most of the above memory locations)
$7000-$7800 for char set or logo graphics (if a logo char set is being used instead of a bitmap picture - else use it for text)
$7c00 is used as BANK 2's screen RAM for displaying the char set logo and text characters
$8000 is mostly used for front end code.
$8400-$8800 is used for the multi colour bitmap picture colour video RAM data
$8800-$8C00 is used for the multi colour bitmap picture's colour RAM data
$9000-$9FFF is used for music (Goat Tracker/DMC/JCH) ... Range can be bigger if no multicoloured bitmap is used
$A000-$B6C0 is used for the multi colour bitmap, bitmap data
If spare memory left between these locations. It is even possible to add more code, text or even sprites on to the screen.
$BC00-$BC04
Actual player 1 position and speed in action
$BC30-$BC34
Actual player 1 bullet position and speed in action
$BD00-$BD04
Actual player 2 position and speed in action
$BD30-$BD34
Actual player 2 bullet position and speed in action
Click here for main Menu
SEUCK IN GAME ROUTINE TRICKS
Re spawning players at last position after dying
By Richard Bayliss
Please click this link For Action Replay / M/C monitor version
Source: Cops the Final Chapter by Alf Yngve (Psytronik Software)

If you are writing a push scroll game, you will have noticed that the Shoot Em Up Construction Kit sometimes spawns the player on a deadly bit of background after losing a life and spawning the player. When this happens, it makes you not be able to progress further into this game. I discovered this on some quality SEUCK game titles, that at times you get stuck on something very unpassable. In order to resolve this we need to create some code, where a subroutine can to be called to reposition the player from where it dies. Basically. Following the previous chapter. Add a subroutine to Areas $4B0F, $4E1E the following commands:
$4B0F jsr LifeLostPlayer1
$4E1E jsr LifeLostPlayer2
(Place this where there's free memory if using a M/C monitor, for example $8000 for LifeLostPlayer1 and $8100 for LifeLostPlayer2).
LifeLostPlayer1 sta $5dbf ;BAM. Player cops it.
lda $bc01,x ;Read ACTUAL X position of player 1
sta $40a3 ;Place it into SEUCK's default XPOS for player 1
lda $bc02,x ;Read ACTUAL X MSB position of player 1
sta $40a4 ;Place it into SEUCK's default MSB for player 1
lda $bc03,x ;Read ACTUAL Y position of player
sta $40a5 ;Place it into SEUCK's default Y pos for player 1
rts ;Return from subroutine
LifeLostPlayer2 sta $5dc0 ;Bam! Player 2 cops it!
lda $bc31,x ;Read actual X position of player 2
sta $40b6 ;Place it into SEUCK's default XPOS for player
lda $bc32,x ;Read ACTUAL X MSB position of player 2
sta $40b7 ;Store it into SEUCK's default MSB for player 2
lda $bc33,x ;Read ACTUAL Y position of player 2
sta $40b8 ;Store it into SEUCK's default Y pos for player 2
rts ;Return from subroutine
This trick does work well in the game, but there is a slight drawback. When you start a new game, the player gets repositioned in an incorrect position. To solve this issue, all you have to do is initialise the position of the player by setting the defaults from the original SEUCK game. To do this, you need to use an Action Replay M/C monitor and map out the bytes. Simply by typing in
m 40a3 (For player 1)
or
m 40b6 (For player 2).
Note down the first 3 bytes, then create an INIT routine (Jump routine linked to $41a4), which is:
jmp initgame
initgame lda #(player_1_default_x)
sta $40a3
lda #(player_1_default_xMSB)
sta $40a4
lda #(player_1_default_y)
sta $40a5
lda #(player_2_default_x)
sta $40b6
lda #(player_2_default_xMSB)
sta $40b7
lda #(player_2_defauly_y)
sta $40b8
jmp $4260 ;Start game
ACTION REPLAY CODE SNIPPET:
Okay, so I showed you the code completely in assembly language, which I have tested in Alf Yngve's "Banana Jones" game. However, if you wanted to just use an Action Replay machine code monitor on a completely raw version of your game. Of course you do not need to place the code in the same code location as I have for this example, in case for example you are enhancing your project even further manually. I am just using $7000, $7100 and $7200 here as an example. Anyway, here are tip tips and example code to help you out.
1. View the first three bytes of $40a3 and then note down player 1's start position values for all three bytes.
For example enter:
m 40a3
Player 1: 1C, 01, B6
m 40b6
Player 2: 1C, 01, BE
Hint: The first byte indicates the horizontal start position of both players, the second byte indicates the horizontal sprite MSB value and the third byte indicates the vertical start position of the player.
Take note of the first 3 bytes at $40A3 and $40B6. They will be needed.
2. Edit the code in player life lost routines. (For now, we'll use $7000 for player 1 and $7100 for player 2)
> 4b0f jsr $7000
> 4e1e jsr $7100
3. Write the following code for player 1's respawn routine. This will force the player 1 to spawn at exactly the same position the player has last died.
> 7000 sta $5dbf ;Player 1 death animation
> 7003 lda $bc01,x ;Grab current X position of player 1's sprite area
> 7006 sta $40a3 ;Store to player 1 X start position
> 7009 lda $bc02,x ;Grab current X MSB position of player 1's sprite area
> 700c sta $40a4 ;Store to player 1 X MSB start position
> 700f lda $bc03,x ;Grab current Y MSB position of player 1's sprite area
> 7012 sta $40a5 ;Store to player 1 Y start position
> 7016 rts ;End of subroutine
4. Now write the following code for player 2's respawn routine. This will force player 2 to spawn at exactly the same position the player has last died.
> 7100 sta $5dc0 ;Trigger Player 2 death animation
> 7103 lda $bc31,x ;Grab current X position of player 2's sprite area
> 7106 sta $40b6 ;Store to player 2 X start position
> 7109 lda $bc32,x ;Grab current X MSB position of player 2's sprite area
> 710C sta $40b7 ;Store to player 2 X MSB start position
> 710F lda $bc33,x ;Grab current Y start position of player 2's sprite area
> 7112 sta $40b8 ;Store to player 2 Y start position
> 7115 rts ;End of subroutine
5. Now these are in place, it is time to create a quick routine that will store the values of the three bytes of the player starting positions and store them into the actual player starting position. This is because whenever we start a new game, this always should take place. Otherwise the players will not spawn at the correct starting position.
> 7200 lda #$1c ;Starting X position (first byte displayed from m 40a3)
> 7202 sta $40a3 ;Player 1 start X position
> 7205 lda #$01 ;Starting X MSB position (second byte displayed from m 40a3)
> 7207 sta $40a4 ;Player 1 start X MSB position
> 720a lda #$b6 ;Starting Y position (third byte displayed from m 40a3)
> 720c sta $40a5 ;Player 1 start Y position
> 720f lda #$1c ;Starting X position (first byte displayed from m 40b6)
> 7211 sta $40b6 ;Player 2 start X position
> 7214 lda #$01 ;Starting X MSB position (second byte displayed from m 40b6)
> 7216 sta $40b7 ;Player 2 Starting X MSB
> 7219 lda #$be ;Starting Y position (third byte displayed from m 40b6)
> 721b sta $40b8 ;Player 2 Starting Y position
> 721e jsr $443a ;Call init game code
> 7221 rts
6. One more trick to do now. We need to edit the game init code at $4261 to initialise the in game enhancements, then call the game init code. So enter as follows:
> 4261 jsr $7200
7. Now, let's check the game out. Type in g 4245 in your machine code monitor and see what happens.
Brilliant. The player can now spawn at its last place it died. This trick also works on player 2.
Power Ups and Detecting which Enemy has been hit
By Jon Wells (Additional routines added by Richard Bayliss)
Source: Super Tau Zeta 2 by Alf Yngve (Psytronik Software)
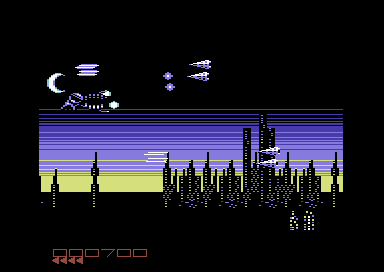
When I was doing some features with Kung Fu Maniacs. I wanted to work out which enemy could be killed, in order to change sprites to make power ups for the game. Jon gave me some technical information, and the results have been very rewarding. Here's what Jon said. And here's his example:
Basically, the on screen sprites are stored between $BC00 - $BCFF in clumps of $08, the First byte is the object number and $06 along holds the score to be added in jumps of 10's for that enemy so HEX $0A would award 100 points, HEX $14 - 200 points and HEX $28 - 400 points. Now I found a piece of code that handles the score and killing of a sprite around the $5500 onwards point. To make this easy for you here's a piece of code that if added stores 3 bytes at $8000-$8002 which hold the last enemy object killed, which player did it and how much was awarded. Anyway, here goes:
At $55C3 change the LDA $BD06,Y to JSR $8200, then add the following code starting at $8200:
Please take note that you do not need to use $8000, $8001, or $8002 (or use $8200)
LDA $BC00,Y ; OBJECT NO
STA $8000
LDA $09 ; PLAYER either $00, $01
STA $8001
LDA $BC06,Y ; SCORE TO ADD IN JUMPS OF 10
STA $8002
LDA $BD06,Y ; YOU MUST END THE ROUTINE WITH THIS
RTS
Right now you have 3 bytes of data $8000 holds the actual object number that was last killed / collected, $8001 holds the player number which did it. If it is $00 then that's player 1 joystick port 2, if it is a $01 it's the other player using port 1. Finally, the score is held in $8002.
Actually this code provides a few interesting things you could adapt. For a start you could make it so that if it is a power up it could be set so that a specific player can only use that if collected. Thus for example if player $00 picks it up they only get the score added, if player $01 picks it up then they get the power up. You can even change how many points are awarded as long as you add the points to STA $BC06,Y before returning the LDA $BD06,Y and ending the routine, so that one off score would be awarded instead of the preset amount.
Anyway, this should allow you to do what you need, if you have any probs let me know.
Alternative assembler version would be:
KillObject
LDA $BC00,Y ; OBJECT NO
STA ObjectType
LDA $09 ; PLAYER either $00, $01
STA RewardPlayer
LDA $BC06,Y ; SCORE TO ADD IN JUMPS OF 10
STA ScoreType
LDA $BD06,Y ; YOU MUST END THE ROUTINE WITH THIS
RTS
The code can be expanded underneath STA ScoreType to use something like THIS:
lda ObjectType
cmp #(ObjectNumber) ;Check if object by looking at the SEUCK object editor
beq BossDestroyed ;Boss type hit?
lda $BD06,Y
rts
BossDestroyed
lda #$0a
sta ExplodeTimer ;Set explosion timer (see next chapter)
lda $BD06,Y
rts
LOOPING ENEMY ATTACK WAVES
by Eleanor Burns
As we all know, the Shoot Em Up Construction Kit is *very limited* for joystick controlled attack wave patterns for enemies that are inserted into the game before enemies leave the screen. For decades there has not been a solution, until 2025 that is. It is now possible to loop the enemy movement formation with a set of Action Replay POKEs. Before I give you the snippets, please be aware that there will be a short delay before looping enemy attack patterns. It is also recommended to use enemy speed of 2 or 3, perhaps use push scroll or as end of level boss stages as well.
1. In the attack waves editor, select the enemy to insert.
2. Place the enemy at its starting position.
3. Make your movement to the next position then hold it for 1 second. It does not matter if you do fire press delays
4. Make your reversed movement back to the position you originally placed the enemy sprite then press F7 to store it.
After finishing your saved game, enter these POKEs from the Action Replay POKEs menu.
POKE 21220,169
POKE 21221,255
POKE 21222,157
POKE 21223,4
POKE 21224,190
POKE 21225,76
POKE 21226,236
POKE 21227,82
After entering those POKEs, return to the game by pressing F3 from the Action Replay / Retro Replay menu. Test your game and you'll see looping enemies in place.
DETECTING AN EN ENEMY HIT BASED ON OBJECT TYPE
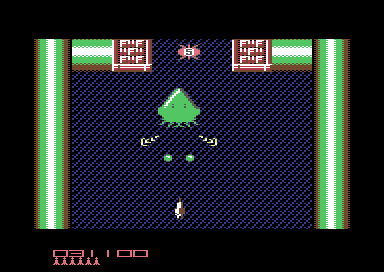
Above, shows a very basic example of storing SEUCK object, player type and score types into variables. It is now time to put this into proper use. If you are using a machine code monitor instead of an assembler, then you will need to set any free addresses as pointers object_killed, player_no and score_type, as well as ExplodeTimer
Here's a fun example on how to detect an enemy hit as a full boss that consists of six enemy objects (Actual enemy 1 to actual enemy 6). This is how you can destroy all enemies on screen.
Checking enemy by sprite object (This subroutine still needs to be linked at $55c3)
KillObject lda $bc00,y
sta object_killed
;Check object ID hit
lda object_killed
cmp #23 ;Object number - actual enemy 1
bne not_boss1
jmp doit
not_boss1 cmp #24 ;Object number - actual enemy 2
not_active bne not_boss2
jmp doit
not_boss2 cmp #25 ;Object number - actual enemy 3
bne not_boss3
jmp doit
not_boss3 cmp #24 ;Object number - actual enemy 4
bne not_boss4
jmp doit
not_boss4 cmp #25 ;Object number - actual enemy 5
bne not_boss5
jmp doit
not_boss5 cmp #26 ;Object number - actual enemy 6
bne not_boss6
jmp doit
not_boss6 lda $bd06,y
rts ;Exit routine
;Boss enemy object detected destroy it
doit lda #$0a
sta ExplodeTimer
lda $bd06,y
rts
object_killed !byte 0
player_no !byte 0
score_type !byte 0
Explode_Timer !byte 0
For the actual boss explosion / smart bomb routine please look at "Destroying Enemies in One Go"
DETECTING AN ENEMY HIT BASED ON SCORE
(This subroutine still needs to be linked at $55c3)
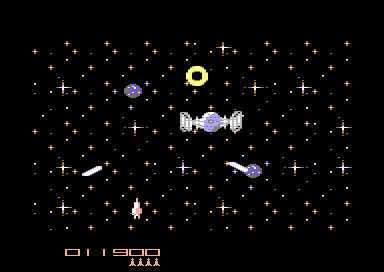
Sometimes it can be quite complicated to declare an object type which you want to have a special feature as there could be many objects. The alternative option would be to use a unique score type instead of an enemy type. Scores are formed by using a single byte (VBLANK). These are read from the score type at $bc06 and gets stored to a pointer. We then check the pointer to see if it equals a specific value. Some basics: 01 equals 10 points, 02 equals 20 points, 10 equals 100 points, 100 equals 1000 points and 250 equals 2500 points. So basically, what needs to be done to trigger a feature is to detect one of the score values picked by you. This following example is similar to the above example, but this time it checks for any enemy that has a score that consists of 2500 points.
KillObject lda $bc06,y
sta score_type
;Check object ID hit
lda score_type
cmp #250 (or use $fa)
bne not_boss
jmp doit
not_boss lda $bd06,y
rts ;Exit routine
;Boss enemy object detected destroy it
doit lda #$02
sta ExplodeTimer
lda $bd06,y
rts
score_type !byte 0
ExplodeTimer !byte 0
player_no !byte 0
For the actual boss / smart bomb explosion routine please look at "Destroying Enemies in One Go"
If you wanted to, you could make different power up types, such as increase the player's speed, or bullet speed. Change a bullet frame, etc. Remember to keep $BD06,Y at the end of the power up process code. Okay, assuming you want to make actual power ups, for the player. You can easily refer to Jon Well's "Secret SEUCKcess Part 3". Where he gives out a memory map of the player's speed, and bullet pointers.
Click here for main Menu
Object Transformation:
Used in: Zap Fight by Alf Yngve (Psytronik)
(Make sure you read Power Ups and Detecting an Enemy Object Hit first)
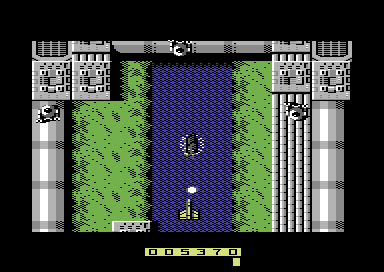
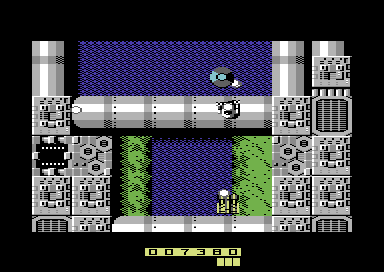
Say you wanted to change the shape of the player or a bullet, when making a power up, which increases the player or bullet, itself. The game Zap Fight used the player/bullet frame transformation. When doing a power up like this you would need to set up a table of 18 bytes (Unless you game uses just one frame). You will need to read from the sprite value in SEUCK, and store it into a table, consisting of 18 bytes. For example in Zap Fight. The player transforms its ship after it boosts firepower:
WITHOUT FRAME TABLE:
BoostFirepower1
lda #BulletSpeed1
sta PlayerBulletSpeed
ldx #$00
BoostFrame1
lda #124 ;Sprite number for single framed object (for player)
sta PlayerFrame,x
lda #82 ;Bullet number for single framed object (for bullet)
sta BulletFrame,x
inx
cpx #18
bne BoostFrame1
lda $bd06,y
rts
WITH SPRITE FRAME TABLE (18 BYTES):
Please note that if you are using directional/directional hold mode for the object which should transform, make sure you copy the sprite values for each frame from the table - like you would in a table, which consists of 18 frames (anim type 18). Don't copy the table from the Direction/Directional hold mode, otherwise the table in the code will be inaccurate.
BoostFirePower1
lda #BulletSpeed1
sta PlayerBulletSpeed
ldx #$00
BoostFrame1
lda PlayerTable1,x
sta PlayerFrame,x
lda PlayerBulletTable1,x
sta PlayerBulletFrame,x
inx
cpx #18
bne BoostFrame1
lda $bd06,y
rts
;Set values from table by referring to the 18 sprite values in SEUCK.
PlayerTable1 !byte 000,000,000,000,000,000
!byte 000,000,000,000,000,000
!byte 000,000,000,000,000,000
PlayerBulletTable1
!byte 000,000,000,000,000,000
!byte 000,000,000,000,000,000
!byte 000,000,000,000,000,000
Click here for main Menu
Adding an Invincibility Cloak to the player and fairer player spawning
By Richard Bayliss
When playing a SEUCK game, it is much easy to discover that during game play, there are some issues of the player spawning on to a deadly background at times and you just cannot move the player off the deadly background, and just allow it to die. This makes game play unfair to the player, and some game developers accidentally make a fault where a player gets stuck while respawing. In this chapter. We are going to be making a much fairer game play, and allow the player move freely while respawned. Also we are going to create a shield power up
First of all some basics. With sprite / background collision. You should take a look in SEUCK at your game project, to view the background collision char. Number, as that would be vital to note down when coding a shield routine. The idea is in shield and spawn mode, the player should be able to fly freely over the deadly background, and once out, restore the player back to its state.
LDA #$FF ;(COLLISION WITH CHAR 255)
STA $40AC ;Player 1 to background
LDA #$FF ;(COLLISION WITH CHAR 255)
STA $40BF ;Player 2 to background
This feature can easily be triggered to allow the player fly over deadly background.
But what if you want the player sprite/enemy sprite protection? Well, here's the genious part to it.
$4B03 to $4B05 reads player 1's sprite/sprite collision death activation code.
$4E12 to $4E14 reads player 2's sprite/sprite death activation code
If you wanted to make the player invincible you'd need to POKE out $4B03-$4B05, and/or $4E12-$4E14 with #$ea (234)
Load in a SEUCK game and try using the POKES option in your cartridge and type in the following pokes:
POKE 19203,234 ;FOR PLAYER 1
POKE 19204,234
POKE 19205,234
POKE 19986,234 ;FOR PLAYER 2
POKE 19987,234
POKE 19988,234
OR ALTERNATIVELY IN A M/C MONITOR create an installation source, which does as follows say we put it at $8d00
> 8D00
LDA #$EA
STA $4B03
STA $4B04
STA $4B05
LDA #$EA
STA $4E12
STA $4E13
STA $4E14
Then add
JMP $4245
Now in the M/C monitor, type G $8D00 and play the game. You'll notice that both players have invincibility against enemy sprites.
However, that is just the basics of protecting the player by allowing it to fly over background and protect itself against alien attack. Now what about putting it to the test in a SEUCK game?
Well, we have to create some subroutines, in which creates a temporary shield and also protects the player from enemy attack and allow the player to fly over the background. Also we need to control the duration of the protective shield, for whenever a player either spawns, or maybe come in to use with a power up. A small example for spawning a player, with a temporary shield would look a little something like this:
(A small example to try):
At $41A4, change JMP $4260 to another address, for init a temporary shield, and allow free flight over background. For example, say we use $8D00 (Although a different address can be used)). This example is for a 1 player only game, where player 1 is the target player.
initgame jsr initshield ;Call subr. initshield
jmp $4260 ;run main game.
initshield lda #255 ;Starting counter for
sta shieldpointer ;shieldpointer
lda #255 ;Target collision char as 255 for player 1
sta $40ac ;Player to background collision
lda #$ea ;Make player invincible to enemy attack
sta $4b03
sta $4b04
sta $4b05
rts
Also at $4b6c add jsr initshield
At $4503, add a jsr enhancements routine. Then as the new routine add the new code
enhancements
jsr shieldtest ;Call shield test routine
jsr $5c94 ;SEUCK SFX player
rts
Now let's do a shield test routine
shieldtest lda shieldpointer ;Countdown shield check
cmp #0 ;has the shield pointer reached 0?
bne shieldok ;Shield is still active and has not reached 0
lda #(collision char) ;Restore background collision char
sta $40ac
lda #$ad
sta $4b03
lda #$be
sta $4b04
lda #$5d
sta $4b05
lda #(default player colour)
sta $2c93
rts
shieldok dec shieldpointer ;Decrement shield value by 1
ldx flashpointer ;Call flash pointer to flash player
lda shieldtbl,x ;colour table
sta $2c93
inx
cpx #shieldtblend-shieldtbl ;Length of table
beq resetflash
inc flashpointer
rts
resetflash ldx #$00
stx flashpointer
rts
shieldpointer .byte 0
flashpointer .byte 0
shieldtbl .byte $09,$02,$08,$0a,$07
.byte $01,$07,$0a,$08,$02
shieldtblend
I have provided an example SEUCK game I made specially for this feature. Also there are a few samples of code included in the D64, which can be run from Turbo Assembler (Your C64 1541Ultimate, VICE or Ultimate 64 cartridge plugin needs to be the Final Replay with Turbo Assembler + Codenet (TASM/Codenet), one specially made for 2 player games. . This was already mentioned in the hi-score detection chapter. The final code sample on the .D64 features the full enhancements added to the game, to make it even more playable. The only thing not changed is the front end. :)
ROCKET 'N ROLL
Rocket 'n Roll is a zany blast 'em up for 1 or 2 players, in which you have to try and fly a Rocket safely into 4 dangerous zones in order to take a trip of a life time... To the Sun! :). During play, you will encounter assorted aliens, which just don't like rockets very well and try their damned hardest to stop you from flying over their territory. Luckily, your rocket consists of a super fast ray gun. Firing a few hits will knock those aliens flying (or perhaps making them toast). You have to fly through 4 different zones. There are as follows: Space, above and beyond, alien water planet, bubble planet, and the planet of death. Avoid hitting deadly obstacles. Collect shields to allow free flying and also protect yourself from aliens.

TASS Code snippets are documented.
View TASM/CODENET shield code 1 (1 player only)
View TASM/CODENET shield code 2 (2 players)
View TASM/CODENET Rocket 'n Roll full game enhancement code
Click here for main Menu
Destroying all Enemies on screen in one go
By Jon Wells
Source: Twin Tigers by Alf Yngve (Binary Zone PD). Make sure you read Power Ups and Detecting and Enemy Hit first, as it goes through the objects hit. The same source needs to be used for the feature.
So here's a few pointers that will help you to do it. For a start you should make sure that the linked boss you want to blow up is the only enemy present on the screen as the routine will kill all enemies (this can also be tweaked to use as a smart bomb!), I used this code in Archetype for the potion that kills all on-screen enemies!
There is an alternative to this trick. The SMART BOMB trick. In which you use a similar subroutine from the previous chapter. If the enemy equals the object that should generate such explosion. Set the ExplodePointer as $0a.You can easily do this by copying the players score into a temporary data score every v-blank, then, before you refresh the next score on the next v-blank, check the present player score with the stored previous score. If there is an increase that matches the boss sprite death points then you'll need to set the explode_timer to any number above zero for v-blank number of frames that is enough to kill all enemies. For example setting explode_timer to $0a will make an attempt to explode all enemies for the next 10 v-blanks. That should be enough to kill all enemy sprites...Anyway, here's the main explode routine that you'll need to add...
IMPORTANT: If you use this feature on boss enemies. Please ensure there are no other small enemies or collectable items amongst the boss. This code operates the in-game SMART BOMB effect.Explode_Init_loop: ; call this every v-blankLDA explode_timer ;Check if explode_timer = 0BNE Turn_Explode_on ;Else keep it switched on
LDA #$00 ;Switch off the explosion timer
STA explode_timer
LDA #$4C ;Restores the standard/sideways
STA $55E1 ;SEUCK scoring features after a
LDA #$A5 ;full linked enemy explosion
STA $55E2 ;(Store JMP $5BA5).
LDA #$5B
STA $55E3LDA #$08STA $531DLDA #$BD ;Restore SEUCK scoring pointersSTA $5568 ;back to normal, until yet anotherLDA #$F7 ;boss / smart bomb effect has beenSTA $5569 ;featured.LDA #$B6STA $556ARTSTurn_Explode_on:DEC explode_timer ;Decrease the explosion timerLDA #$00STA $531DLDA #$4CSTA $5568LDA #<Explode_Main_address ;Low byteSTA $5569LDA #>Explode_Main_address ;Hi byteSTA $556ARTSExplode_Main_addressLDA #$60STA $55E1JSR $55B6LDA #$4CSTA $55E1RTS
explode_timer !byte $00 ;Pointer to time explosion effect
In some games, such as Zap Fight, it is possible to also add a timer, which will flash the screen. For example (To be linked with the loop which contains the enhancements code:)
DoExplodeFlash
ldx ExplodeFlashPointer
lda ColourTableToReadSet1,x
sta $d021 ;Background Colour
lda ColourTableToReadSet2,x
sta $d022 ;Background Multi-Colour 1
lda ColourTableToReadSet3,x
sta $d023 ;Background Multi-Colour 2
inx
cpx #$0b (Hex Amount of colours to read = 12)
beq StopFlash
inc ExplodeFlashPointer
rts
StopFlash ldx #$0a (Hex Last but one position for pointer = 11)
stx ExplodeFlashPointer
rts
;Colour table ... Make sure the Last byte matches the colour of your background
ExplodeFlashPointer !byte 0
ColourTableToReadSet1 !byte $09,$02,$08,$0a,$07,$01,$07,$0a,$08,$02,$09,$00
ColourTableToReadSet2 !byte $02,$08,$0a,$07,$01,$07,$0a,$08,$02,$09,$00,$0b
ColourTableToReadSet3 !byte $08,$0a,$07,$01,$07,$0a,$08,$02,$09,$00,$0b,$0c
Note from Richard. The subroutine needs to be linked to a subroutine linked at $4503 in order to set the explosion up. Under the main enhancements code where you have the SFX routine. Add JSR Explode_init_loop. Now referring to the power up listing in the chapter before hand. This trick to destroy all sprites can be done, if the explode_timer is set inside the power up routine. BEWARE... If you use the routine as a boss explosion. Make sure there are no other enemies or collectibles on screen otherwise they, too will explode. And the player might gain another power up or something like that (if the feature is implemented).
Click here for main Menu
Background Animation and Parallax Scrolling
By Richard Bayliss, Eleanor Burns and Jon Wells
Source: Renovator by Simon Peterson
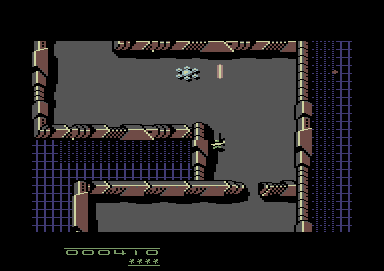
There have been some requests on background animation, where charset animation is concerned. In this chapter, we take a look at scrolling single chars inside a SEUCK game. We will be looking at scrolling the char upwards, downwards, left, right and also a push/scroll parallax operation.
There are 8 bytes inside a single char, and the value of the char is noted down. The background char address is set at $f800-$ff00. Where there are 254 chars, instead of 256.
To calculate the address for where the char lies. In a M/C monitor, you type:
N CharNo*8+$f800
Say for example in the game Renovator, the characters that represent a blue void are chars 252 and 253. To work out the char value 252 inside a machine code monitor, we type:
N 252*8+$F800
The result is:
$FFE0
Now what about the code, regarding scrolling chosen background character?
Assuming you know $4503 and adding enhancement code. Simply add JSR before adding RTS. So that a new subroutine can be called. Which of course will be this one. For example
At $4503, in assembler add something like:
jsr enhancements
... rest of code
enhancements
jsr scroll_char_up ;can be modified to a different subroutine
jsr $5c94
rts
Scrolling the char upwards
By Richard Bayliss
Example: Night of the Valkyrie by Eleanor Burns
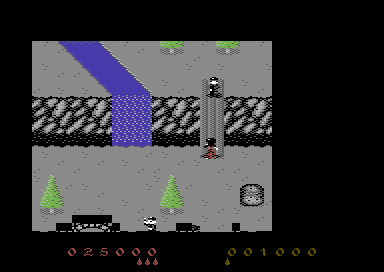
This trick can be used for making a parallax scrolling effect, in a SEUCK game. Say for example you created a space game, which used just a plain black background, and replace the background char with something more exciting? Maybe add a subroutine, where a scroll moves at the speed of 2. Pick out a single char, and then that single char upwards to give a an parallax effect. This trick is perfectly brilliant. The trick would also be good for scenarios where a player is traveling along on a conveyor belt, while the screen is scrolling. BEWARE, pausing the game will also scroll the chars up. In oder to fix this problem, I suggest you refer to the Push/Scroll Parallax feature.
scroll_char_up
lda $ffe0 ;Get first byte of selected char (Char number 252)
sta chrtemp1 ;store it to a temporary byte (any free byte that is available in memory i.e. $6900)
ldx #$00 ;Starting loop to move bytes backwards.
chrloop1 lda $ffe1,x ;Fetch next byte of same char
sta $ffe0,x ;Store to current byte of char
inx ;Move on to the next char byte
cpx #$08 ;Until reached the 8th char byte
bne chrloop1 ;loop
lda chrtemp1 ;Fetch the stored byte of selected char
sta $ffe7 ;Store it as the last byte
rts
If you find the scrolling is just too fast, and you want to slow it down. A simple delay subroutine (using a delay pointer) will help show things down a little. For example in scroll_char_up before the main code add:
lda scrdelay
cmp #$03 ;Speed of delay limit..... Can be changed if you need to
beq docharscroll ;If limit reached, move to docharscroll subroutine
inc scrdelay ;Increment delay value
rts ;Return To Subroutine
docharscroll lda #$00 ;Reset scroll delay
sta scrdelay
... NOW COPY THE ABOVE CODE char_scroll_up
Scrolling the char downwards
By Richard Bayliss
Example: Trash Course by Inferior
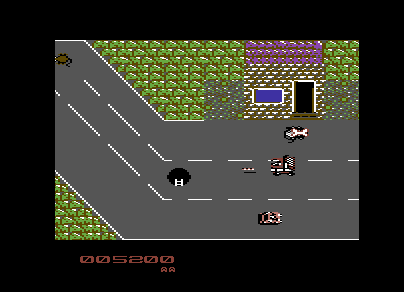
It is also possible to add a downwards scrolling effect to your characters. All that you'd need to do is reverse the process. Simply by fetching the last character, store it, call a loop and then push all the bytes of the character forwards. Then fetch the temp byte and store to the first character again. The code below shows you this trick - although it will not give you any sort of parallax effect :). This is best used for things like flowing rivers, waterfalls, etc.
scroll_char_down
lda $ffe7
sta chrtemp1
ldx #$07
chrloop1 lda $ffdf,x
sta $ffe0,x
dex
bne chrloop1
lda chrtemp1
sta $ffe0
rts
Scrolling the Char to the left / right
by Richard Bayliss
Example: Dodo's Deep Doodoo by Carl Mason
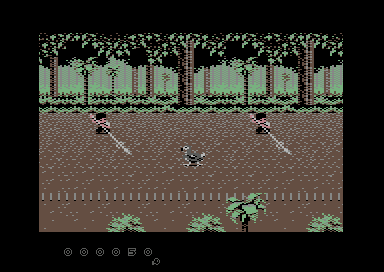
You can also scroll the char to the left, simply by using ROL. This can be used a number of times to increase scrolling speed for the single char. This effect is best used with single colour hi-res characters, otherwise the scrolling could look odd..
scroll_char_left
ldx #$00
scrloop3 lda $ffe0,x
asl ;Repeat the two lines to increase
rol $ffe0,x ;char scroll speed.before adding 'inx' - rol = rotate to left
inx
cpx #$08
bne scrloop3
rts
You can also rotate chars to the right inside a SEUCK game, using the similar, but also by rolling the 8 bytes of a characters the opposite direction.
scroll_char_right
ldx #$00
scrloop4 lda $ffe0,x
lsr ;Repeast the two lines to increase
ror $ffe0,x ;char roll speed.- ror = rotate to right
inx cpx #$08
bne scrloop4
rts
Push/Scroll Parallax Technique
by Eleanor Burns, Richard Bayliss and Jon Wells
Example which uses this trick: Laser Hawk by Shaun Coleman
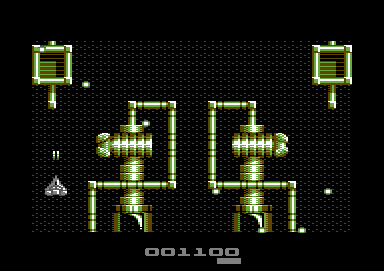
If you wish to use this feature, it is best used with scroll speed 2 (Push screen 2) with the scroll_char_up subroutine. If push scroll speed 2 is used, no delay subroutine to control the speed of the upward scrolling would be required. Therefore the trick will work nicely. This trick can also be used for games which use SCROLL as well as PUSH. So that any time the background stops pausing, the rolling characters should also stop. Here's how the trick works:
The VIC2 Vertical Screen Position - $D011, is checked to see whether there is movement or not. Basically if $D011 does not equal the value of the last tempbyte (tempbyte 2) the char rolling should still take effect. It is also possible to use this feature in Sideways SEUCK, but instead of using VIC2 Vertical Screen Position, use VIC2 Horizontal Screen Position - $D016, and use the charset rolling technique.
lda $d011
cmp tempbyte2
bne scroll
rts
scroll ... see scroll_char_up, but before rts add ...
lda $d011
sta tempbyte
rts
Click here for main Menu
Making Platform Games with SEUCK
by Eleanor Burns
A lot of people have been bragging about the lack of possibilities of what can actually be done with the SEUCK engine. Of course we have a frame work, with the good old SEUCK Redux - With that anything is possible. However, if you are not too familiar with the ACME cross assembler, and you wanted to make SEUCK games that run on a standard SEUCK engine, but wanted to implement code to make the player use a platform game style engine in Sideways SEUCK via an Action Replay Cartrirdge. With special thanks to Eleanor Burns, the impossible has now become possible. Here's her amazing tips for this.
The first step will be to reroute the code from the SEUCK main game code, to custom code. Then create the custom code which will check the jump counter value and then perform various other operations depending on joystick control and also player area size. It is generally possible to make a float 'em up style game with Sideways Scrolling SEUCK - Simply by creating an increment of the player's Y position - until, of course it reaches a collision background. Eleanor's idea is much better. Check this out :)
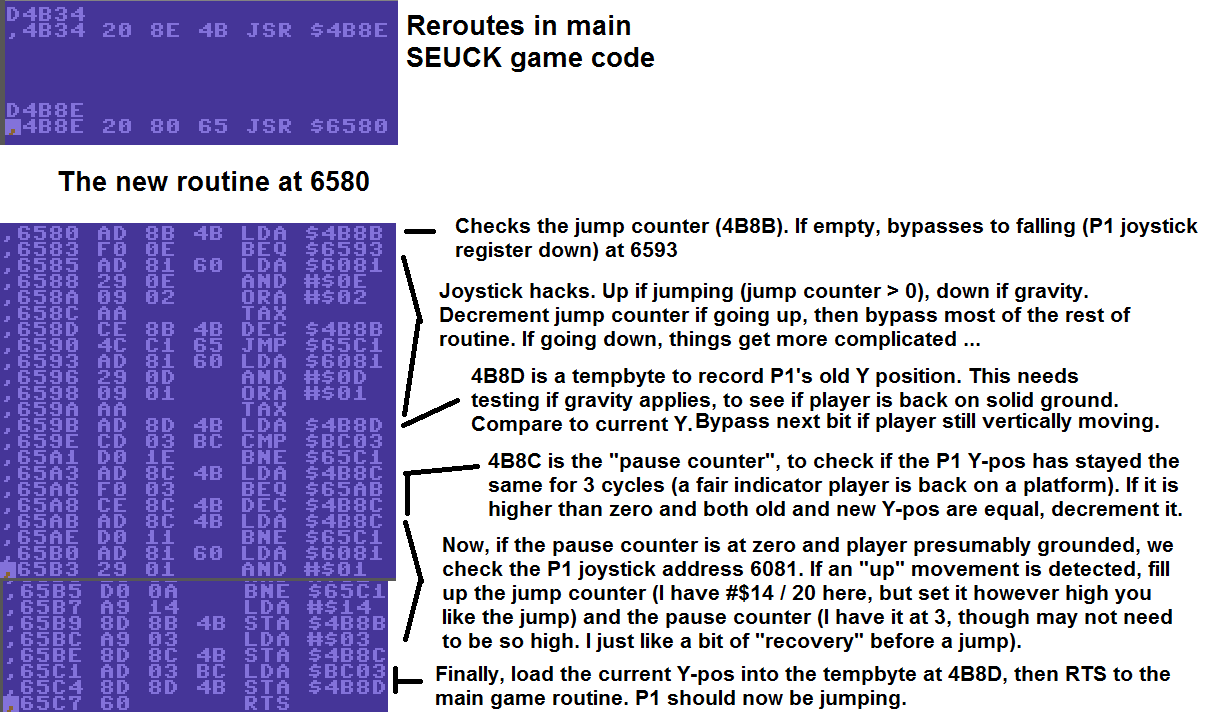
Example jump download available
Click here for main Menu
Flip Screen with SEUCK (Continued from jump example)
by Eleanor Burns
The accompanying demo shows a simple layout of three screens in an L-shape, thus showing the possibility of controlled flick-screen movement in all 4 directions using a new subroutine to manipulate SEUCK’s level timers, map settings, and level redraw feature. Before beginning this, however, it is necessary to make changes elsewhere in the code.
In order to use still screen levels as persistent, rather than timed (as is standard for SEUCK), we must reprogram existing code. Go to $469F and change the instruction to “LDA #$01.” This tells SEUCK to stop counting spaces between seconds, so there is no delay before a redraw. Then change the instruction at $46A9 to “RTS.” This stops SEUCK from counting down altogether. Now, the level will only redraw when we decide (according to any trigger we are to set – in this case, player screen position).
Also notice how I have set the levels in the SEUCK editor. Level 3 is doing all the hard work, and is the one which will be re-used throughout the game, its map settings ($B784 and $B786) changed with each change of room. These settings can be 0-255, and are counted in background blocks. Since each screen is five blocks high, that allows for a map of up to 51 still screens. Level 2 is just used for redraws, so make sure it is set accordingly. Its location is irrelevant. Level 1 is not used at all: in a finished game, I would use it for a “get ready” screen where I would reset all new variable, but in this demo it does nothing, so make sure when testing the demo to always start on cheat mode (or the player will just materialise in empty space).
This demo already has a platform jumping routine programmed in at $1980, with both players linked. That code is explained separately (and is thankfully much quicker to implement). It is important to note two of its settings when doing flick screen, though: the jump counter (upward momentum) at $4E9B and the jump recovery counter (checking if player without momentum has held the same y-pos long enough that they are on a platform and not falling) at $4E9C.
When linking two players this way, it is important also to unify their char collision coordinates (or the top half of a linked player does not necessarily know that its bottom half has touched a platform, leading to glitches). I do this by giving player 1 player 2’s char collision settings (Make the following program changes: $4A8B LDA $BC32, $4A8E LDA $BC31, $4A91 LDA $BC33. If you’d rather make player 1 the main “collision” player, program $4D9A LDA $BC02, $4D9D LDA $BC01, $4DA0 LDA $BC03 instead). You can also unify their directional animations (recommended, if using that mode) by saving the X-value you get after the jumping routine into a tempbyte ($19CC here) and feeding it into the other player’s joystick routine (I do this with the following changes: if player 2 is “main” then $4B8D LDA $19CC, $4B90 TAX. For making player 1 the main, this would go at $4E9D instead).
Now, for the flick screen code. Please refer to the screenshot for the addresses. As with most SEUCK extra coding, this is rerouted from $4503 with a command “JSR $6580”, so the first thing we must do is type “$6580 JSR $5C94” to let SEUCK do its normal things. Now for the new stuff …
$6583 - $6595: bolts player 1 onto player 2 with a 21-pixel offset (15 in hex) to make a character two sprites high. In a finished game, this would require a linked death routine as well (cf. “spawning players at last position after dying” in SEUCK School).
$6598: Just jumps to the address where the main routine is. For unclear reasons, it is necessary to finish with the “smart bomb” routine, but in the interests of getting it out of the way I just decided to branch here (so I could do it first, but run it last).
$659B - $65EE: The “smart bomb” routine, from SEUCK School (http://tnd64.unikat.sk/SEUCK_School.html#DestroyEnemy). Very important, this will clear the screen of all unwanted sprites before redrawing a new one, so nothing will carry over as the player flicks to a new screen. In the game, I could also use this as a standard bomb, or for solving puzzles. The “timer” for the bomb (i.e. how many v-blanks to run the routine in order to maximise effectiveness) is a tempbyte, $19CD.
$65EF - $66B3: The bulk of the screen redraw code is four positional checks to see if the player has reached any of the screen edges. At maximum player area (in SEUCK’s player limitations), the edges correspond to the following hex numbers: top edge = 32, bottom edge = E5, left edge = 16, right edge = 33). Whenever player is not at one of these coordinates, we can branch past a chunk of code and onto the next (with CMP, BNE commands). If, on the other hand, they are, the player is teleported to the opposite screen edge, though not quite to the furthermost point (to avoid an instant redraw back). The “almost there” hex coordinates are 33, E4, 17, and 42. When changing x-position, it is also important to change the player’s X-MSB ($BC02 for P1 or $BC32 for P2). For the left side it should be 0, for the right side it should be 1.
After the teleport, take the changed coordinate value(s) and save it / them into a tempbyte (Here, I am using $19CF for old X, $19D0 for old Y, and $19D1 for old X-MSB). This is necessary as player is going to be frozen during the redraw (and it is useful, in any case, to have that option at other times). Also, set to zero another variable I call the “redraw boolean” ($19CE). This will later be used to tell the program it is time to flick screens. Also, the bomb timer ($19CD) needs to be filled. I give it 4 v-blanks to clear all sprites, which seems sufficient (More would possibly be more reliable, but the more you give it, the more delayed the transition).
Next, we need to alter level 3’s map positions to find our new screen. For this demo (and, hopefully, game), I envision a 40-screen map in a 10x4 pattern. Moving right moves one screen ahead (or five blocks on the vertical SEUCK map), moving up moves 10 screen ahead (or 50 blocks). Vice versa for left and down. I use a DEY loop in each of the four position checks, tied to level 3’s map settings ($B784 and $B786), to find the right screen (32 = 50 in hex).
After this is done, we need to set the level pointer back to level 2 (by putting a value of #$0E in $5DC9). We are now ready to activate the changeover …
$65B6 - $66DC: Check that boolean at $19CE to see if it’s set to zero. If it isn’t, everything is running normally and the routine is bypassed. If it is, a redraw is in effect, and we now need to check the bomb timer $19CD. If that’s higher than zero, the old screen is still being wiped, so freeze the player (feed those old coordinate tempbytes $19CF-D1 into the current player positions) and bypass the final redraw. If the timer is zero, proceed to the redraw: deactivate the boolean (feed a value greater than zero into $19CE) and then knock the main level timer $408D down to zero.
Almost done, but in the interests of neatness …
$66DF - $66E8: If a redraw is in effect and the player is detected at E4, thus meaning they are moving up a screen, it’s a good idea to give them some more jump momentum, as they will have lost a little during the wipes. This just puts a value of 32 (hex 20) into the jump counter at $4E9B. It’s a bit of a cheat with physics, but makes sure they have enough momentum to reach the platforms above.
$66EB - $66FA: Saves all current player coordinates into the aforementioned tempbytes in case we need to freeze the player.
$66FD - $6706: This last bit before the RTS simple corrects a bug. As the Y coordinate is frozen during the wipes, the player can end up thinking they are on solid ground and able to jump (which is a big problem if they are actually falling between screens, for example). To avert this, whenever the level pointer is set for level 2 / #$0E (the transition phase), refill the jump recovery counter at $4E9C.
And that’s it. A crude but functional flick screen routine that will enable SEUCK to make non-linear games (possibly of the Monty Mole, Jet Set Willy variety, or Cybernoid, Cyberdyne Warrior stylee if violence and shooting is still one’s preferred thing). One limitation to remember, though: since you are basically bombing all enemies whenever you leave a room, it’s best to forget scoring. Just make survival the goal …
Oh... and here's the full listing
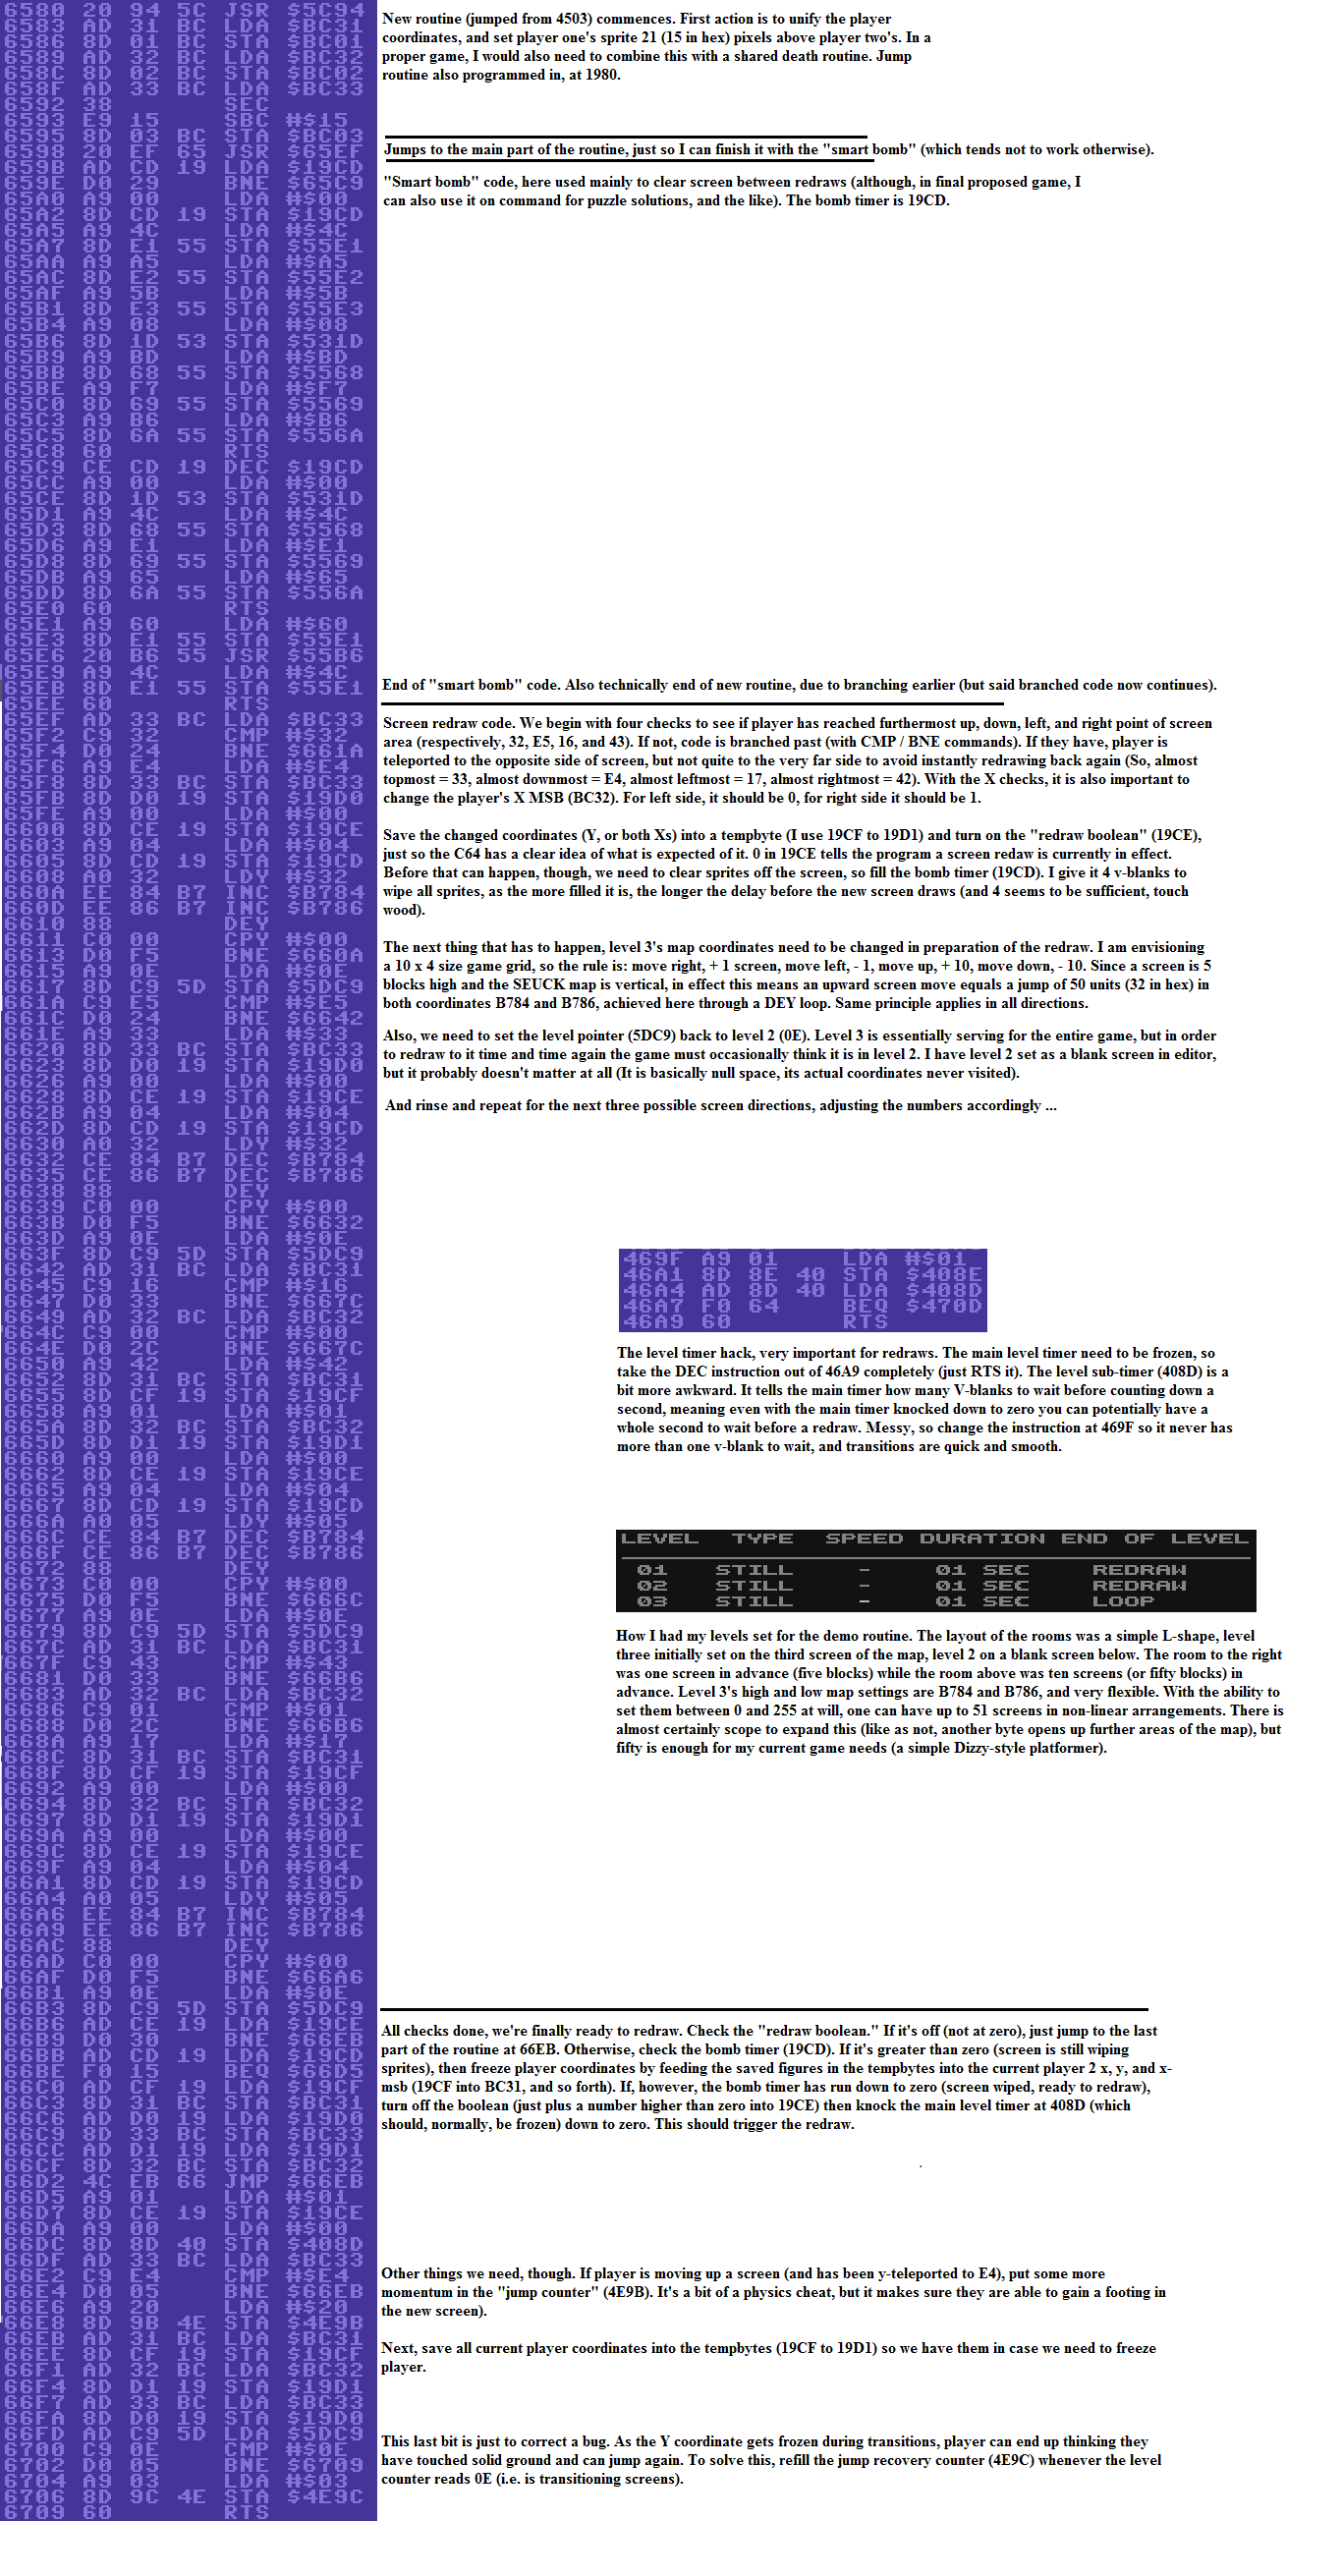
Example Flip screen download available
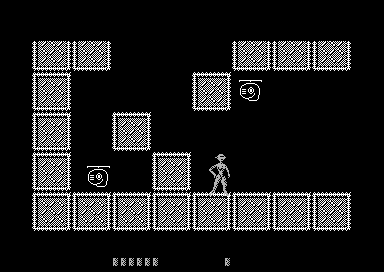
... Additional information, and a quick bug fix:
The code from 66E2 to 66E8 (that refills the jump counter when player detected at the bottom margin during a screen transition) is not always reliable (and it tends to fail further up the map you get, for some reason). A more reliable method is just to put a couple of lines of code to refresh the jump counter (LDA #$20, or thereabouts, into whatever tempbyte is serving that purpose) into whichever of the screen checks registers an upward screen transition (In the example, from 65EF to 6617).

The debug to stop the player from jumping on the bottom edge of the screen is also not especially reliable, but this may be because I set the "teleport" margins too tightly (causing the program, on certain screens, to instantly redraw back again because the player is touching the edge when they shouldn't be). I managed to solve this by just making the player materialise a bit further down from the very top edge of the screen when they fall a screen (In the example, by setting the line 661E to LDA #$3F instead of LDA #$33).

Hopefully this will nicely fix the flip-screen routine for a full game, touch wood ...


Click here for main Menu
Linked Players and Score + Lives Sharing
by Richard Bayliss
Example: Re-Alienator by Alf Yngve
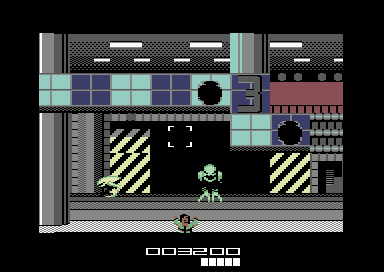
Earlier on in this chapter, I gave you a quick tip on which you could link 2 players with one joystick (POKE 16578,2 or in Assembler LDA #$02 : STA $40C2). SEUCK will display two score panels. Unfortunately however, with linked players it doesn't really make any sense to have two scores. When I was enhancing Alf Yngve's Re-Alienator for a past TND Christmas release update. I needed to generate some code in which linked the player's score data from player 1 with player 2's score panel, along with the amount of lives that had to be deducted. Also, Player 2's score panel sprite needed to be removed. Luckily I still have the Re-Alienator source for you to check out.
First off, here's a simple code routine, which will remove one of the player 2's score sprite, and align player 1's score panel to the centre of the screen. It basically reads the sprite position table, and places the score panel sprites in a different place. It also removes player 2's score panel.
;Remove player 2's status panel, and centre player 1's panel


	ldx #$00
PlotCentreStatus
         lda CentreScorePlot,x  ;Read new position table for score panel
	 sta $5eaf,x 		;Store sprite X/Y position for score panel
	 inx
	 cpx #17
	 bne PlotCentreStatus
  	 ... do rest of code ...

;... at the end of your code, add Actual table for CentreScorePlot

CentreScorePlot
	!byte $03,$89,$07,$a1,$07,$b9,$07,$d1,$07,$77
	!byte $77,$77,$77,$77,$77,$77,$77,$77,$77,$77

Now then. If implemented correctly before your game is run to the front end. The score panel for player
1 will be centered and player 2's score panel is hidden. GREAT! However, shared scoring in
no way has been implemented yet. You would need to add some additional code.

Under the last subroutine (bne PlotCentreStatus) we should create a poke which will force a new
score result, simply by plotting a low and high byte of the calculated shared score.

;Replace player 1's score with the final score added up
;between both players.

	lda #<store
	ldx #>store
	sta $5a2a
	stx $5a2b

Now, what about sharing the score? In the main SEUCK Enhancements in game loop. We create
a subroutine that will share player 1's lives with player 2's lives. Also call a subroutine to calculate
the final score, according to the score of both players (Player 1 and Player 2). The Enhancements
routine should be JSR'd to $4503 (4503 JSR  Enhancements)

Enhancements
	lda $5db8 ;Grab player 2's amount of lives
	sta $5db7 ;Store to player 1's lives counter ... you can also reverse
	          ;this trick if you wish to.
	cmp #$00  ;Life counter = 0
	beq .GameOver
	jsr CalculateScore	;Call subroutine to add p1+p2 score
	jsr $5C94
	rts
.GameOver
	jmp $4245		;Run back to the title screen

Now for the main score calculation.

CalculateScore
	ldx #$05
	lda #$00
clear01 sta borrow,x ;Clear score digits
	dex
	bpl clear01

	ldx #$05     ;We are reading 6 digits
calc01  lda $5ea3,x  ;Read player 1's score
	clc
	adc $5ea9,x  ;Read player 2's score
	and #$0f
	cmp #$0a
	bcc noborrow
	inc borrow-1,x
	sec
	sbc #$0a
noborrow
	ora #$30
	sta result,x
	dex
	bpl calc01

	ldx #$00
calc02	lda result,x
	sec
	sbc #$30
	sta store,x ;Print result on panel
	inx
	cpx #$06
	bne calc02
	rts

Now here comes a table for plotting the score panel points.

borrow !byte $00,$00,$00,$00,$00,$00
store  !byte $00,$00,$00,$00,$00,$00
result !byte $00,$00,$00,$00,$00,$00

Although the example should work on the score panel, there is also another tip you should also
if you're using linked players or twin mode in your own games. You need to generate linked deaths
to player 1 and player 2, unless of course one of the two players is invulnerable. Shared lives should
still take place.

An Alien Autopsy

I have uploaded the complete C64 project Re-Alienator on to this page, should you wish to explore through the game code to see the enhancements working in place. Click the disk icon to download
the complete project and its source code. This is a stunning SEUCK game creation, which was written by Alf Yngve back in 2013, for the TND Christmas 2013 update. This game features score
sharing and lives sharing, and a few other enhancements, including a new front end. If you just want to see just the source in full. Click on download link underneath the disk icon.


Re-Alienator Enhancements Code (C64 Studio/ACME)
Click here for main Menu


Score Sprite hack trick
by Eleanor Burns


here are two identical instructions for plotting the life counters:
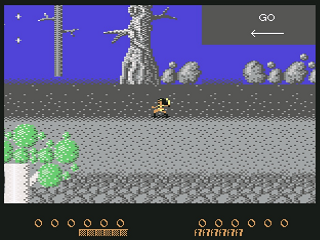
Click here for main Menu
Using MORE than 2 animation frames for player directional movement (for 1 player games only)
By Eleanor Burns
I've long wanted to improve directional animations from the lousy two-frame cycles SEUCK allows, and I had a stab at that in Legion of the Damned 3
by using otherwise useless frame tables as "storehouses" for quickly pasting in extra player frames ('cos whoever needs 8 enemy deaths anyway?).
Then I realised it might be simpler if I just changed player 1's object number, which is even better as it also changes animation speed, though, as in this
demo, it's still better to have the same number of frames in the table, or the animation can get caught on empty frames and make the player disappear until
it cycles again.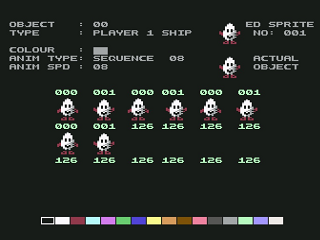
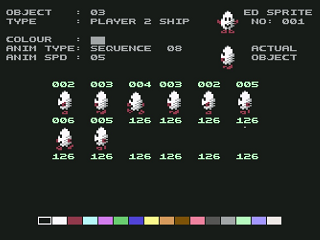
The code:
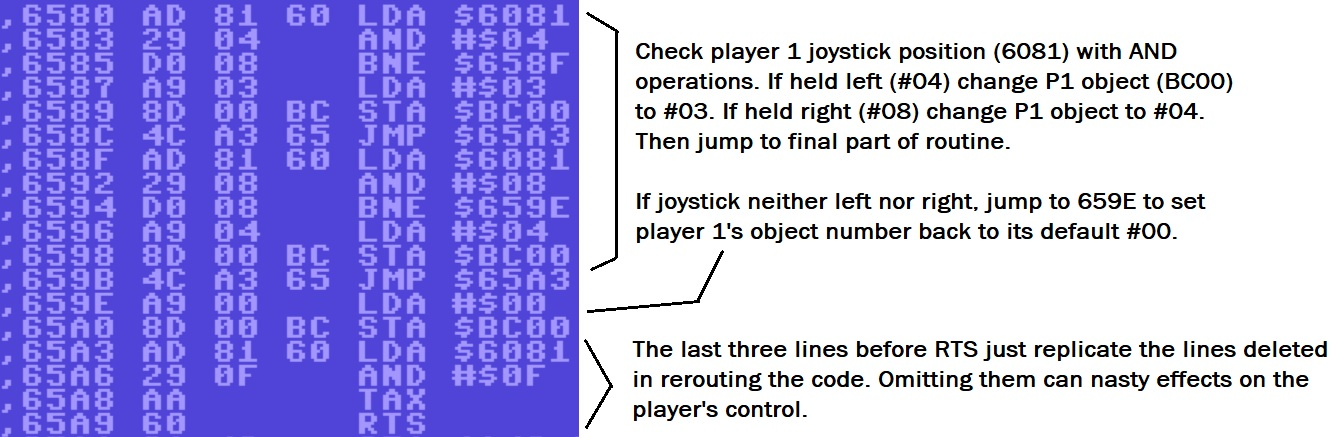
Download example demo and code snippets (Code snippets requre Action Replay M/C monitor)
A quick note on that subroutine: since it's only reading rather than hacking the joystick, one can (and probably should) use BIT rather than AND to make the boolean checks. However, doing so saved me no memory at all in this demo, but it may be worth bearing in mind for longer versions of this, as in a full platform game this will also be the best place to put in the jumping and gravity code.
Click here for main Menu
Background Terrain Trick (Detecting background type)

by Eleanor Burns
Eleanor is back with another trick that might come in handy for developers. By playing around with the char collision routine for player 1 you can customise your ownOne thing to note, though, in its current form this routine can cause problems with solid stopping chars (though it seems to work OK with fatal ones), so I may have to refine it if I can, though it shouldn't be too difficult to approximate a solid check (Save the last "clear" x,y, and x-msb point to tempbytes, reload them back in if player collided with chars over a certain value). Anyway here's the routine that performs the background check and transformation:
terrain effects. First, reroute (to be on the safe side, I unconditionally JMP) to a new subroutine at $4AA7 ($6580 in the example).
Then, at $6580, you can pretty much add in as many char checks as you like, as long as you finish by JMPing to $4AB6. In the example,
CMPs are used to check the char number P1 is in collision with. If it matches up, a simple effect is carried out (border flash or background
flash in this example), if not it branches ahead to the next check or the end of the routine. Instead of these simple effects, though, it
could be used to add in object transformations (say, turn the player into a boat or a half-submerged figure on water chars), alter player
speed (slow on rough terrain), or trigger death as per usual. There will be similar code for P2 around the $4D9A mark, which could most probably
be rerouted through the same subroutine (unless the designer wanted the players to have different responses to the terrain, of course).
Example 1: Background Flashing Trick
The second example is a more practical example of how the routine should be used to effect an
object transformation on different terrain: when the car touches water (CHAR 002), the first sprite
in player 1's object table ($2C80) is switched from SPRITE 000 (Standard Car) to SPRITE 001
(Aqua Car). Vice versa if the car is touching any other char.
In game speed is determined by two separate addresses per player, BC04 for the x axis and
BD00 for the y axis (and for player 2 it seems to be BC34 and BD30). Both need to be hacked
to change speed, and this new version of the demo does that, slowing speed drastically on the
mud, and slightly in the water.
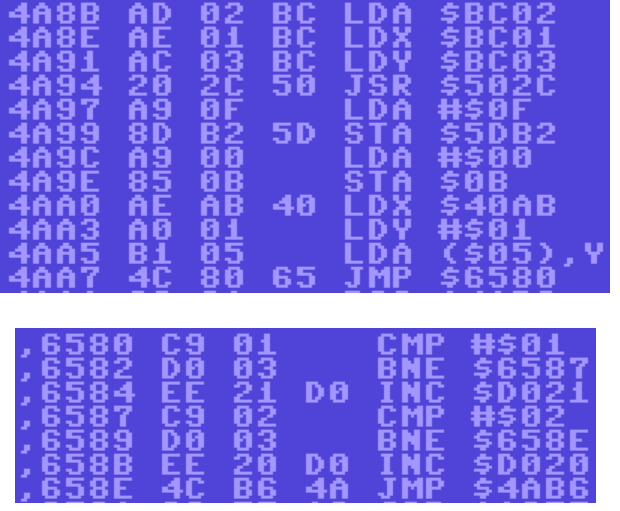
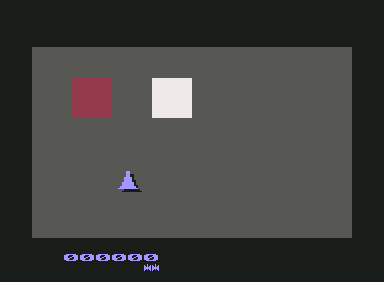
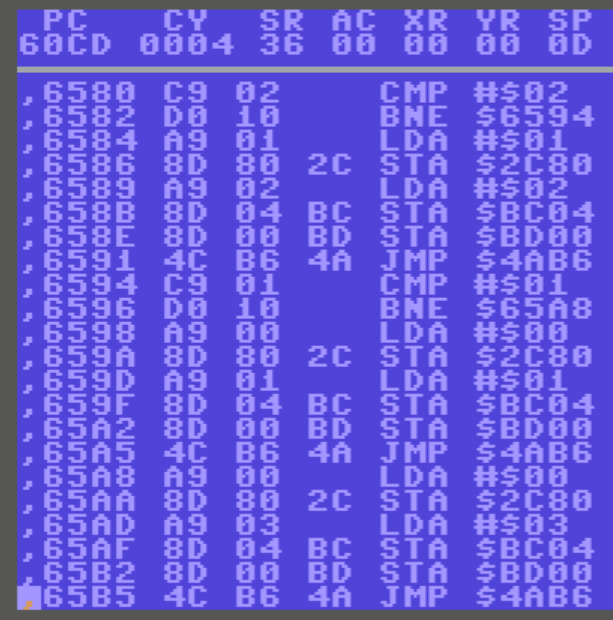
Here's the download to see the example in action
Click here for main Menu
THE SEUCK EDITOR:
SEUCK with Hi-Resolution Sprites
by Eleanor Burns (Tipped from Lemon64 forums)
This might be useful for a few creators (Well, maybe Alf. It's interesting, but still a labour of love):
We already have a poke to display the ingame sprites as hi-res single colour, but the sprite editor still shows them in standard lo-res, making the business of plotting them out and then having to put them in the game to check if they look right rather tedious. However, this can be fixed to an extent...

At $6582 and $672C are two similar "STA $D01C" instructions, telling the VIC-II to put the current sprite (the small preview window in the sprite editor) into lo-res. If using a machine code monitor, I just replace those lines with "STA $D015" which is just identical to the line above it (a tad messy, but it does no harm) and thus does nothing, so the sprite window turns out hires. Now you get an accurate preview of what the hires version of the selected sprite will be.
If doing this with an Action Replay, do it this way:
POKE 25987,21
POKE 26413,21
There are a few limitations: as with using the hi-res mode in the background editor, you will still have to paint the graphics two pixels at a time, and if you interact with the colour select bar it will change the preview window back to lo-res (This is not permanent, though. Just reselect the sprite to put it back in hi-res). Also, it has no effect on the preview windows in the object editor.
Also - very important - this does not change the fact that there is, alas, no mixing and matching of lo and hi-res sprites in SEUCK (so no cool hi-res outlines, alas). Though two hires sprites could be matched together for a single one with better colours, at least.
Also you will need to do this to the game using to enable all hires sprites in game.
POKE 17968,0
SCORE PANEL ENHANCEMENTS
Making new score panels
by Richard
Last updated on 1st January 2023 - Edited sprite score panel rendering tutorial as previously the tips slowed the game down and created more nasty bugs. This update has been improved.
In so many games created using the Shoot Em Up Construction Kit, we have always had a default score panel matrix for our SEUCK games. The panel can be altered by changing the charsets inside SEUCK's very own charset editor (in front end menu). The charset I did for one of my example games, Ray Fish, look something like this:

Of course this may look nice for a score panel for a game before enhancement, however wouldn't it be more nice to actually change the score panel and really make it stand out? Like Jon Wells did for Binary Zone PD's Twin Tigers?

Also Frank Gasking's excellent epic SEUCK creation, Syntetic had a nice status panel made by Jon, which displays 6 sprites for the score, one for the player and one for the lives.

This looks more professional and makes the game stand out even more on the presentation front.
How does SEUCK make a score and lives panel? Well, simply said, it uses a charset to sprite conversion routine, and plots the charset from memory $f400-$f600 and stores it to sprite memory. In 1 player mode, only four sprites are used to display the score panel, in 2 player mode however there are eight sprites shown as the status panel. The sprites are located at $f080-$f240.
We will be looking at doing something similar using my own method. The first section (All sprites score and lives method) will be straight forward in a machine code monitor. The second part (Rendering charsets to sprites) will be slightly more complex and will require an assembler, but of course I will also provide machine code monitor snippets for the second method.
We need all 8 sprites on screen.
There is also a problem where when you start a 1 player game, you will only have 4 sprites being used for the panel. If you were to overwrite that memory with a custom subroutine at $f080-$f240, half the amount of sprites will get displayed. The sprite panel hardware co-ordinates are located between $455c and $456b. (see figure below)
The code above displays the number of sprites that is controlled by the number of players that are enabled during game play. As you spot here $D015 = the number of sprites which can be displayed on screen. Also $D01C is also the value for the sprite multicolour. The number of sprites displayed in the panel are set to not be multicolour, and in 1 player mode, the number of sprites is only displayed as 4.
A quick fun code change
Just for a bit of fun, in one player mode, we are going to try and display both player 1 and player 2's score panel sprites. This can be done simply by replacing the STA $D015 at $455C and replacing it to jump to a free memory location which is not being used. For this example, I am just using a raw SEUCK game to perform this. So I'll place code to display all of the sprites with a small JSR command.
> 455C JSR $6580
Then at $6580 I shall code a full sprite display code: (You don't have to use $6580, you can use any other spare memory to add what you want).
> 6580 LDA #$FF
> 6582 STA $D015
> 6585 RTS
After we go back into the game, the sprite panel displays all 8 sprites.
This is a very good trick to do for a start off because the SEUCK game is currently playing in 1 player mode, and there is also all 8 sprites displayed at the bottom of the screen, for the score panel. One thing we shall do next is a very small trick. Now then. Wouldn't it be interesting if the score panel gets replaced by the very first sprite frame in your SEUCK game.Of course, it sounds like a daft idea, but this is just a little practical exercise in which to make things really interesting. The very first sprite frame for Rayfish is at $C000-$C040.
Before doing anything, alter the code at $4564 and $4566 to enable sprite multicolour mode.
> 4564 LDA #$FF
> 4566 STA $D01C
Next, let's get rid of some of the old SEUCK Score panel code by filling unwanted memory. Simply use your machine code monitor and enter the F (fill) command and fill memory with $60 (RTS). For example: F 4426 443A 60.
This fills memory for score clear routine since we no longer need it:
F 4426 443A 60
This fills memory for the score sprite plot routine:
F 5A25 5AD5 60
This fills memory for Player 1 lives plot routine:
F 5AD5 5B3D 60
Finally, clear out the Player 2 lives plot routine:
F 5B3D 5BA5 60
(Hint, you can fill it with $ea (NOP) instead of $60 (RTS), but you will need to plant an RTS somewhere in the subroutines if you do that).
Type in G 4245 in your Action Replay to run the game again.
Now if you run the game, you will still see the SEUCK score and lives on display but when you play the game, it is not active. This is because the score and lives plot routines have been completely erased. This makes some nice space for making a new score panel. Before we can do this, lets take a look at where to find the old score panel sprites.
Viewing the old score panel sprite in a sprite viewer
Now, let's learn about the old score panel sprites. $F080, $F0C0, $F100, $F140, $F180, $F1C0, $F200 and $F240 are the score panel sprites. The code above is reading 64 bytes (a whole sprite) from the very first sprite in your SEUCK game, and is being copied to the score panel sprites $F080-$F240.Each sprite consists of 64 bytes. (See picture below - The sprite viewer from Action Replay)
Go back to the SEUCK game title screen. We want to do some sprite rendering onto it.
Now let's hunt for the Ray Fish sprite in the Sprite Viewer on the Action Replay. As you can see, the very first Ray Fish sprite is positioned at $C000.
Guess what is going to happen right now. That's right, we are going to attempt to fill all 8 sprites with the Rayfish sprite. Each sprites is $40 bytes (which is 64 bytes in total). Now, where are we going to find the original score panel sprites? Well, keep on scrolling until you get to $F080. $F080 represents the score panel. Both panels are formed of 8 sprites. We are going to replace these with the Ray Fish.
Before doing any sprite rendering we will need to edit the game init routine at $41a4.
Now just for fun, copy sprite 000 from the SEUCK data, and place it onto all 8 sprites where the score panel is based.
First at $41A4 type in the code JMP $6C00
Then at $6C00 type in the code JSR $RENDER and perhaps place RTS below it.
For instance
>6C00 LDX #$00
>6C02 LDA #$00
>6C04 STA $D400,X
>6C07 INX
>6C08 CPX #$18
>6C0A BNE $6C02
>6C0F JSR $6700 ;(JSR $RENDER)
>6C10 JMP $4260 ;(JMP $GAME_START)
Go back into the M/C monitor and type in the following code below:
Now let's go back to the game.
Now, we may have solved this problem, but what about the sprite colours? Well, the status panel colour can easily be found. Check out the routine below. This will automatically make sprite colours in the panel fully become green. If you take a look at the code below, it will create a result with the panel on the left.
WARNING: By using this method above, you can only set the sprites to one colour due to a risk in loss of raster time, resulting the game to crash. If you want to use two main sprite colours - they must be rendered as player 1 and player 2 colour.
Alternatively if the game is for just one player, you can save some rastertime simply by poking the other (disused) player's colour with the current colour of player 1 (or player 2.
This can be done using:
LDA $2C93 ; Colour of player 1
STA $2CCF ; Colour of player 2
or
LDA $2CCF
STA $2C93
METHOD 1: Rendering a score panel using sprites only (This method is recommended for one player games only)
You may have noticed that I managed to get the Rayfish player sprite appear on the screen during game play. Now it is time to add the sprites to the score panel. I have chosen to use the Roboform X2 sprite panel for rendering to the player's score. Of course, when doing this you will need to load in your sprite data into spare memory - then of course copy the new sprite data to where the old score panel sprites are placed. There are two extra bytes free after the eighth sprite. So we can use those positions for all of the numbers.
For this example, I'm placing my number sprites at $7000, and I will be changing the rayfish rendering code to copy all of the sprites into $F080 all the way to $F2C0. (If using Spritepad to do your 10 sprites, you must export those to PRG format).
Using the Action Replay Machine Code monitor, load the sprite data where memory is free using the command:
L "PANELSPRITES",7000
I have chosen $7000 for the rendering.
Now in the code (from the previous part in this chapter), we want to change all of the Rayfish into the score panel sprites. As you may notice there are 10 different sprites that are numbered sprites. However, the two last bytes $F280
Where we did the sprite copy code in the task in the above sub-chapter (Making a new score panel). Let's change the whole routine to be able to copy all of the sprites to the score panel sprites instantly. Basically copy 64 bytes from each of the 10 sprites that build the score panel.
Now let us go back to the game, and check it out.
Absolutely brilliant, the numbers display on screen great. Now how about re-positioning all of the sprites so that they are fully aligned in your SEUCK game?
Well, you may have remembered in the Re-Alienator example where bytes were changed to re-position the sprite panels. If you take a look at the bytes at $5EB0-$5EC8, you will see a list of data which consists of the X, and Y position of the panel sprites. Use M 5EB0 5EC8 as the command to view the tables.

The first 16 bytes all represent the X position and also the Y position for the 8 sprites. You should also take note that the last four bytes in the table (Highlighted in yellow) all represent lower X and Y positions, but these sprites are also using X MSB positions. Now, what we want to do is shift the X values of each sprite so that six are on the left of the screen, and two are based on the right hand of the screen. Edit the X values (leave the 07 alone) in order to re-position the sprites. Change the values to this example below.
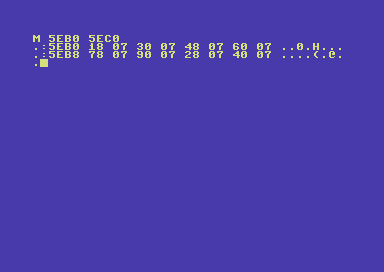
Now let us check the game out.
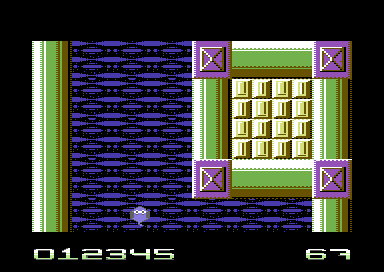
This looks much better, but we are not there yet. There are a couple more things that need to be done. The scoring and lives counter needs to be correct. Before we do anything like that, let us take a look at $5ec0 ... This represents the sprite frame value for the score panel.
Type in M 5ec0 5ec8
^ This is the sprite type table. These make the sprites 0,1,2,3,4,5,6,7 however. We don't want the panel to be like that. Instead, let's manually type in $c2 on six sprites, then $00, followed by a $c7
After you run the game, here is the result.
Great, we have a set of zeros and also a a lives counter. However this is not a functional scoring or lives counter. Something needs to be done to the rendering code, in which to make the score active.
Let's take note of the values for each player:
Player 1 score = $5ea3
Player 2 score = $5ea9
Player 1 lives = $5db7
Player 2 lives = $5db8
Now, you may remember the code we wrote that renders the score panel. Let's add some more code underneath the score rendering subroutine. This where the real fun takes place. It is also the final stage of this score panel (well sort of, because there is one more thing we wish to do afterwards). Go back to the render routine (I used $6700, and where RTS is placed, edit the code to be able to copy the six bytes of the score memory, and paste it to the sprite values).
> 4503 JSR $6900 ; Main loop call (originally playing SFX)
> 6900 JSR $6800 ; Main loop call subroutine, calls score panel workout routine
> 6903 JSR $5C94 ; and sound effects
> 6906 RTS ;Exit subroutine
The main code for an active score panel:
>6800 A2 00 LDX #$00
>6802 BD A3 5E LDA $5EA3,X ;Score player 1 (Score player 2 is $5EA9)
>6805 18 CLC
>6806 69 C2 ADC #$C2
>6808 9D C0 5E STA $5EC0,X
>680b E8 INX
>680c E0 06 CPX #$06
>680e D0 F2 BNE $6802
>6810 AD B7 5D LDA $5DB7
>6813 C9 09 CMP #$09
>6815 D0 05 BNE $681C
>6817 A9 08 LDA #$08
>6819 8D B7 5D STA $5DB7
>681c AD B7 5D LDA $5DB7
>681f 18 CLC
>6820 69 C2 ADC #$C2
>6822 8D C7 5E STA $5EC7
>6825 60 RTS
Before we play the game, there is one more thing that needs to be done. You may remember the one-time rendering code? We need to completely initialise the sprite values and setting the score panel. Let's go to the sprite render routine and add some more code to it, so that the sprites are initialised at the correct amount of points (zero).
Where RTS was placed under the rendering code, let's add a short routine that will initialise the values for the chosen player's score
>6743 A2 00 LDX #$00
>6745 A9 00 LDA #$00
>6747 9D A3 5E STA $5EA3,X ;Score Player 1 (Score player 2 is $5EA9)
>674a E8 INX
>674b E0 06 CPX #$06
>674d D0 F6 BNE $6745
>674f 60 RTS
Now let's play the game and see it working.
Brilliant, the score is working and so is the lives counter. All we need to do is edit the colour
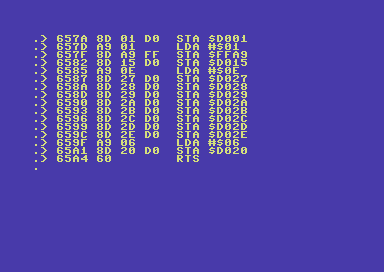
And finally, test the game.
Yes, finally we have made a new sprite panel, and it is functional. How cool is that?
If you want to check this cool enhancement out and of course browse through the code of this game. Please click on the download link below:
The D64 features the old version, with no enhancements, the score panel and also the raw version of the game featuring the enhancement built into the game.
The 3 files are as follows:
Rayfish.RAW - Crunched Raw version of the SEUCK game Ray Fish
Panelsprites - Sprites that form the new score/lives
Rayfish.newpanel - Crunched game with new panel sprites
Click here for main Menu
Rendering a score panel using sprites and charsets (Suitable for 1 or 2 players)
For this part of the tutorial. Most of the work has more or less been done in the previous part (Rendering, filling old score memory, etc). However, there is a big difference. You don't need to update each sprite by frame. Instead, you just display all 8 sprites onto the screen together. The only changes you will need to make are the player score initializing (in the onetime routine) and also the score. You will also need to create a new sprite position table and of course create some code and a table to render the charset onto your sprite score panel.
Here is how the 8 sprites for our new score panel will look like before rendering a score and lives onto the sprites.

And here is the character set for the score/lives/symbols

We want to combine those together with the sprites:
Well, first of all. Something new. You will want to move the sprite MSB value so that all sprites in the score panel will NOT use MSB. Using your machine code monitor change the $D010 value. This can be done at $455F
> 455F LDA #$00
> 4561 STA $D010
Now, if you remember before setting up the sprite positions. We will need to change the table so that the sprites are positioned next to each other centrally. At $5EB0, setup a new position table like this:
That should position all of the sprites.
Now let's load in the sprites and example charsets (Same addresses as before)
Use L "PANELSPRITES",8,7000
then
Use L "PANELCHARS",8,7400
After loading in the panel sprites and the panel chars, we are going re-master the sprite values in SEUCK, so that the panels can display the 8 sprites (2 blank, rayfish logo and 2 blank) into the bottom border.
Great, this is done. Now we will need to edit the onetime code (from part 1) by doing as follows:
> 6700 A2 00 LDX #$00
> 6702 BD 00 70 LDA $7000,X
> 6705 9D 80 F0 STA $F080,X
> 6708 BD 40 70 LDA $7040,X
> 670b 9D C0 F0 STA $F0C0,X
> 670e BD 80 70 LDA $7080,X
> 6711 9D 00 F1 STA $F100,X
> 6714 BD C0 70 LDA $70C0,X
> 6717 9D 40 F1 STA $F140,X
> 671a BD 00 71 LDA $7100,X
> 671d 9D 80 F1 STA $F180,X
> 6720 BD 40 71 LDA $7140,X
> 6723 9D C0 F1 STA $F1C0,X
> 6726 BD 80 71 LDA $7180,X
> 6729 9D 00 F2 STA $F200,X
> 672c BD C0 71 LDA $71C0,X
> 672f 9D 40 F2 STA $F240,X
> 6732 E8 INX
> 6733 E0 40 CPX #$40
> 6735 D0 CB BNE $6702
> 6737 A2 00 LDX #$00
> 6739 A9 00 LDA #$00
> 673b 9D A3 5E STA $5EA3,X
> 673e 9D A9 5E STA $5EA9,X
> 6741 E8 INX
> 6742 E0 06 CPX #$06
> 6744 D0 F3 BNE $6739
> 6746 A2 00 LDX #$00
> 6748 A9 00 LDA #$00
> 674a 9D 00 D4 STA $D400,X
> 674d E8 INX
> 674e E0 18 CPX #$18
> 6750 D0 F6 BNE $6748
> 6752 4C 60 42 JMP $4260
Basically (highlighted in CYAN), you will see the additional code I have added to zero both player 1 and player 2's scores.
Edit the main loop from part 1 at $6900 (which is linked to $4503) to call the new sprite panel rendering code. However make sure you clear out $6800 - $6900 using (F 6800 6900 00), this is because we do not need to use it no more.
>6900 20 00 78 JSR $7800 ;Score char rendering subroutine
>6903 20 94 5C JSR $5C94 ;SEUCK SFX player
>6906 60 RTS
Next, we will type in some pretty lengthy code. It will of course do the main rendering of the player's score panel. It might give you a real headache to type in, but don't worry. I have actually included the code snippets on disk to save you some time. Anyway, in the main loop from part 1, change JSR $6800 to JSR $7800. This is because the long string of code will not fit between $6800 and $6900.
>7800 A0 00 LDY #$00
>7802 BE A3 5E LDX $5EA3,Y ;Score - player 1
>7805 BD 00 7A LDA $7A00,X ;Charset digit table lo-byte
>7808 8D 07 79 STA $7907 ;Self modifying font lo address
>780b BD 0A 7A LDA $7A0A,X ;Charset digit table hi-byte
>780e 8D 08 79 STA $7908 ;Self-modyfying font hi address
>7811 C8 INY
>7812 BE A3 5E LDX $5EA3,Y ;As above, but for next digit
>7815 BD 00 7A LDA $7A00,X ;We do the same for all of
>7818 8D 0D 79 STA $790D ;player 1's sprites.
>781b BD 0A 7A LDA $7A0A,X
>781e 8D 0E 79 STA $790E
>7821 C8 INY
>7822 BE A3 5E LDX $5EA3,Y
>7825 BD 00 7A LDA $7A00,X
>7828 8D 13 79 STA $7913
>782b BD 0A 7A LDA $7A0A,X
>782e 8D 14 79 STA $7914
>7831 C8 INY
>7832 BE A3 5E LDX $5EA3,Y ;Third digit
>7835 BD 00 7A LDA $7A00,X
>7838 8D 19 79 STA $7919
>783b BD 0A 7A LDA $7A0A,X
>783e 8D 1A 79 STA $791A
>7841 C8 INY
>7842 BE A3 5E LDX $5EA3,Y ;Fourth digit
>7845 BD 00 7A LDA $7A00,X
>7848 8D 1F 79 STA $791F
>784b BD 0A 7A LDA $7A0A,X
>784e 8D 20 79 STA $7920
>7851 C8 INY
>7852 BE A3 5E LDX $5EA3,Y ;Fith digit
>7855 BD 00 7A LDA $7A00,X
>7858 8D 25 79 STA $7925
>785b BD 0A 7A LDA $7A0A,X
>785e 8D 26 79 STA $7926
>7861 A0 00 LDY #$00
>7863 BE A9 5E LDX $5EA9,Y ;Now we read score for player 2
>7866 BD 00 7A LDA $7A00,X ;Charset digit table lo byte
>7869 8D 2B 79 STA $792B ;Self-modifying font lo address
>786c BD 0A 7A LDA $7A0A,X ;Charset digit table hi byte
>786f 8D 2C 79 STA $792C ;Self-modifying font hi address
>7872 C8 INY
>7873 BE A9 5E LDX $5EA9,Y ;Second digit of P2 score
>7876 BD 00 7A LDA $7A00,X
>7879 8D 31 79 STA $7931
>787c BD 0A 7A LDA $7A0A,X
>787c BD 0A 7A LDA $7A0A,X
>787f 8D 32 79 STA $7932
>7882 C8 INY
>7883 BE A9 5E LDX $5EA9,Y ;Third digit of P2 score
>7886 BD 00 7A LDA $7A00,X
>7889 8D 37 79 STA $7937
>788c BD 0A 7A LDA $7A0A,X
>788f 8D 38 79 STA $7938
>7892 C8 INY
>7893 BE A9 5E LDX $5EA9,Y ;Forth digit of P2 score
>7896 BD 00 7A LDA $7A00,X
>7899 8D 3D 79 STA $793D
>789c BD 0A 7A LDA $7A0A,X
>789f 8D 3E 79 STA $793E
>78a2 C8 INY
>78a3 BE A9 5E LDX $5EA9,Y ;Fith digit of P2 score
>78a6 BD 00 7A LDA $7A00,X
>78a9 8D 43 79 STA $7943
>78ac BD 0A 7A LDA $7A0A,X
>78af 8D 44 79 STA $7944
>78b2 C8 INY
>78b3 B9 A9 5E LDA $5EA9,Y ;Sixth digit of P2 score
>78b6 BD 00 7A LDA $7A00,X
>78b9 8D 49 79 STA $7949
>78bc BD 0A 7A LDA $7A0A,X
>78bf 8D 4A 79 STA $794A
>78c2 A0 00 LDY #$00
>78c4 BE B7 5D LDX $5DB7,Y ;Player 1 lives
>78c7 E0 FF CPX #$FF ;lives must not be below 0 (1)
>78c9 F0 09 BEQ $78D4 ;else lives cannot update
>78cb E0 09 CPX #$09 ;lives must not be above 8 (9)
>78cd 90 07 BCC $78D6 ;else lives can be updated
>78cf A2 09 LDX #$09 ;set 9 as max no of lives
>78d1 4C D6 78 JMP $78D6
>78d4 A2 00 LDX #$00
>78d6 BD 00 7A LDA $7A00,X ;Read font lo-byte table
>78d9 8D 61 79 STA $7961 ;Store to P1 selfmod lives lo
>78dc BD 0A 7A LDA $7A0A,X ;Read font hi-byte table
>78df 8D 62 79 STA $7962 ;Store to P1 selfmod lives hi
>78e2 A0 00 LDY #$00
>78e4 BE B8 5D LDX $5DB8,Y ;Player 2 lives
>78e7 E0 FF CPX #$FF ;lives must not be below 0 (1)
>78e9 F0 09 BEQ $78F4 ;else lives cannot update
>78eb E0 09 CPX #$09 ;lives must not be above 8 (9)
>78ed 90 07 BCC $78F6 ;else lives can be updated
>78ef A2 09 LDX #$09 ;set 9 as max no of lives
>78f1 4C F6 78 JMP $78F6
>78f4 A2 00 LDX #$00 ;Main font to sprite rendering
>78f6 BD 00 7A LDA $7A00,X
>78f9 8D 67 79 STA $7967
>78fc BD 0A 7A LDA $7A0A,X
>78ff 8D 68 79 STA $7968
>7902 A2 00 LDX #$00
>7904 A0 00 LDY #$00
>7906 BD 00 74 LDA $7400,X ;Selfmod font addr - Digit 1 P1
>7909 99 80 F0 STA $F080,Y ;Render digit to sprite
>790c BD 00 74 LDA $7400,X ;Selfmod font addr - Digit 2 P1
>790f 99 81 F0 STA $F081,Y ;Render digit to sprite
>7912 BD 00 74 LDA $7400,X ;Selfmod font addr - Digit 3 P1
>7915 99 82 F0 STA $F082,Y ;Render digit to sprite
>7918 BD 00 74 LDA $7400,X ;Selfmod font addr - Digit 4 P1
>791b 99 C0 F0 STA $F0C0,Y ;Render digit to sprite
>791e BD 00 74 LDA $7400,X ;Selfmod font addr - Digit 5 P1
>7921 99 C1 F0 STA $F0C1,Y ;Render digit to sprite
>7924 BD 00 74 LDA $7400,X ;Selfmod font addr - Digit 6 P1
>7927 99 C2 F0 STA $F0C2,Y ;Render digit to sprite
>792a BD 00 74 LDA $7400,X ;Selfmod font addr - Digit 1 P2
>792d 99 00 F2 STA $F200,Y ;Render digit to sprite
>7930 BD 00 74 LDA $7400,X ;Selfmod font addr - Digit 2 P2
>7933 99 01 F2 STA $F201,Y ;Render digit to sprite
>7936 BD 00 74 LDA $7400,X ;Selfmod font addr - Digit 3 P2
>7939 99 02 F2 STA $F202,Y ;Render digit to sprite
>793c BD 00 74 LDA $7400,X ;Selfmod font addr - Digit 4 P2
>793f 99 40 F2 STA $F240,Y ;Render digit to sprite
>7942 BD 00 74 LDA $7400,X ;Selfmod font addr - Digit 5 P2
>7945 99 41 F2 STA $F241,Y ;Render digit to sprite
>7948 BD 00 74 LDA $7400,X ;Selfmod font addr - Digit 6 P2
>794b 99 42 F2 STA $F242,Y ;Render digit to sprite
>794e BD 50 74 LDA $7450,X ;Lives charset
>7951 99 A1 F0 STA $F0A1,Y ;Render to player 1
>7954 99 21 F2 STA $F221,Y
>7957 BD 58 74 LDA $7458,X ;Colon symbol
>795a 99 A2 F0 STA $F0A2,Y ;Render lives to sprite
>795d 99 22 F2 STA $F222,Y
>7960 BD 00 74 LDA $7400,X ;Rayfish icon (lives)
>7963 99 A3 F0 STA $F0A3,Y ;Render to sprite
>7966 BD 00 74 LDA $7400,X
>7969 99 23 F2 STA $F223,Y
>796c C8 INY ;1 character = 3 bits of
>796d C8 INY ;sprite memory.
>796e C8 INY
>796f E8 INX
>7970 E0 08 CPX #$08
>7972 D0 92 BNE $7906
>7974 60 RTS
Phew, that was hard work wasn't it? Well it isn't over yet. We need to generate a table that represents the character set LOW and HI byte values. Here they are:
M 7a00
7a00 00 08 10 18 20 28 30 38
7a08 40 48 74 74 74 74 74 74
7a10 74 74 00 00 00 00 00 00
Some quick notes, regarding this table....
The low byte (marked in green) means the lower two bit of the address $7400 Therefore the low byte would be $00,$08,$10,$18,etc.
The hi byte (marked in yellow) meand the higher two bit of the address $7400. Therefore the hi byte remains as $74.
When you code your own SEUCK enhancements like score rendering. You do not have to use the same addresses as I use for the examples. You can put them anywhere where there is spare memory available.
Now we are ready to try out the game. Let's see the result.
Excellent. We have the finished decorative score panel . Although it isn't aligned properly. It is just a case of altering the values of the sprite position table at $5EB0-$5EC0. Remember the first digit is for the X position of the sprite, and the digit after that is for the Y position of the sprite. Repeat the process for the other 7 sprites. You might want to trigger the $D010 value in $455F. So that the last sprite might need to be past 256 pixels.
I know that it can be hard work to render a new score panel using this method. In order to help you out a bit and to save you time copying the code I have created a D64 which contains the raw version of Ray Fish, the sprites and all the additional code, which you can load into the Action Replay M/C Monitor.
There is also a source framework which can be compiled using either ACME cross assembler or C64Studio. If working from ACME, you will need to alter the command to read the correct path to the ACME, and TSCrunch (or replace it with the Exomizer command).
Alternatively here is the source code (in ACME/C64Studio format).
But wait a second - This score panel is not central. How do we fix this?
At $45FF enter the following:
> 45FF LDA #$C6
> 4561 STA $D010
Then, change the sprite position tables at 5EB0 - 5EBF to the following:
:5EB0 40 07 58 07 88 07 a0 07
:5EB8 b8 07 d0 07 00 07 18 07
And finally ... This is what happens
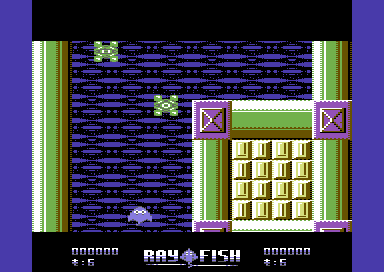
Cool! Ray Fish score panel looks exactly like the SEUCK Redux version. The disadvantage to this however is that the score panel MUST be the same colour, otherwise the result will look odd. Before I end this chapter here are some tips:
1. $4564 (LDA #$XX:STA $D01C) represents the sprite panel multicolour mode. It is possible to mix panel sprites with hi res and multicolour. Simply set the value of $D01C to pick which sprite you wish to have as single colour and which sprite is multicolour
2. $45FF (LDA #$XX:STA $D010) represents the sprite MSB (Most significant bit) X position. By using this, you can trigger the number of sprites to be positioned past the 256th limit. (Hint, to work out $D010, $D01C values, use TND's Sprite Bit Calculation program)
3. $5EB0 - $5EB8 represents the sprite panel X and Y position table. Hint: in the example table above, I highlighted the last two X and Y sprite positions in cyan because they used the $D010 MSB.
4. $5EC0 - $5EC8 represents the sprite frame value
5. $4426-$443a, $5a25-$5ad5, $5ad5-$5b3d and $5b3d-$5ba5 all contain the old SEUCK panel scoring plot routine. This needs to be filled with value #$60 in order to ignore old score routine.
6. At $455c a JSR routine needs to be called to setup all sprites to display, and set all sprite colours.The routine has to be short, otherwise it will force the game to crash.
7. At $41a4, an additional code subroutine must be jumped to initialize the game with the custom score sprite panel in place.
8. At $4503 (the main gameloop), a subroutine to enhancements like music player, other features, etc must call a score panel rendering subroutine). The score rendering routine should then RTS at the end.
9. It doesn't matter were the sprites / panel characters are being read from in memory as long as they are being copied to the correct address in SEUCK's sprite panel memory (Starting at $F080, ending at $F280)
... and basically that is everything. I do hope you have loads of fun attempting to add new score panels onto your C64 SEUCK games. I am sure they will look really nice :)
Click here for main Menu
The SEUCK VAULT andTutorial Videos
For more tips, which include music installation, charsets background animation, and others please visit the SEUCK Vault web site, and have your action replay handy - or 1541U2 maybe :o)
Also check out the video tutorial on YOUTUBE.COM on how I added music and other features on to SEUCK games.
VIDEO 1: Enhancing SEUCK games - Part #1 (Adding title and in game music and bug-fixing games, using packers/crunchers for compression of games)
VIDEO 2: Enhancing SEUCK games - Part #2 (Adding animated charsets background)
VIDEO 3: Adding only title music to your SEUCK game
SEUCK FRAMEWORK
Now for something special for you to play with. It is a little something I have prepared for you, to help you enhance your own SEUCK game creations. It is the SEUCK FRAMEWORK, a programming source, in which allows you to add music, additional code and other great things. In order to be able to use this framework, you will also need Exomizer and possibly SID Reloc. You probably might have those already, but they all should be found on various cross-platform based web sites, and CSDB. Ensure that you security software allows all the C64 cross platform programs to run.
Assuming that C64Studio is installed on your PC. It is time to download and have a play around with the SEUCK framework. It comes with an example game work file and a couple of tunes. You can use C64Studio or .D64 editor to rename and extract the SEUCK work disk files and rename the !BIN "NYAAAAH.PRG" with one of your SEUCK 'ALL DATA' or second file which you saved 'FINISHED GAME' (249 blocks). Alternatively, if you don't have any work disks or 249 block finished game state. You can freeze the current game state and then save your game data from $0900-$fffa using the M/C monitor. (S "game",8,0900,fffa).
DOWNLOAD SEUCK FRAMEWORK
This version allows you to alter colour of the colour bars, play title music, in game music or neither of these. Here are some quick instructions to get you started:
1. Load C64Studio, set up the configuration for testing in VICE (FILE/PREFERENCES, select path of VICE and executable).
2. Load in the framework (FILE/OPEN/SOLUTION OR PROJECT/SEUCK_WITH_MUSIC.s64
The source code should then display.
Assuming that the project has been extracted correctly and Exomizer is in C:\Exomizer\Win32. Try a test run of the framework. Wait a few seconds for Exomizer, then you're ready to launch.
Here's what you should get from the front end:
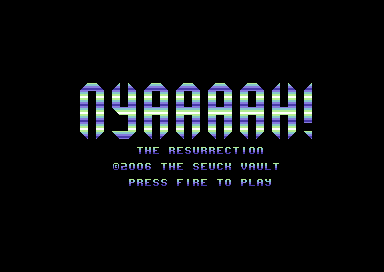
To comment out certain features, just add a ; by EXAMPLE = 1. For example, if you wanted just title music, and no in game music. ;InGameMusic = 1, etc.
Things to try:
Relocate different tunes to the same addresses, using either native C64 music relocators or SidReloc
Change music filenames to something like "mytune1.prg" for title music and "mytune2.prg" for in game music
Create your own 8 rasters over the front end.
Import PRG images of your own SEUCK work files (ALL DATA file or 249 block FINISHED game). Have a little play around with the current framework, and get used to the music player, before we move on to enhancing the games more with the same framework, by altering the player at $4503, to call multiple subroutines to do other tricks (Background animation, etc).
Dark Force - Disected

Right then folks. Who remembers the classic 'Light-Force' by FTL, released by Hewson back in the 1980's? You probably might have remembered it. A pretty good vertical scrolling space shoot 'em up of its time. Highly difficult and very playable. Now fast forward the tape further along, I stumbled across issue 41 of Commodore Format's 'Secret of SEUCKcess feature', which had a POKE 16578,0 for 1 player only or POKE 16578,1. However I tried POKE 16578,2 and ended up having 2 players linked to one joystick control. Interesting. Of course back in the 1990's I didn't actually make any SEUCK games that used that easter egg POKE. Someone else beat me to it (Check out Strike School on the contributors' page).
While I was trying to explore the expanding limitations of SEUCK further, I came across with some possibilities on how to actually link players together and make them re spawn together. The first game I enhanced to use that exact effect was 'The Huntress of Midgard'. A horizontal scrolling SEUCK game which bolts 2 players together. Then in 2014, I set myself a challenge. To write a Light Force style game, with Alf Yngve, using SEUCK. Behold 'Dark Force'.
I have dedicated a page and source code to Dark Force. You can browse the source on each page, or just download the the binary data and source and try it out in C64 studio.
This way for Dark Force - Dissected
SEUCK REDUX
Now for something special. SEUCK games have always been the same? Now what if you wanted to program SEUCK to do things your way?. Well enter SEUCK REDUX, a scroller with a difference. This framework allows you to import your own SAVE ALL DATA files from SEUCK, and import them into a more stable, and flexible scrolling engine. SEUCK Redux allows you to PUSH SEUCK to its limits even further. We have specially written a page, dedicated to getting you started with this excellent framework. Maybe one day you'll be able to program a stonker, rather than a stinker of a game :)
SEUCK Redux Special
KICKASS SEUCK FRAMEWORK
Do you remember the previous C64studio based framework for SEUCK game creations. Well, a new framework engine has been created for SEUCK games, which can be operated in Kick Assembler. Unlike the C64Studio version, I did a long while back - which has just the old RAW front end used time and time again in SEUCK. The KickAssembler based framework, has the complete works. You are able to create and implement a new front end for your SEUCK games, with a high score table. All you need to do is use Charpad to design your screen and export it to the source files, read through the code carefully, and implement what is possible. It is also possible to add additional in game enhancements code to your SEUCK game, by following other tips in SEUCK School, and of course the SEUCK Vault. Please note - you'll need to learn basic assembly language if you are to implement additional routines, and features into your SEUCK game. SEUCK School Tips is a good start to get you going. The link below is a complete guide to setting up your SEUCK games to work with the framework. Should any upgrades be made in the future, it will be announced on the TND news page.
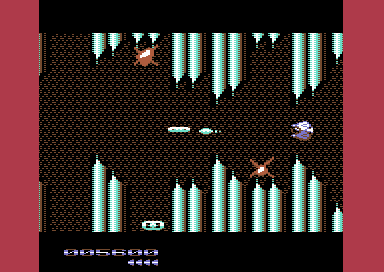
KickAss SEUCK Framework
Version 4 has also been added to the KickAssembler SEUCK Framework page. This will be the final upgrade (for now). Version 4 has some of the old favourite features, but there are also a lot of NEW features. Including multicolour bitmap logo, sprite multicolour panel, power ups upgrades for both player and player bullet, and a whole lot more. Plus there is a D64 with a free utility to help fit your 40x10 Koala Paint logo bitmaps into the SEUCK framework (or your own demos and/or intros).